
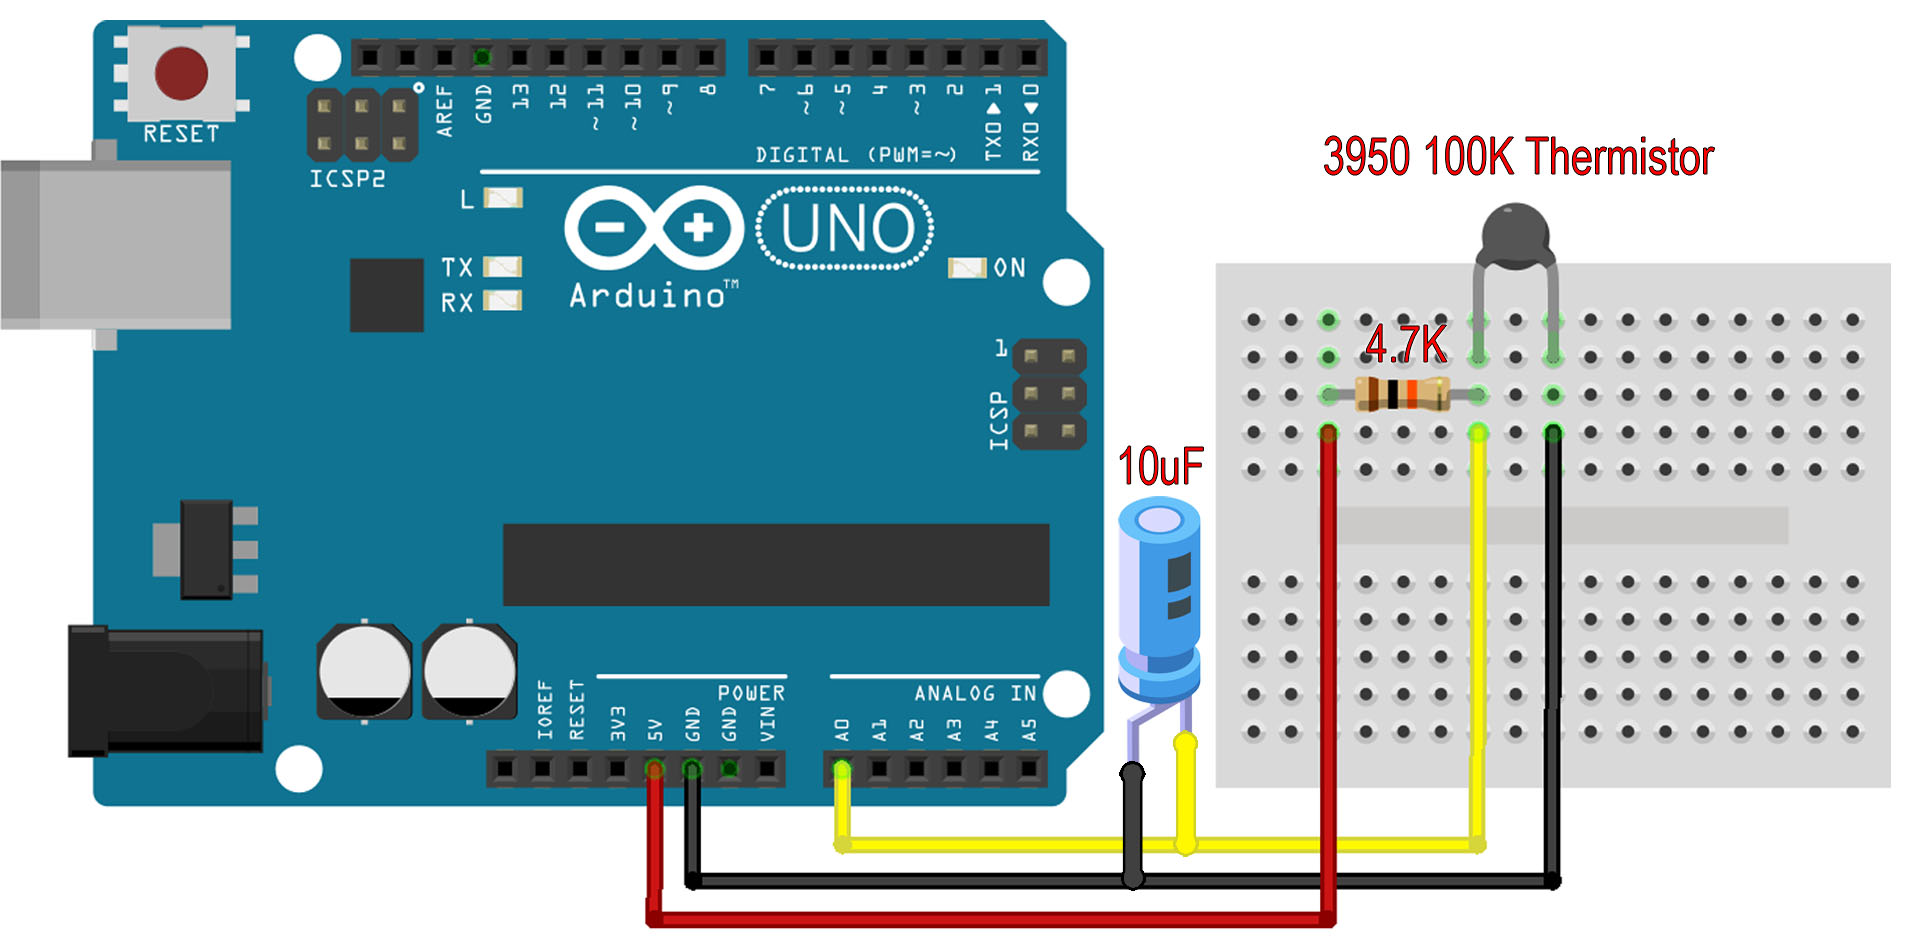
How to measure temperature with Arduino and a 3950 thermistor, or any other, of 100K or 10K and a 4.7K pullup resistor. Measure above 200ºC using thermistor.h library. Check the schematic below and the example code together with the needed library. You have a video below where I've used this setup with a voltage divider and you can see how the voltage is changing when we heat the thermsitor.
To measure the temperature, I will now use a thermistor like this one instead of a thermocouple as we have used in other previous tutorials. This is just a simple resistor that will change its value according to the temperature so is very easy and fast to read compared with a thermocouple that needs an amplifier module. At room temperature its resistance is 10K ohms or maybe other models of 100K ohms or any other value. The value is important so check it with a multimeter. If I connect this thermistor in a voltage divider with another resistor with a known value, I can measure the voltage change at the output and using a graph (thermistor temperature vs voltage graph), I can measure the temperature. As you can see in the video above, I have the thermistor and another 10K resistor in a voltage divider. I supply it at 5V and measure the output. As you can see, when I heat the thermistor, the output will change. All I have to do, is to use the Arduino analog pin and measure this voltage and using a graph from the internet, we can precisely know the temperature. To make it easier I'm using thermistor.h library.
Downlaod from below the library. Open Arduino IDE and go to Sketch, include library, add .zip library and open the .zip file that you have just downloaded. Now the thermistor.h library should be installed. Then copy from below or downlaod the example code.
/* 3950 THERMISTOR EXAMPLE.
 * We use a 3950 thermistor
 * You can configurate this thermistor in Configuration.h in
 * Documents/arduino/libraries/Arduino-ThermistorLibrary/src/Configuration.h
 * and select TEMP_SENSOR_0 value or TEMP_SENSOR_1 if you want to use that */

#include <thermistor.h>   //Donwload it here: https://electronoobs.com/eng_arduino_thermistor.php
thermistor therm1(A0,0);  //Connect thermistor on A0, 0 represents TEMP_SENSOR_0 ( configuration.h for more)


void setup() {
  // put your setup code here, to run once:
  Serial.begin(9600); //initialize port serial at 9600 Bauds.
}

void loop() {
  // All thermistor temperature is in degrade.
  double temp1 = therm1.analog2temp(); // read temperature

  //Print temperature in port serial
  Serial.print("Thermistor temperature: ");
  Serial.println((String)temp1);
  Serial.print("----------------------");
  delay(200); //wait 200 mS for next measure
}If my videos help you, consider supporting my work on my PATREON or a donation on my PayPal. Thanks again and see you later guys.


