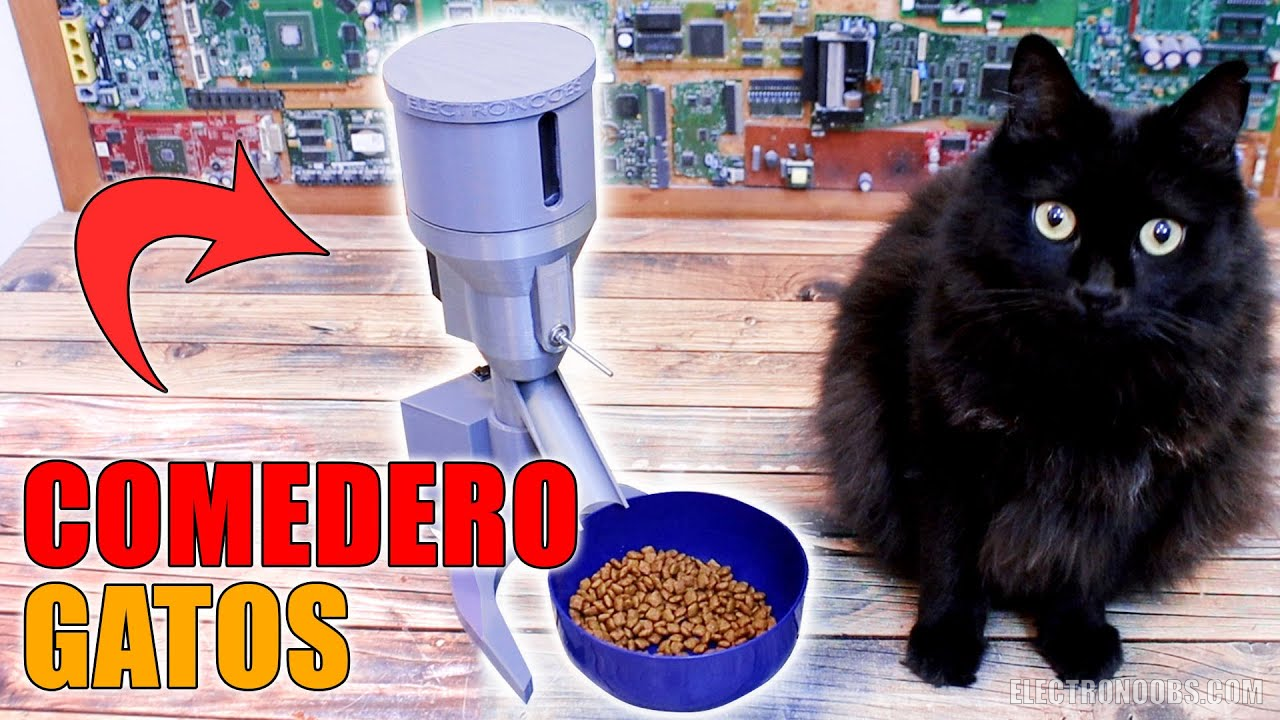
Hi guys. I have two cats, one is Yoko and the other one is named Djony. Sometimes I have to leave them home for more than a day. That’s why I've made this project. An automatic feeder that could be adjusted for different portions and time intervals. I know you could go and buy such a device but I thought it would be a lot more interesting to build my own. I’ve made the design and 3D printed it. Then we control a servo motor with the Arduino, a re
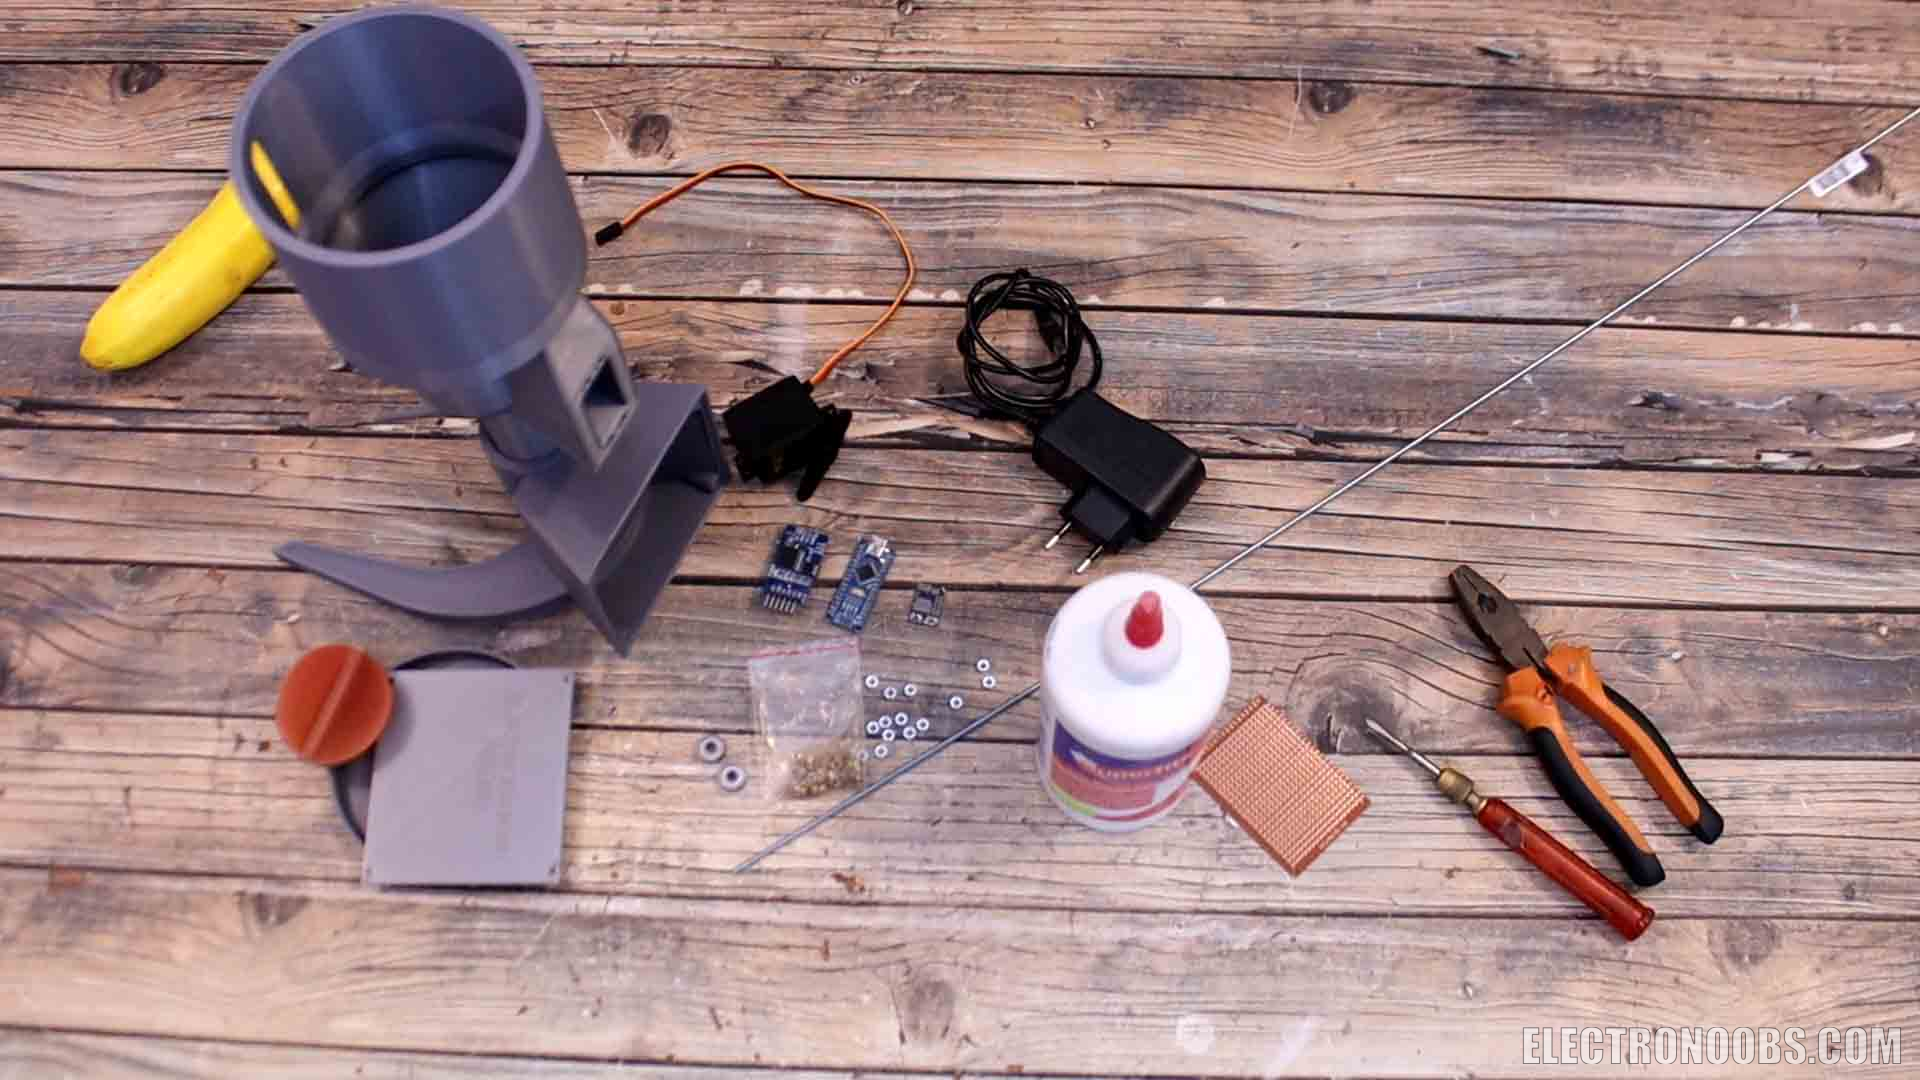
Obviously, you will need my design for the 3D printed parts so download them from below. We have the feeder support base, the main feeder body, the hopper and finally, we have the inside feeder divider. This part will rotate inside and control the amount of foot that will get out. Together with these parts I want to use a servo motor, the MG995. We also need two bearings, a M3 threaded rod and M3 nuts. At the same time, we will also use some M3 insertion nuts for plastic. To control the servo, I will use an Arduino NANO and to get the time I will use a real time clock module based on the DS3232 IC. To supply everything, I will use a 12V DC adaptor and to get 5V I will use a buck converter. The Arduino has a 5V regulator but that is low power and I can’t supply the servo, that’s why we need an external buck converter module. You will also need glue, wires, maybe a prototyping PCB and some tools. This is pretty much all we need. Full part list is below.
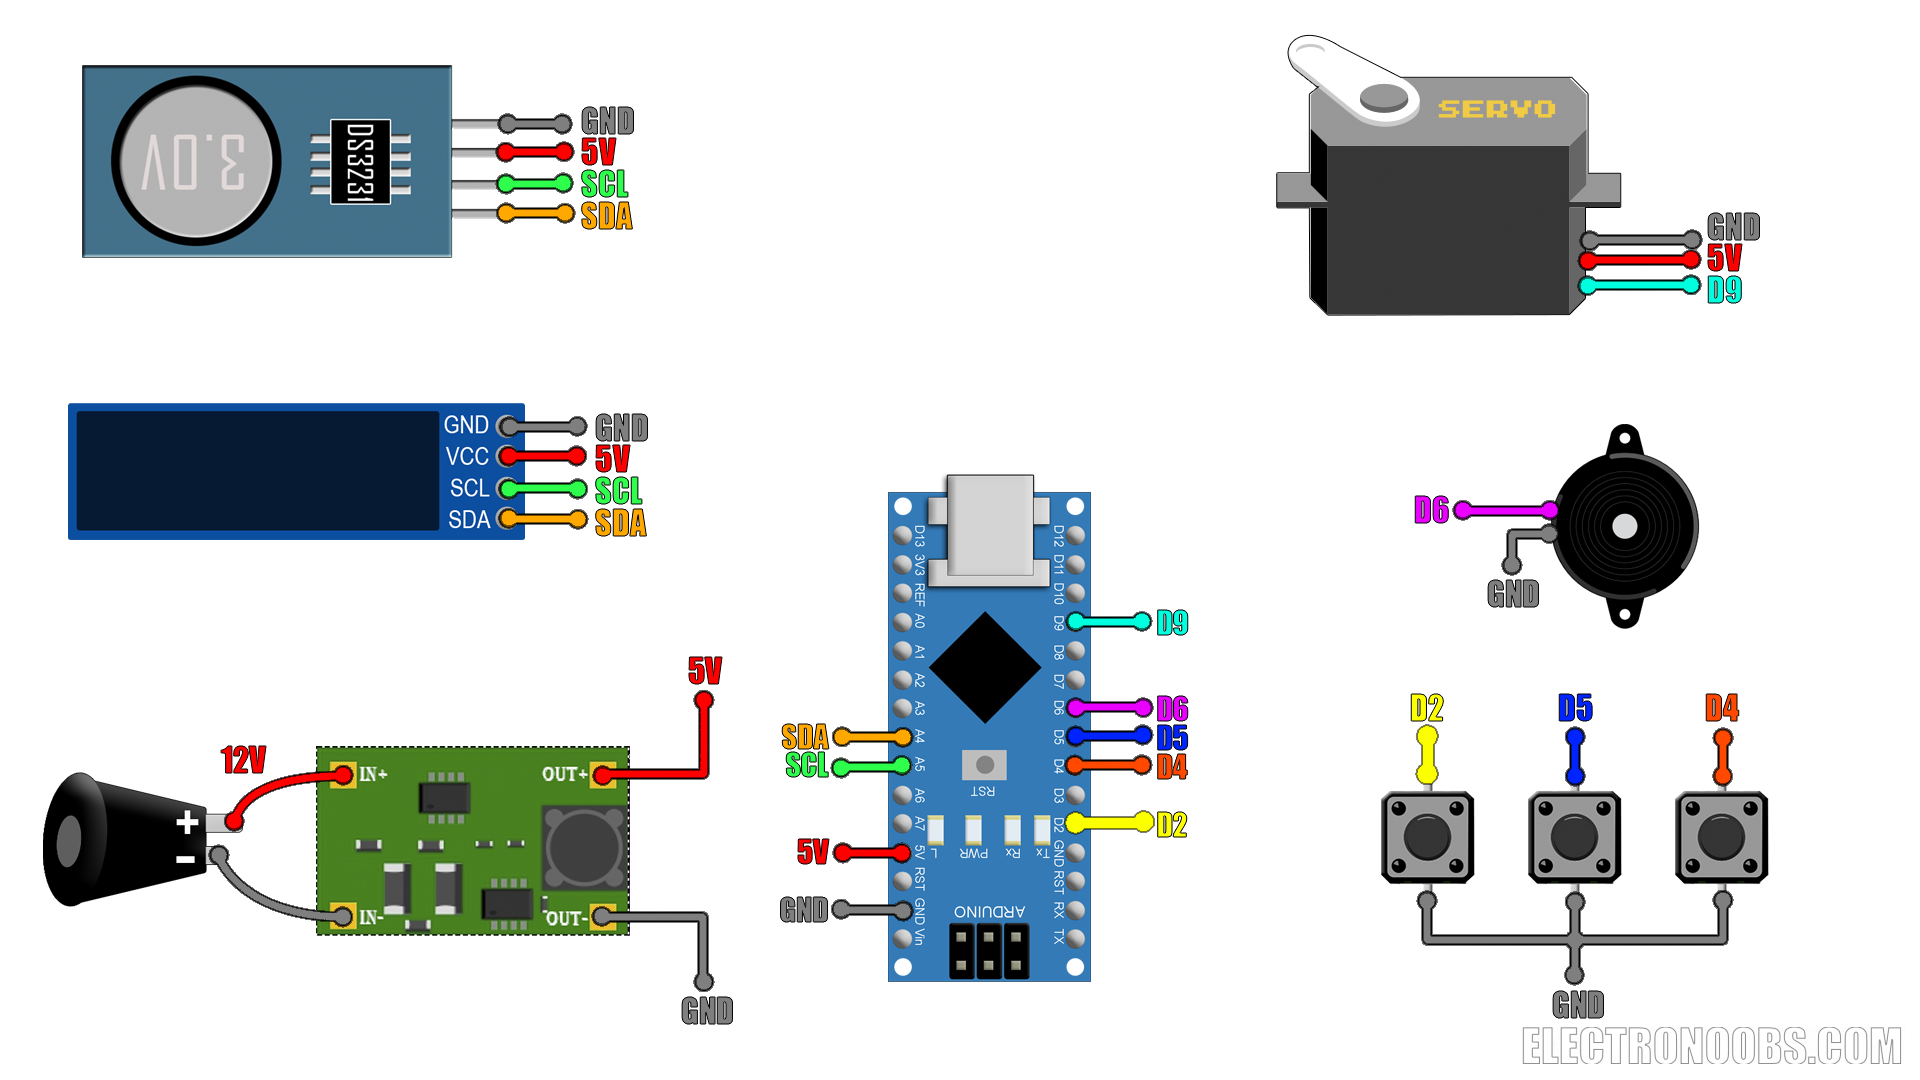
Once you have the body assembled, follow the schematic belo and make the connections. The Arduino connected to the servo and the real time clock module. Everything is supplied with 5V from the buck converter. I also want to add 3 push buttons so we can change the time interval and amount of food to dispense. We also have a buzzer and a OLED display.
Cat feeder Arduino Schematic
~Part 3 - 3D Files
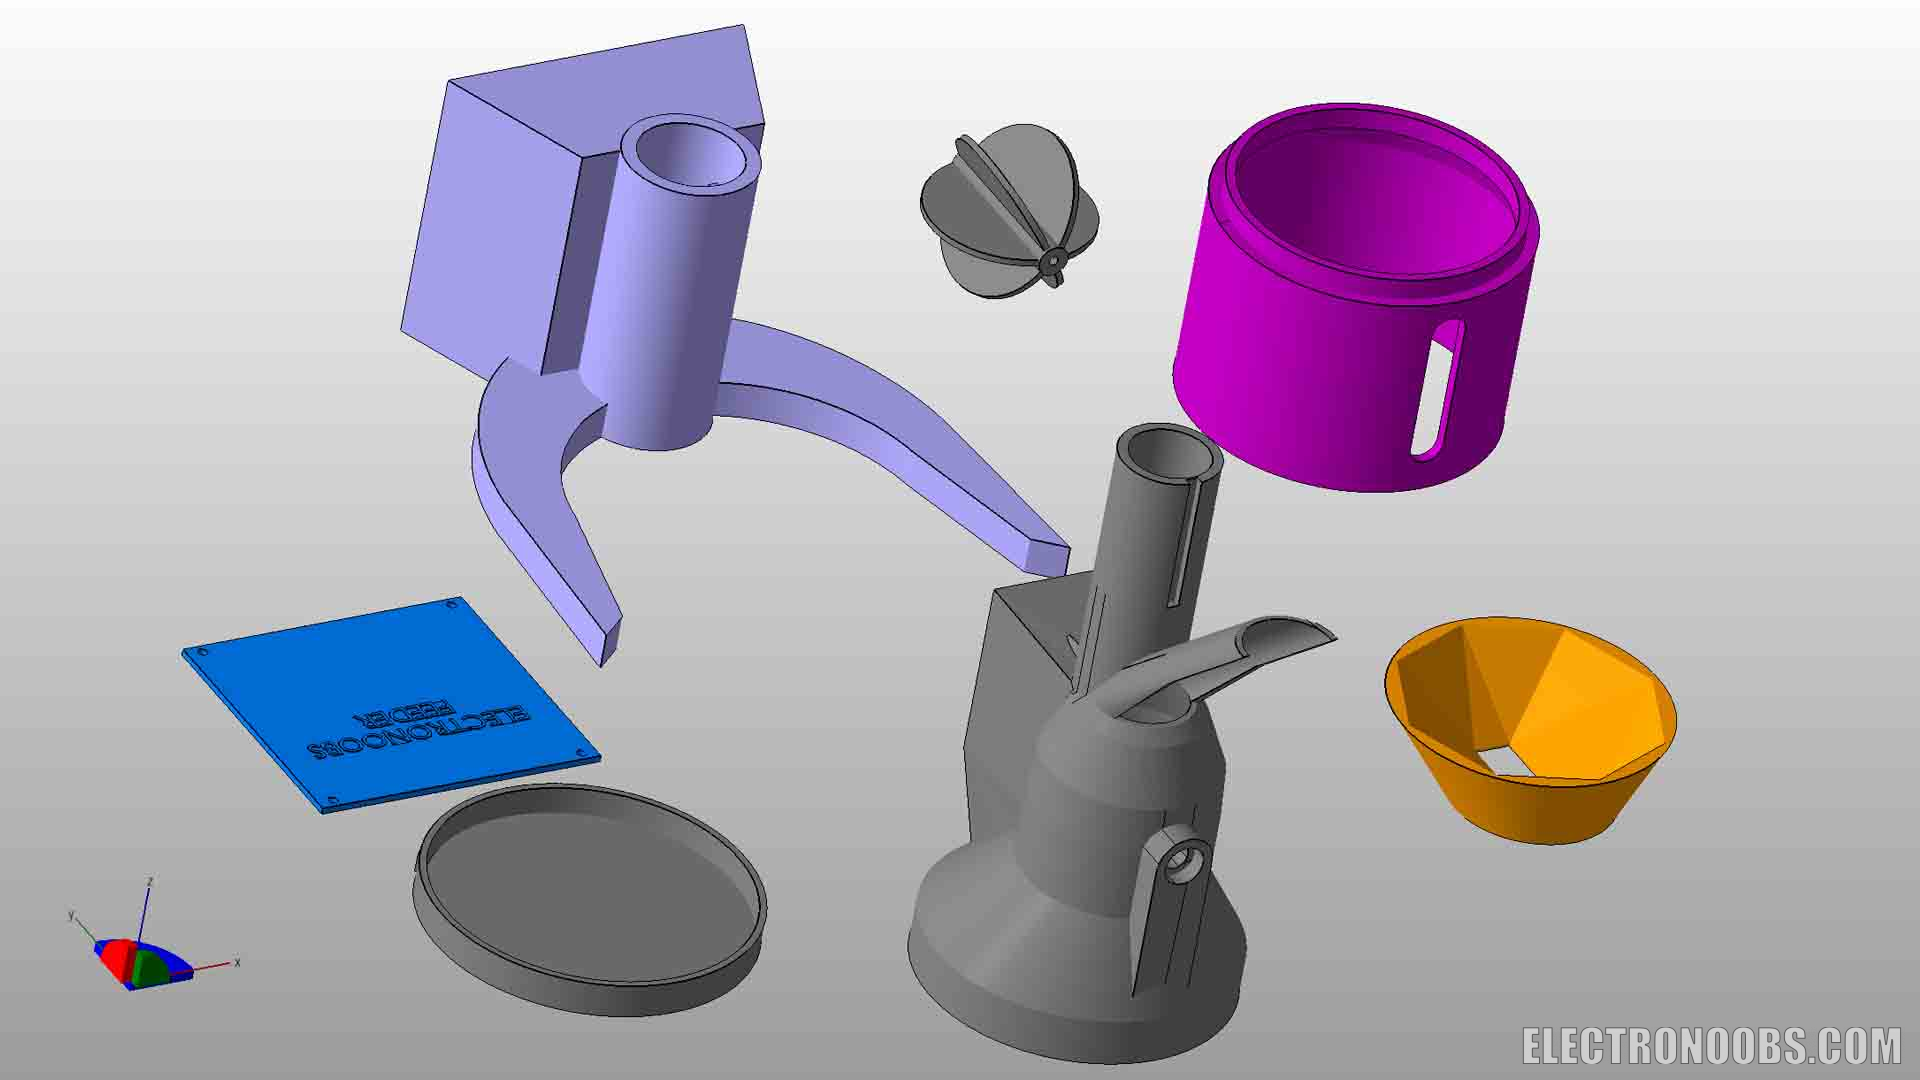
You will need my design for the 3D printed parts so download them from below. We have the feeder support base. Then we have the main feeder body that will go inside the support. We have the hopper that will go inside that main body part where the motor will go. The bottom body part also has a case behind where we can place the electronics such as the Arduino, real time clock, maybe a buzzer and some buttons. Then, we have two more small parts, the top cap and the cover of the electronics case. Finally, we have the inside feeder divider. This part will rotate inside and control the amount of foot that will get out. Everything was printed with PLA material and without support. I’ve used 2 perimeters, 20% infill, 0.25mm layer height and 0.4mm nozzle.
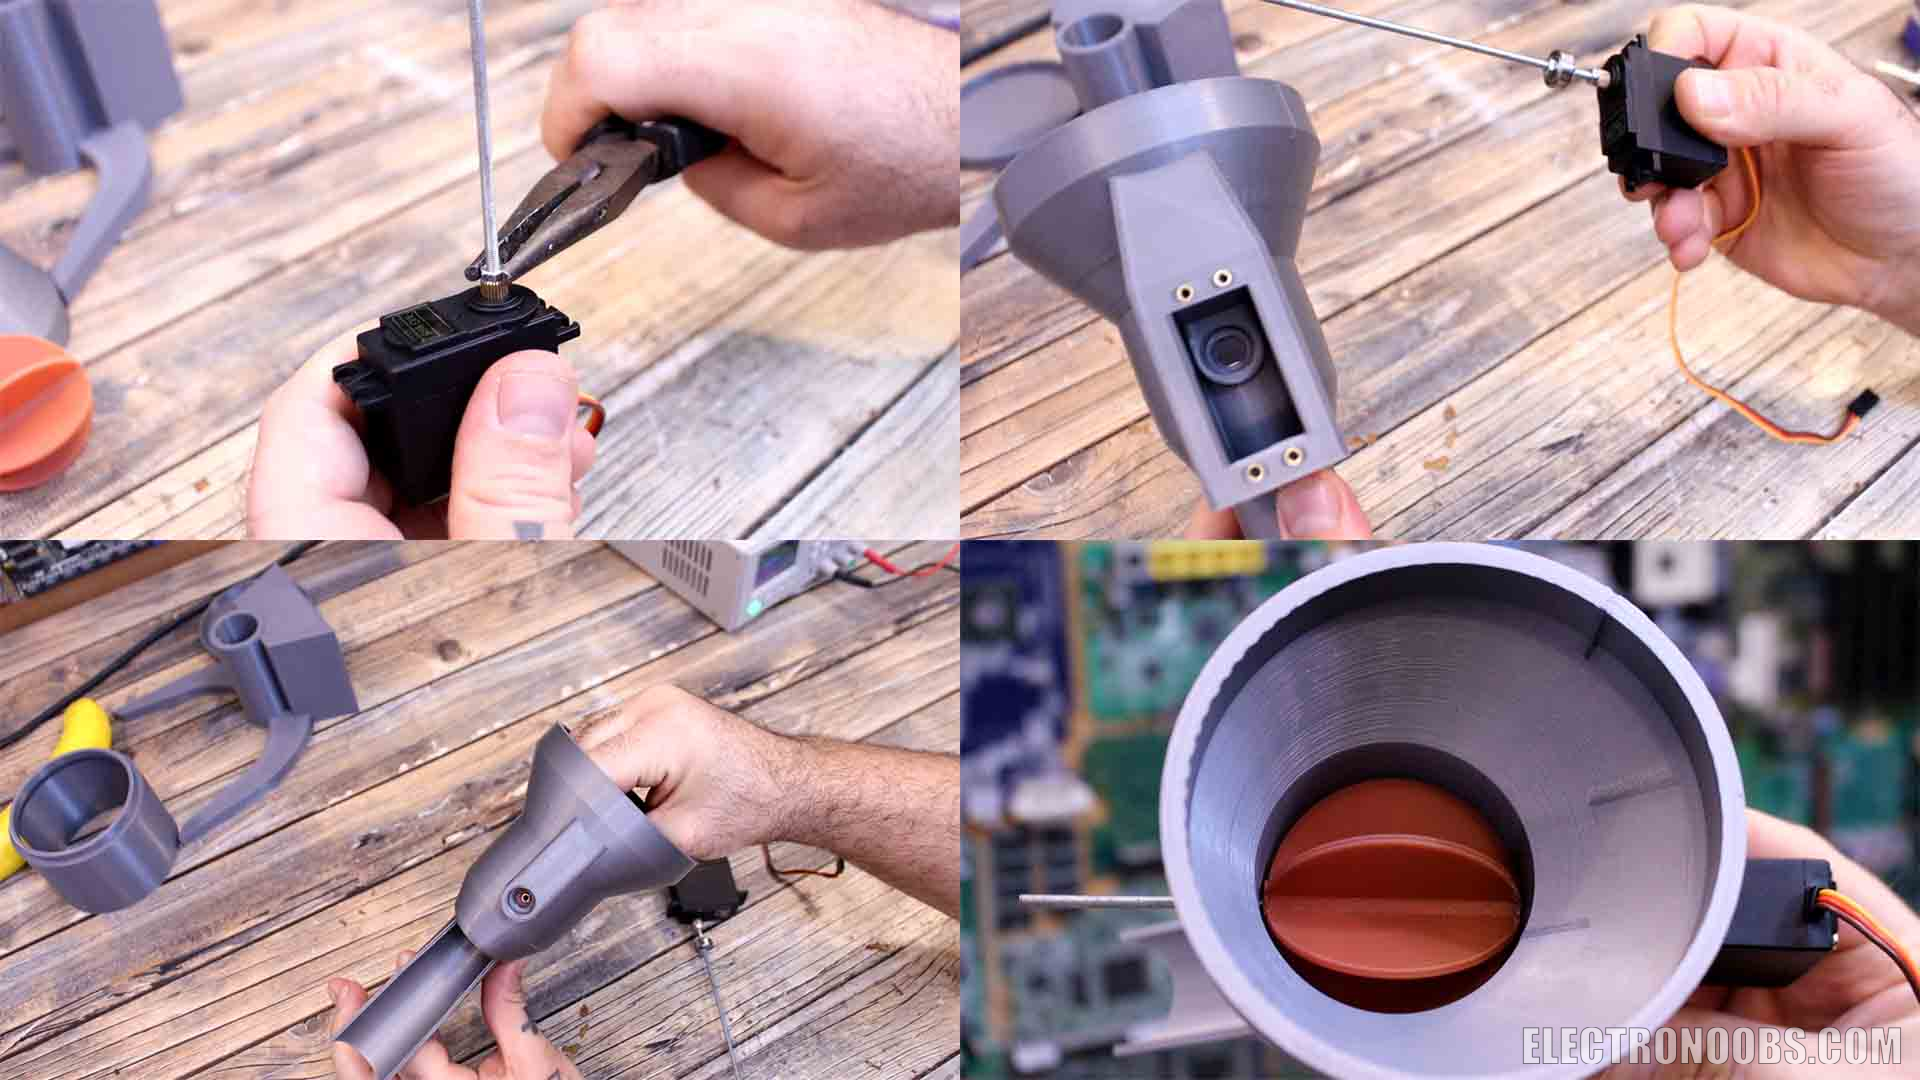
Now let’s hack the servo motor. Servo motors usually rotate 180 degrees. I want to make this rotate without stopping. If we open any servo motor, we will find some kind of feedback which usually is a simple potentiometer. To simulate that the motor is always in the middle position, we need to replace this potentiometer with fixed value resistors. So I will solder two resistors in a voltage divider configuration. They must have the same value so we have a middle value in between (I've used two 10K resistors). I solder them like this to the control PCB. Now the DC motor should spin without stopping when we apply a PWM signal to it. But there is one more thing to do. If we open the gearbox, you will see that one of the gear has a pin. This is used to restrain the rotation to only 180 degrees. Remove that pin so it could rotate freely 360 degrees. That’s it. We can now close back the motor. Here I have it connected to the Arduino and a potentiometer. As you can see, I can control the rotation direction but the servo will now rotate without stopping.
~Part 5 - Prepare 3D files
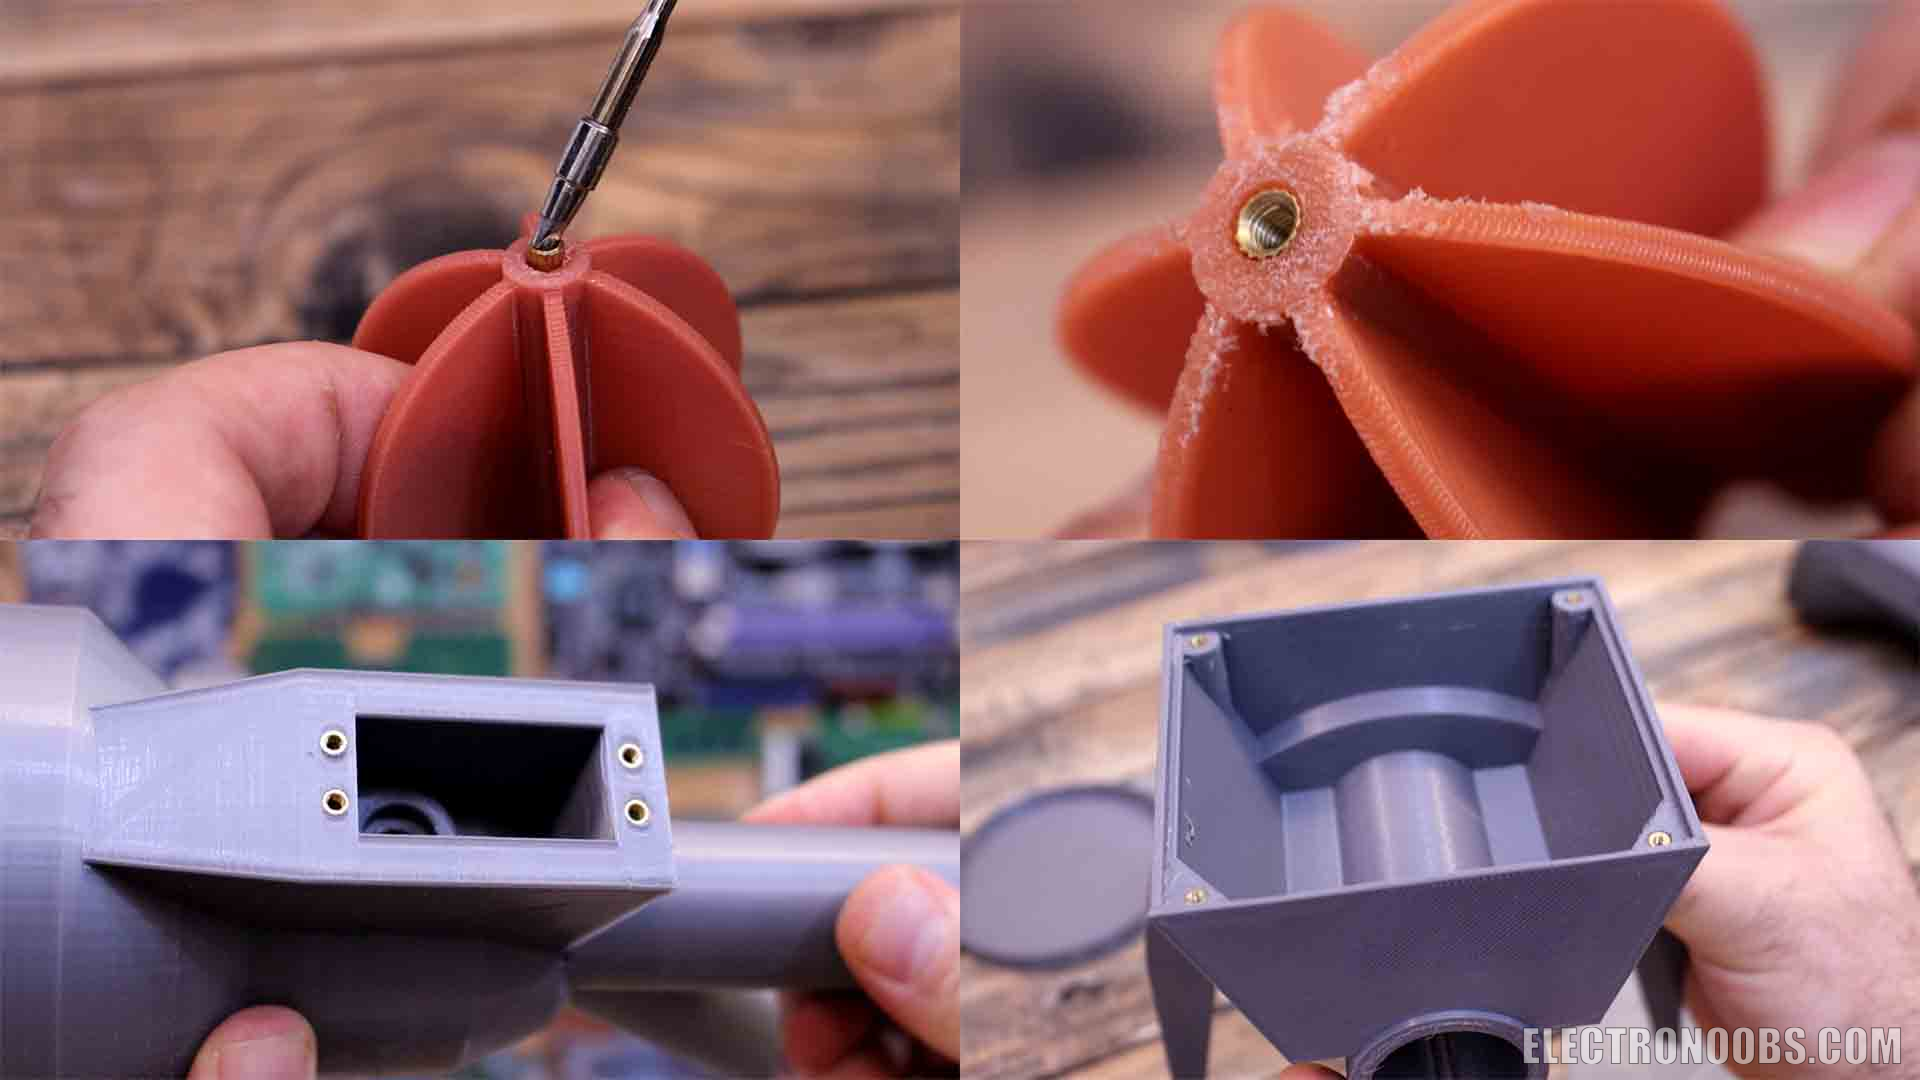
Get the feeder rotating part. Get some M3 insertions nuts. Using the soldering iron, insert one on each end. Now get the main part of the body and this where the servo will go, we also add 4 insertion nuts in the same way, using the soldering iron. We do the same for the bottom part for the electronics case. Add 4 insertion nuts so we can close that case with screws. We will add the bearings on these holes later, once we have the servo motor in place.
~Part 6.1 - Add the feeder and servo
Now get the M3 threaded rod and cut it to around 20cm. If needed we can cut it shorter later. We can screw this on the servo motor. To fix it in place I will add two M3 nuts and tight them on the motor. You could even add some glue if you want. Now add another nut and a bearing. Insert this entire setup inside the plastic part and measure where that nut should be so the bearing will fit exactly on its hole that we have inside. When you find the perfect position, I add two more nuts and I tight them on the bearing. Now the bearing is in place, all that is left is to add the feeder separator in between. So place the feeder inside till you can see the insertion nuts through the side holes. Now add the threaded screw and rotate it till the screw gets on the other side. On this side add a nut and tight it on the feeder inside so it won’t get loose. Add some glue if needed.
~Part 6.2 - Extra part
But after some tests I realized we also need this part in place you can see below. We use this part so not all the food would be on top of the rotating feeder because that will block it in place. Like this we control the flow of food, so also get this part and 3D print it.
~Part 7 - Add the electronics
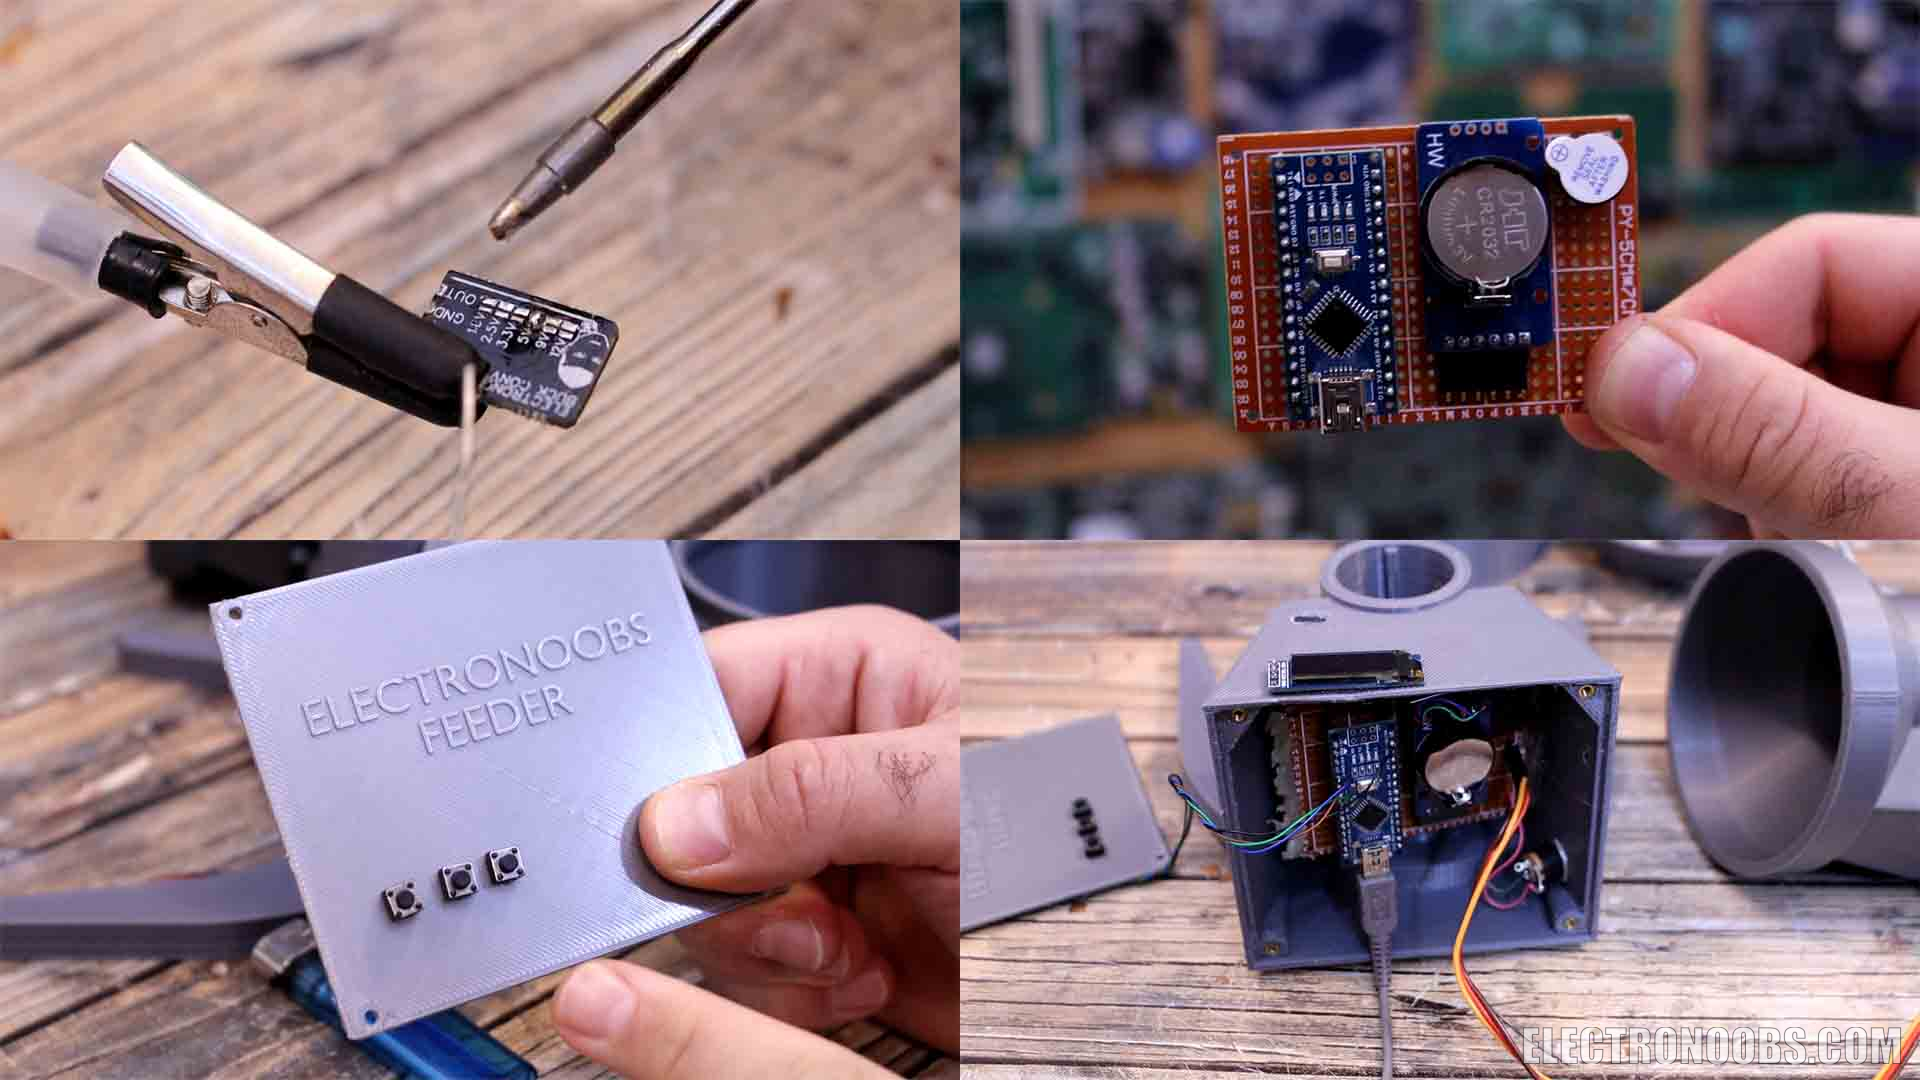
Ok, Is time for the electronics. You have the schematic above. The Arduino connected to the servo and the real time clock module also the OELD screen. Everything is supplied with 5V from the buck converter. I also want to add 3 push buttons so we can change the time interval and amount of food to dispense. Following the schematic, I connect everything on a prototyping PCB adding the Arduino NANO, the buzzer and the RTC module. I get the buck converter and solder the 5V connection on the back. Then I add it to the PCB to supply all the digital parts. On the side of the electronics case, I made a hole. I will add a jack connector for supply. I also make another hole on top and I pass the servo wire through this hole. I make the connections and fix the PCB inside the case. On the cover part of the case, I add 3 push buttons. I solder wires to each for ground and signal. I connect them to the Arduino.
~Part 8 - Code
Now I could close the case but first we need to upload the code. The code is simple. Using the DS3232 library we get the real time. We store this time and the feeding time on the EEPROM memory so even if we unplug the feeder, we still have the schedule saved on the memory. Using the push button we can select the portions of food to serve between 1 and 10, 15, 20 and back to 1. Using another push button we can select the time interval in hours from 1 to 24. Using the third button we can make a manual serving. Important: First time you upload the code, remove the comment from the next liens you can see below. Set the date to the real date and time. Then comment back those lines and uplaod the code again. This must be done just once.
rtc.setDOW(TUESDAY);            // Set Day-of-Week to TUESDAY
rtc.setTime(18, 03, 0);         // Set the time to 18:03:00 (24hr format)
rtc.setDate(2, 11, 2021);       // Set the date to November 2nd, 2021
~Part 9 - Testing the feeder
So, the project works so now my cats will always have food. I will leave this device running while I’m home as well, for a few months so I’ll make sure it doesn’t fail. Maybe a future improvement is to make this based on batteries. Some of the commercial feeders are wireless using batteries so maybe that would be interesting. You don’t want wires hanging around in your kitchen or wherever you have your cat food. I think it looks pretty good and if you want you can also paint it or print it with different colors. You could also change the 3D design and make the hopper bigger for more food if you want. Feel free to make any change.
~ Part 10 - See full Tutorial Video
So guys, if you want to make the same or maybe improve this project, you have all my designs and the schematic above. If my videos help you, consider supporting my work on my PATREON or a donation on my PayPal. Thanks again and see you later guys.
This is a really creative project! Combining 3D printing with Arduino automation makes the feeder both practical and fun to build. I like how the design keeps the electronics and mechanical parts relatively simple while still delivering a useful solution for pet owners. Projects like this are great for learning about servos, sensors, and basic programming while creating something with real-world value.
I also enjoy DIY projects that solve everyday problems through automation. For anyone interested in exploring more resources, these may be helpful: https://docs.google.com/forms/d/e/1FAIpQLSdm_08dSz6zplnx4801QyWYt5jPHvMYFRx7TkAH9y4czYrOkA/viewform and https://sites.google.com/view/howdoigetwateroutofmyphonespea/home.


 @irank
1 month ago
@irank
1 month ago


Leave a comment
Please login in order to comment.