Welcome to this step by step assemble of this 3D printed plane. I say it again, I'm not a professional 3D designer, so, this might have a lot of issues. Anyway, in this tutorial you will see the parts we have for the plane, some tips of how I've designed some of those parts, the part list we need and how to assemble the plane. You will also find some sort of manual with the specs of the plane. So, let's start.
First you need the 3D parts for this design. For now I'm sharing the design for free on my shop since the plane was not tested yet. But, if you consider supporting my work, there is the same version for 5$ so thank you. So, go below and see all the parts. Download the .zip file with the STL files from my shop. Get the rods, servos, battery, glue and all you need, and then, in a few hours, you can assemble this plane once you have the 3D parts. Printing the parts will take some days. Having multiple printers will reduce time.
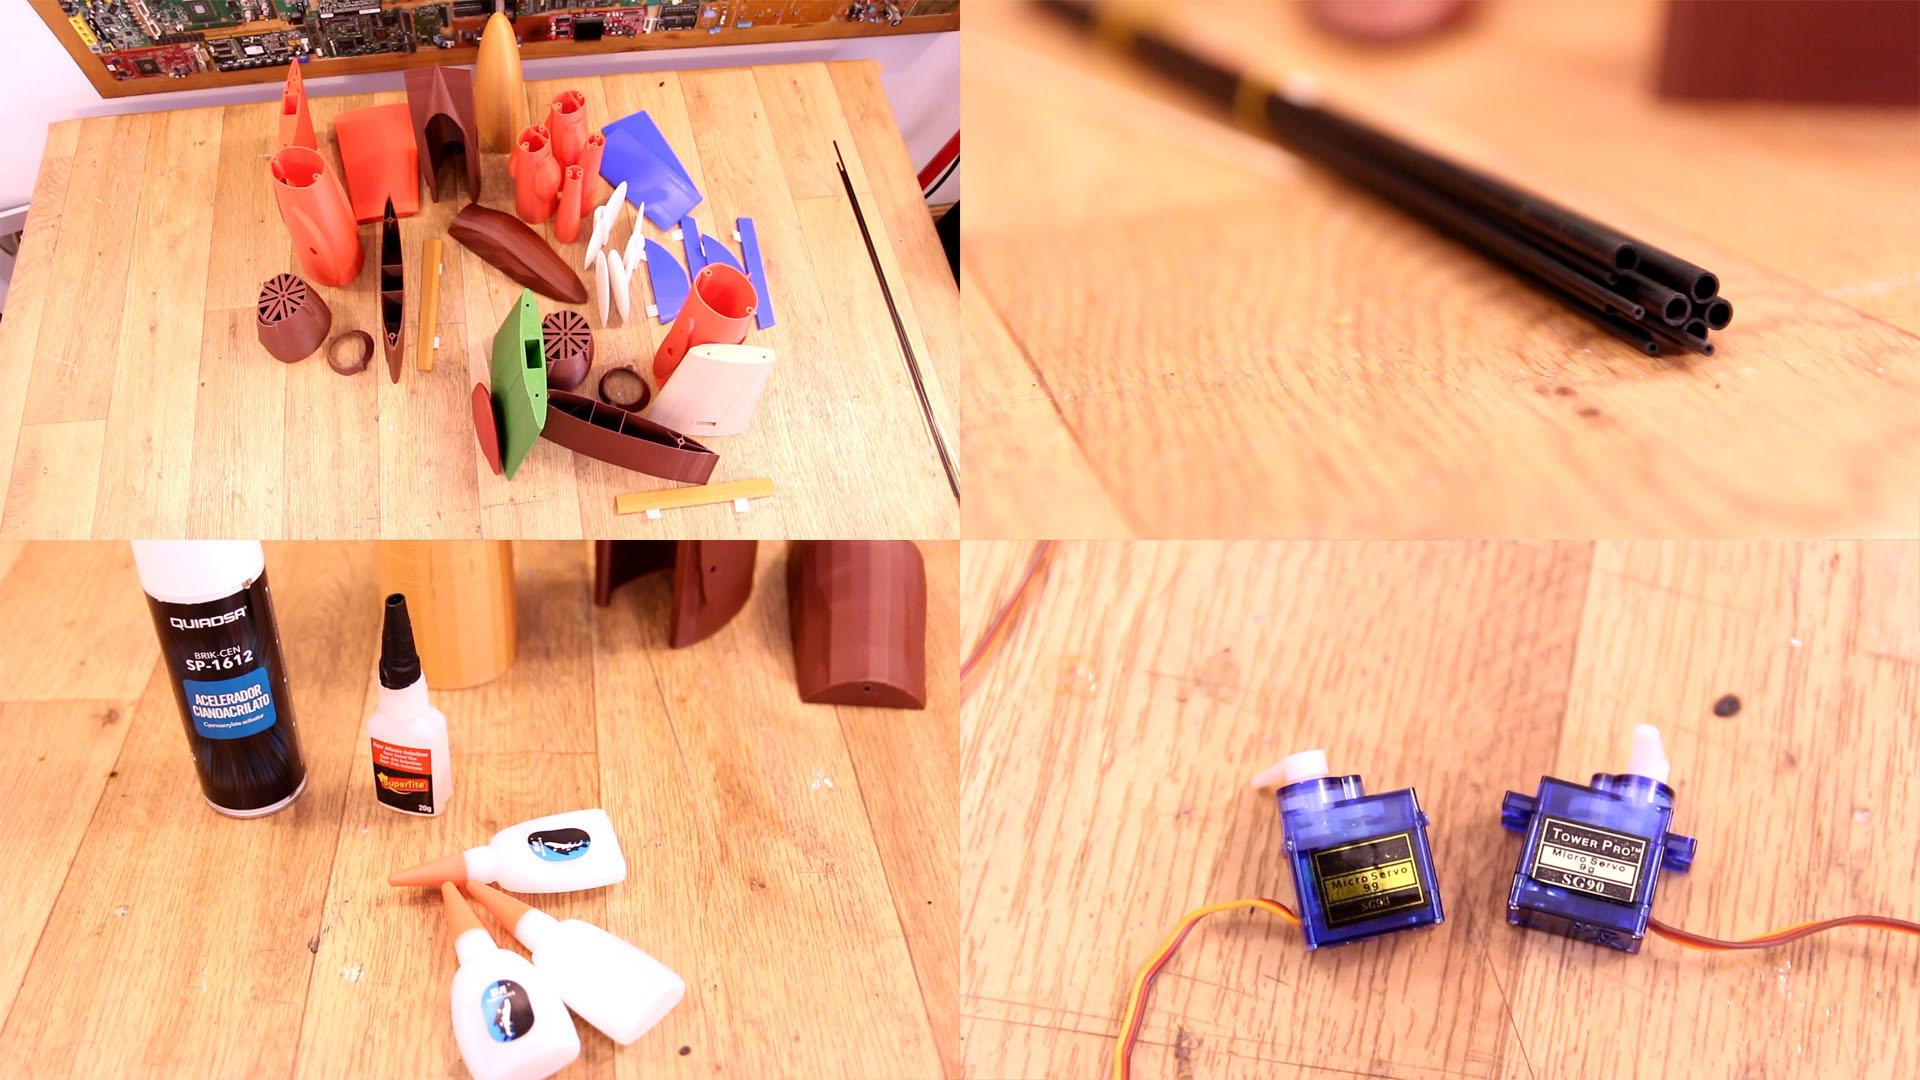
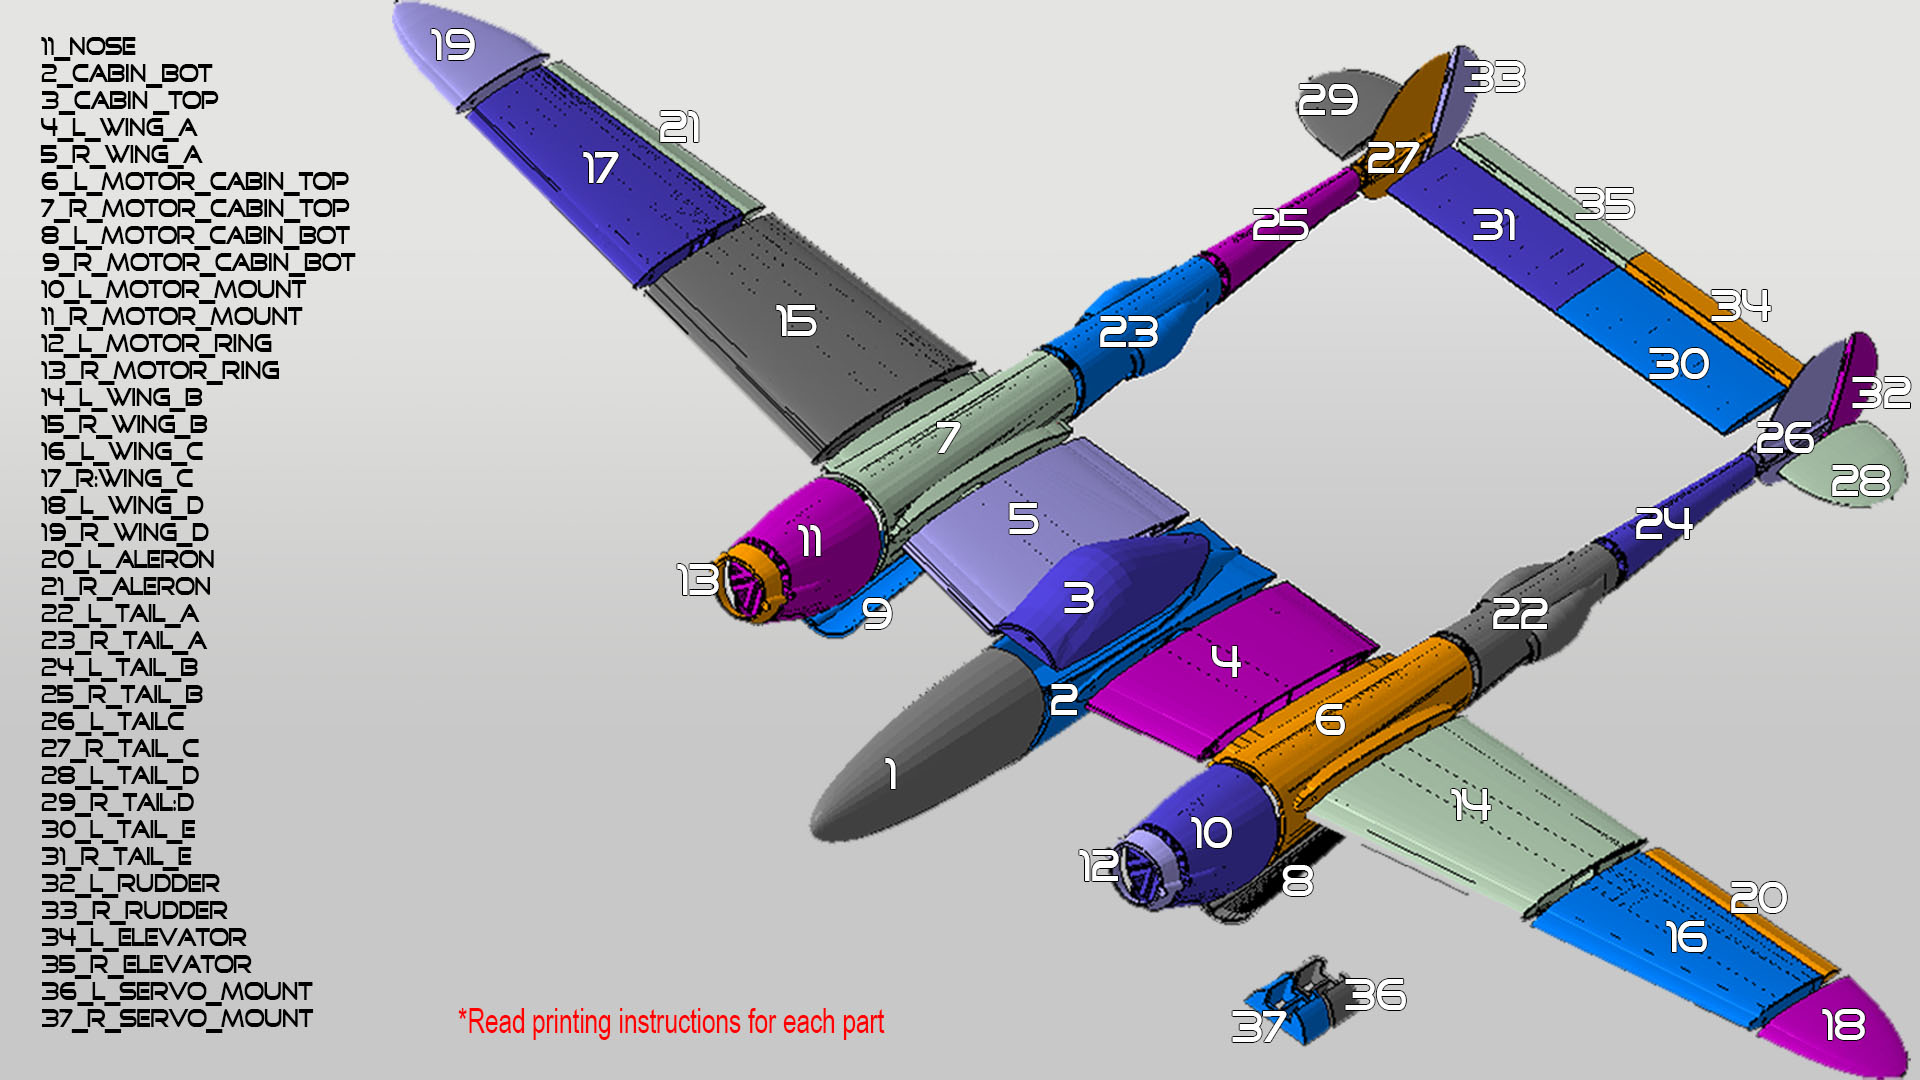
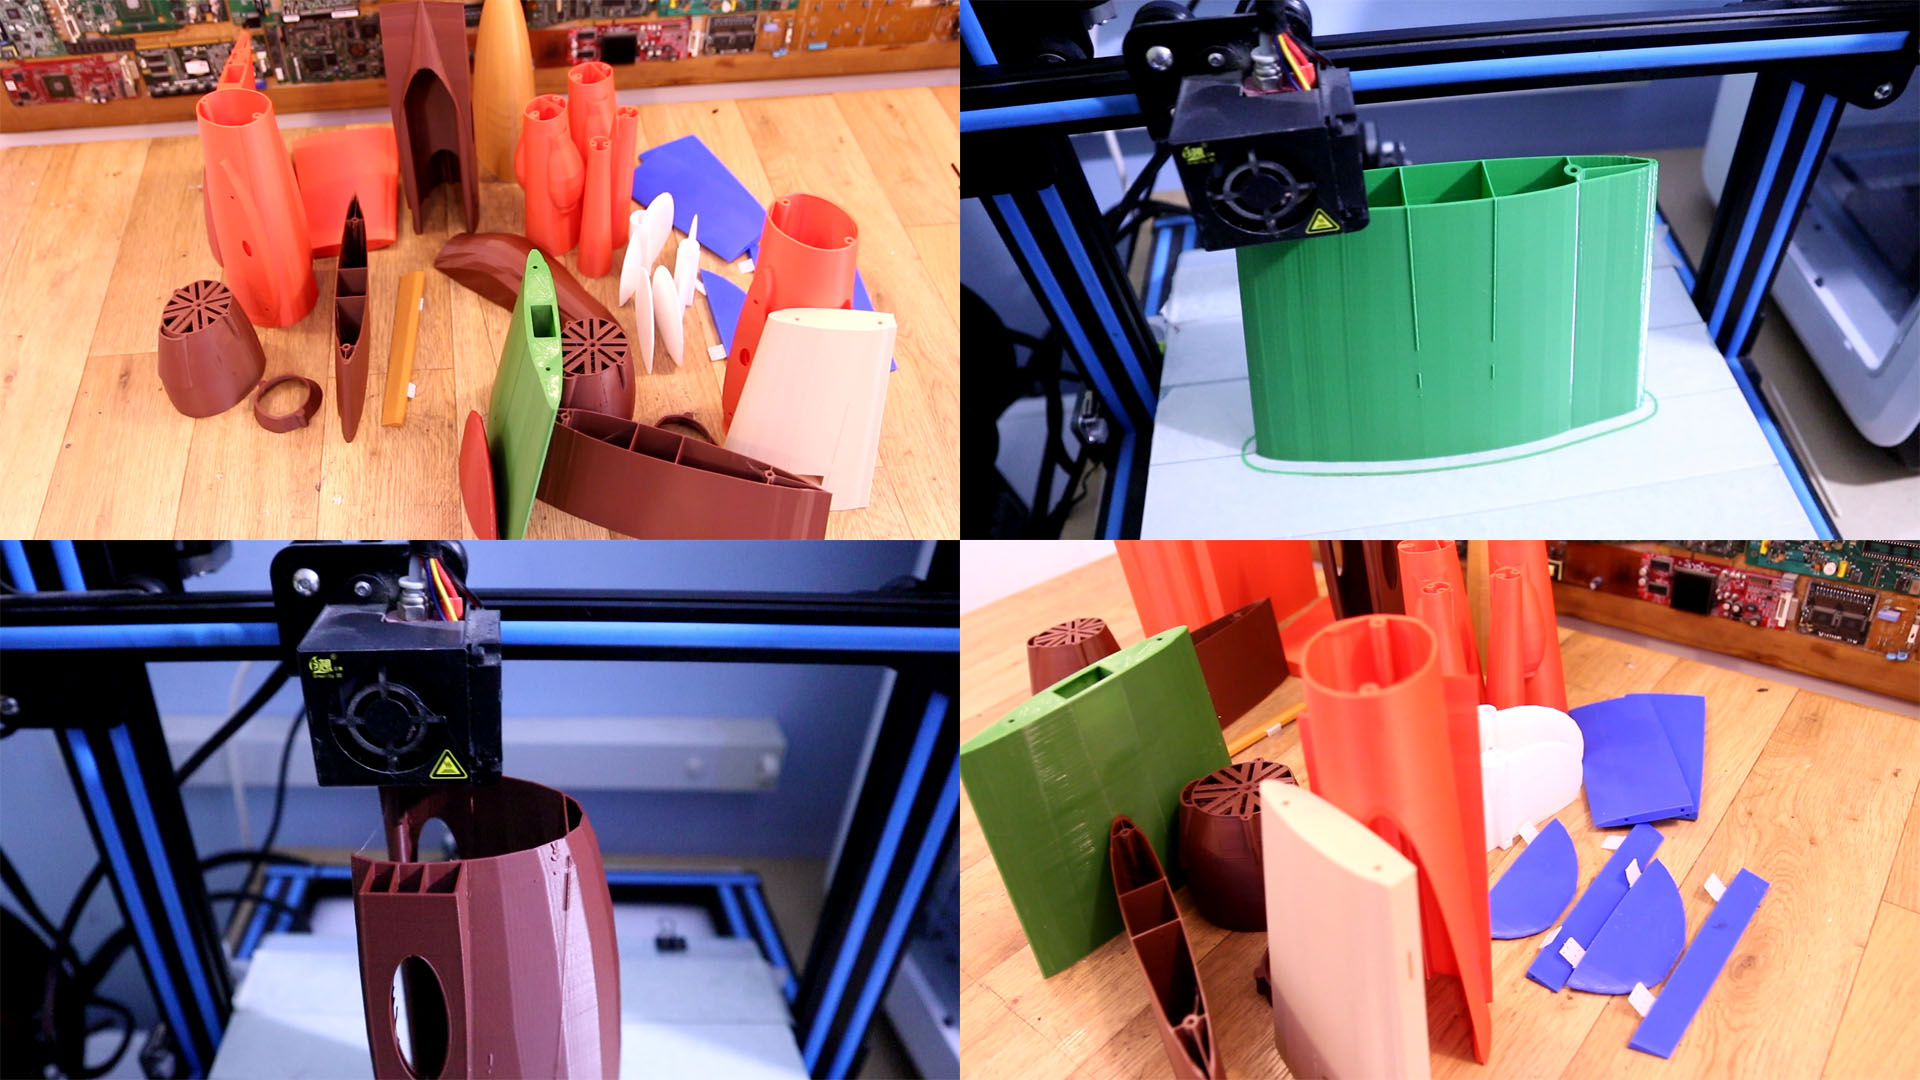
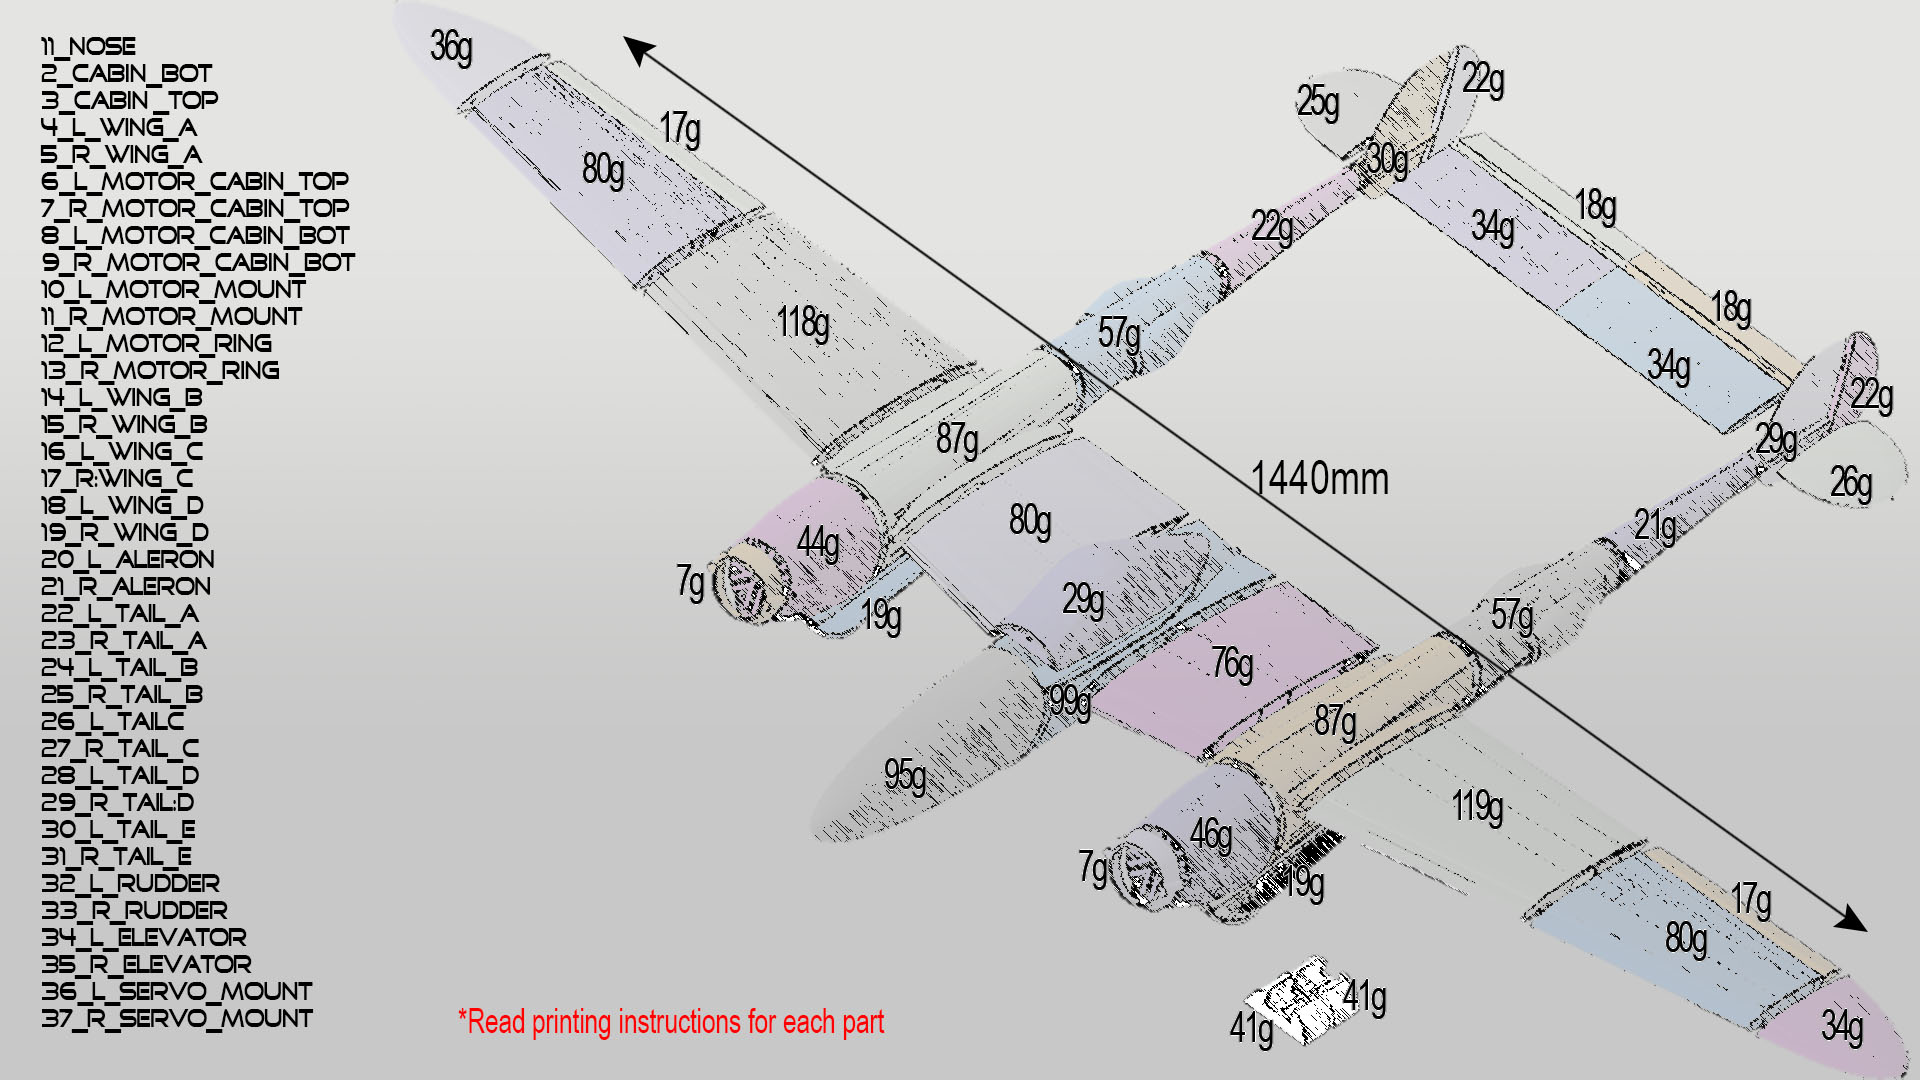
As you can see below, we have 37 3D printable parts without including landing gear which will be available on version 2. Basically all parts are made with PLA filament. There are some exceptions but the rest are printed with 0.4mm nozzle, 0.3mm layer height, 15% rectilinear infill and 2 perimeters. The parts are already oriented so don't worry of rotating the parts. But you do need a big printer of at least 26 by 26cm bed size and 30cm height of printing area. The plane is huge. The wingspan is of 1440mm so imagine that. That's why we need carbon fiber tuebs inside to provide strenght and flexibility. See the exception parts below that you must print differently.
- Exceptions (PLA, 0.4mm nozzle, 0.3mm layer height, 2, perimeters, 10% star shape infill) :
18_L_Wing_D, 19_R_Wing_D, 30_L_Tail_E, 31_R_Tail_E, 28_L_Tail_D, 29_R_Tail_D, 32_L_Rudder, 33_R_Rudder, 34_L_Elevator, 35_R_Elevator, 20_L_Aleron, 21_R_Aleron
This will take some time. I've used 3 printers at the same time and took me a few days. I've used PLA filament at 200 degrees and the bed at 60 degrees with some painters tape on it. See slicer settings above. Get the files for the cabin first and start the assemble.
I've also weighted the parts in order to know the total weight of the final plane. Without Battery, motors and landing gear, the plane is around 1.5KG and with a wingspan of 1.44m, I think that could be enough to create good lift. See the weight of each part below if you want to compare.
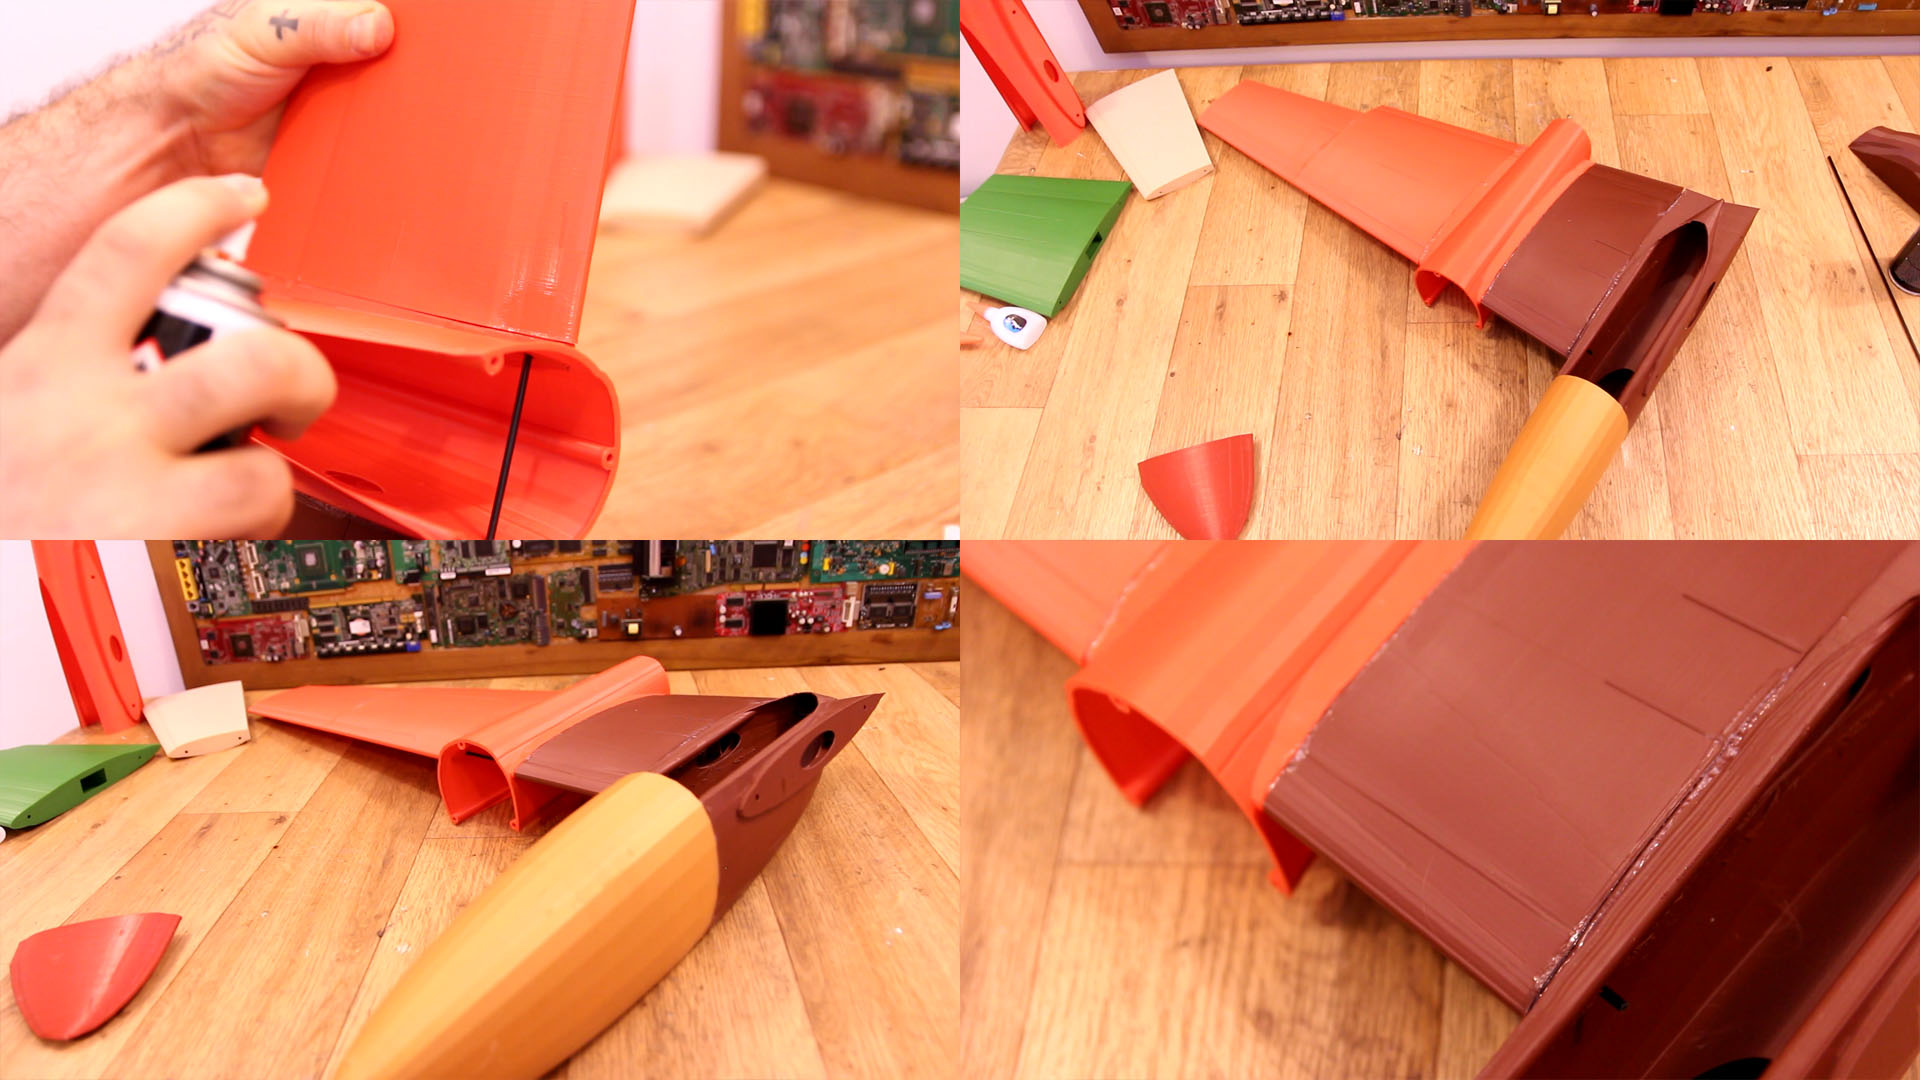
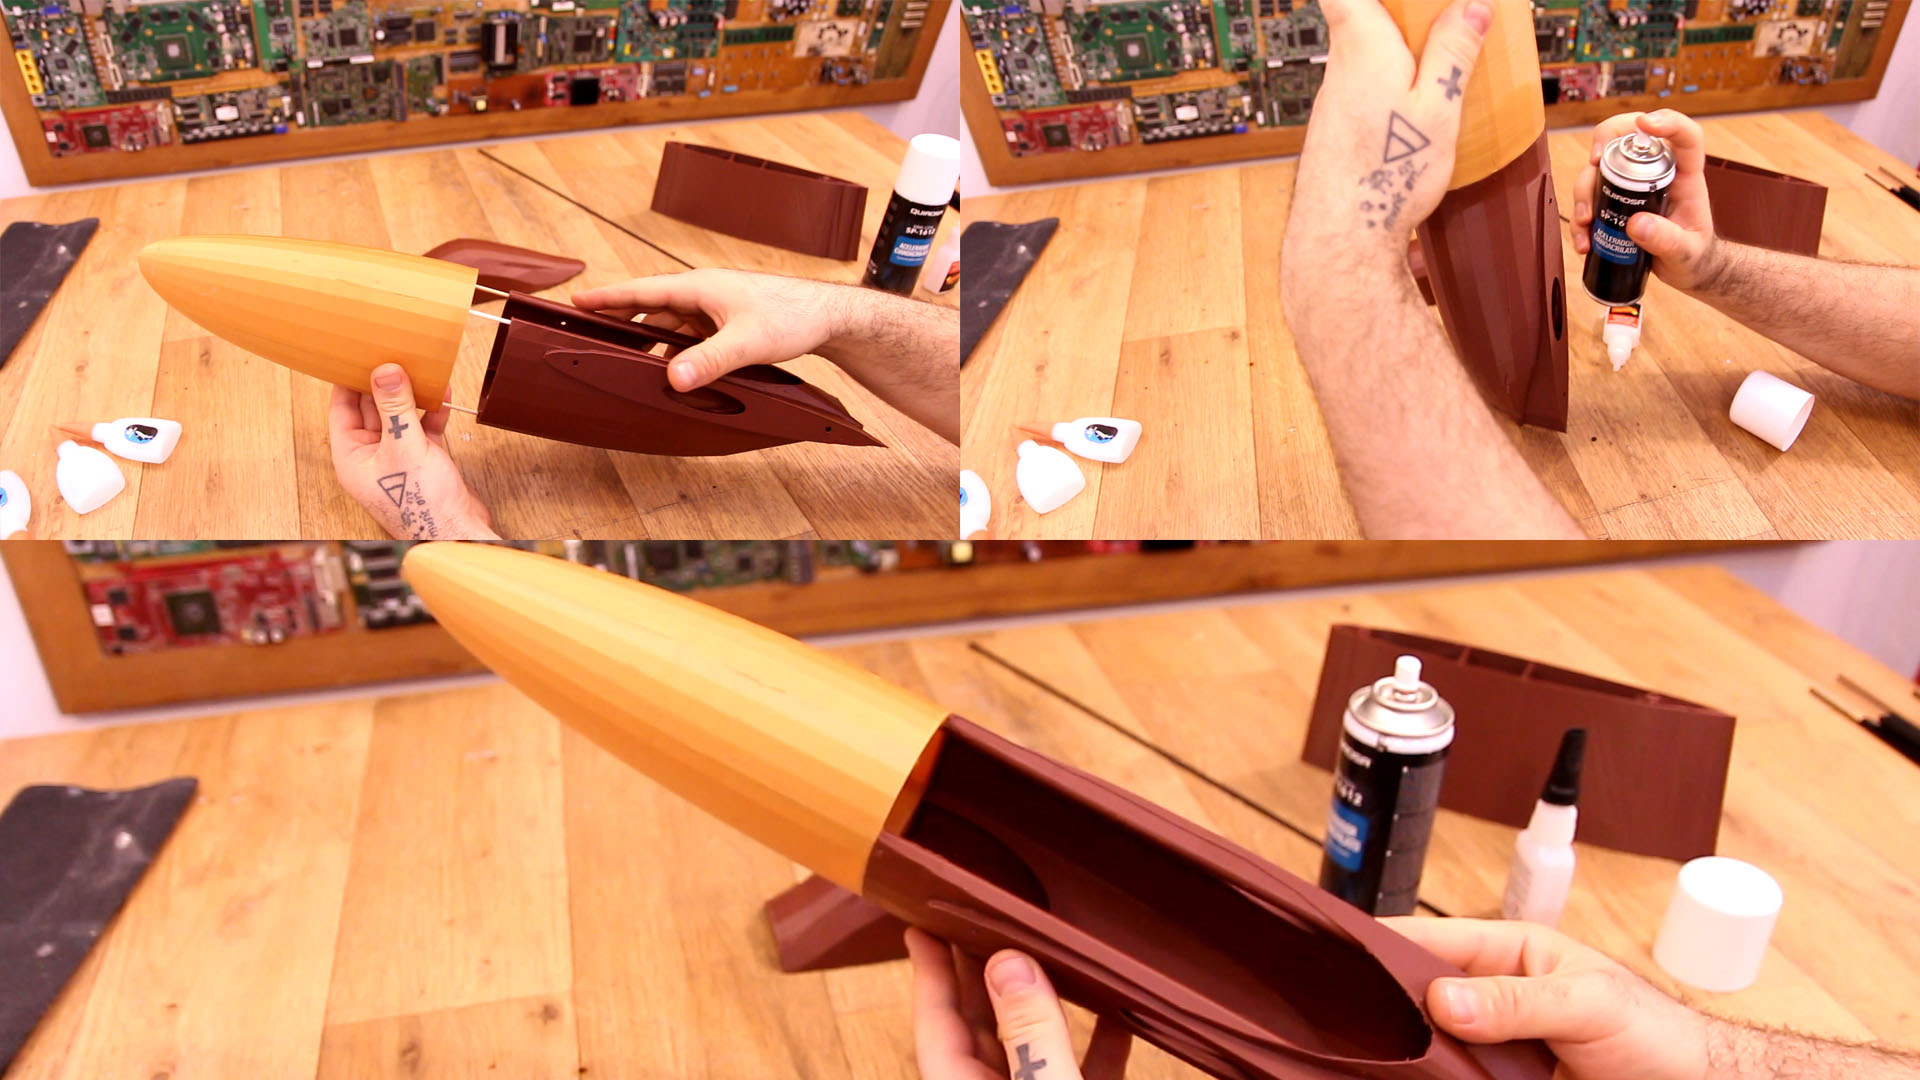
First part we make is the cabin. So take part 1 and 2 (nose and bottom cabin) and add some 4mm barbeque wood sticks in the holes. Add superglue, join the parts and add the activator fast. That's it. We have the cabin. We don't add the top part of the cabin yet. That will have magnets for easy close/open.
Ok, now we add the wings but this is the tricky part. Since the carbon fiber rods are inserted with adn angle, that means we can't glue one part adn then isnert the next, because the next won't fit because of the angle that will create a size difference between input and output of the rods. So, that's why we have to add wing part A, B and C and also the top motor cabin to the carbon fiber rods first. Then we start glueing the parts one by one.

Now start with wing part A and glue that to the main cabin. Then gue it to the motor cabin and so on. Add gule and then activator. Leave wing part D for later.