
What’s up my friends, welcome back. This is a vacuum tube amplifier and this time it has a lot more power. I say this time because a few months back I made another project for a pre amplifier board based on vacuum tubes. That PCB had very low power and it only added the vacuum tubes harmonics but we had to use another amplifier to increase the power. This time this amplifier has enough power for some normal size speakers and is also based on vacuum tubes. This is not my design, I’ve ordered this kit online and in this post I will share with you the schematic, the component list and how to assemble it. At the end we will give it a test and see how it sounds. So guys, let’s get started.
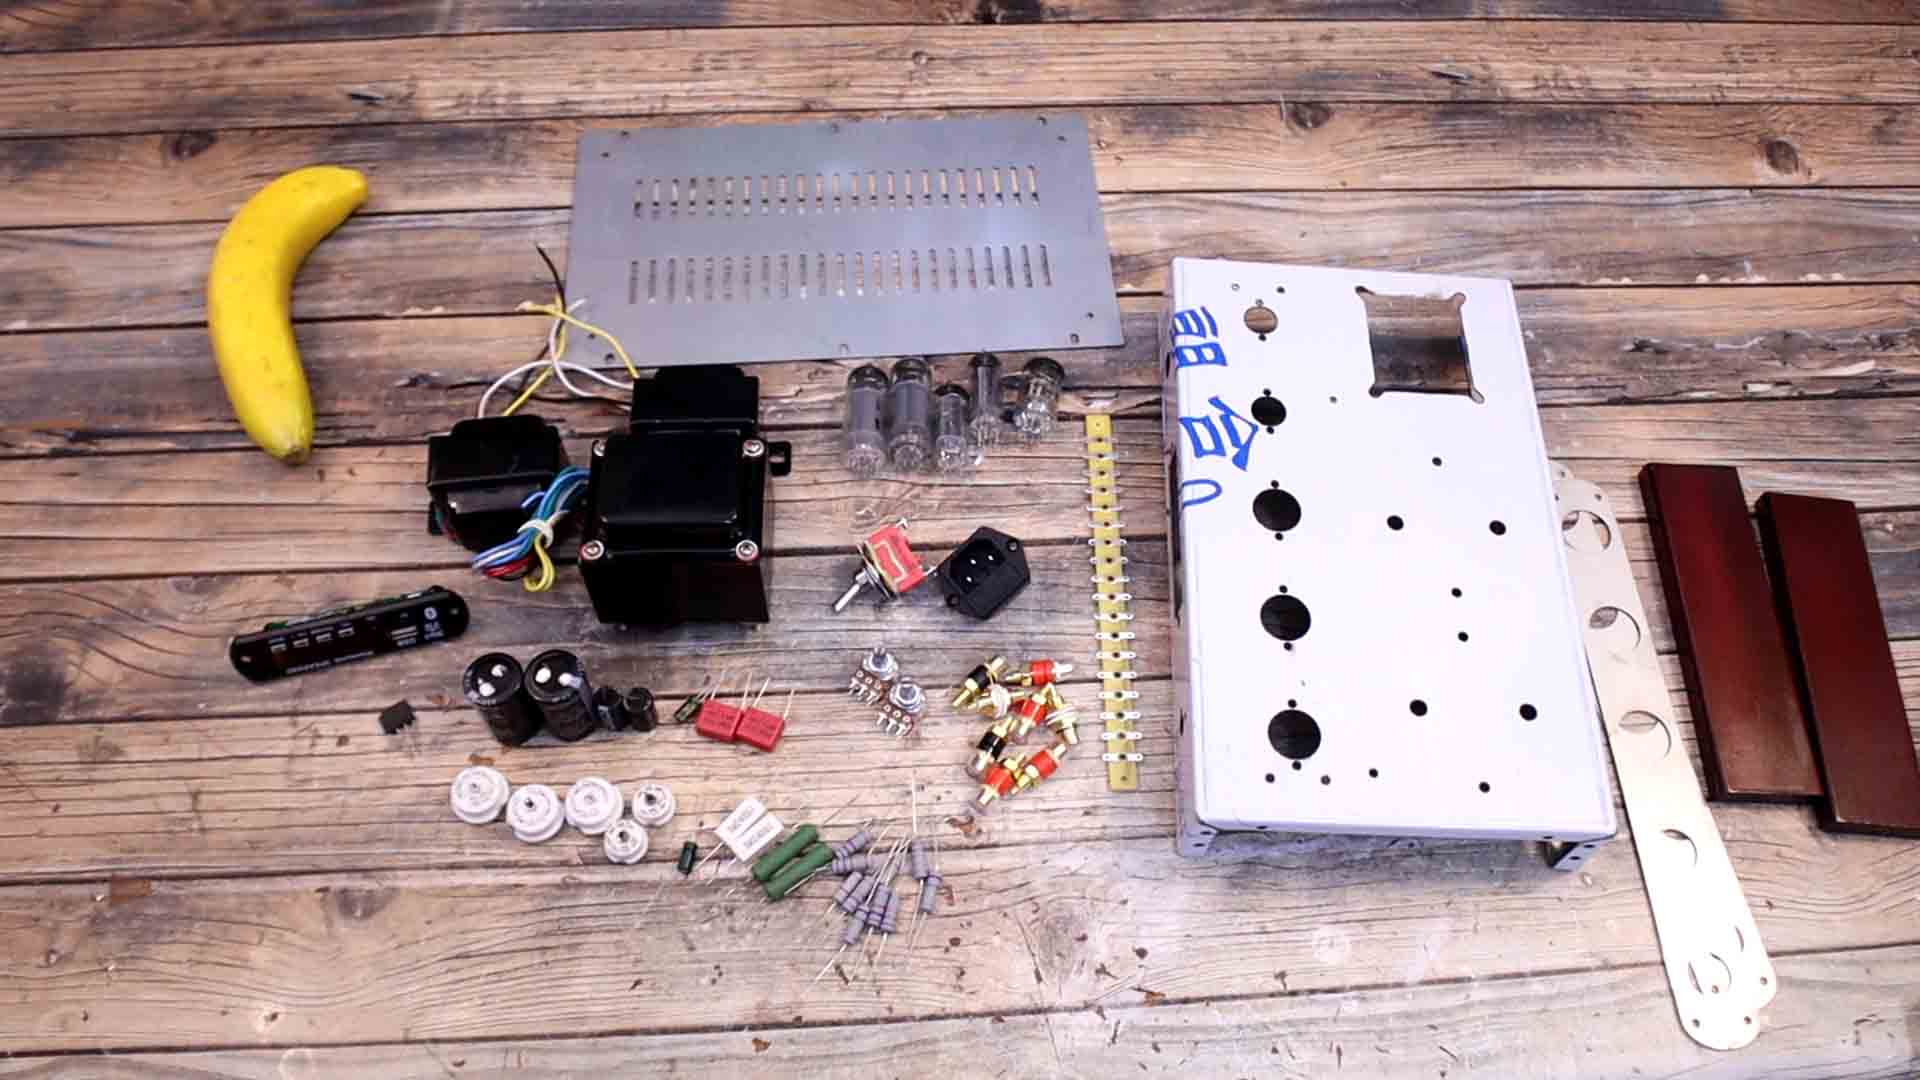
What’s up my friends, welcome back. Now remember that my previous post on vacuum tubes amplifiers was with a low power one. Actually, that was a so-called pre amplifier. It was only adding the harmonics effects but the power output wasn’t high enough for a speaker. This time we will make a bigger one. I’ve bought a kit from AliExpress and today we will check the part list, I will try to make the schematic and then we assemble it and test it out with some speakers. Let’s see what we need.
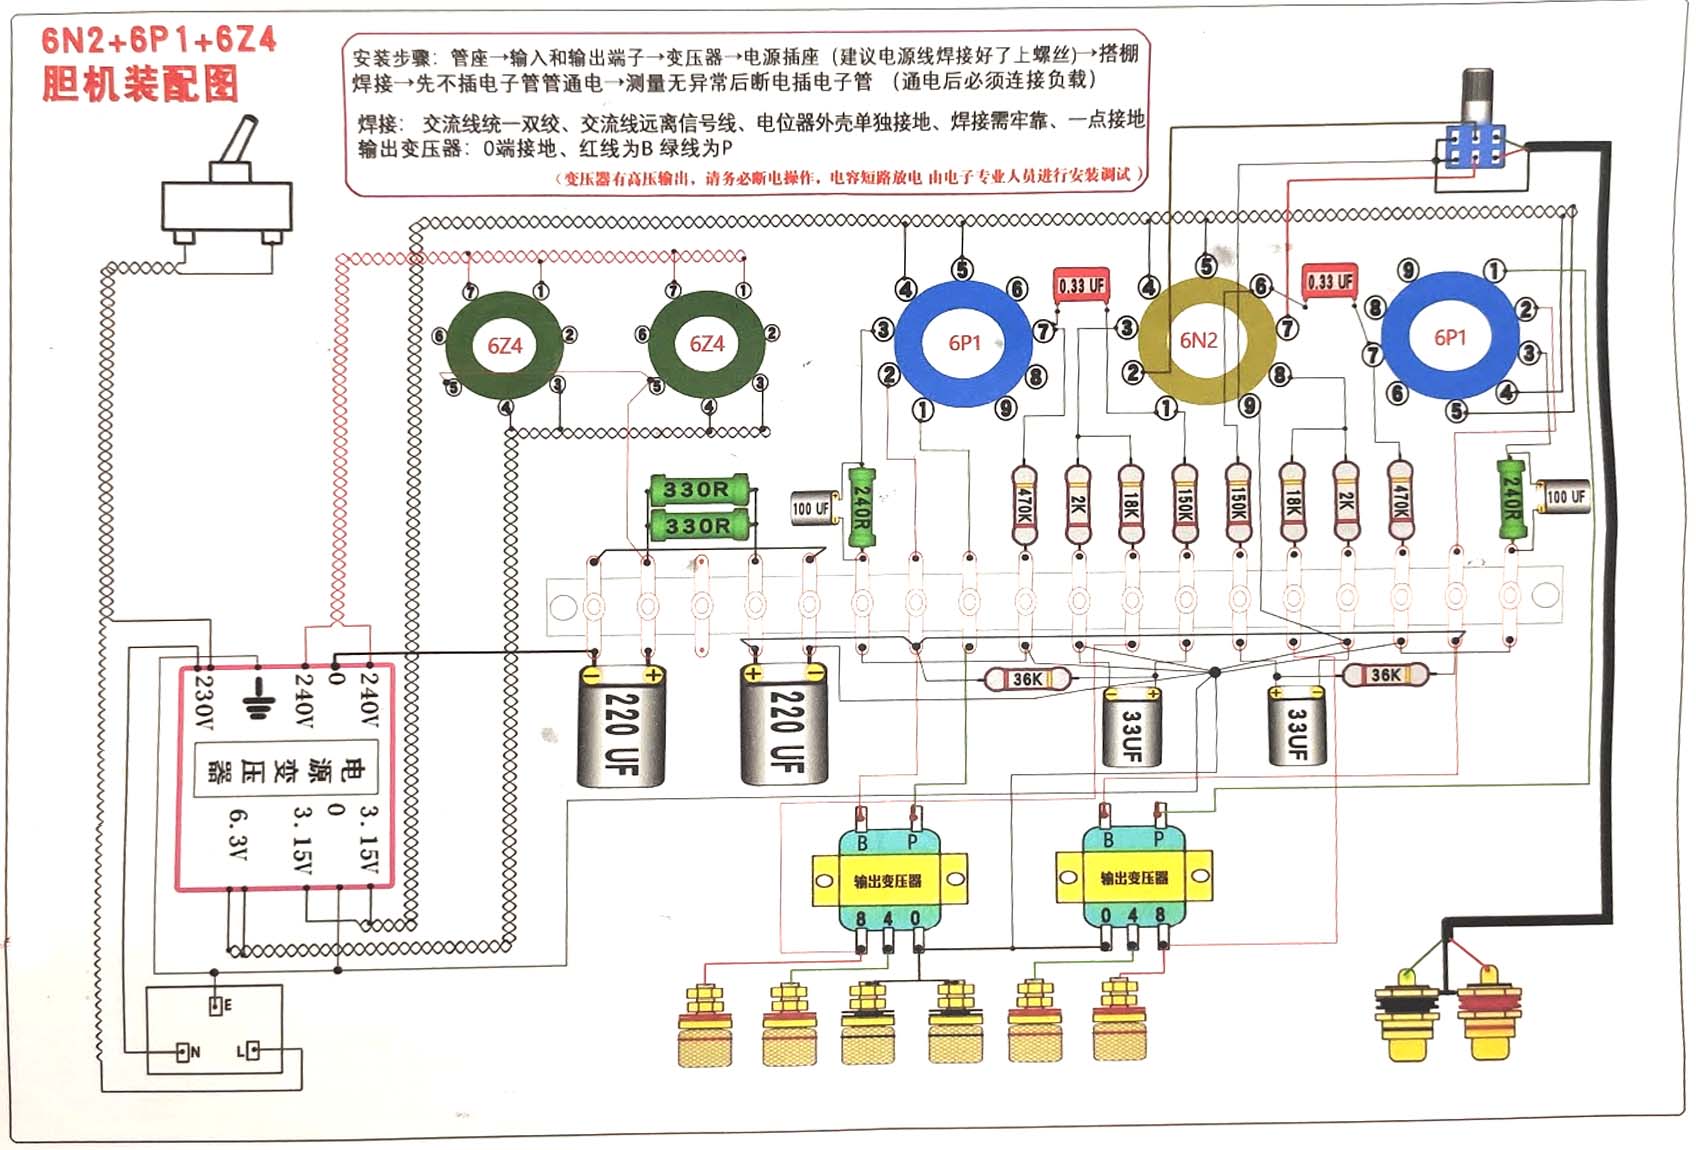
The kit give us this schematic but I will try make for a future video another schematic made by me. Actually, I will design a PCB for this and share it with you in the future. So as you can see the connections are simple. The main transformer will give us 240V, 3.15V and 6.3V, all AC. With that we supply the vacuum tubes. The audio input from the potentiometer is connected to pins 7 and 2 of the 6N2 tube. Then the signal goes to the other 6P1 tubes. We have some power limiting resistors and some output capacitors and at the output we have the transformers. To make the connections the kit has a connection support. That’s why I would like to make a PCB for this project. Because it would be a lot easier and better looking than some connections on this support.
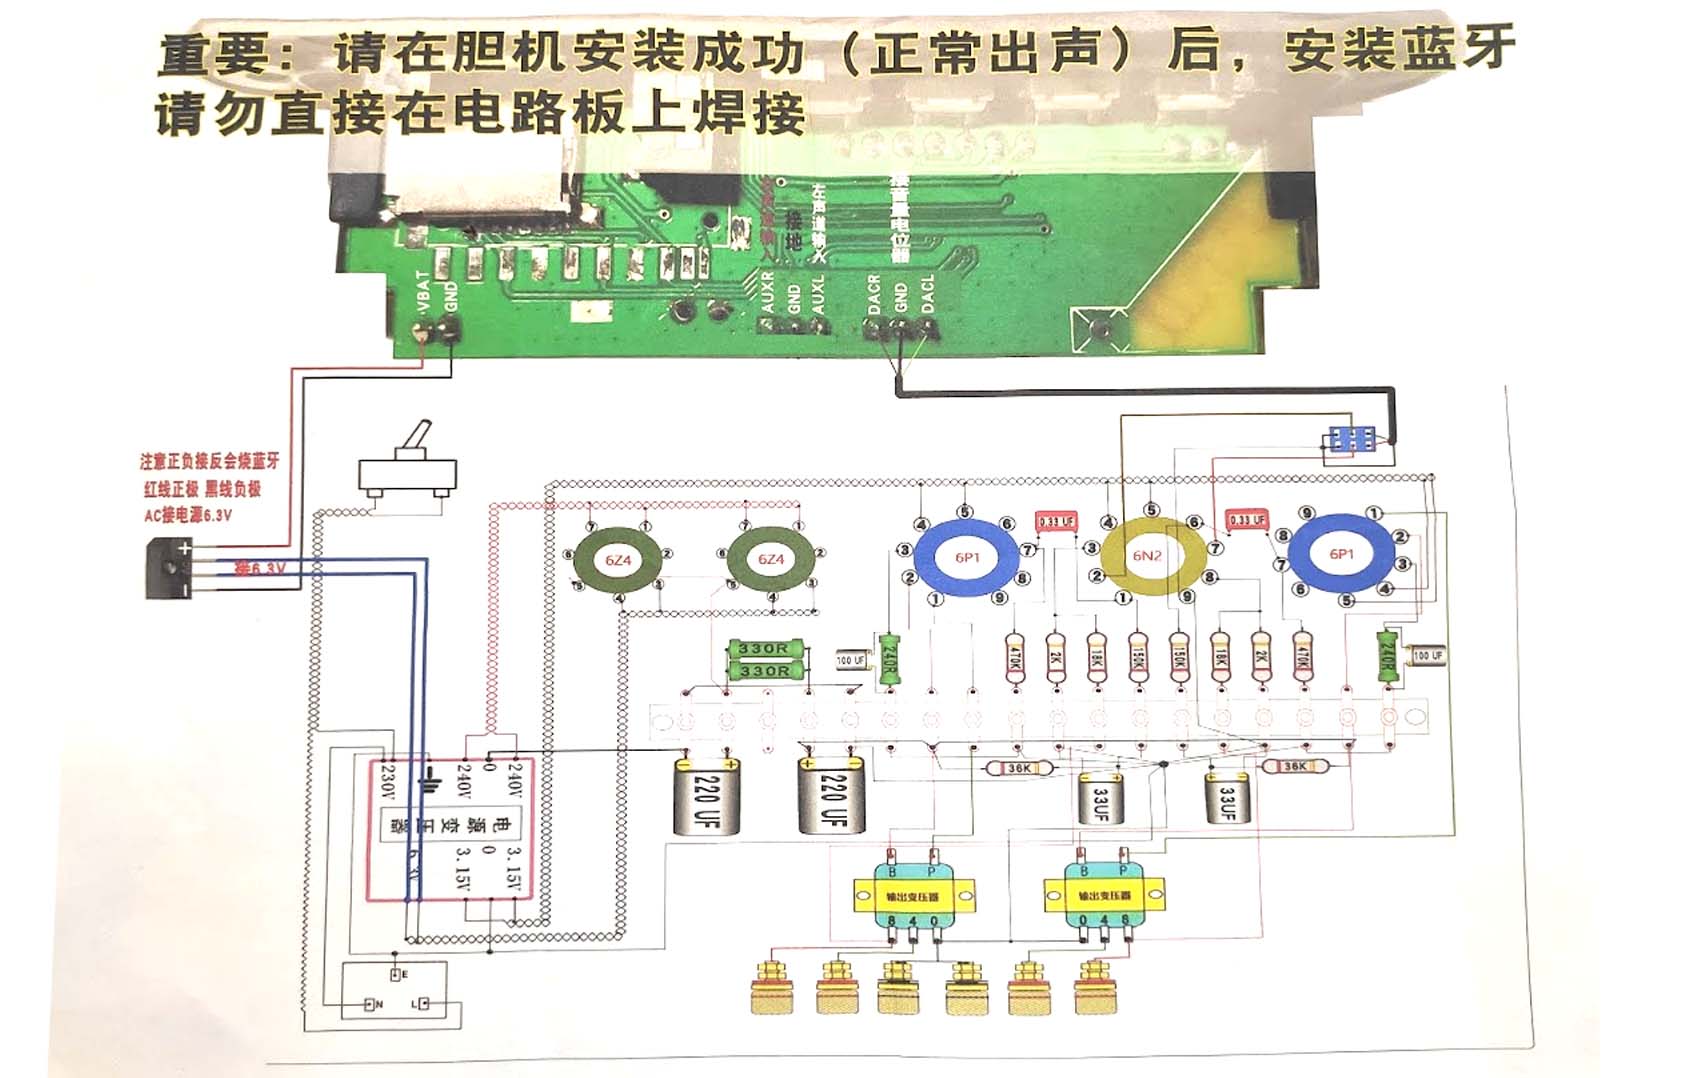
The kit has a Bluetooth player. We can take 6.3V from the transformer which is AC. We add a rectifier and supply the music player with that. Then we connect the L adn R channels output from the player to the volume potentiometer of the amplifier. We also share GND and that's it. We can now have music from the player or from the connectors.
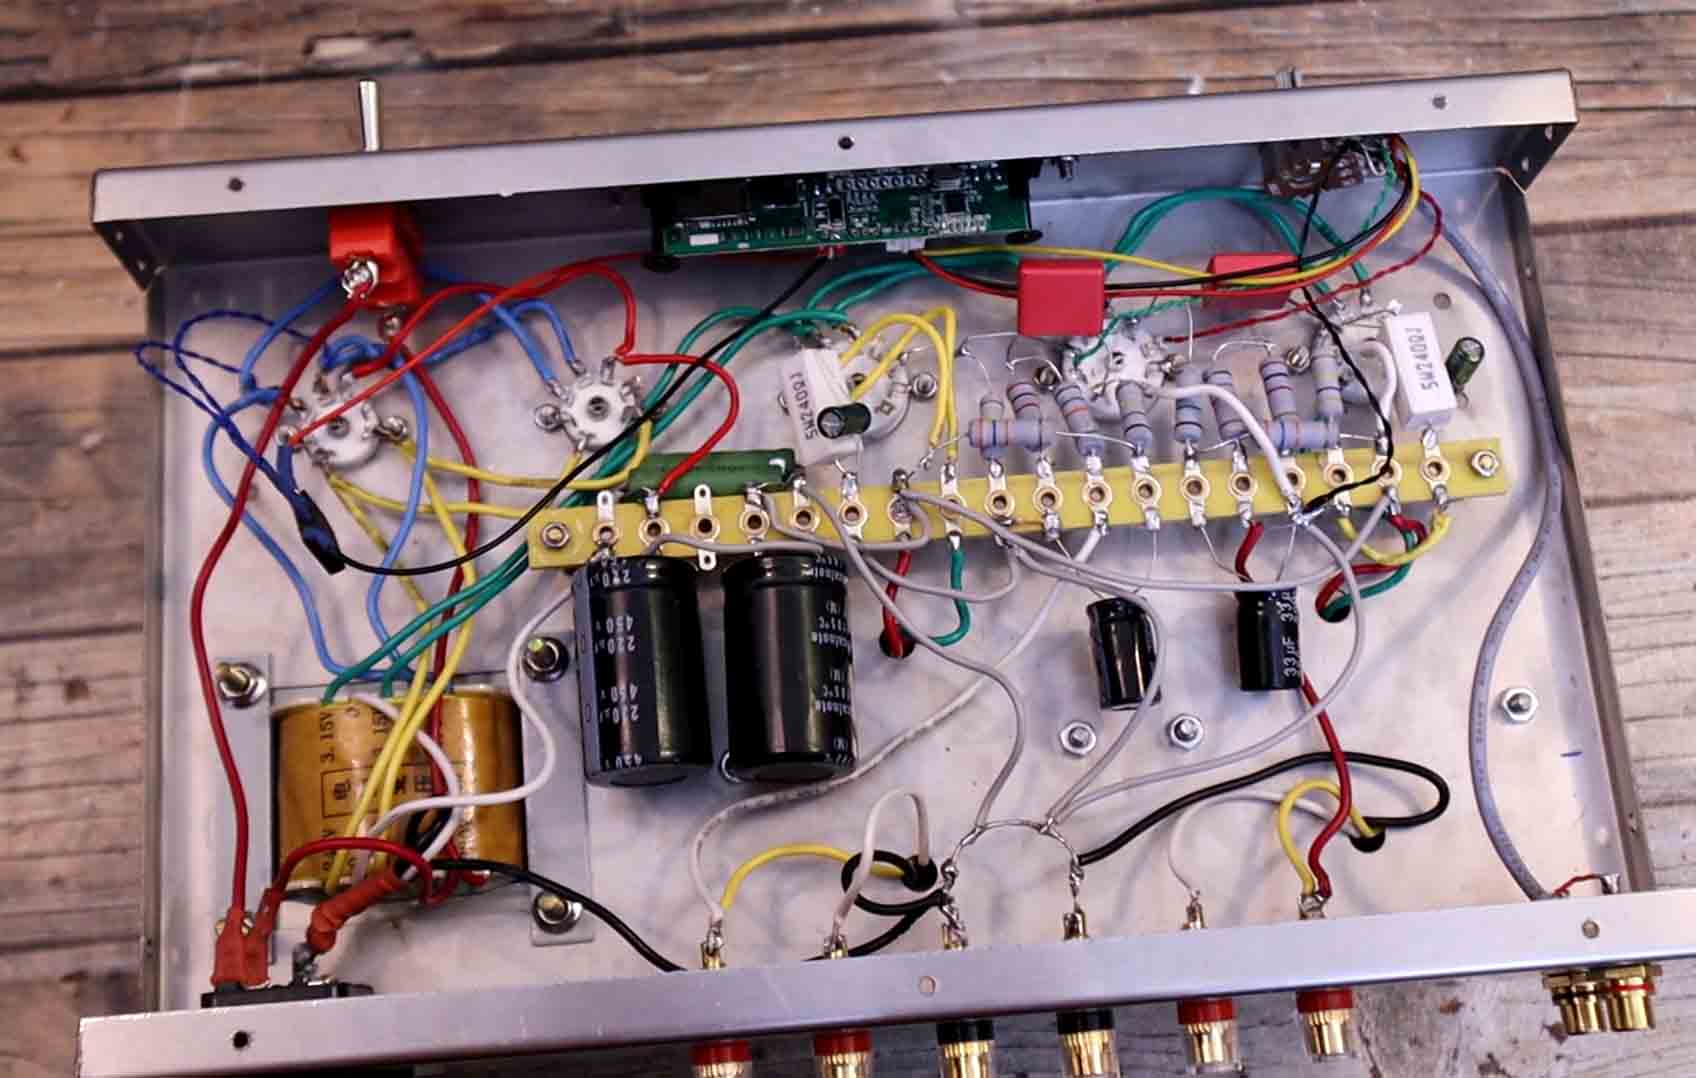
We add the big transformer. It has its own screws. Then We add the other smaller transformers in place and make sure the wires are going inside of the case. On the inside, using a separator and some screws we fix in place the connection support and later we will make all the solder connections there. Then I also add all the RCA connectors on the rear part. We have 6 connectors for the audio output since this can work with 4 and 8 ohms speakers. Then we also add the main power input connector. On the front part we add the switch, the potentiometer and in my case I also screw in place the mp3 player. On top of the potentiometer we can add a plastic knob. Now all the peripherals are in place, is time for the internal connections. We have to follow the schematic and add all the components. In my case I first solder all the power wires from the main transformer for 3.15V and 240V. Then I solder the wires from the smaller transformers to the output banana connectors. Then I add all the capacitors, as shown on the schematic. Then the power resistors. I connect everything to the vacuum tubes sockets. I add the film capacitors connected to the resistors and the vacuum tube sockets. I finish all the connections with wires to the audio jack, the vacuum tube sockets and the output transformers for the left and right channel. Ok, now pretty much everything is connected, we could give this a test. I’m a bit of nervous since this is working with high voltage AC. We add all the vacuum tubes. I get a small speaker and connect it to the output. I power the amplifier with 220V AC from the main outlet and flip the switch.
Good, nothing blew up so we can continue. We can see the filament getting hot inside the tubes. I put the player in Bluetooth mode and connect to it with my smartphone. I play some free music from YouTube.
So guys, above you will find the schematic and in the near future I will make a PCB for such project as I did with the preamplifier PCB. I'm also sharing all the needed components and other different schematics. If my videos help you, consider supporting my work on my PATREON or a donation on my PayPal. Thanks again and see you later guys.


