
I will use a parallel plate capacitor for some experiments today. Today we start with the first class and it will be about capacitors. I want to show you how they work, some related equations with the capacitors, what types we have and how could the area, the dielectric and the distance between the plate could affect the capacitor characteristics. Also, we will see how to measure the stored charge inside a capacitor using some cool formulas.
So, how dose a capacitor works? Well, the most basic representation of a capacitor are two conductive plates like the ones below, placed together side by side, but never touching and usually we have some sort of dielectric material in between, and we will see what a dielectric is in a moment. On the other side we know that electrons have a negative charge. Negative with negative will repel each other and positive with negative will attract, all thanks to electric fields. The idea of a capacitor is to store these electrons on its metal plates. But you see, you can’t really add more electrons on a metal because they will get pushed out by the other electrons the metal already has. Unless you apply some positive charge on the other side so they would get attracted. This attraction force (Electric field) could overcome the pushing force created of the electrons repelling each other and in this way we would have a bigger charge stored on to the metal plates of the capacitor. The bigger is this Electric Field, more charge we could push on the metal plate.
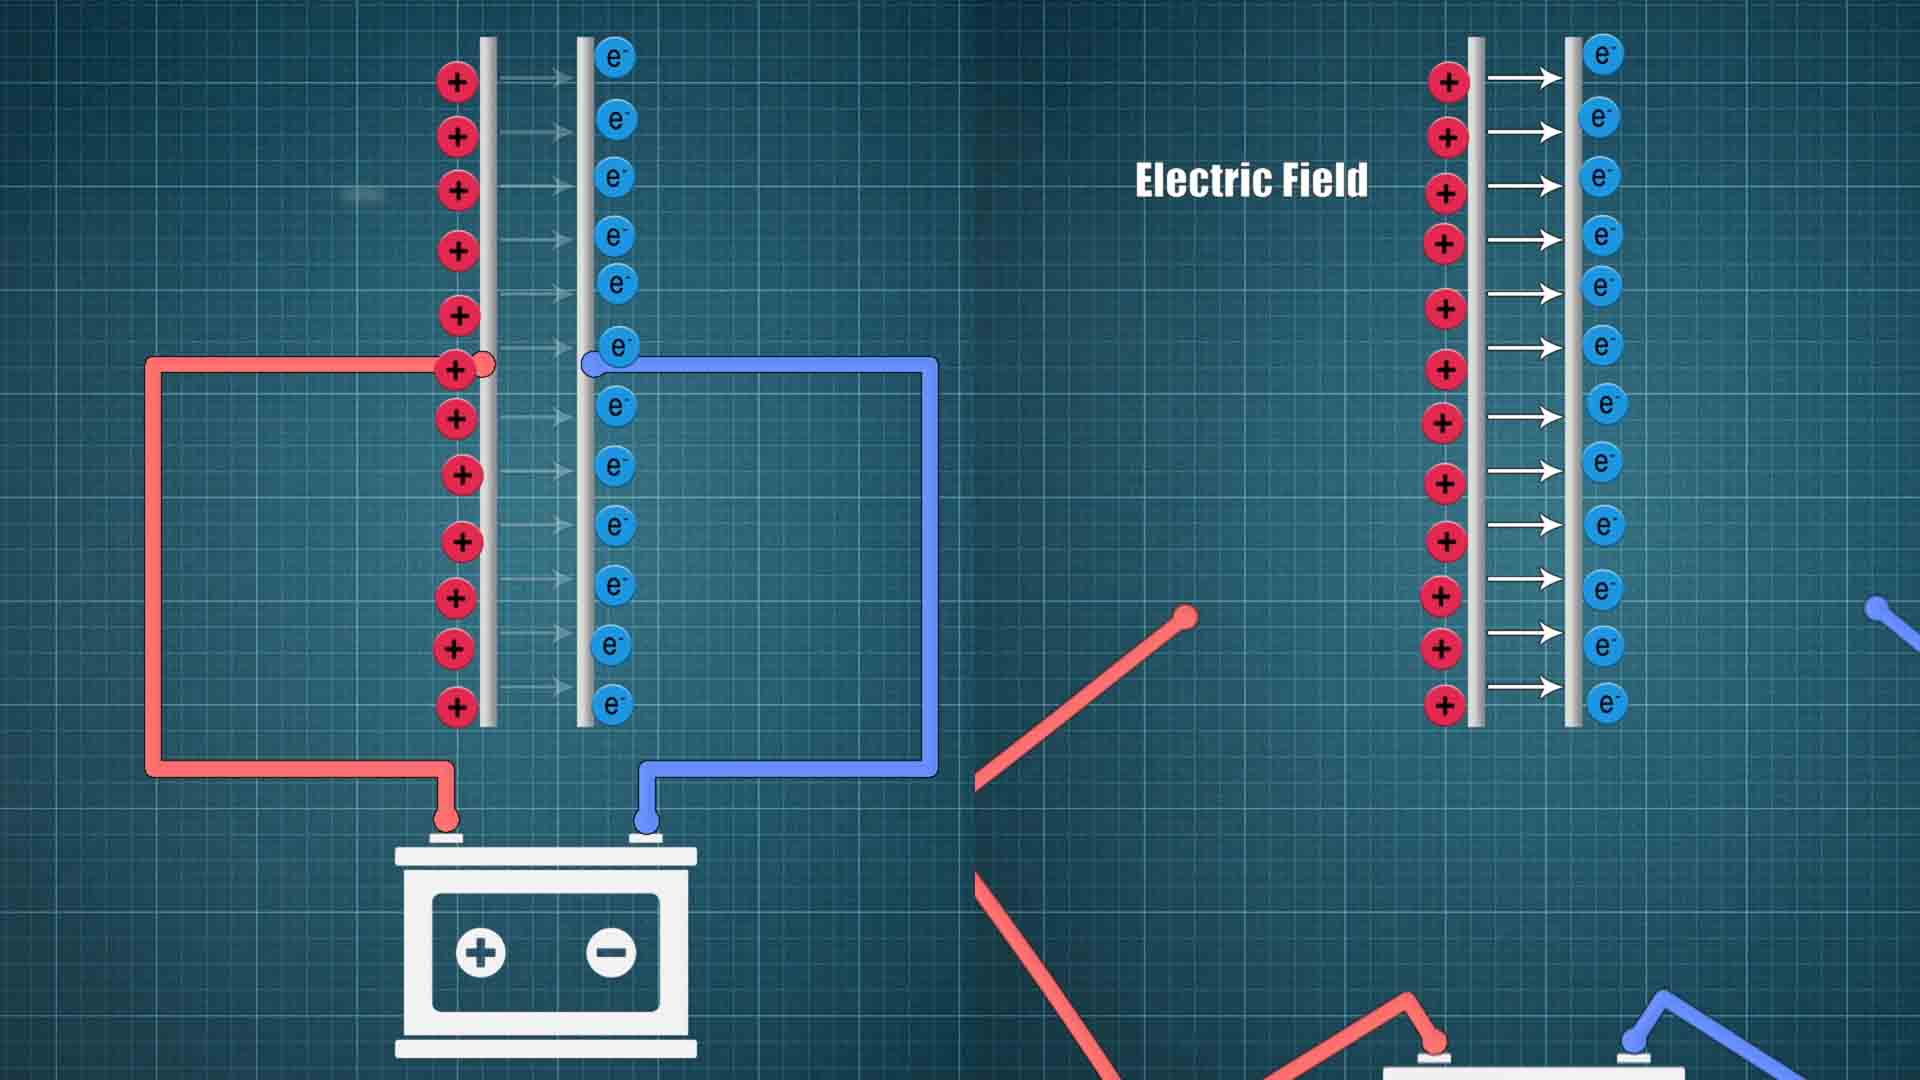
To create negative and positive charge, we apply a voltage differential to the plates but the plates are never touching each other. With this voltage difference we can now push electrons on to the right plate and suck them out from the left plate creating a positive charge. Since the metal plates are not touching, the electrons can’t go to the other side to fill the positive holes. But there is an electric force between the positive and negative charge and this force will keep them together. So even if I disconnect the voltage supply, since the charge has no place where it could go, the capacitor will keep its charge. That’s basically how we can store energy inside of a capacitor.
But what if I connect the battery backwards. For this ideal capacitor, the left and the right metal plates are the same so it would work without problems. But depending on the materials that we use to manufacture the capacitors, this might be a problem and this could happen to your capacitor. You see there are a few types of materials we could use to make capacitors such as ceramic, tantalum, electrolytic, polymer, mica, film or silicon and they each have their own characteristics.
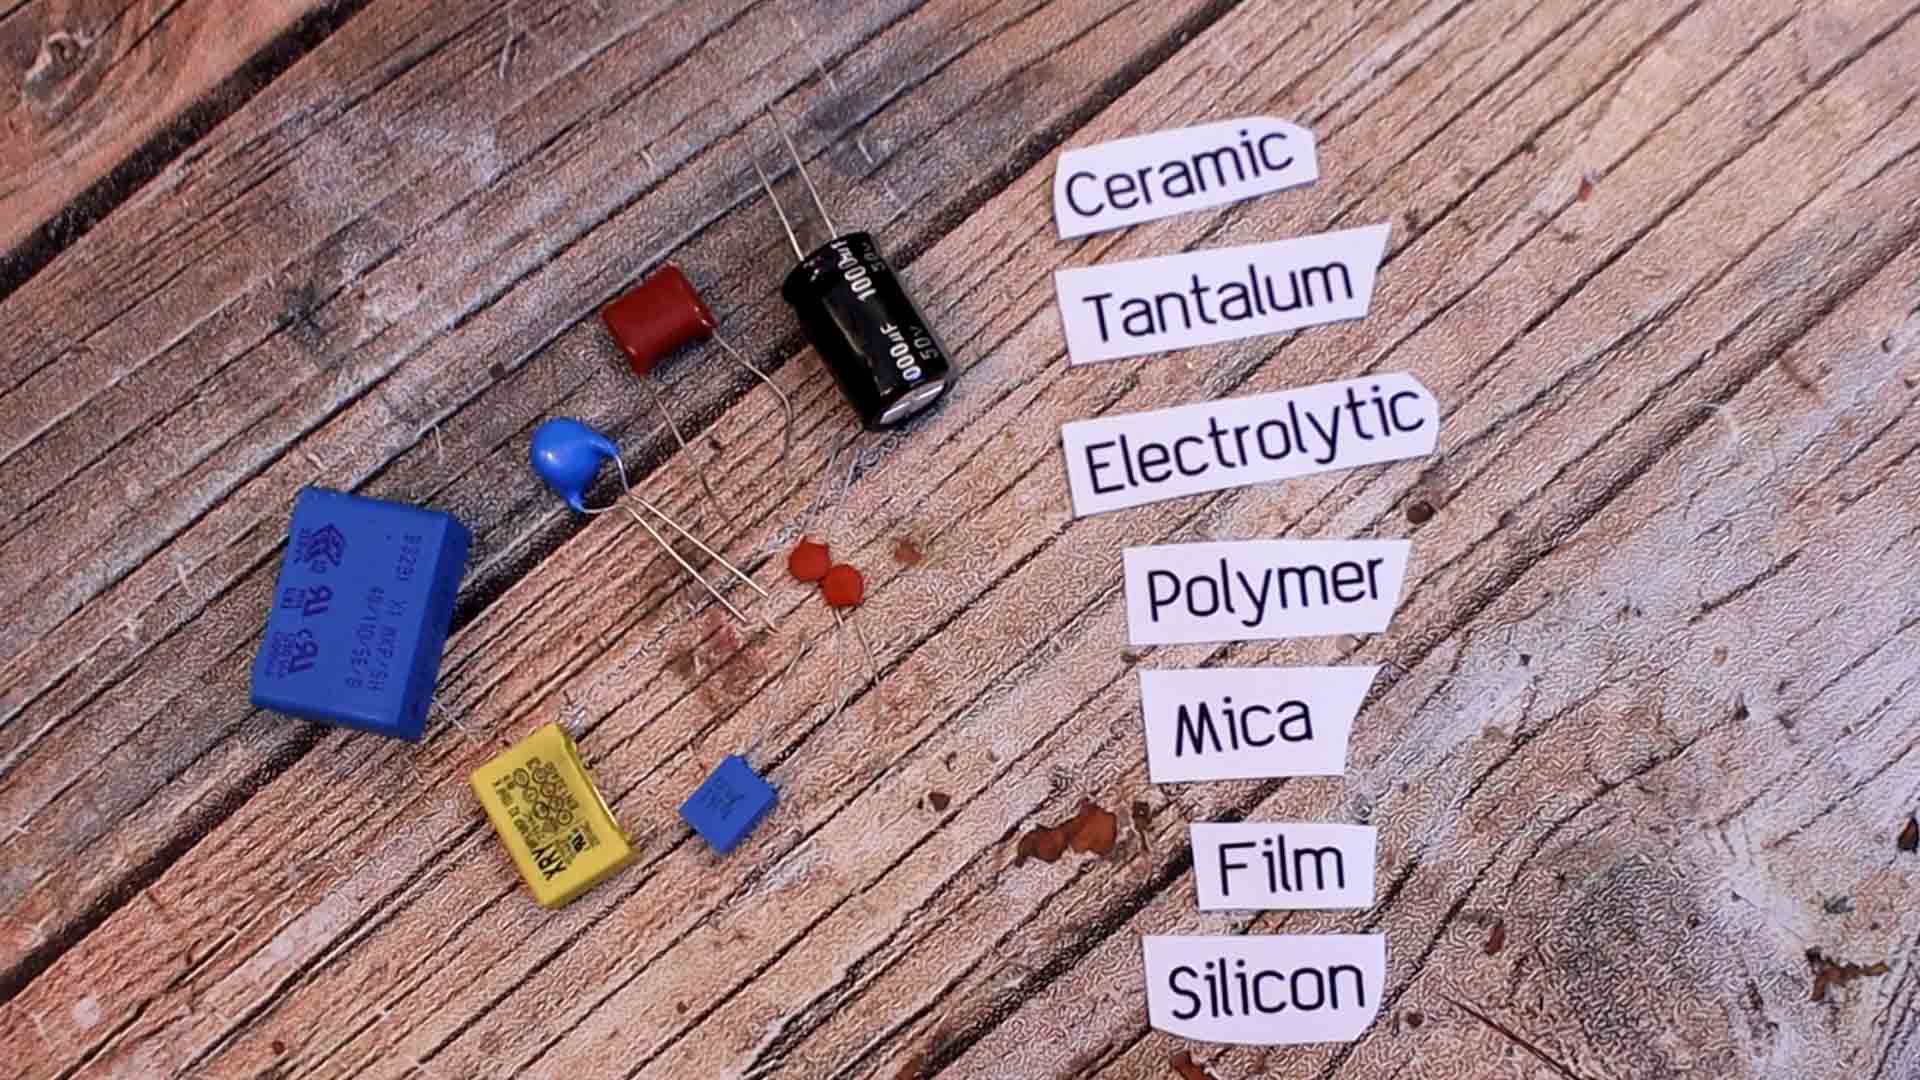
For example, for electrolytic and tantalum capacitors, these materials make them to be polarized and we use symbols such as these ones to mark them as polarized or non polarized. We can see the electrolytic or tantalum capacitor having a line indicating the negative pin. If you place them backwards, they might not work or even explode. Take a look at the video below and see some capacitors explode!
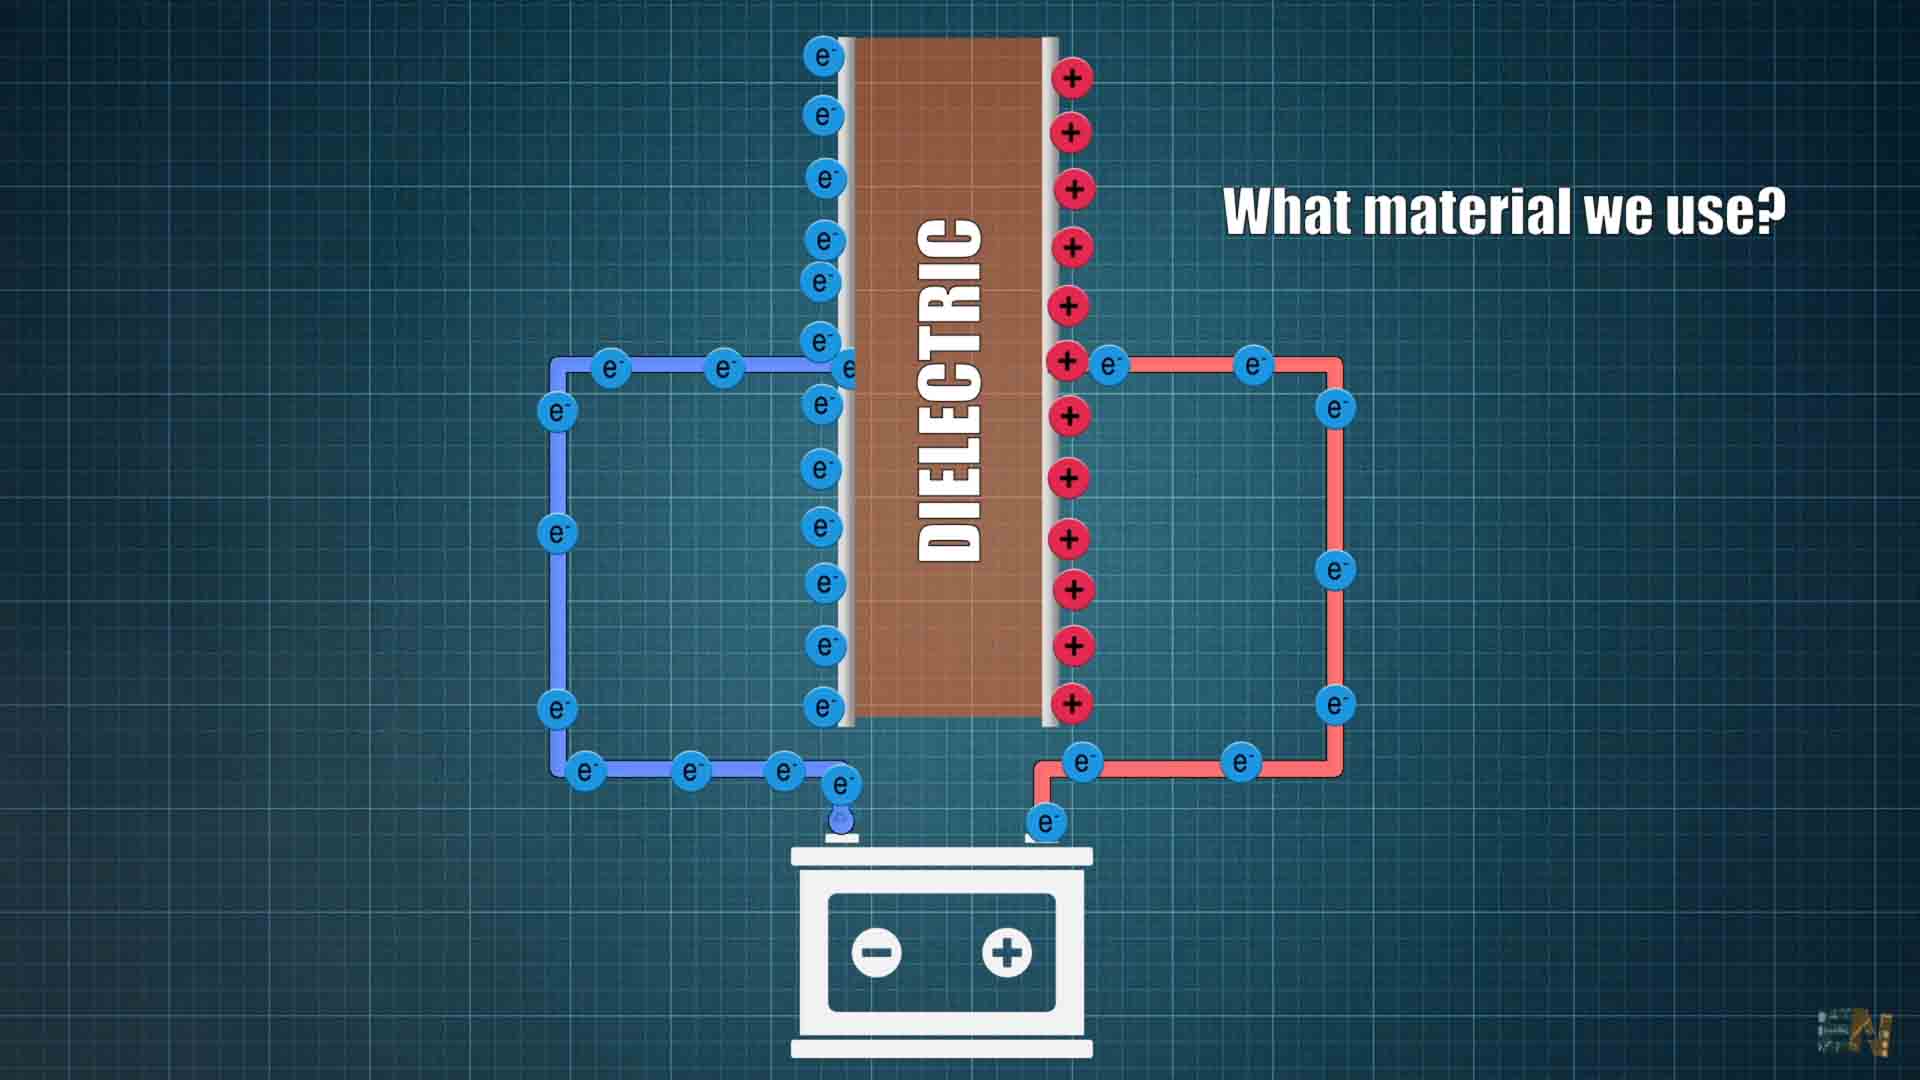
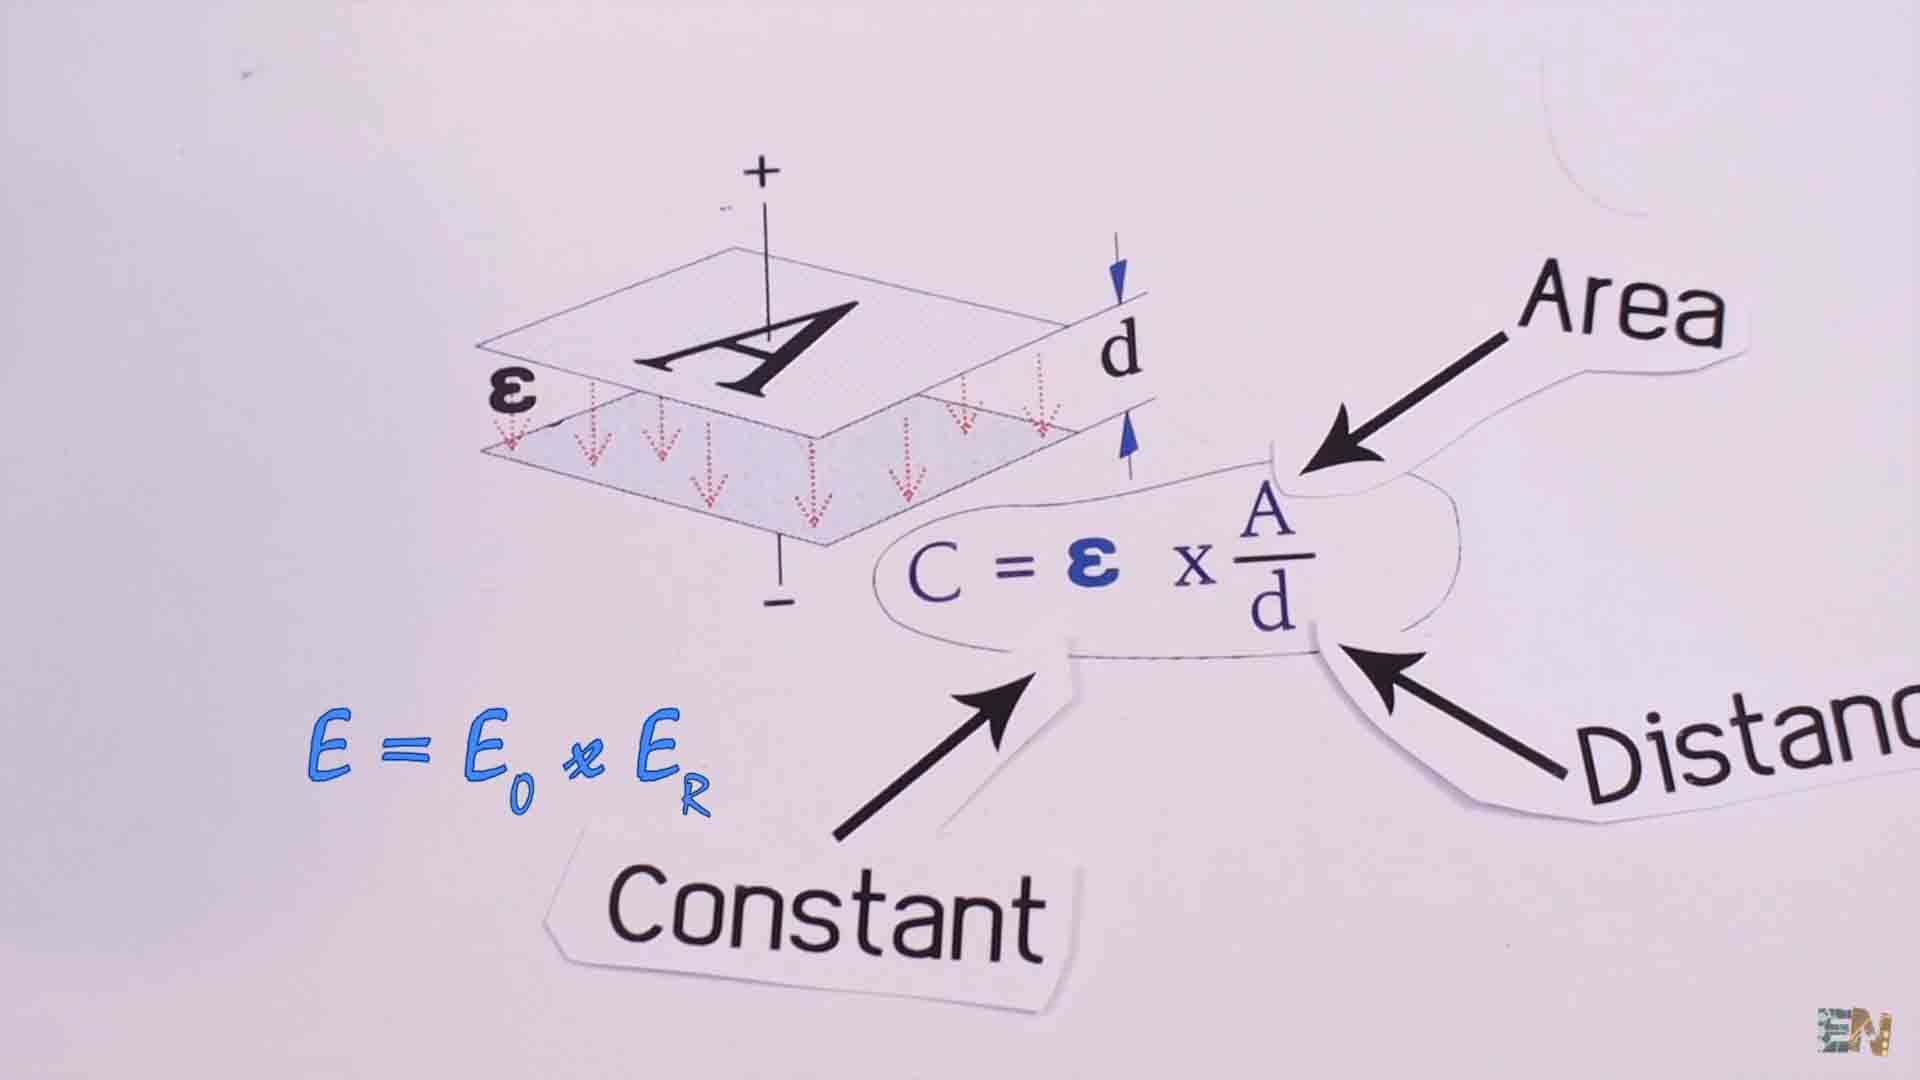
Ok so that was the basic part about capacitors. Till now between the metal plates we had air. We call the material between the plates a dielectric, and in electromagnetism, this is an electrical insulator that can be polarized by an electric field. Air is a dielectric, plastic is another one, rubber could be a dielectric, glass could also be or even wood could be a dielectric for capcacitors. But depending on the used material for the dielectric, the capacitor properties would change. The unit to measure capacitors is capacitance and is measured in Farads in honor to Michael Faraday. This capacitance is ideally equal to the Area of the plates divided by the distance between the plates and multiplied by an electrostatic constant. This constant is equal to epsilon 0 multiplied by epsilon r where epsilon 0 is the permittivity of the void and epsilon r is the permittivity of the used material. So obviously, the capacitance of a capacitor is affected by the used material for the dielectric.
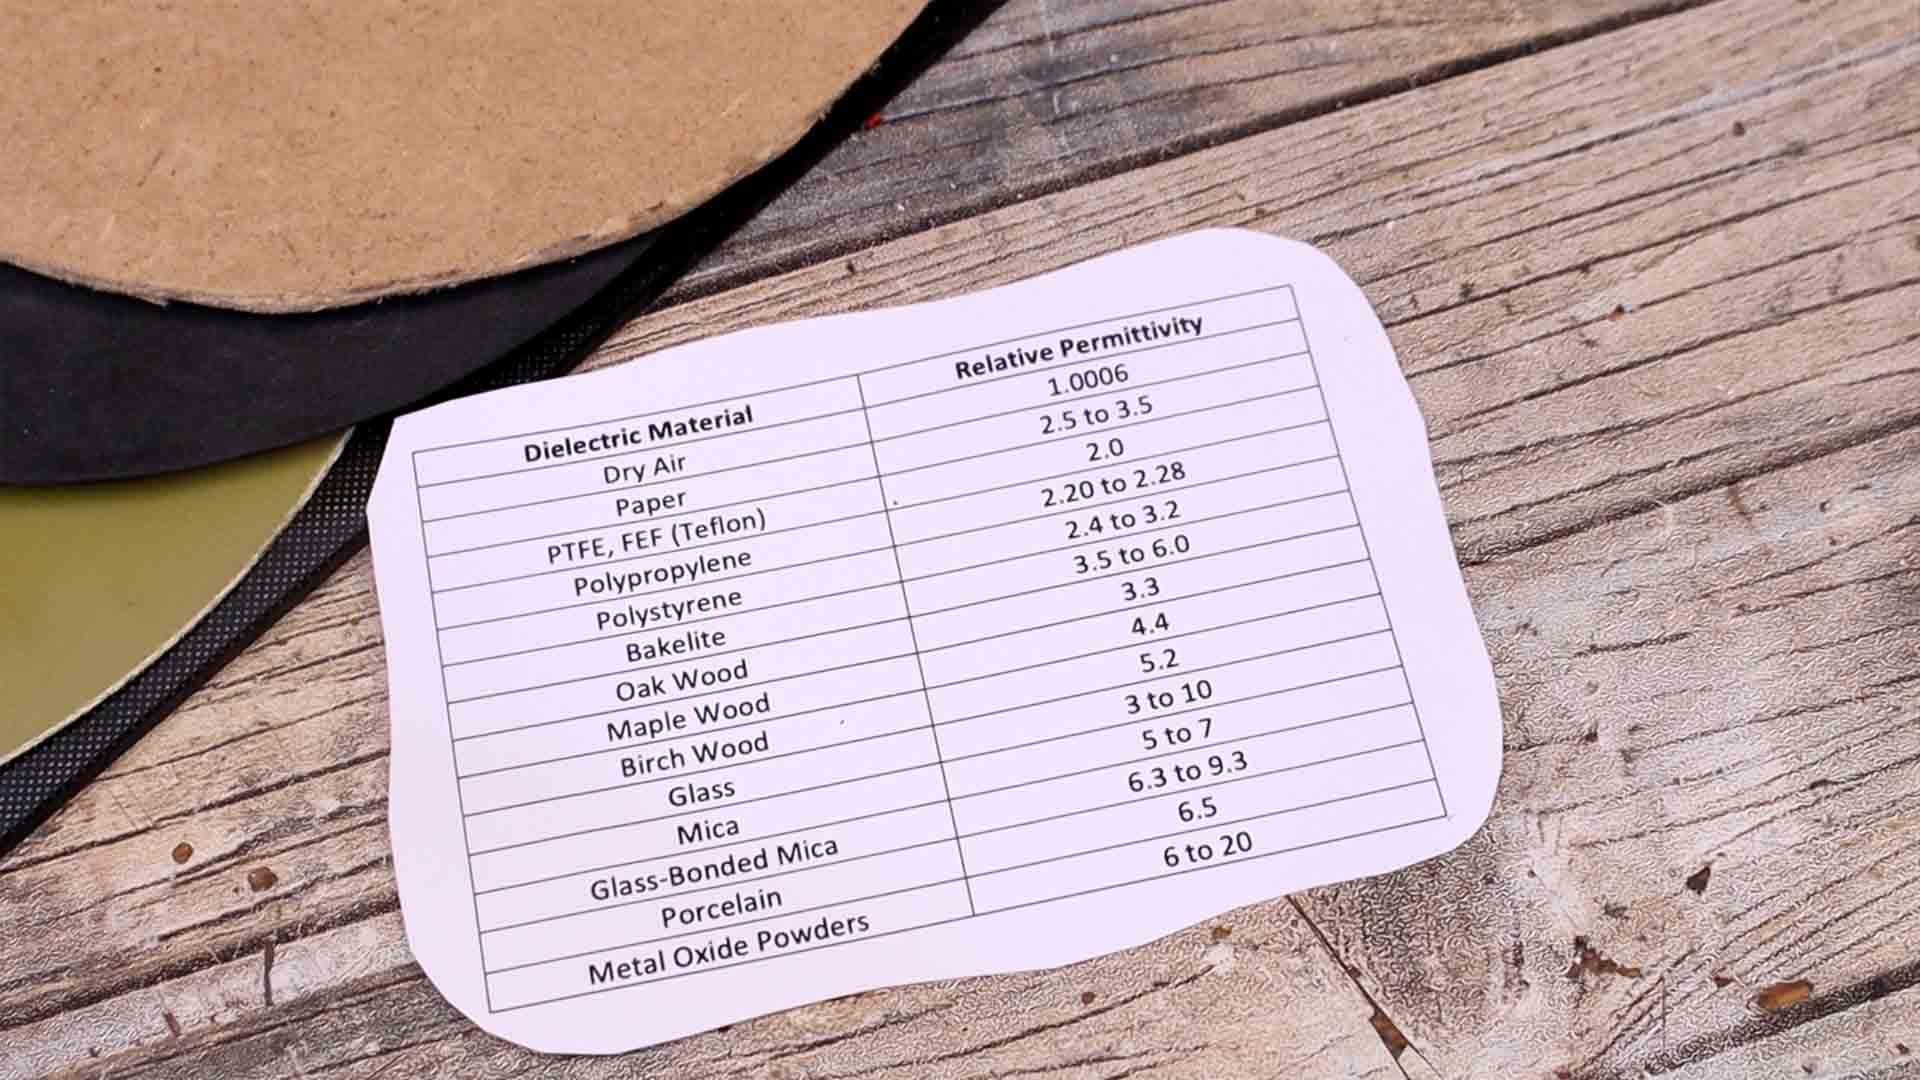
Below is a table with different materials and each respective permittivity. As you can see, the air has a permittivity of 1. But the glass for example has a permittivity between 5 and 10 so obviously, using the formula before, if the distance and the Area stays the same but we change the dielectric from air to glass, the capacitance should be higher.
From the same formula, we can also see that the capacitance could change according to the distance. The smaller is the distance between the plates, the higher would the capacitance get. Again, I measure the capacitance of these two metal plates. I now decrease the distance in between. As you can see, the capacitance is now higher. And it would get lower if I increase the distance. To get very high values, manufacturers are using very thin materials wrapped together so the conductive material would always be insulated. Like this we have a huge area and very small distance in between resulting into high capacitance values.
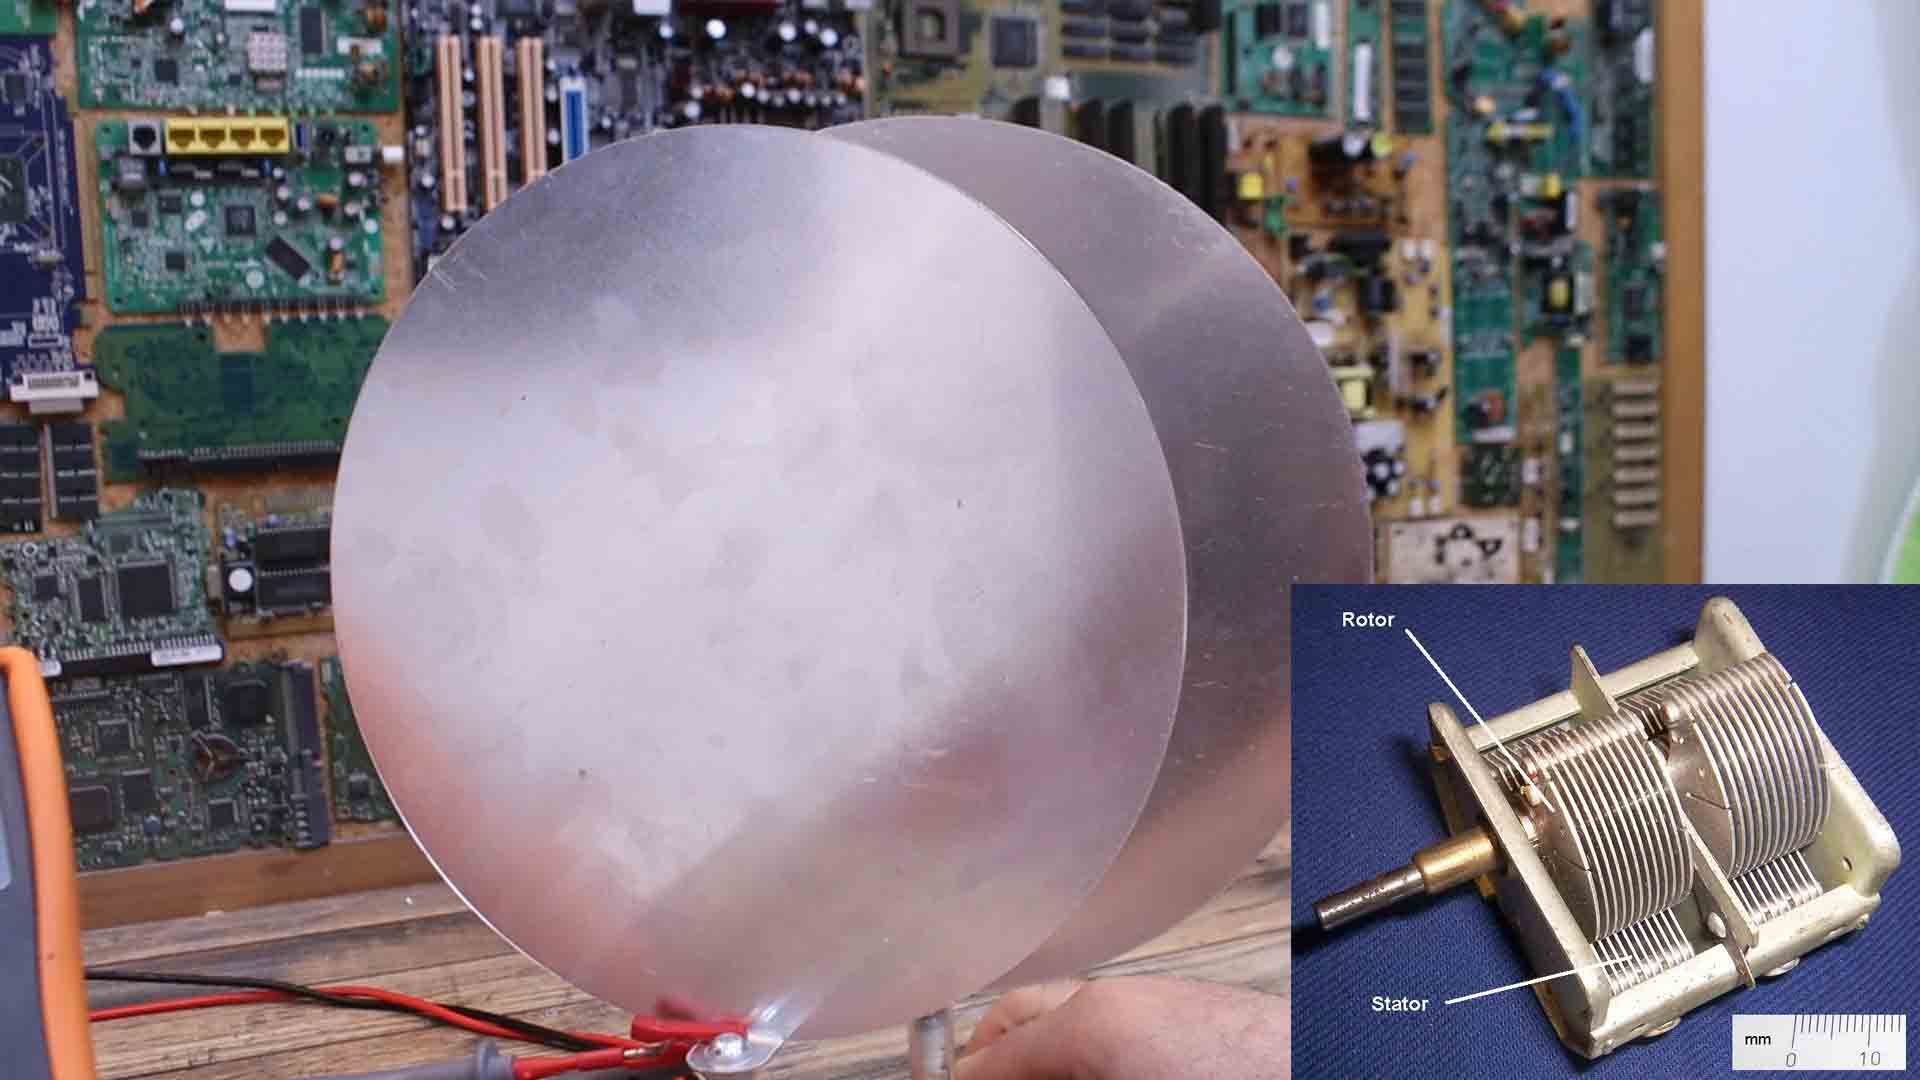
The bigger is the shared area, the higher would the capacitance get. In this example, as I slide one plate to the side, the common area is getting smaller so the capacitance is getting lower as you can see. Actually, we can see this with variable capacitors such as this one here. By rotating the knob, more or less area is shared so the value is getting higher or lower. And as I’ve told you before, to get the highest area and minimum volume, manufacturers pack the capacitors like this where the conductor and the dielectric are wrapped together in a cylinder.
Another formula is that the electric field is equal to the applied voltage divided by the distance. The electric field must be constant so what happens if I increase the distance with the same voltage. Well, another experiment we can do with these plates is to calculate the stored charge inside the capacitor. What we have to do is to charge the plates to let’s say 12V when the distance is 1mm and then disconnect the power supply. Then we increase the distance while measuring the voltage and distance, and according to the formula before, since the field should be constant, the voltage must increase. We can make measurements and make a table where we have the voltage and the distance in mm. Then we pass these values to inverted values, so 1 divided by the voltage and 1 divided by the distance. We graph these values and we make the lineal regression of that line in excel. That will give an equation that we could use, in the example case below is y = 0.0545x + 0,0336.
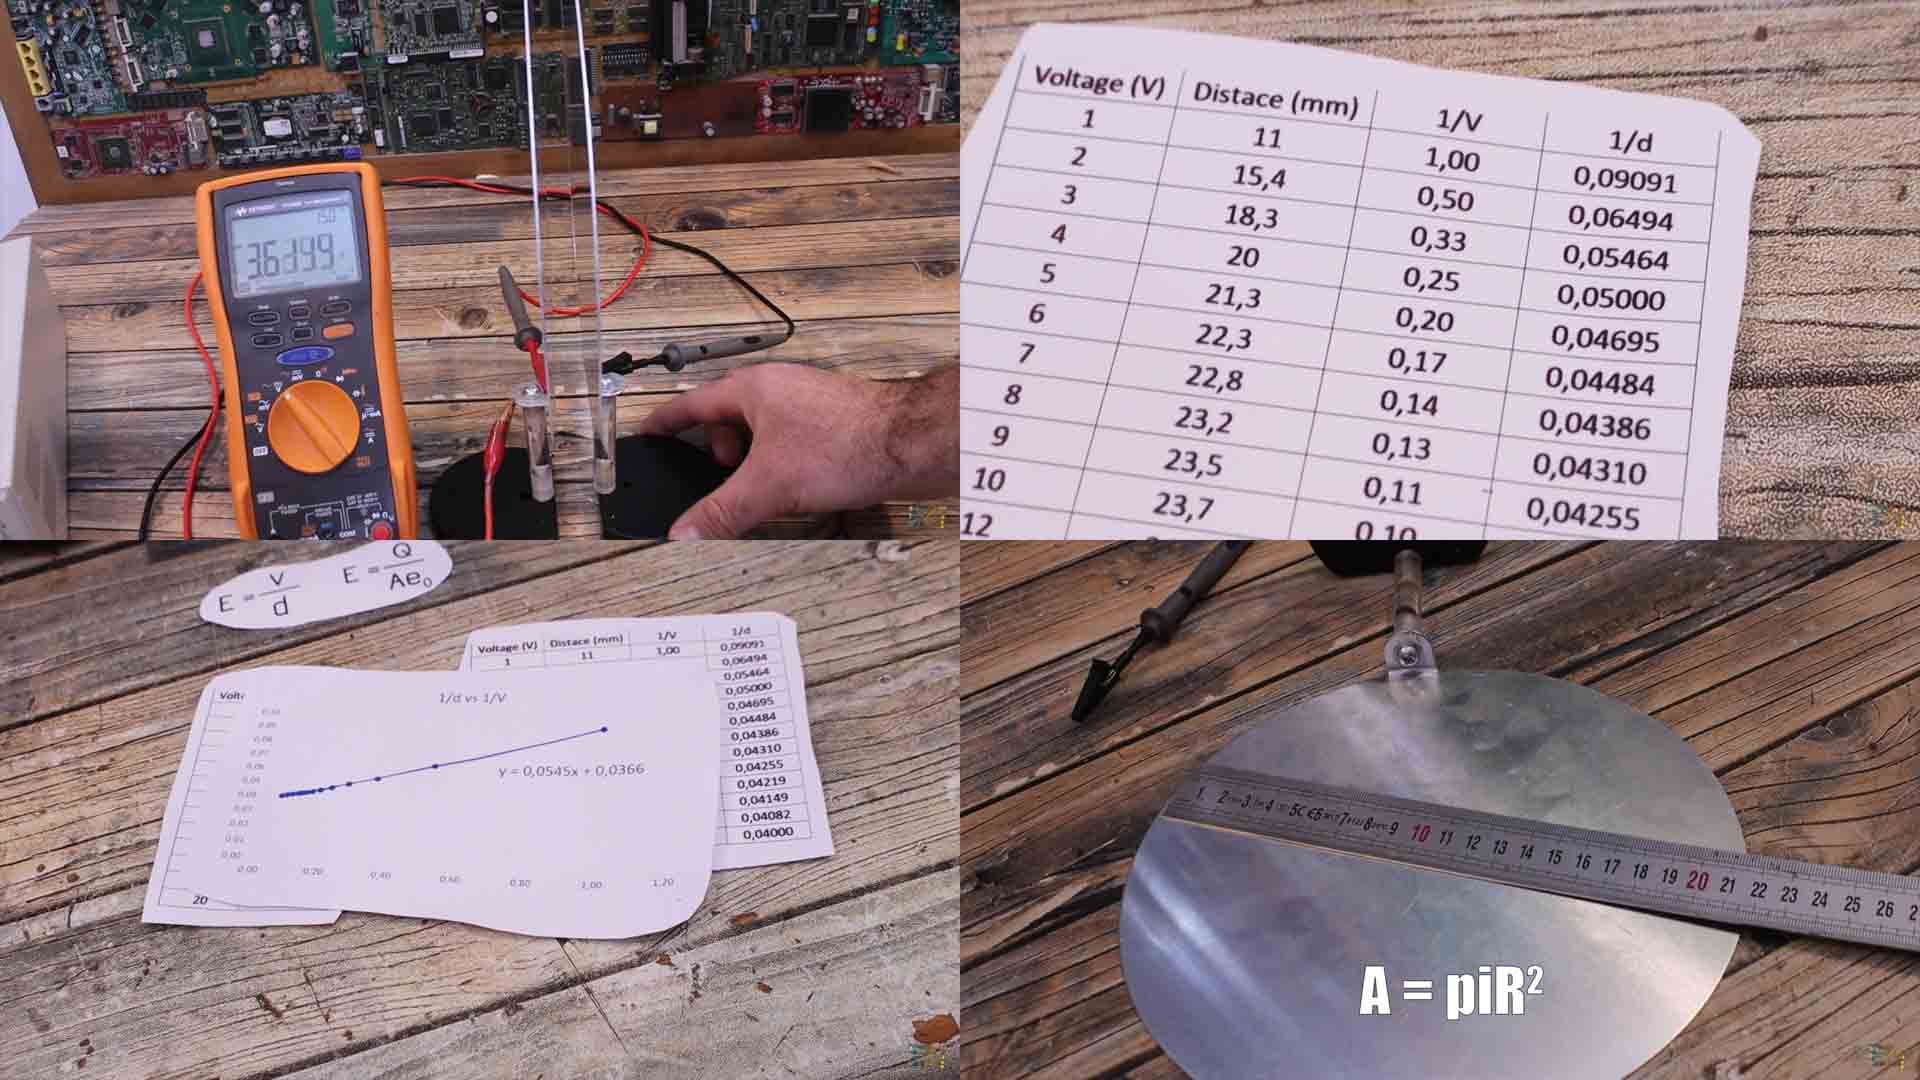
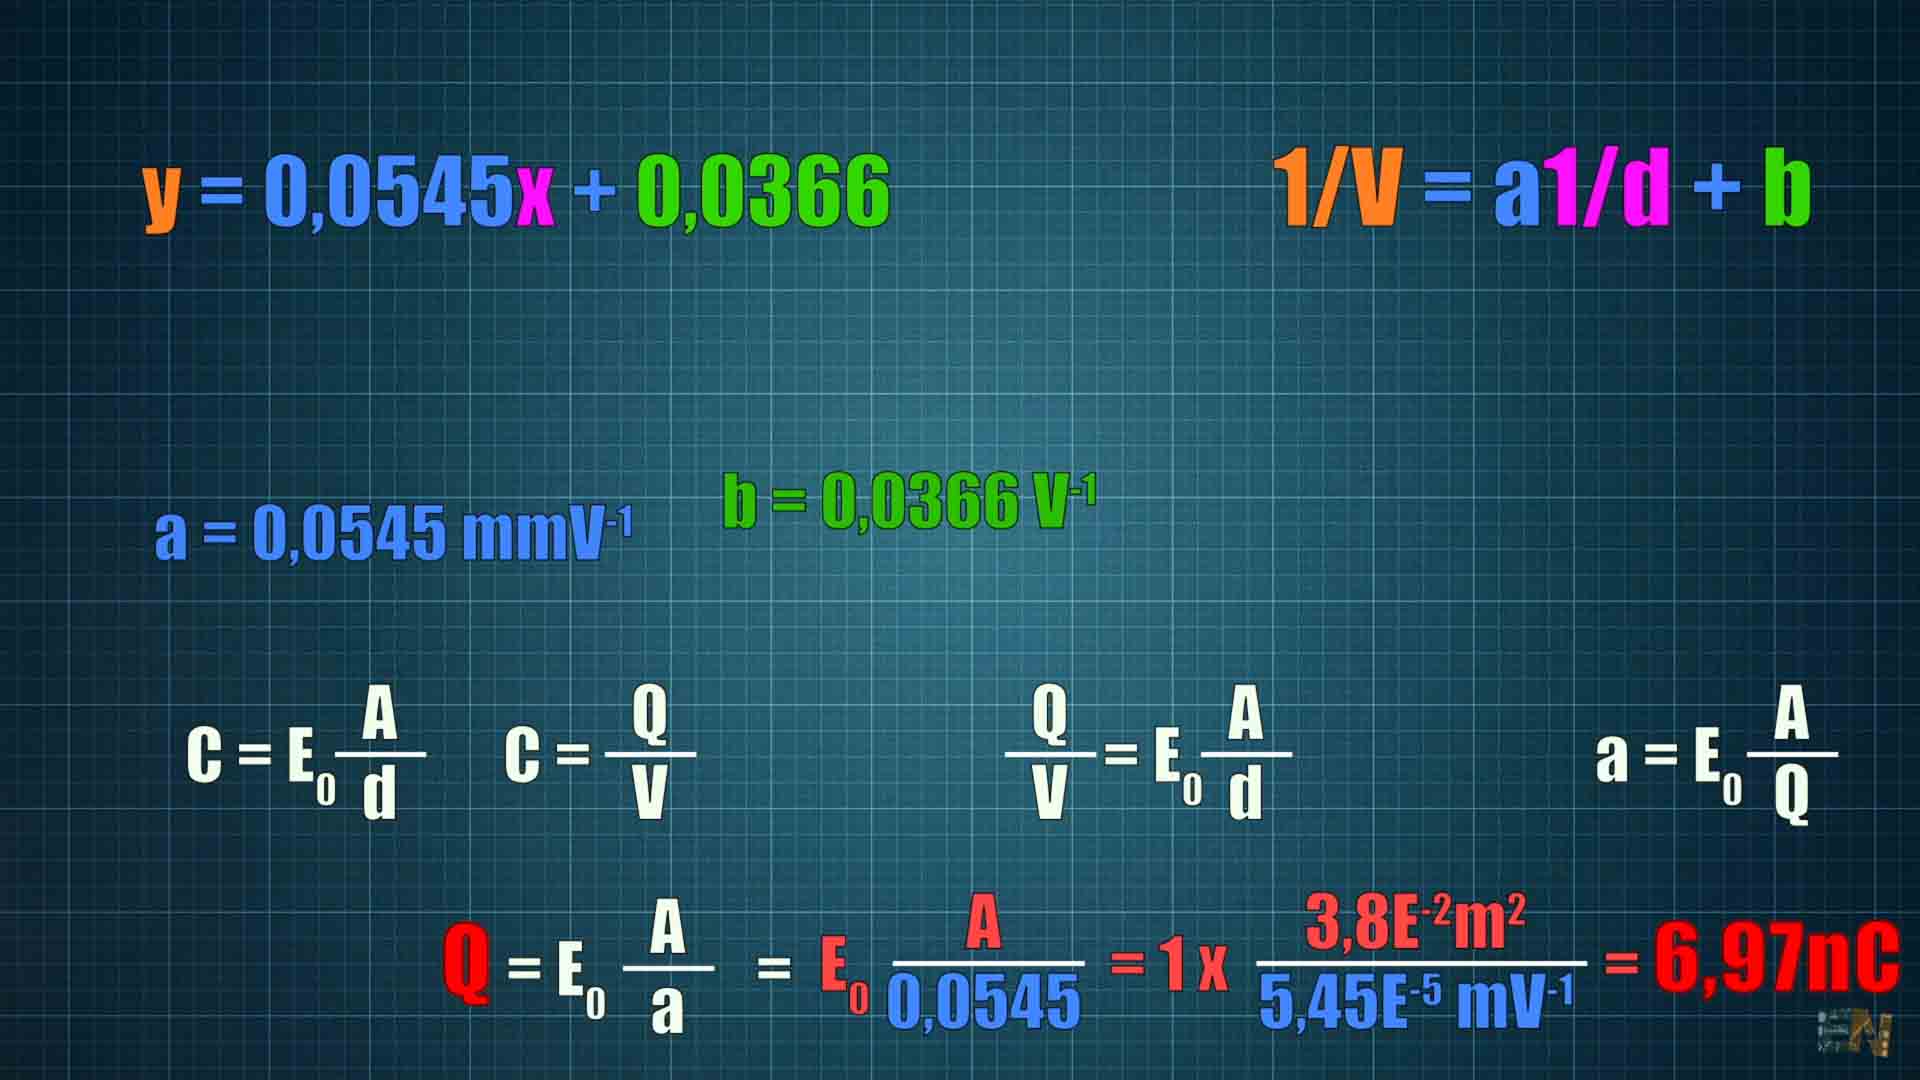
This equation is actually representing 1/V = a * 1/d + b. Now we get this 0.0545 and we call it "a", for example. Then from those two other formulas and the equation before, we can get that the Q, which is the stored charge, is equal to epsilon 0 multiplied by the area of the capacitor divided by that "a" number. Since my capacitor is round, the area in my case is pi R squared where R is the radius of my metal plate and we can easily measure that. Place that area into our equation and we get the stored charge.
I hope that you now know more about capacitors. If my videos help you, consider supporting my work on my PATREON or a donation on my PayPal. Thanks again and see you later guys.


