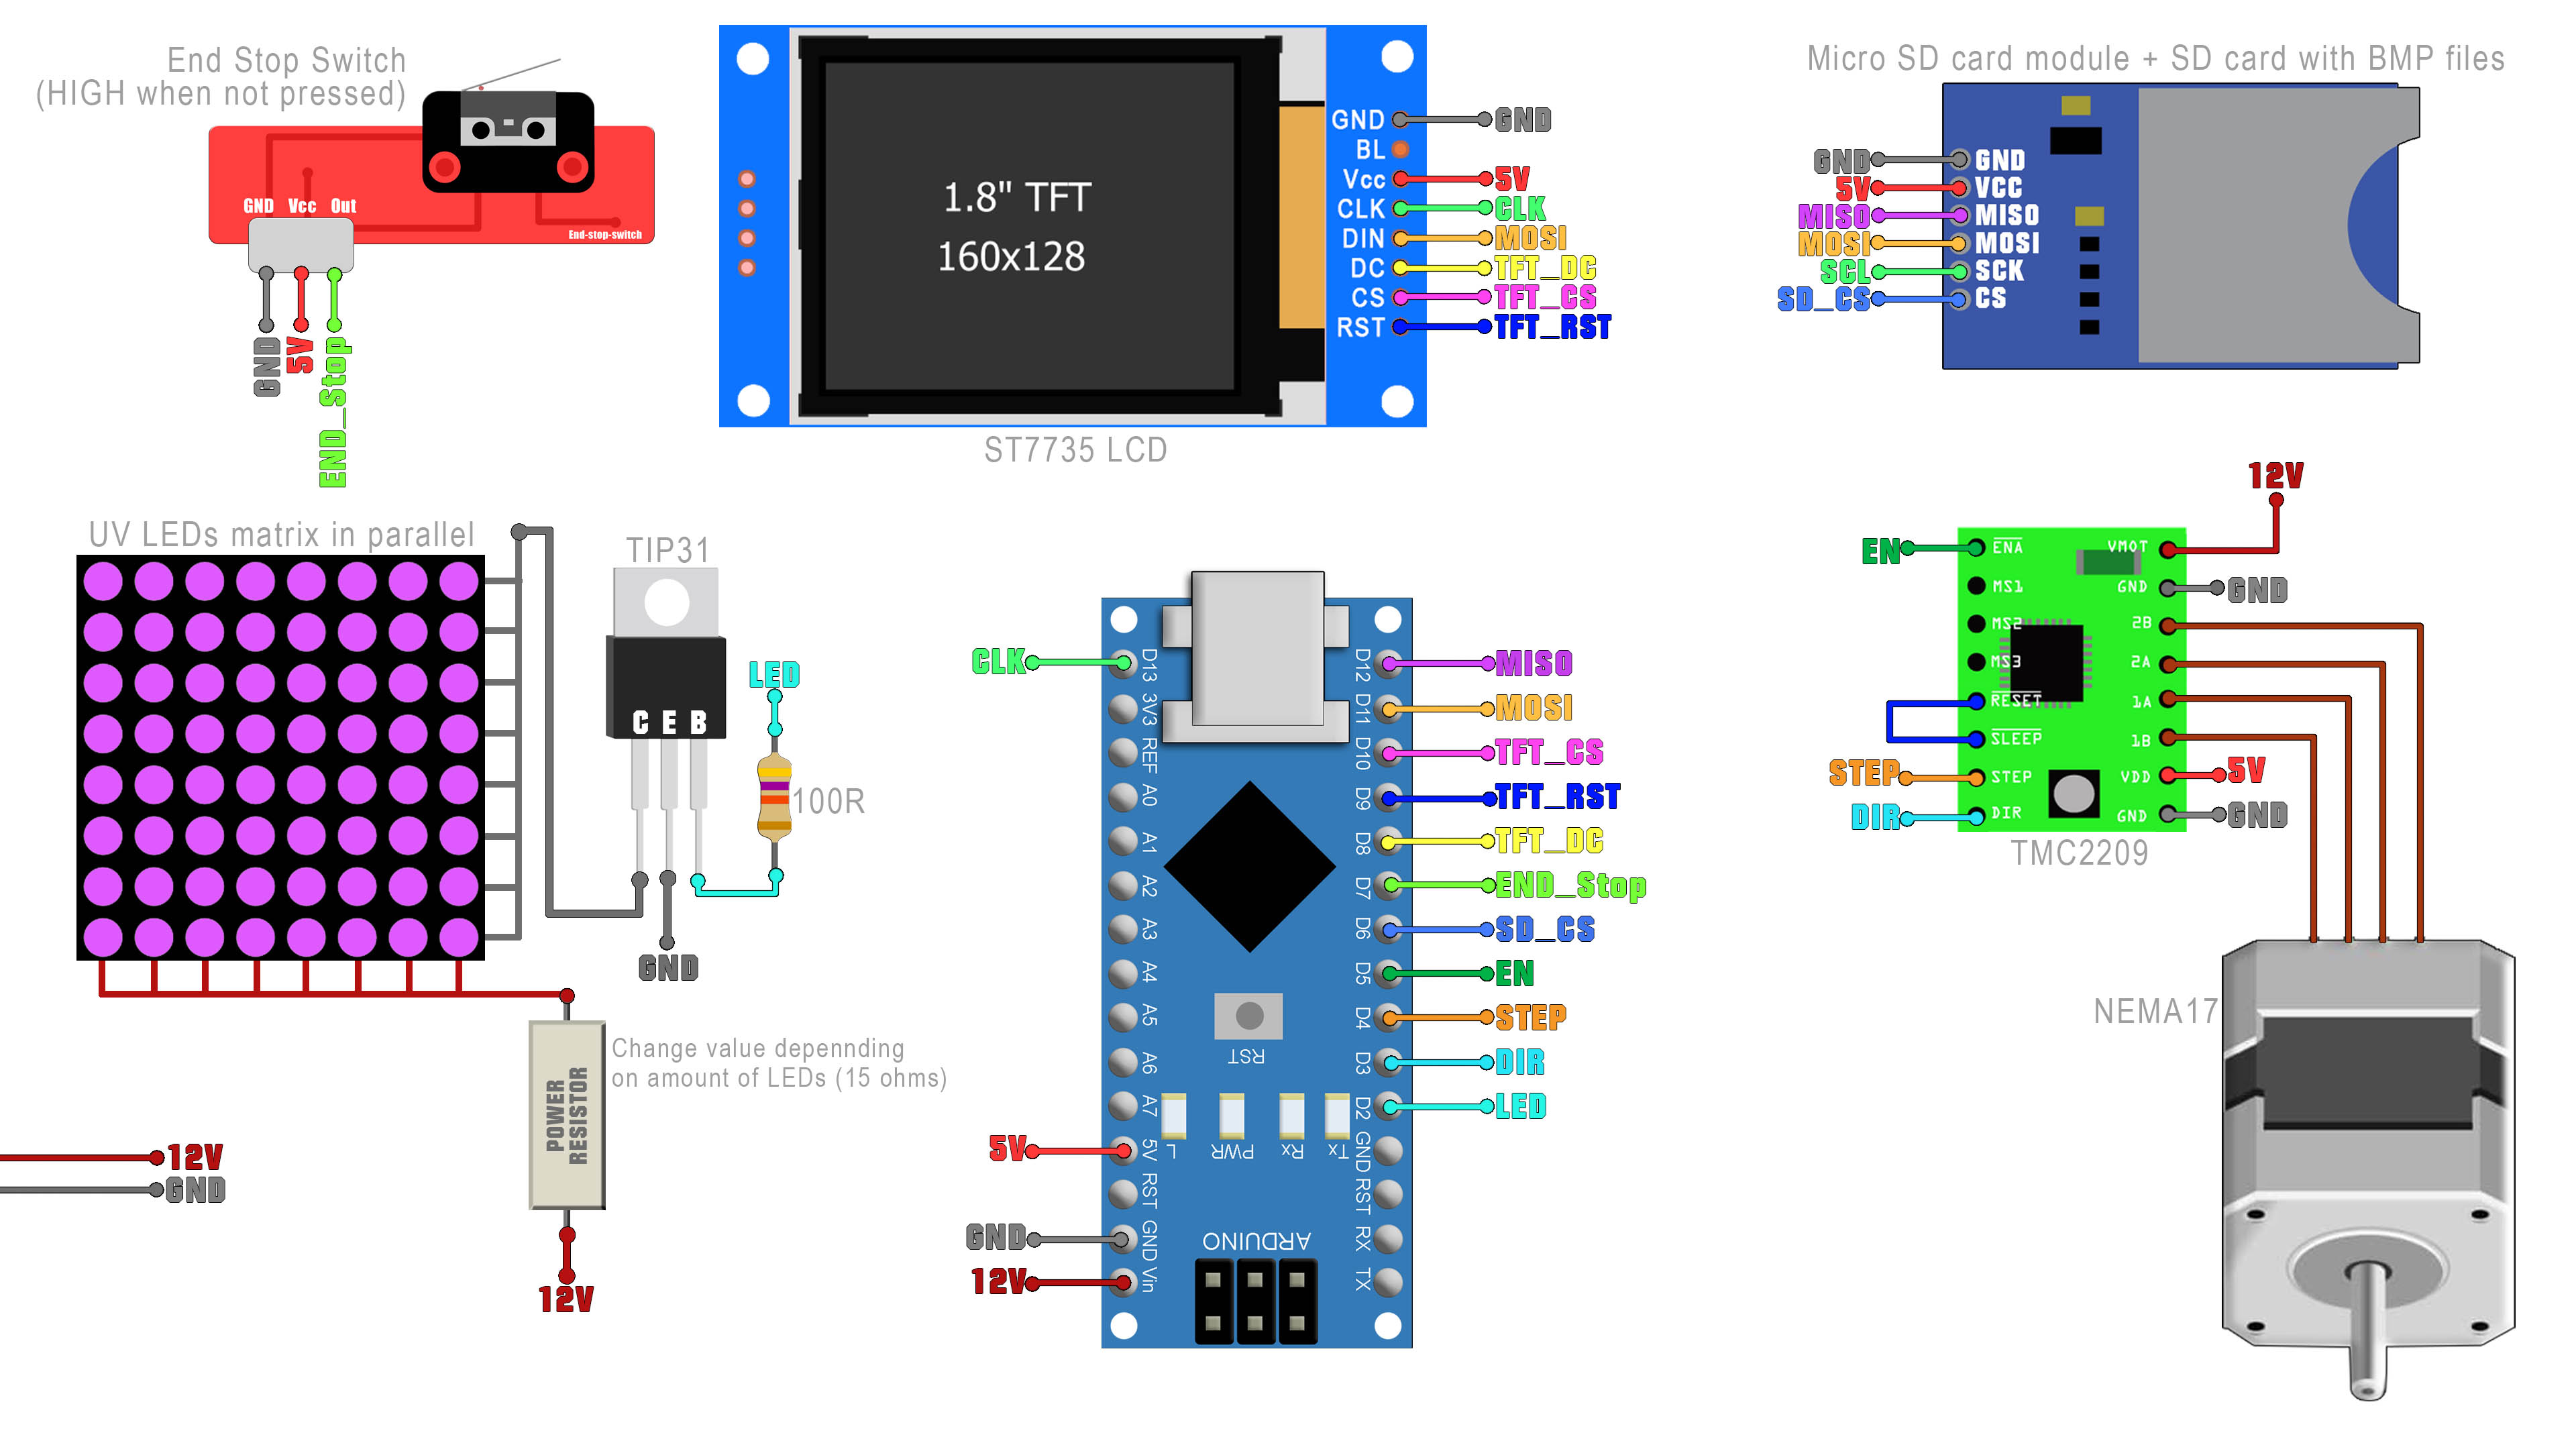
You have all the connections below. The SD card module and LCD screen are using SPI pins so they share the SCK and MOSI pins. The rest of the pins are defined in the code for the CS and so on. For the LED matrix I had 20 LEDs in paralel. You could limit the current with a few 1/4W resistors or with just one power resitor of 5W. It should limit the current to about 1A since each LED would use around 50mA. To turn the LEDs on and off I have the TIP31 BJT transistor controlled with pin D2 from the Arduino. The Step drivver could be the A4988 but is better to use the silent one the TMC2209. The entire circuit can be powered with 12V since the NANO has a 5V regulator so connect 12V to the Vin pin of the Arduino, to VMOT pin of the driver and to the LED matrix. Make the connections and then go to the enxt part and get the code and libraries.