In this tutorial I am going to talk about the HL-69 module, a soil moisture sensor that uses the conductivity between two terminals to determine certain parameters related to water, liquids and humidity. This sensor has the ability to measure soil moisture. Applying a small voltage between the module terminals, it passes a current that basically depends on the resistance that is generated in the ground and this depends a lot on humidity. Therefore, as the humidity increases, the current grows and when the current decreases, it decreases.
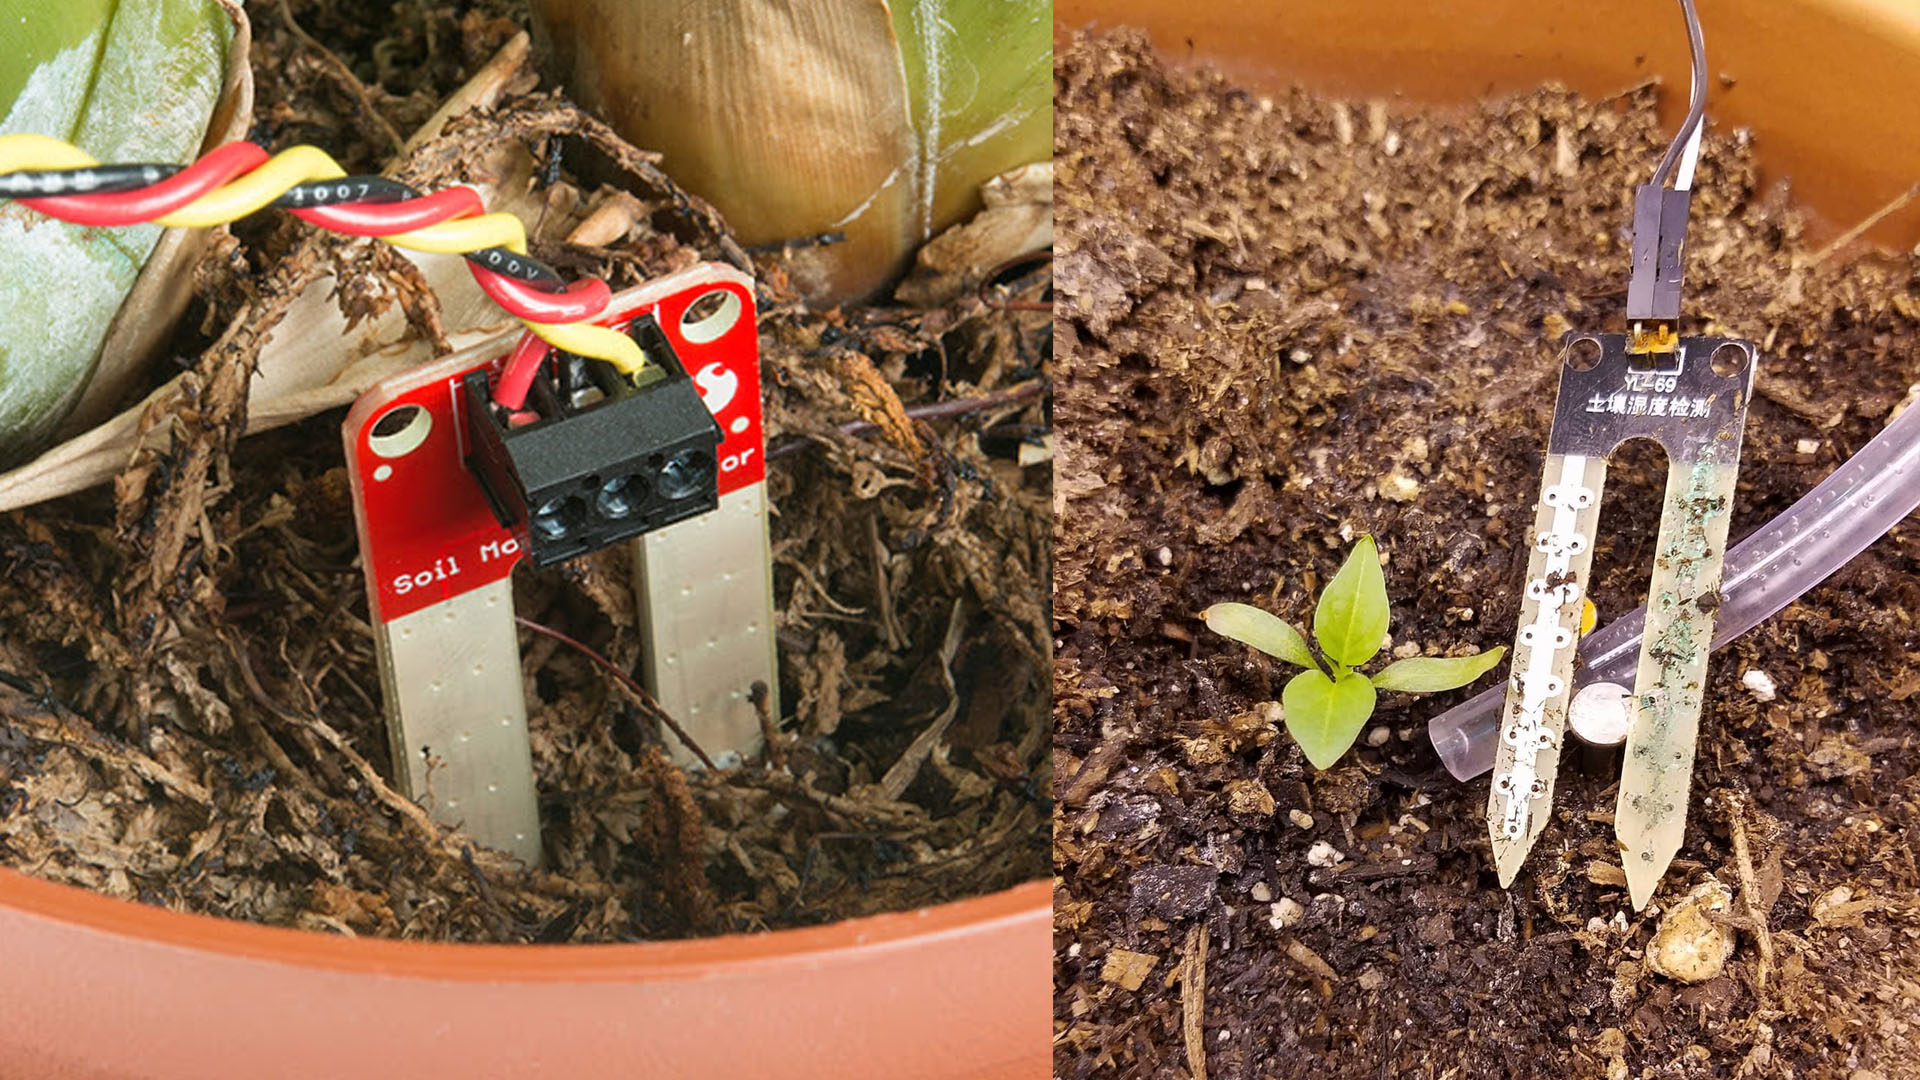
This humidity sensor has two types of outputs, an analog and a digital. The digital output will deliver a low pulse when there is sufficient conductivity between each of the tips. The trigger threshold can be set by moving the potentiometer on the control circuit. At the analog output the voltage level will depend directly on how much moisture is in the soil. That is, depending on how much conductivity (product of the water in the soil) there is between the tips of the module, this will vary the value delivered by Arduino (between 0 and 1023).
In this example, we have only connected to the analog output, since we want to know if the soil is dry, humid or very wet: 0 -300 very wet 300-700 wet 700-1023 dry These values depend on the plant you want to water, since a captus is not the same as a cove, although for most plants those values are valid.
A very important notation is that the module we have depends, at best the values close to 0 is because the plant is dry and those close to 1023 are because it is very watered down. I recommend that when loading the program you test how your sensor works by putting it in a glass of water.
Copy the example code from below adn uplaod it to your Arduino. Open the serial monitor and thest the soil moisture.
// Humidity Sensor
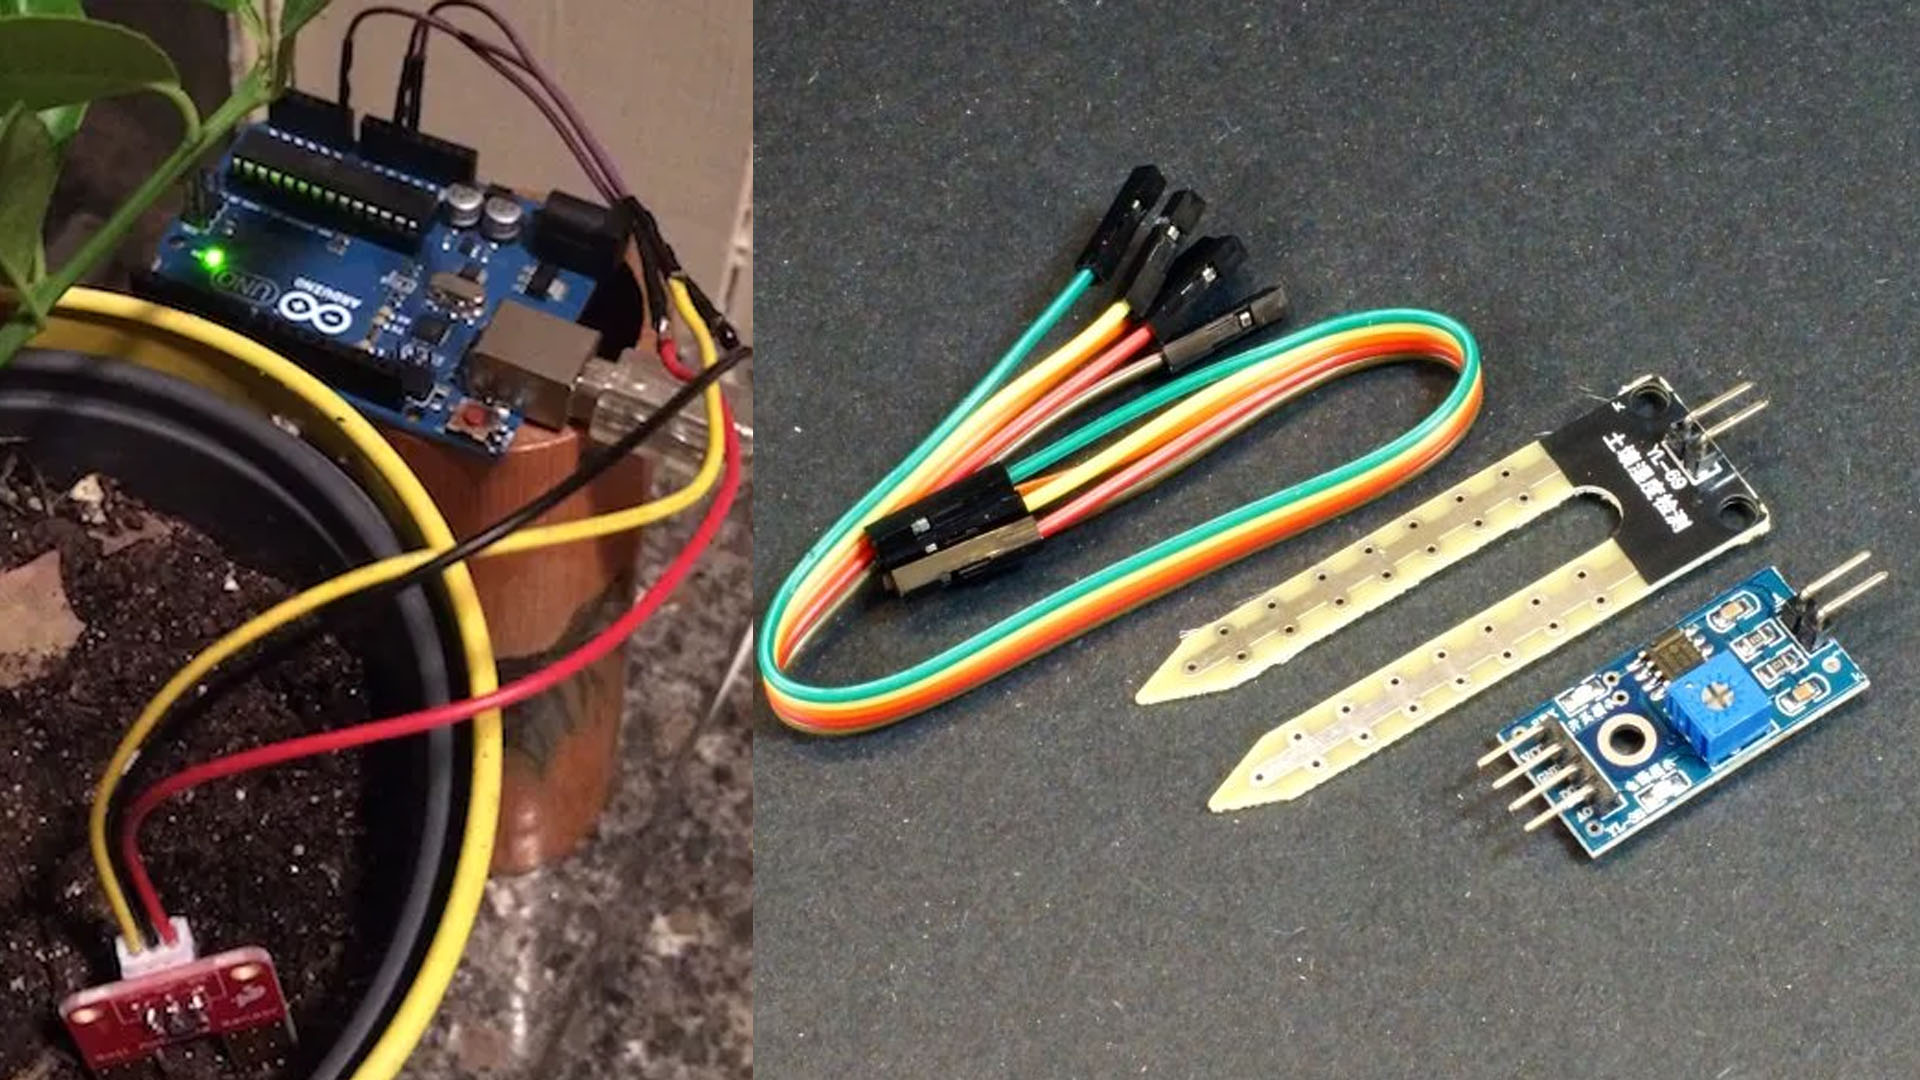
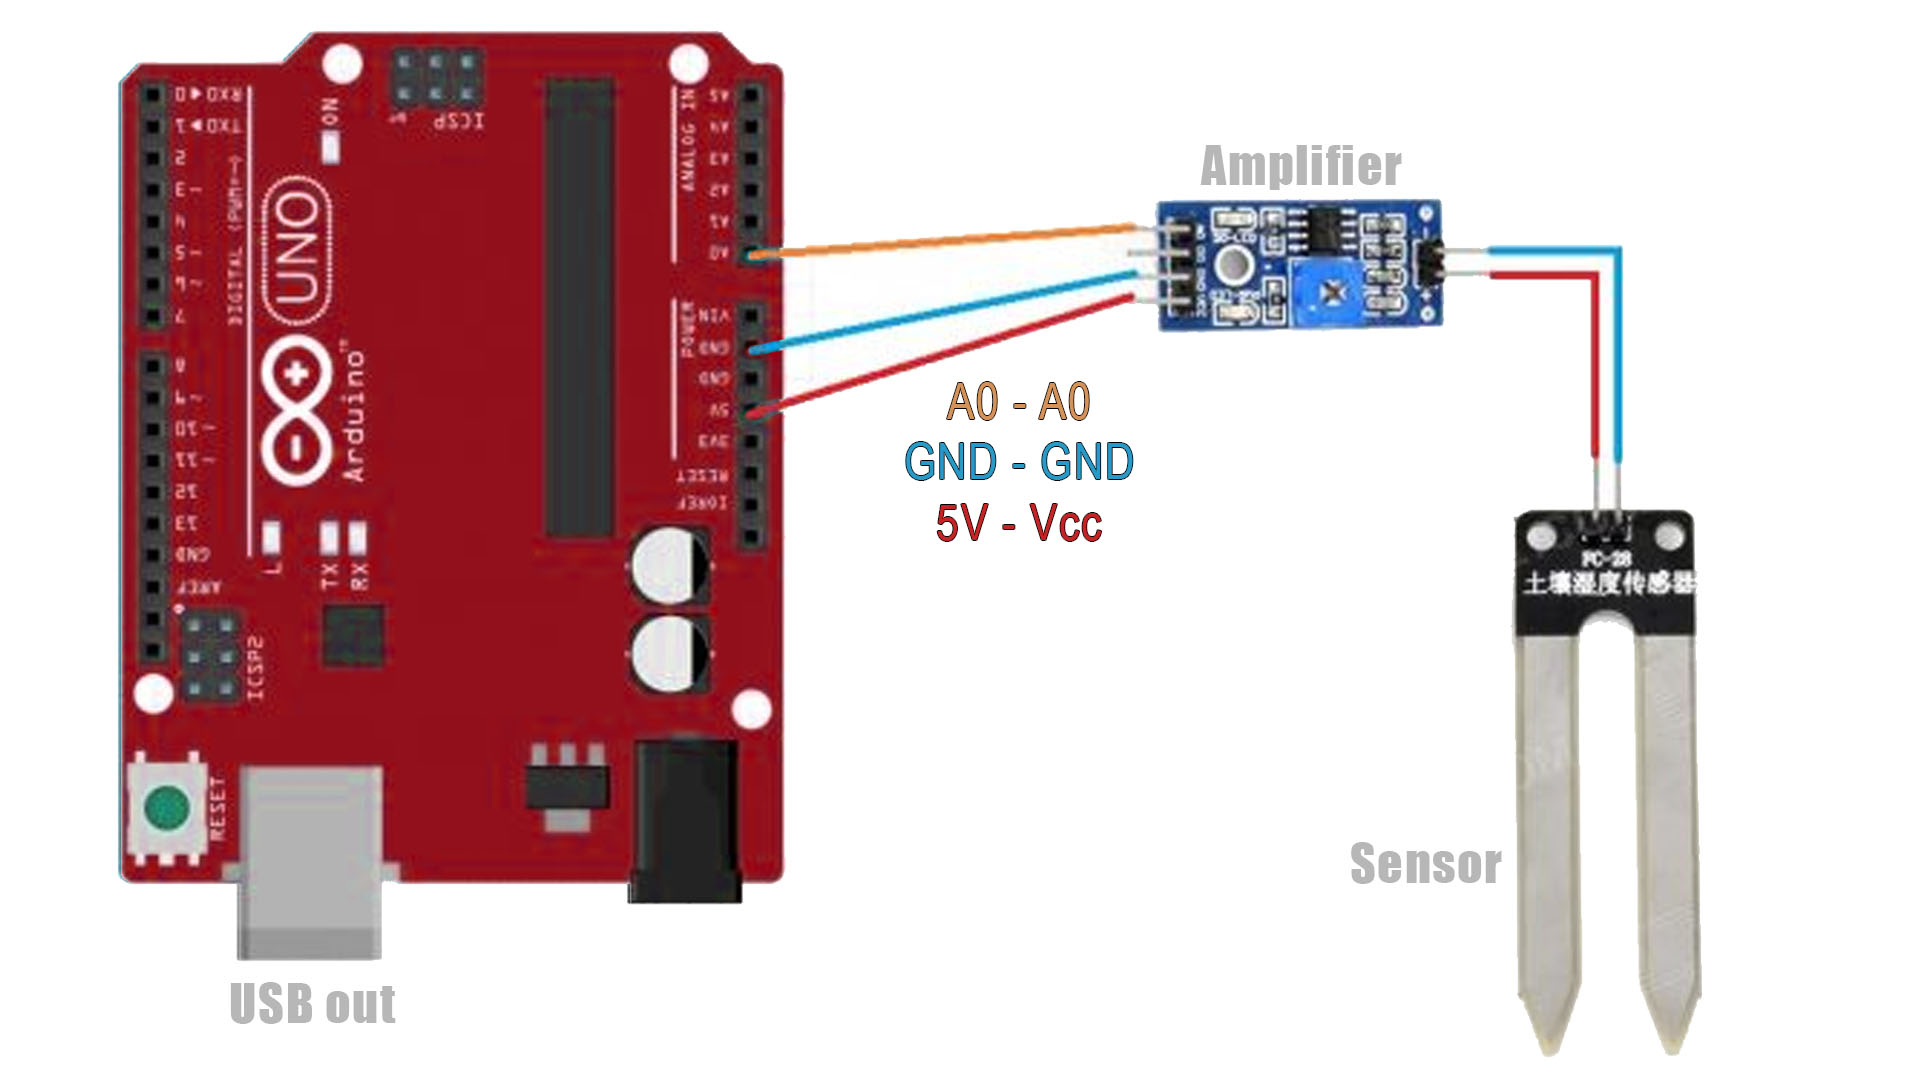
// Connect the sensor like this:
// GND -> GND
// VCC -> 5V
// DAT -> A0
int Value;
void setup () {
Serial.begin (9600); //serial speed for the monitor
}
void loop () {
Serial.print ("Humidity Sensor value is:");
Value = analogRead (0);
Serial.print (Value);
if (Value <= 300)
Serial.println ("Waterlogged");
if ((Value> 300) and (Value <= 700))
Serial.println ("Wet, do not water");
if (Value> 700)
Serial.println ("Dry, you need to water");
delay (1000);