Using the services of PCBWAY I’ve ordered the panelized board where you have the same design repeating in various columns and rows. Together with the panel I’ve ordered for a few more dollars, the SMD stencil. I can use this to apply paste, then add the components in a systematic manner and reflow all the modules at once. In the video below I’ll show you how to prepare the design, how to order the panel board service from PCBWAY, how to use the SMD stencil, add the components, reflow the PCB and give a proper test to each PCB and make sure they are ready for sale. So, let’s get started.
Step one is to show you my circuit and design as you can see below. Second step is to show you how to order the panelized boards from PCBWAY together with the SMD stencil. Third step is to show you how to prepare all the components and the stencil and apply paste to the boards and just after that, add the components for the entire panel. For the fort step, we reflow the PCBs using my reflow hot plate project from a previous video. And final step is to show you how to make a proper testing bench in order to test each PCB fast and not lose any extra time.
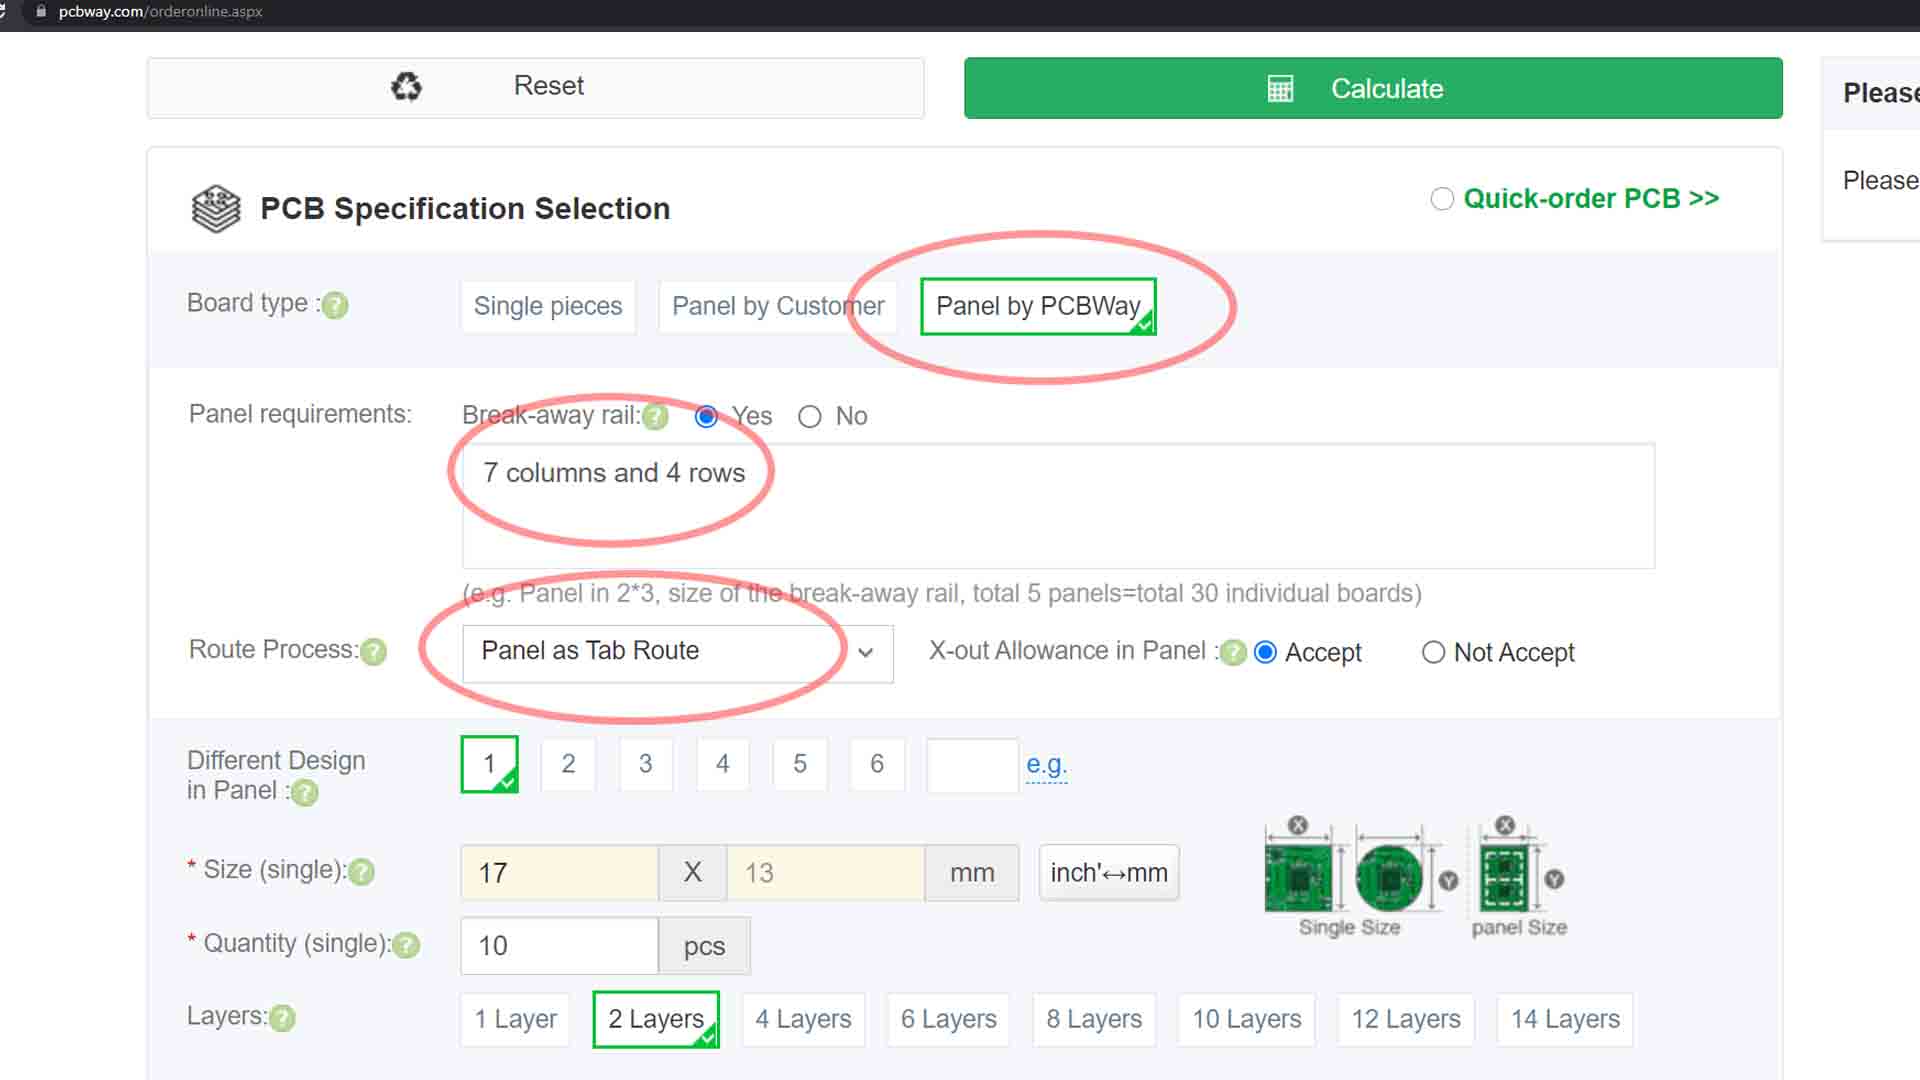
Once the design is ready,I export the GERBER files just as always that you could get from below. If you want the assembled product, you can find the link below as weell. I now go to PCBWAY.com and click quote now. In the standard PCB section, on the first row I select panel by PCBWAY. New setting will appear. I select YES for break away rails which are these rails here that are used to accommodate the panel. In that text box you have to fill the details of how you want the panel to be, in my case I write for example that I want that I want 7 columns and 4 rows so a panel of 28 PCBs. As for the route process I select “Tab route” and that will leave all PCBs merged together but with a small groove in between and with simple push, you can snap and separate them. I select 1 design in panel since I only have one type of PCB design and I select a quantity of 10 panels, so 10 by 28 PCBs o 280 PCBs in total.
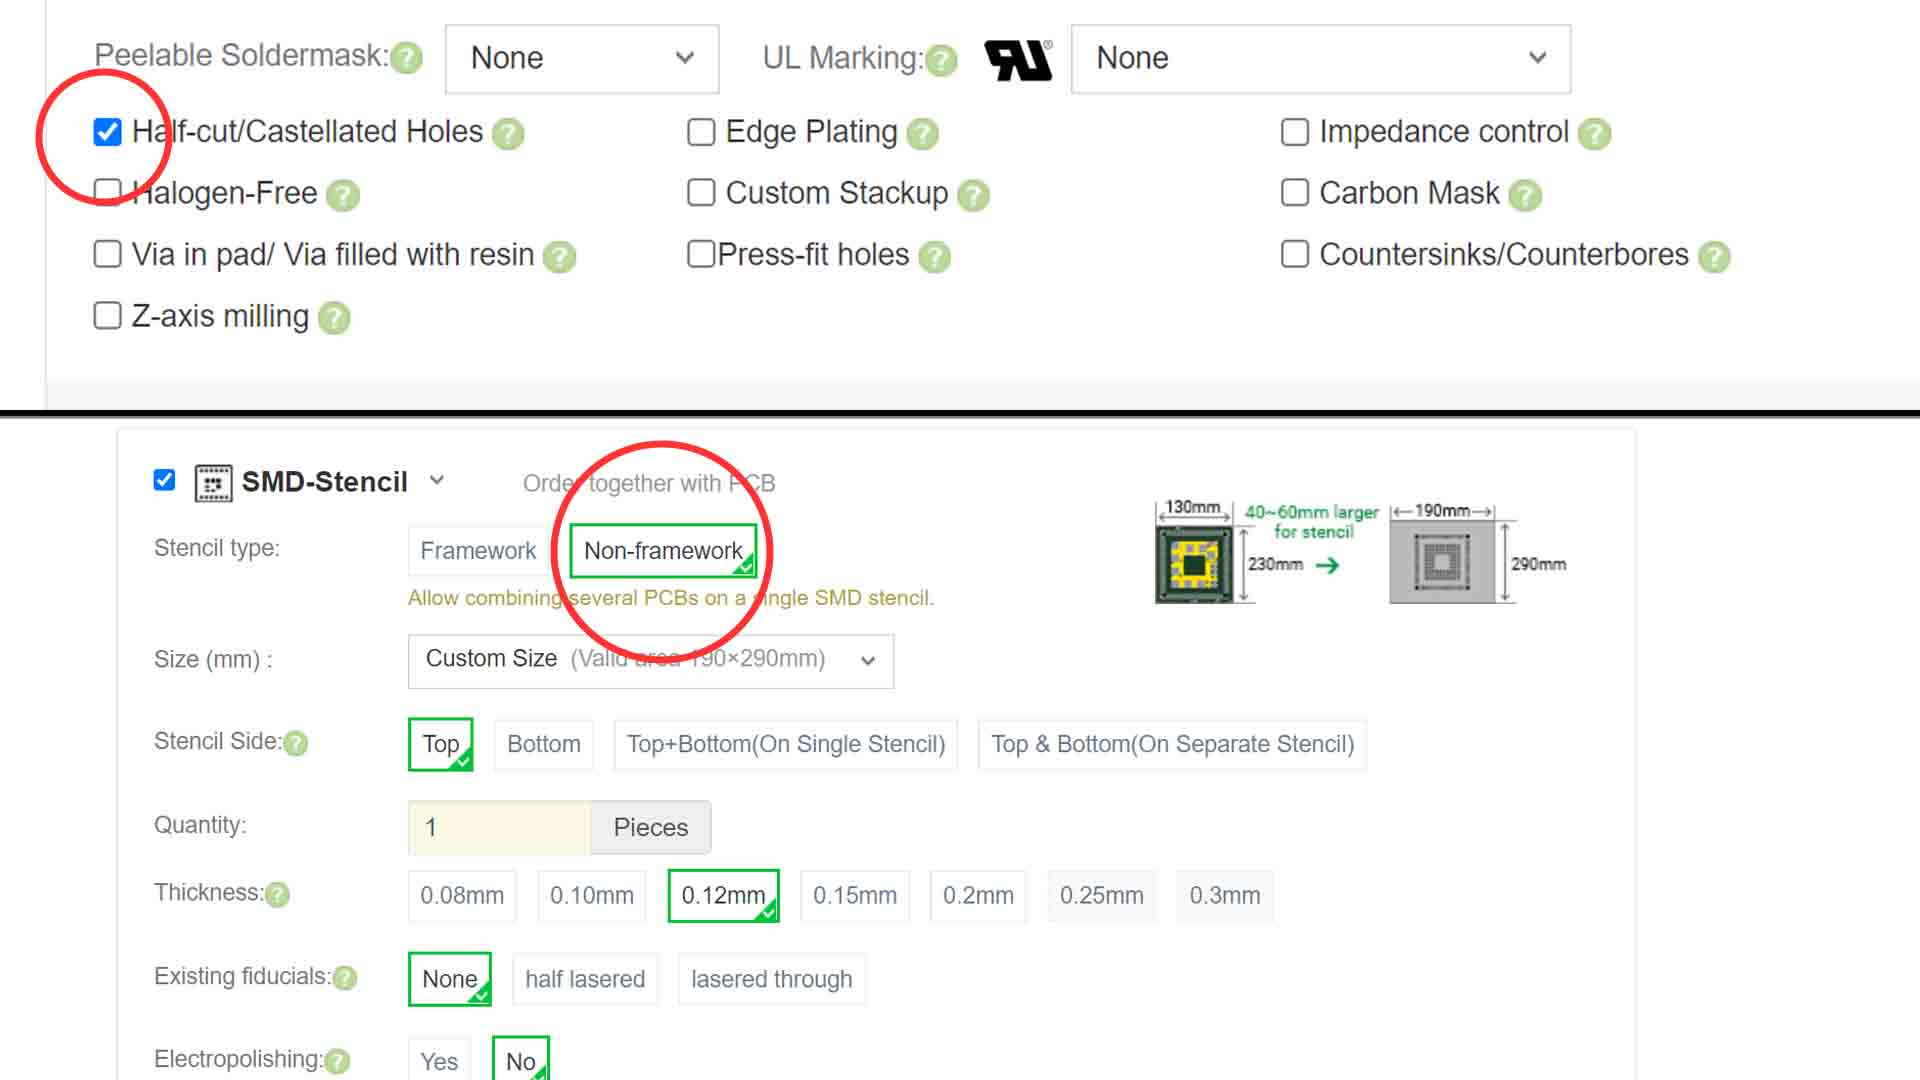
I select black color for the silklayer. Finally at the bottom I select additional options and here I also mark this case for the Castellated holes since my design has that type of holes. I also want the stencil for this panel so I can easily apply paste. So below the PCB order, just check this case here for SMD stencil. I don’t want the frame only the stencil and I only want the top side since all my components are on the top side of the PCB. 280PCBs will cost me 43 dollars and then we add 10 more dollars for the stencil and 17 dollars for shipping to Spain.
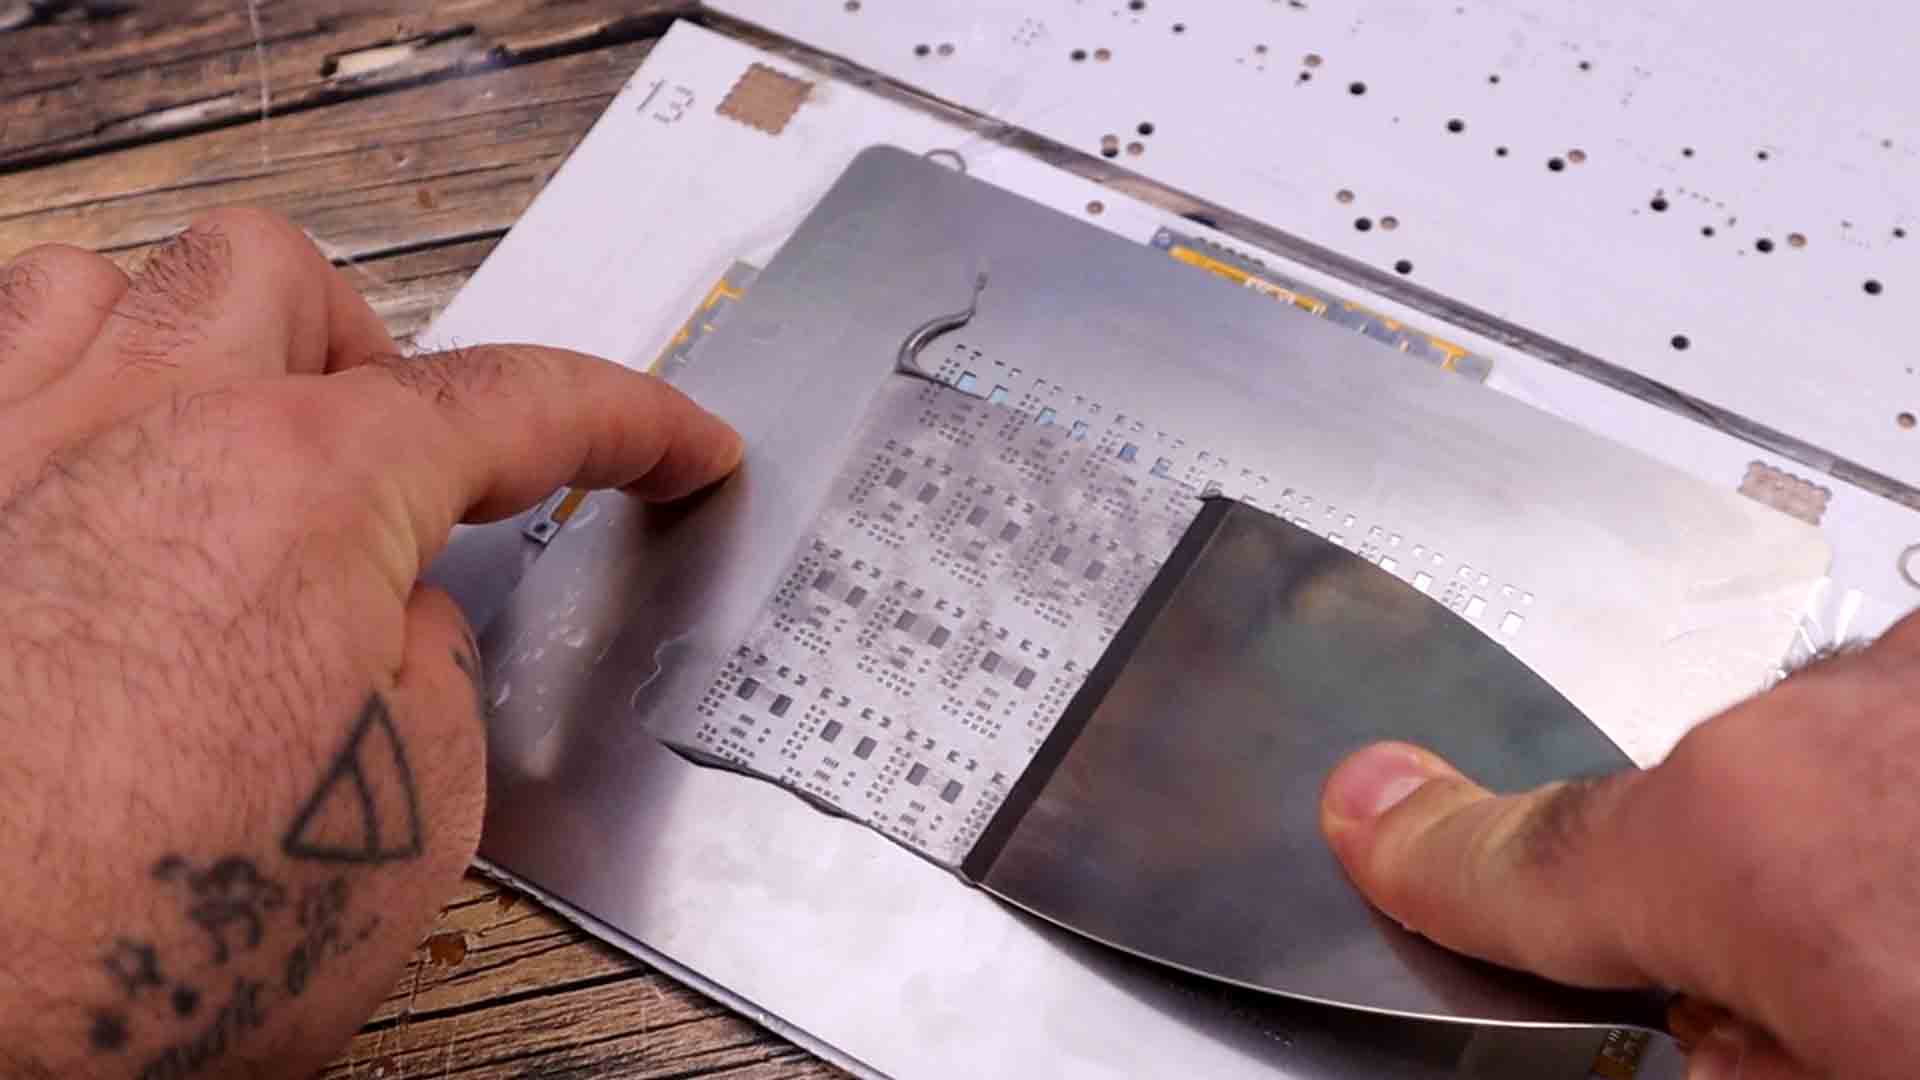
The order arrived to Spain in around 12 days. Inside the box we have protection and the PCBs are wrapped in some vacuumed plastic film for more protection. The stencil is also here kept secure between two wood plates. We need to fix the PCB to be always in the same spot. So I get some old PCBs with the same thickness and them around the panel and using some scotch tape, I fix in place those PCBs. Now I put the stencil on top and I move it around till the pads on the PCBs are exactly below the holes of the stencil. At that moment, I add another scotch tape on the left side of the stencil. I add some solder paste. I add paste along the top side of the panel and using a spatula and while pressing downwards, I fill all the holes with paste. Make sure the stencil won’t move during this process. Carefully remove the stencil and there we have it, the perfect amount of solder paste for each pad.
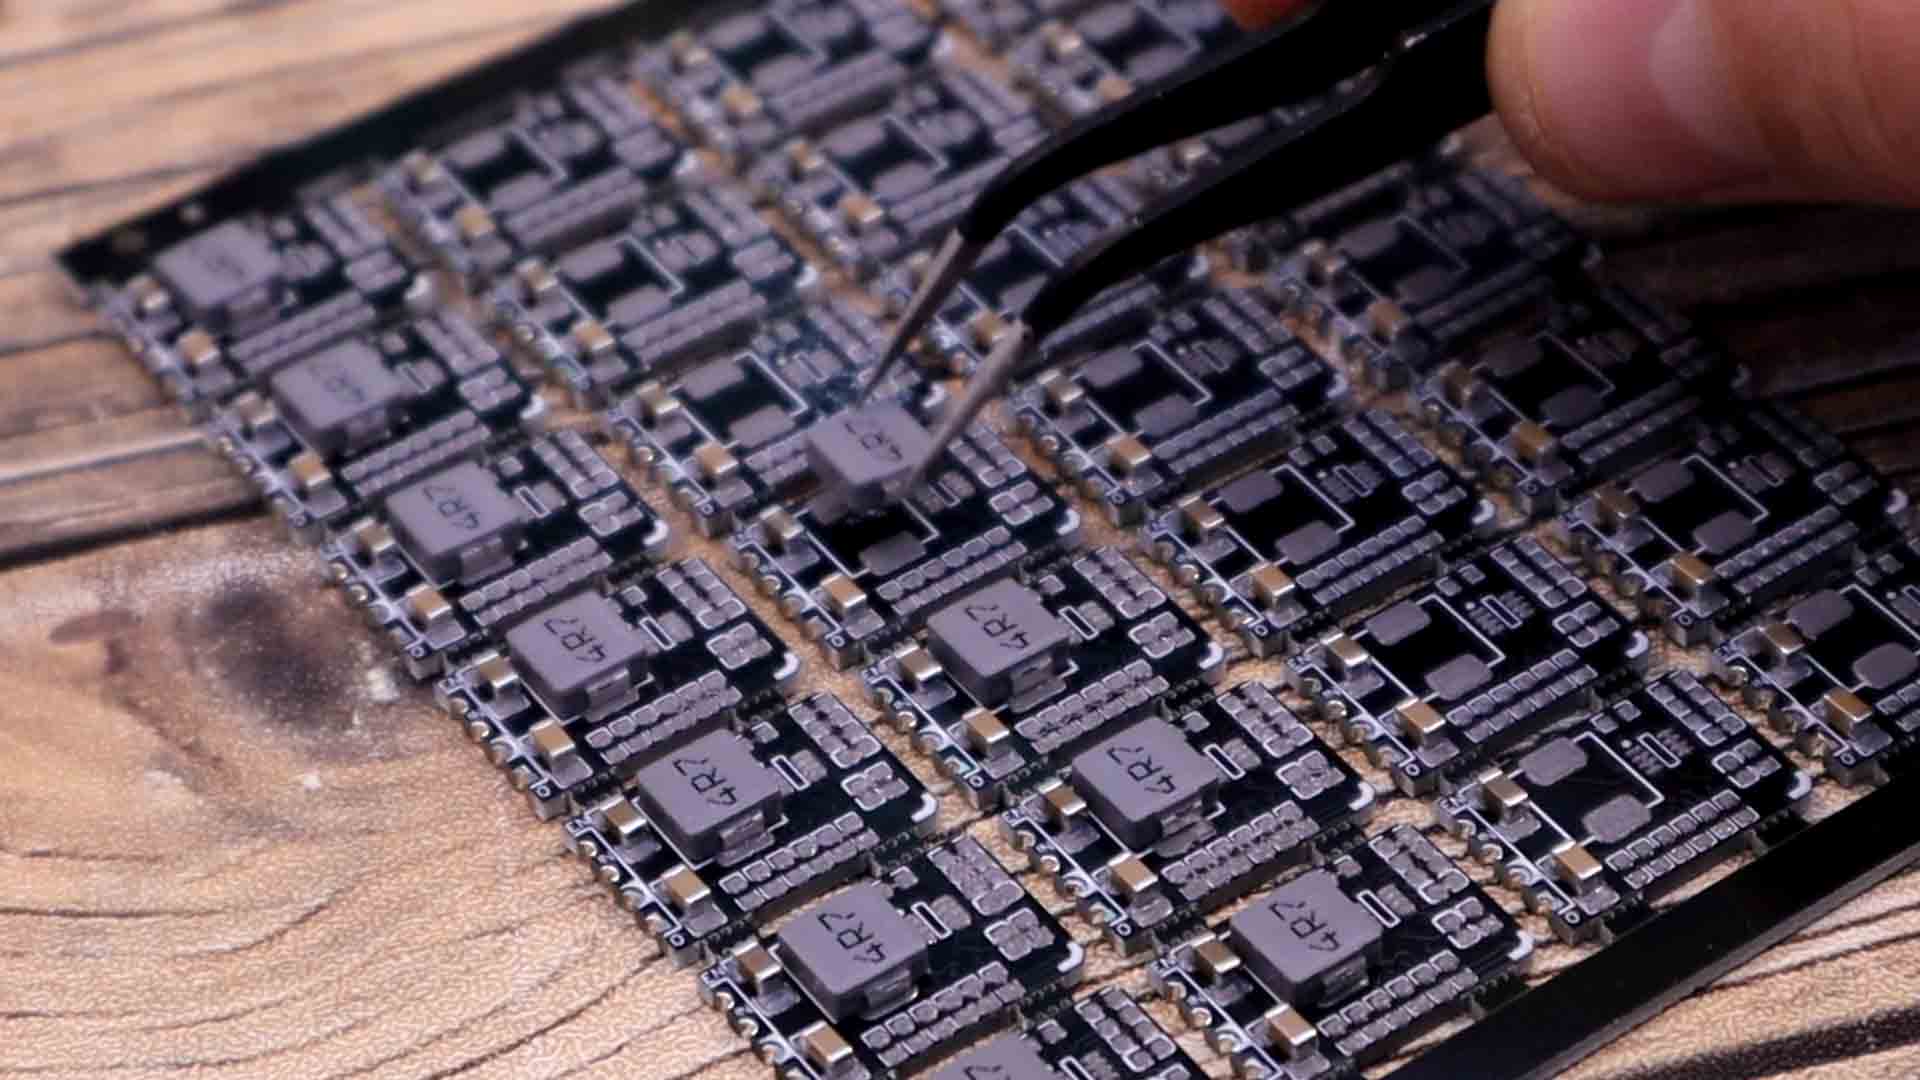
So is time to add components. Actually, it would be great to have the components prepared before you add the paste, because if you take too long to arrange the components, the paste might get too dry. Also make sure you have the design and schematic in front of you so you can make sure what value is each component. The idea is to add the first component to all the PCBs, then the second component to all the PCBS and so on, I think that will be faster than adding all the components one PCB at a time. This might take a while.
Is time to reflow the PCB. I get my homemade reflow hot plate and turn it on. It has a mode where it tries to follow a temperature curve. I place the PCB in the middle, select the mode and press ok. The PCB starts heating up and after a while, we can see the solder paste melting and each component getting in place. This looks like magic. And just like that we have our modules, all we have to do is to repeat this process for the rest of the panels.
So guys, that’s one way to get your product on the market. Get your ides, make the design, order the panel, add the paste with the stencil, place each component by hand which is the long process and then reflow the PCB at once with a homemade or a commercial hot plate or maybe a reflow oven. Finally, test each module and prepare your product for shipping.
I hope you like this tutorial and maybe you have learned something new. If my videos help you, consider supporting my work on my PATREON or a donation on my PayPal. Thanks again and see you later guys.