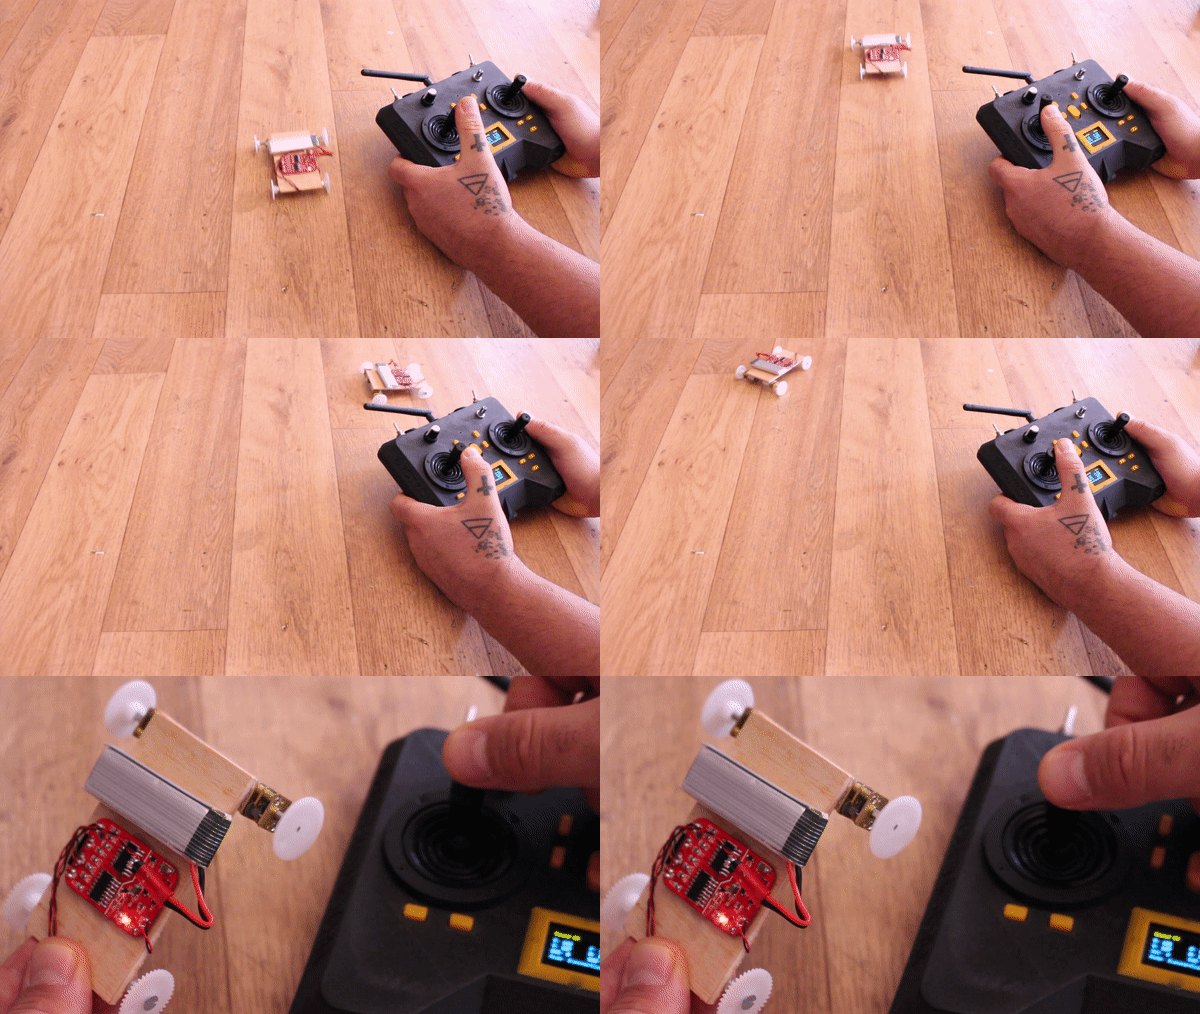

In this tutorial we will see how I've made this tiny PCB for a radio receiver. It is based on the ATMEGA328 chip and the NRF24 radio module. It has 4 outputs with H bridge and that means we can control the speed and direction of rotation of 4 DC motors. Ihas one more MOSFET output that could be controlled with PWM signal. You could use this for RC toy cars, drones, RC planes and so on. All you need is to power 5V to this PCB and connect motors, servos or any actuators to the outputs.
For this project we need a few components. See full list here on this link. We need taht small SMD version of the NRF24 radio module and the microcontroller of the Arduino, and that's the ATMega328p- au chip. Then we need 2 H bridge ICs, the MC1508, and the rest are small parts such as capacitors, resistors and diodes. We will need a diode with 0.5V dropvoltage in order to get the 3.3V from the 4.2 battery.

The schematic has a few connections. First, we need the basic configuration of the ATMega chip, and for that we need the 16MHz resonaror, a few resistors for pullups and some capacitors. On the bottom left part of the scheamtic we have the configurations of the two H bridge ICs and on the right, a small MOSFET with a pulldown. On the top left corner we have the supply input and some pads for the NRF24 SMD radio mdoule. To get a lower voltage for this radio mdoule that works at 3.3V more or less, I've used just a simple diode.
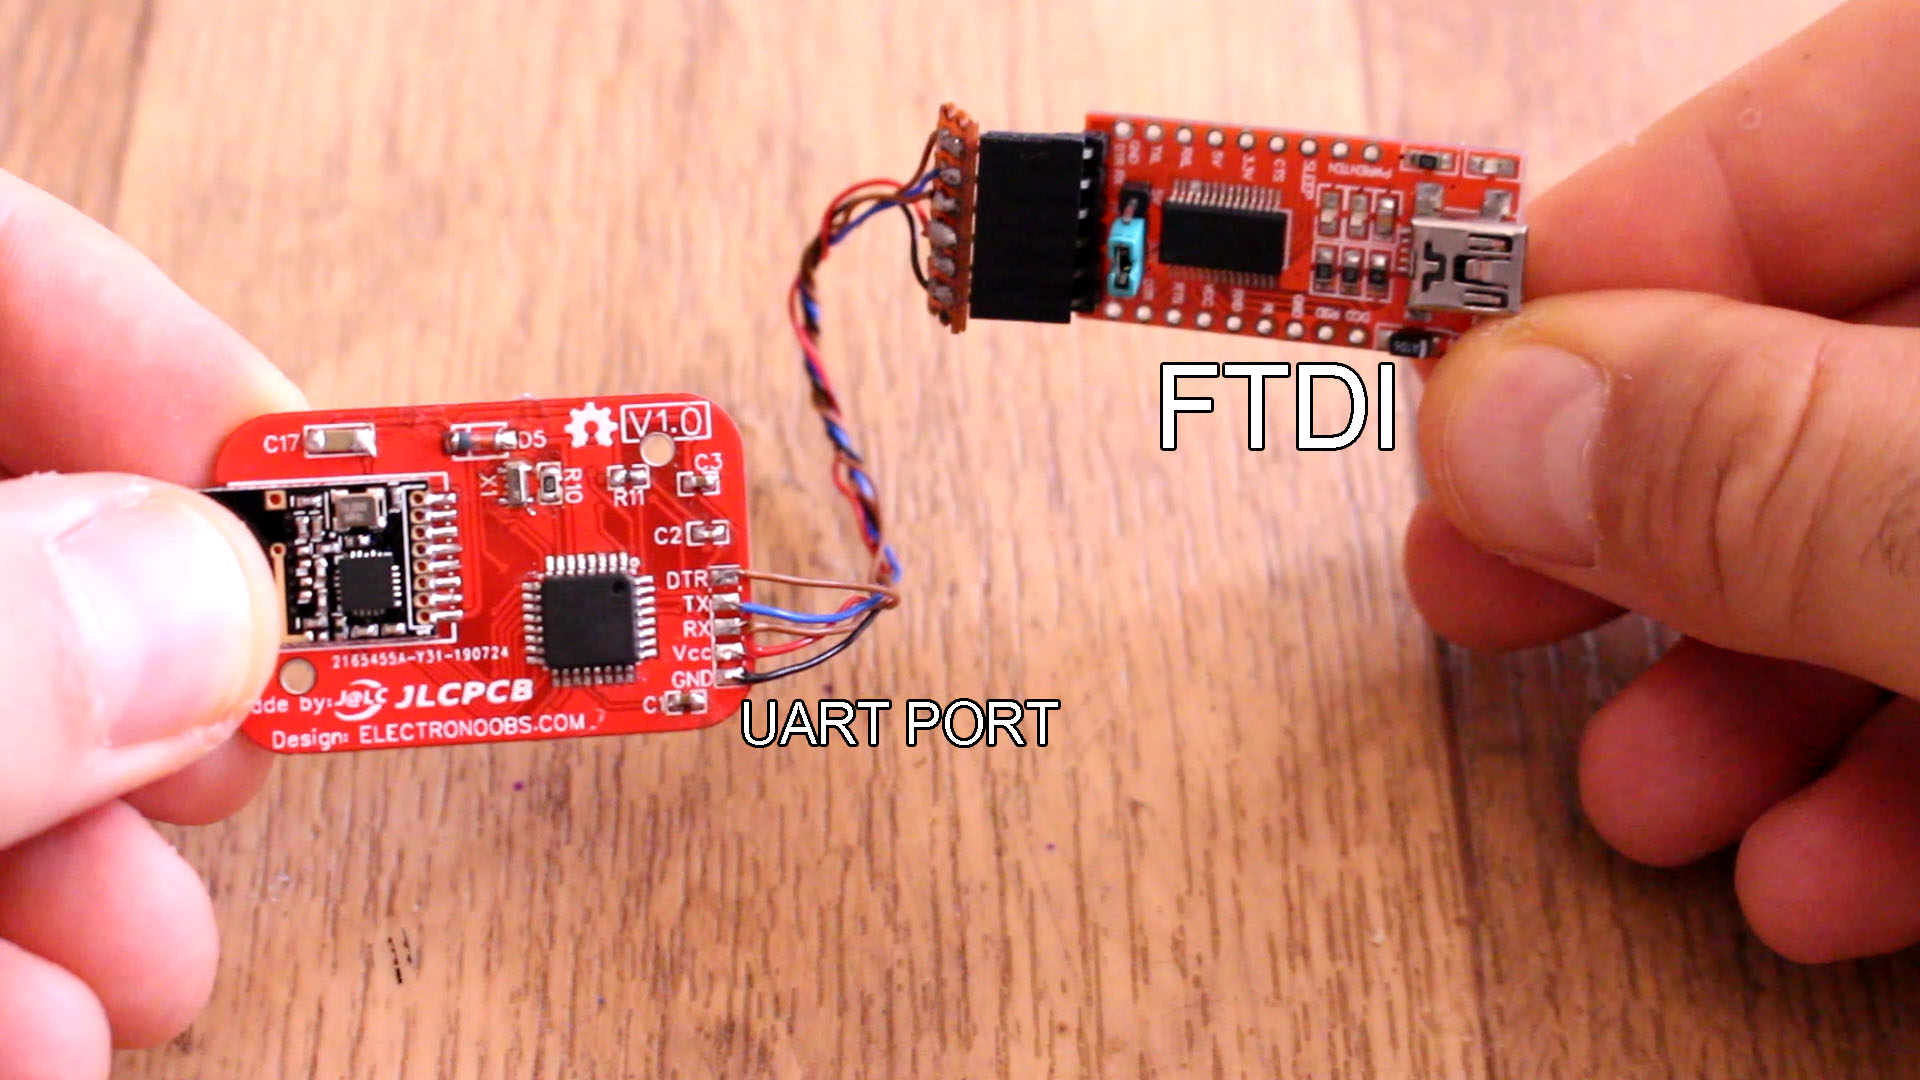
To make the PCB is very easy once you have all the components. Just follow the schematic above in order to see what components you need and the value of each resistors, capacitor and the rest of the components. But, I recommend you to start with the ATMega chip basic configuration. So solder the chip, the 16MHz crystal, the R10 and R11 resistors, the C3, C2 and C1 capacitors and power the chip. Connect an FTDI programmer to the UART pads on the abck and try to uplaod any test code.
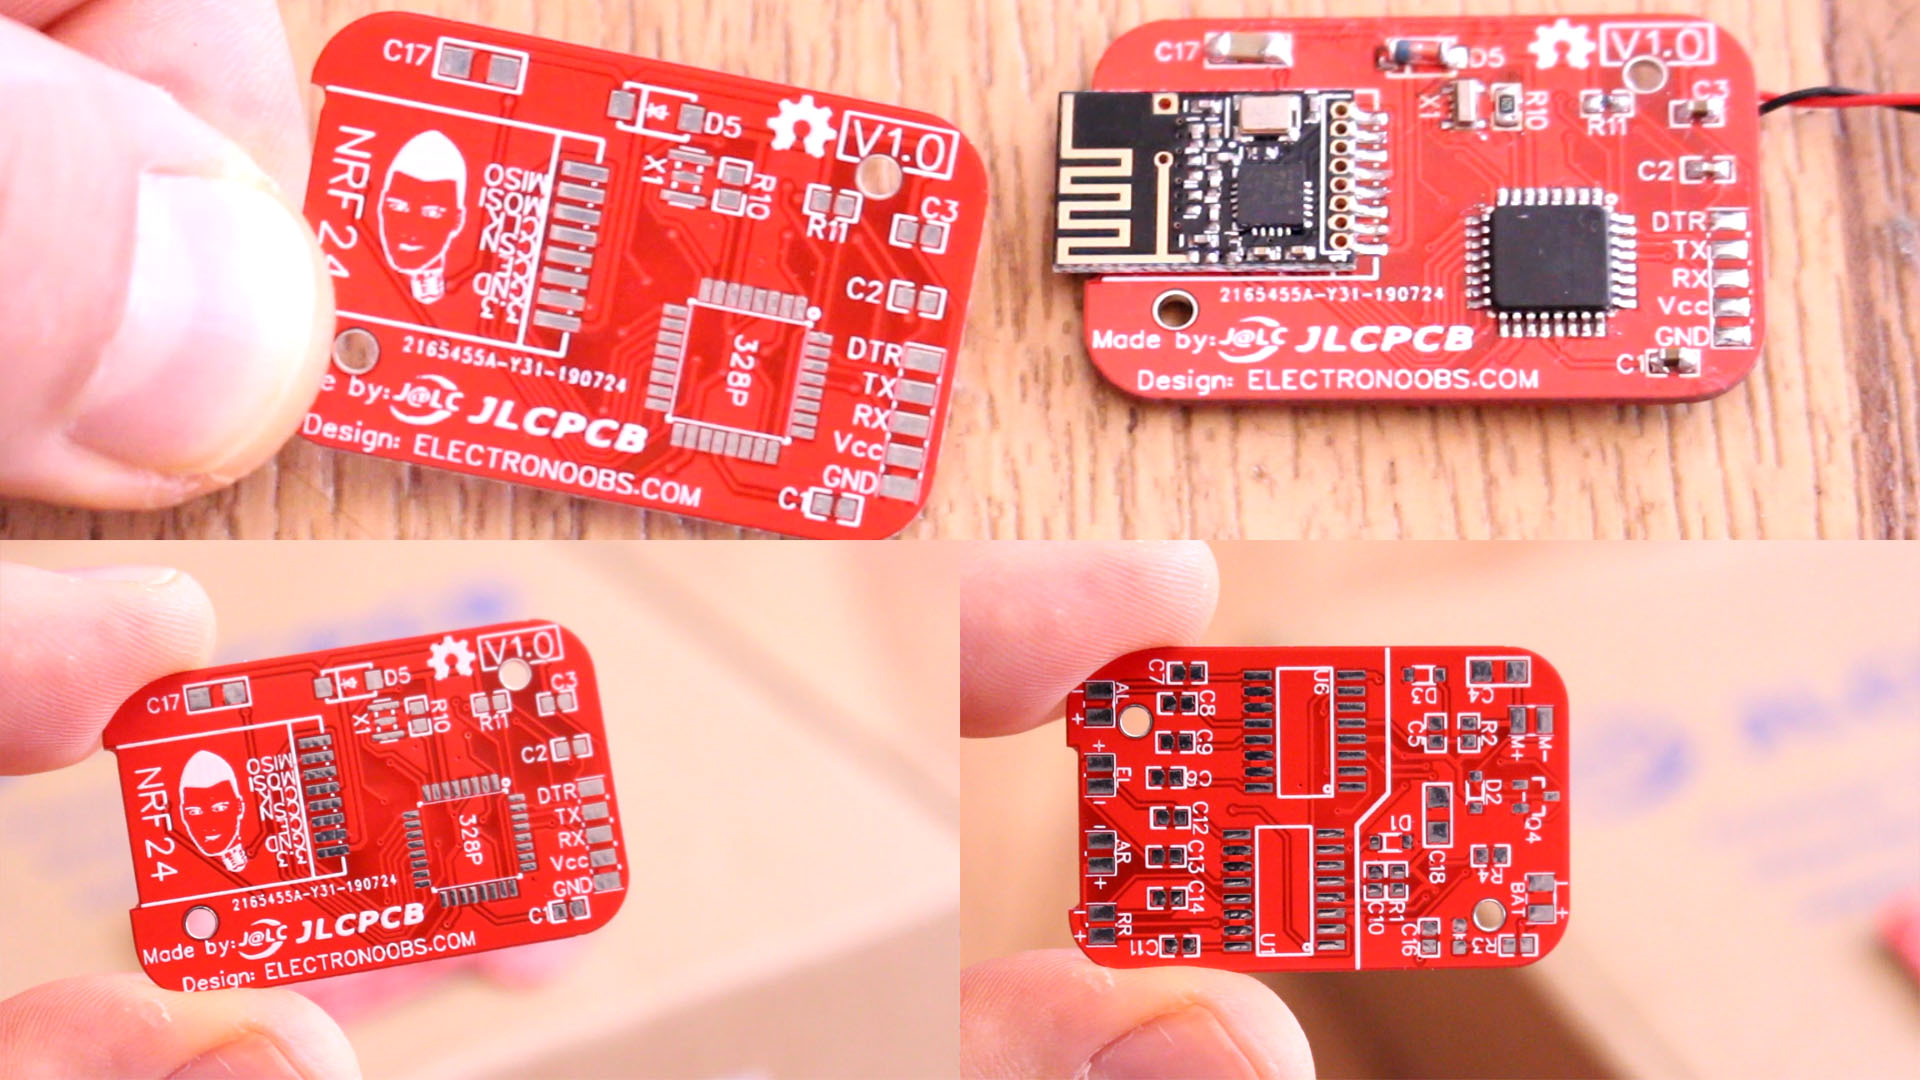
Below I have the PCB ready. Connect the FTDI programmer to the UART pads, to RX, TX, DTR pin adn power. Now, in order to test the chip, what I usually do is to uplaod a test code with a counter and Serial print. After I uplaod that I open the serial monitor and if I get the counter on the monitor, that means the IC works. Now the baord is ready. Let's see how we could use it.
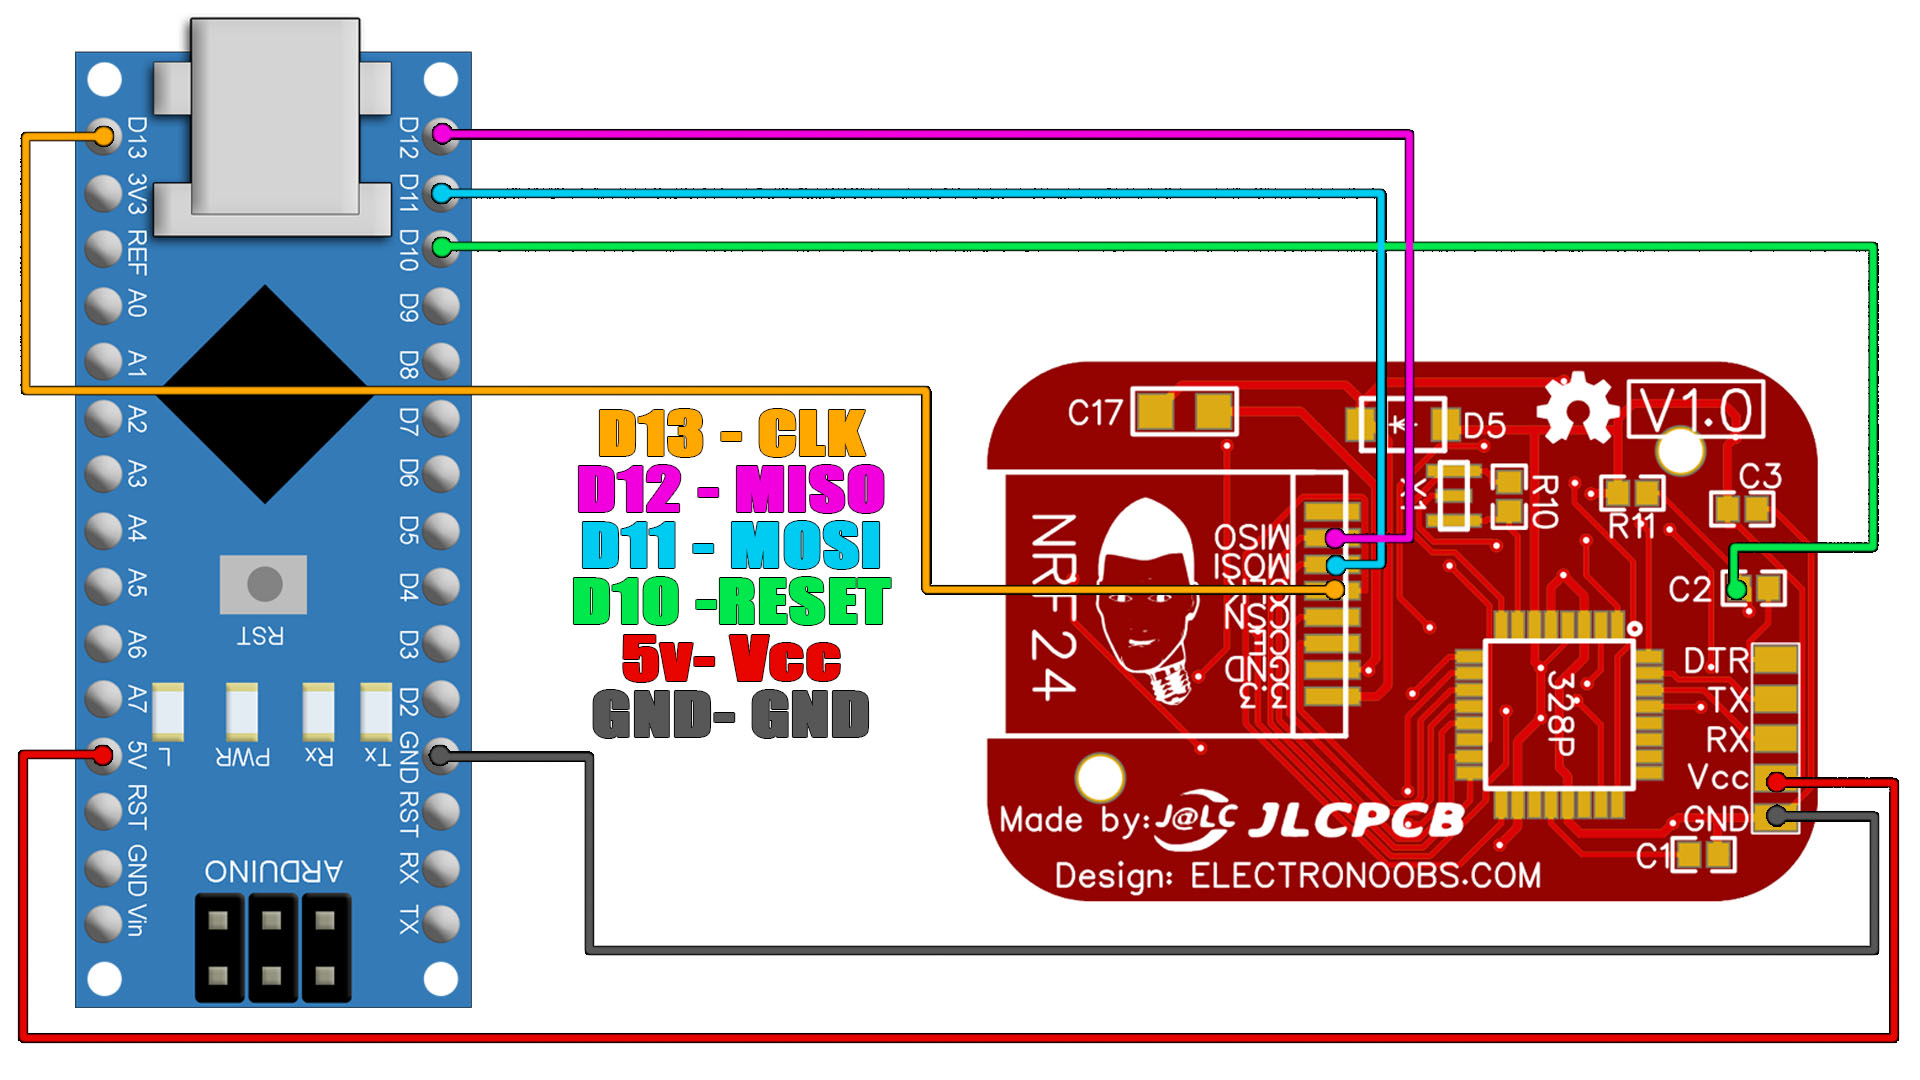
This part is just in case you chip is brand new and dose not have a Bootlaoder. For taht we need to burn the bootloader first. So don't solder the NRF24 radio module yet. Just solder the ATmega328p-AU chip, the C2 DTR capacitor of 100nF, the R10 of 1M and the 16MHz crystal and the R11 10K pullup for the reset pin. Then we need an Arduino NANO to burn the bootlaoder. Once you have the bare minimum configurtion of the chip soldered, make the connections from the NANO to the PCB as below. You need to solder the D10 pin to the left pad of the C2 which is the reset pin.
Ok, once you have the Arduino NANO connected to the PCB you need to prepare it to work as an ISP programmer. For that you need yo upload the Arduino as ISP code to the NANO first. So, go on the Arduino IDE, examples, ArduinoISP and open that example sketch. Then select the Arduino NANO board and the default programmer type. Upload this code to the NANO.
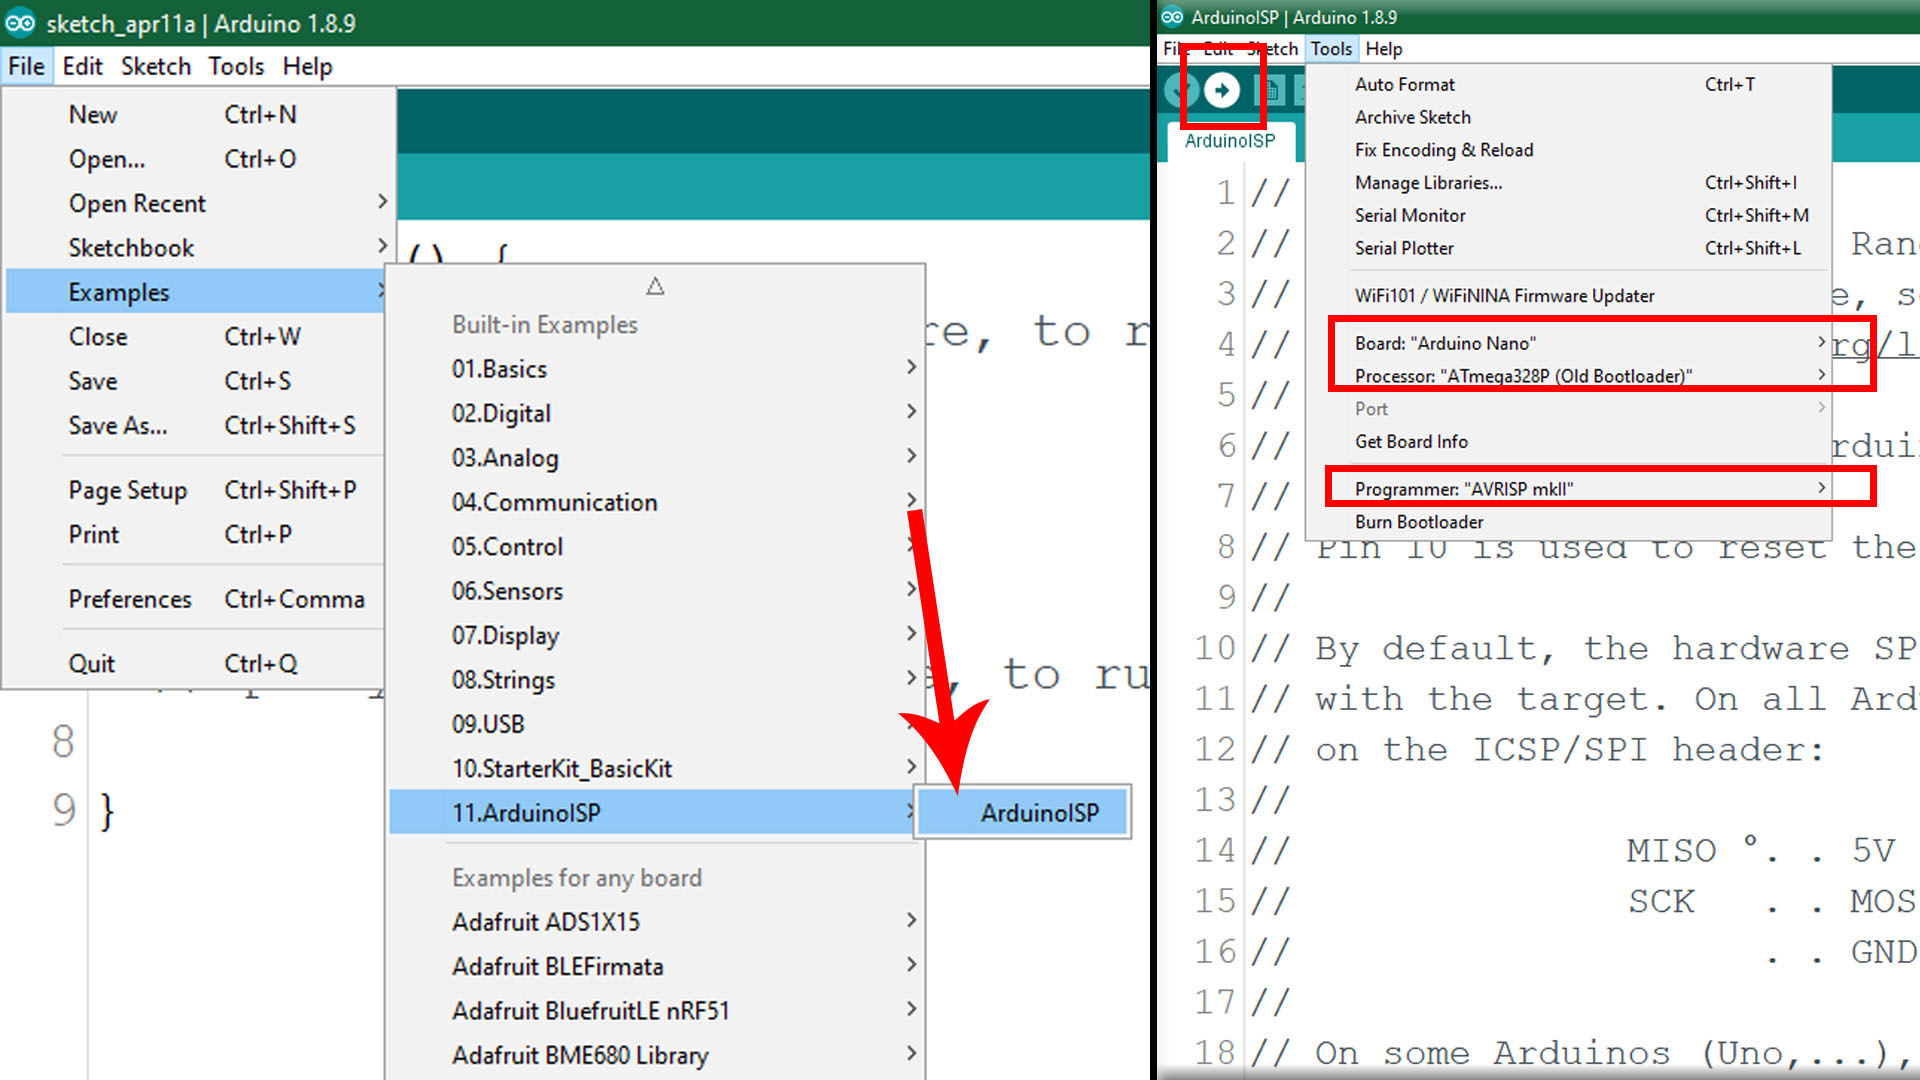
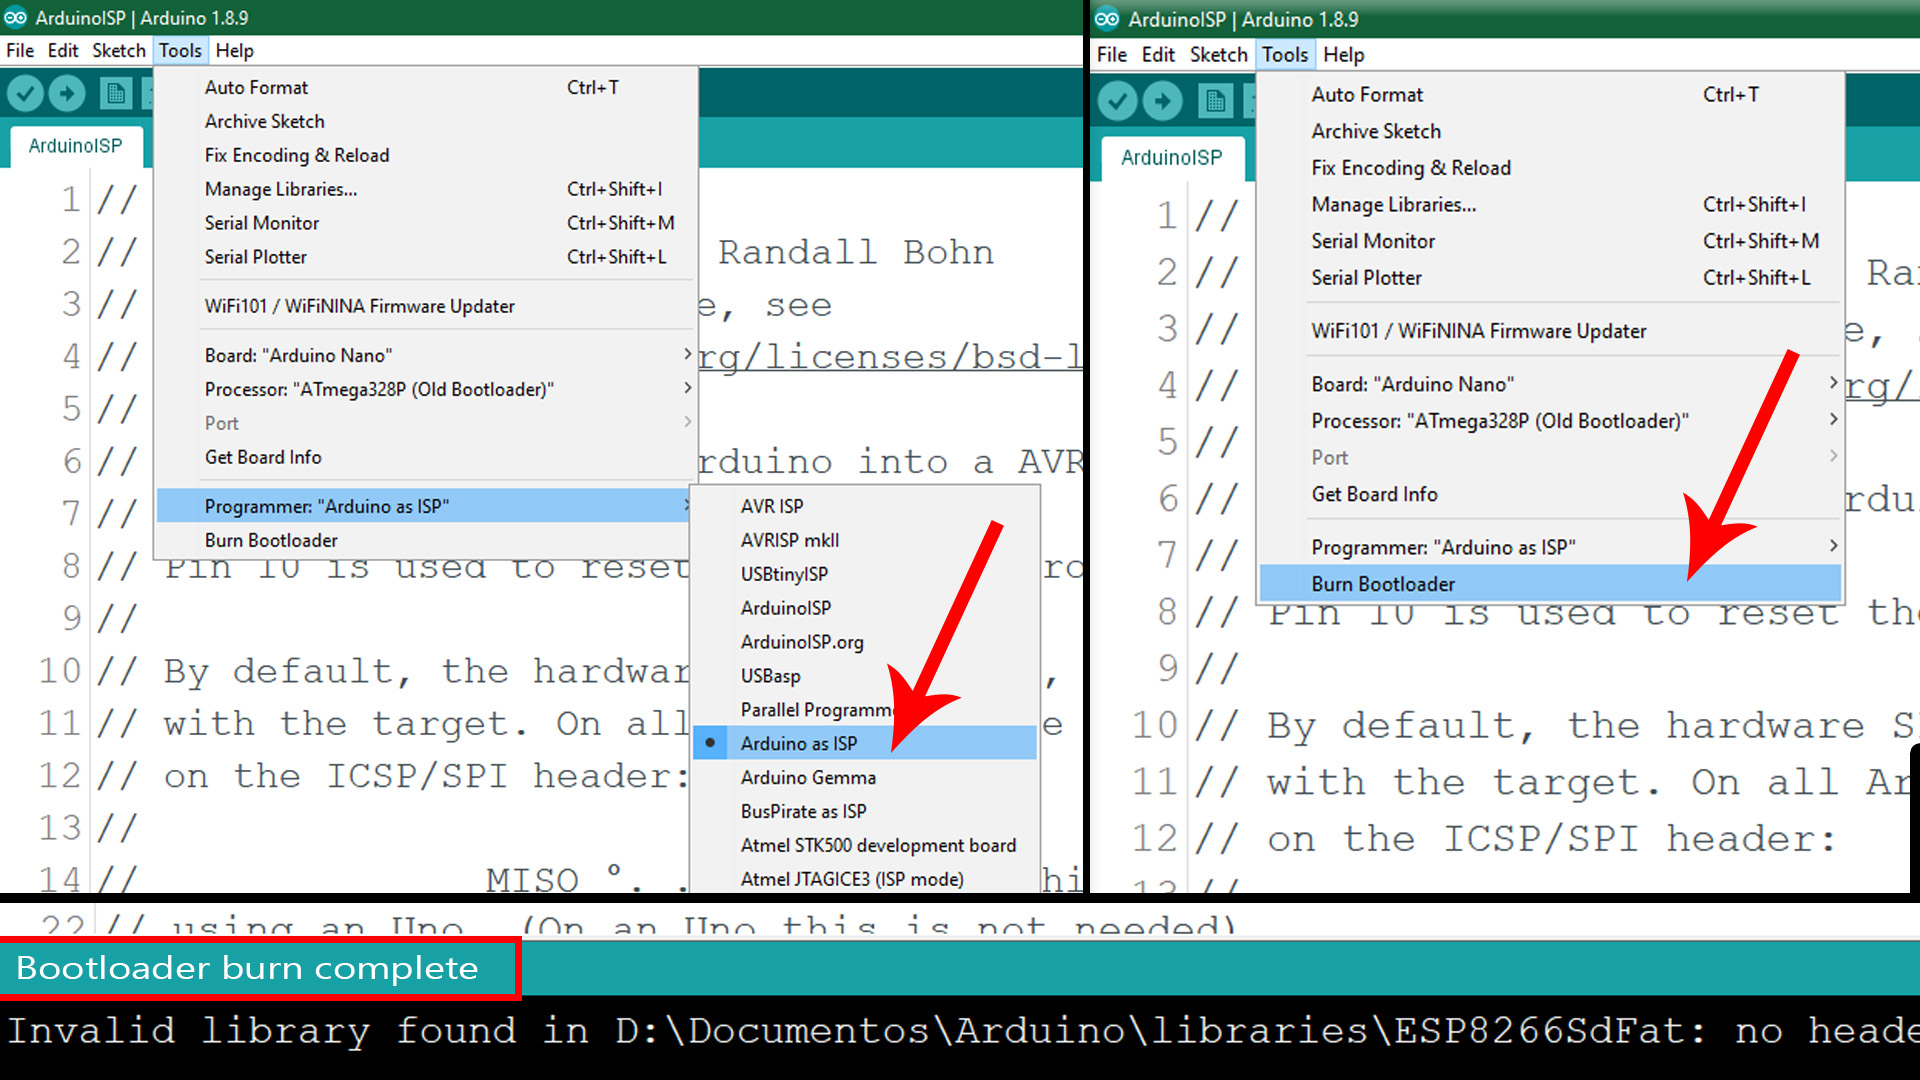
Now that the Arduino ISP code is uploaded and the connections are made, is time to burn the bootloader. First, change the programmer type from default to Arduino as ISP as you can see below. Then go to tools and click burn bootloader. The LEDs of the Arduino NANO should blink like crazy. After that you should get the message Bootloader burn complete if everything goes well. To test the chip, change back the programmer to AVRISP MKII and follow the step before (3.2) and using the FTDI programmer, upload a test sketch.
Ok, for the first test I've made a simple RC car. Connect the battery at the input. Then add 2 DC motors at the outputs AR and AL. Then go below and downlaod the example receiver code. You will need the radio controller we've made in this tutorial so use the transmitter code from that tutorial. If you don't have the radio controller, just use the transmitter code from that tutorial and make your any kind of radio controller with potentiometers or cheap joysticks.
int AL1 = 5;
int AL2 = 6;
int AR1 = 2;
int AR2 = 4;

/**************************************************/

void setup()
{
  pinMode(AL1,OUTPUT);
  pinMode(AL2,OUTPUT);
  pinMode(AR1,OUTPUT);
  pinMode(AR2,OUTPUT);
  .
  .
  .
