About me
  History
  Let's learn
  Contact us
  Arduino tutorials
 Circuits tutorials
  Robotics tutorials
 Q&A
Q&A Blog
Blog  Arduino
  Circuits
 Robotics
  Modules
  Gadgets
  Printers
  Materials
  3D objects
  3D edit
  Donate
  Reviews
  Advertising


3D printed body
You can download the STL files of the Spitfire plane here. Please support me subscribing to my
This tutorial is divided in 3 parts: transmitter, body construction and the receiver.
 3D printed body
 Transmitter
 Receiver
3D printed Spitfire - Body.
First of all download the STL files from this LINK.
Once you've downloaded the .zip file extract it in one of your folders. Inside you will find two subfolders. One is the recommended one with the full parts. The other one, not recommended, has the same parts but sliced in to smaller parts to print them in smaller amounts of time. Printing the full parts means less glueing later.
You can download the
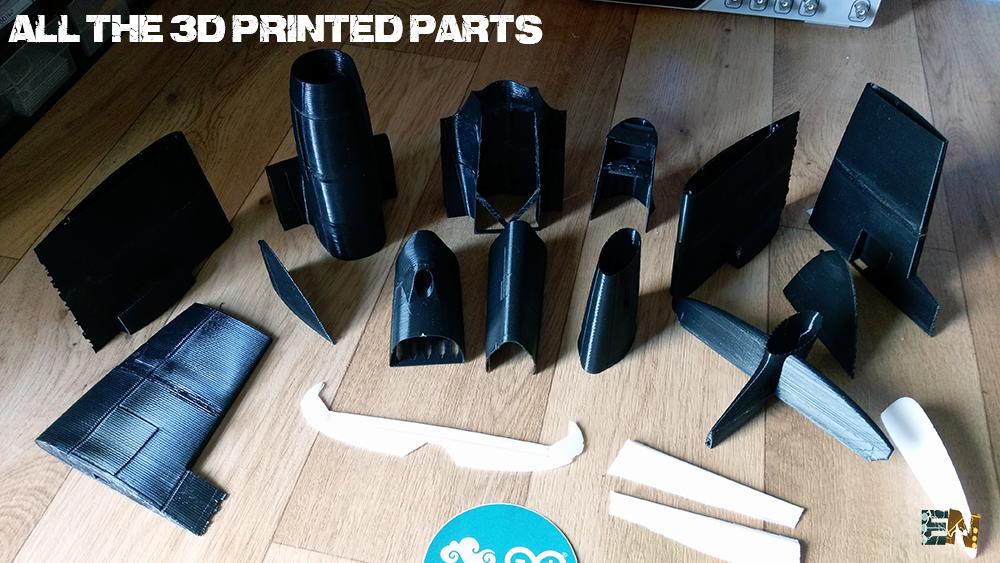
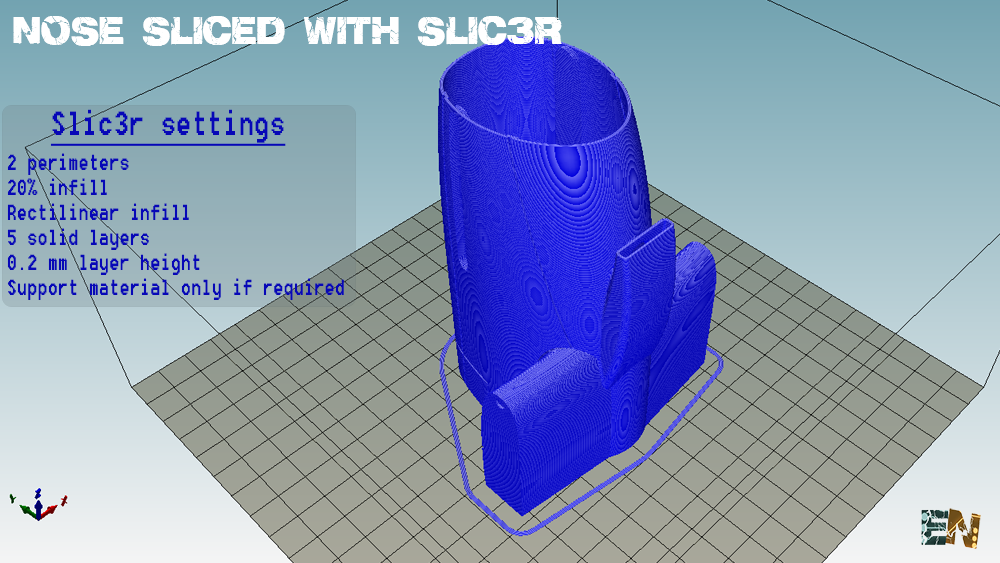
Now that you have all the STL files you should start printing them one by one. If you own a very good printer you could print them in packs of two or more files at a time. I own a Prusa i3 and sometimes it fails and I lose the entire print, that's why I print them one by one in case the printer fails. I use Blender to edit my files and Netfab to auto crrect them and make them wather sealed. Once the files are ready I create a g-Code file using Repetier with Slicer. I also print them directly from the Repetier software.
Don't glue anything till you print all the files. Once you have all the files download the plane construction plans and print them on a paper sheet or just have them in front of you on a PC to guide you while glueing. Start with the middle body parts. Glue together the parts 3, 4 and 1. I glue them using strong super glue first and applying one or two layers of flexible plastic model glue. Don't glue the nose tip yet (part 2) because there is where we have to screw in place the brushless motor. Now glue together parts 5 and 6. That will be a separate part that we will be able to remove whenever we whant and be able to work inside of the plane.
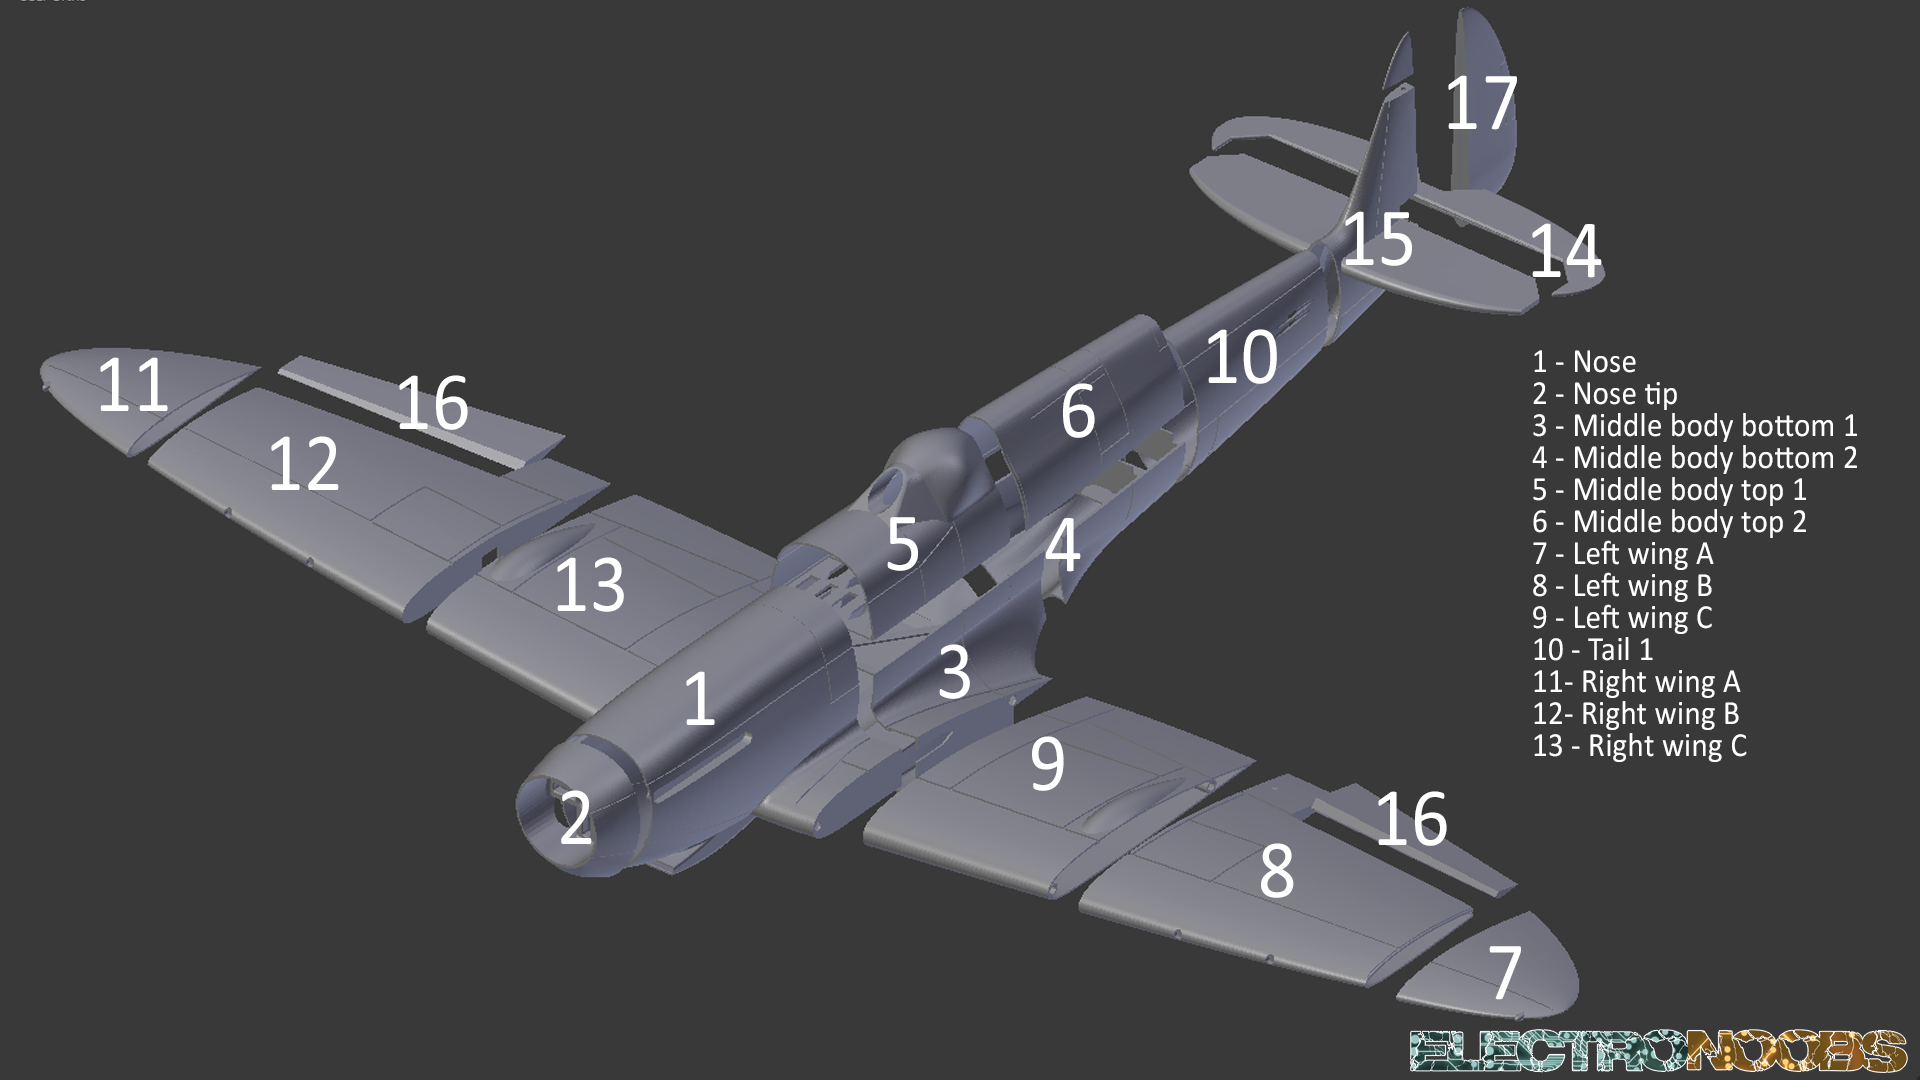
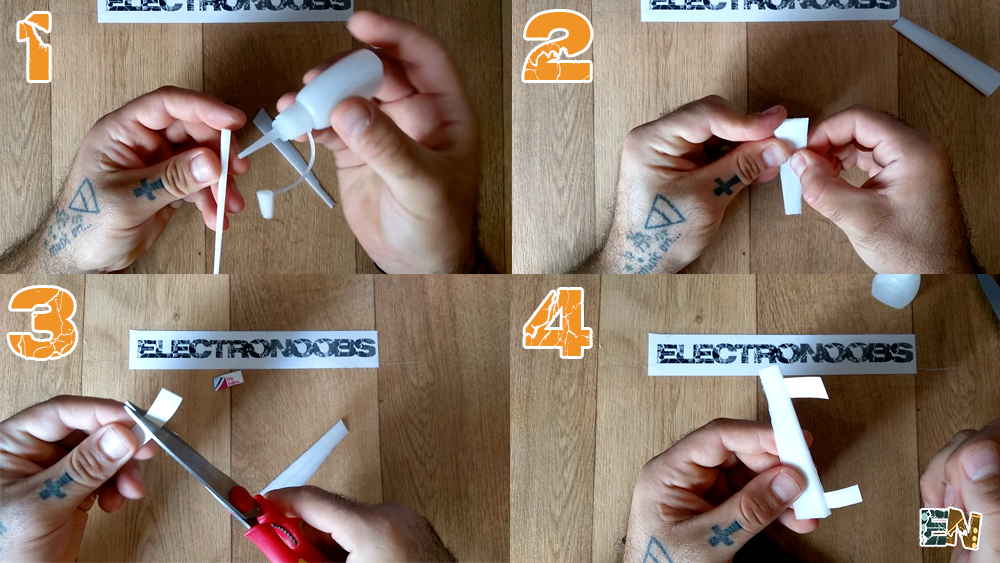
Glue the wings separately. Join togheter part 9 with 8 and 13 with 12. Before you add part 7 and 11 you have to put in place the controls 16. First glue together the two partso of the controls (part 16). As hinges I've used plastic form a yogurt case because is flexible and strong. Cut two 1cm wide yogurt plastic stripes and glue them inside of the control holes.
Now we can glue the controls on each wing. Once it dries make sure that they can move without problems. Finnaly we glue the last part of the wings (part 7 and 11) and the wings are ready. Leave about 1m or 2mm between the airlerons and the wing.

Now we have to do the same for the tail. Glue the controls first. Add the hinges and glue them in place on the tail as shown in the Spitfire plane plans. Now we can glue the tail at the middle body. To glue the wings we first add two wood sticks to each wing. This stick are some normal barbeque sticks taht you could buy in any supermarket. You can see that the part 9 and 13 of the wings have two holes in it. Glue the sticks inside that hols leaving about 2cm outside. Now glue thw wings in place with a lot of glue.
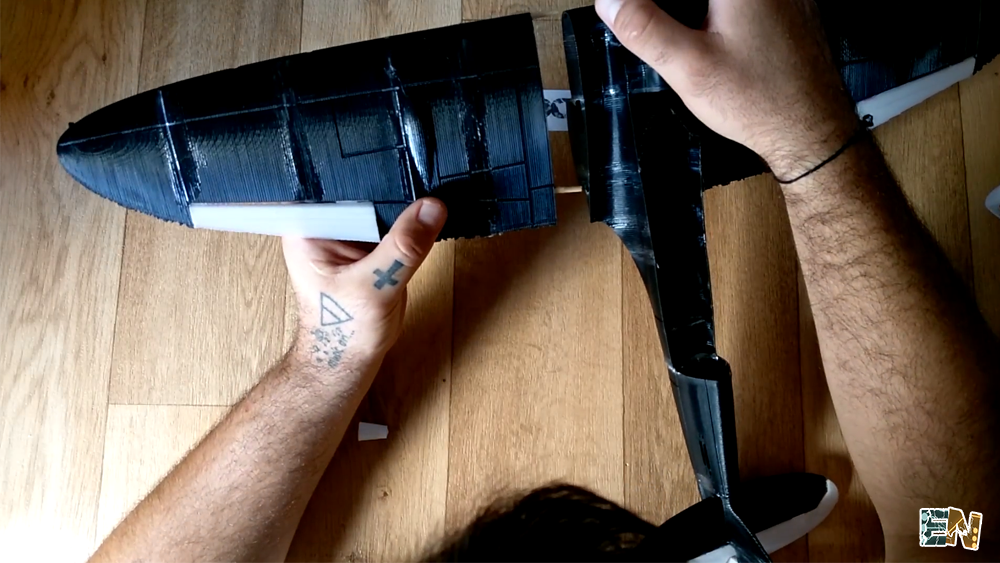
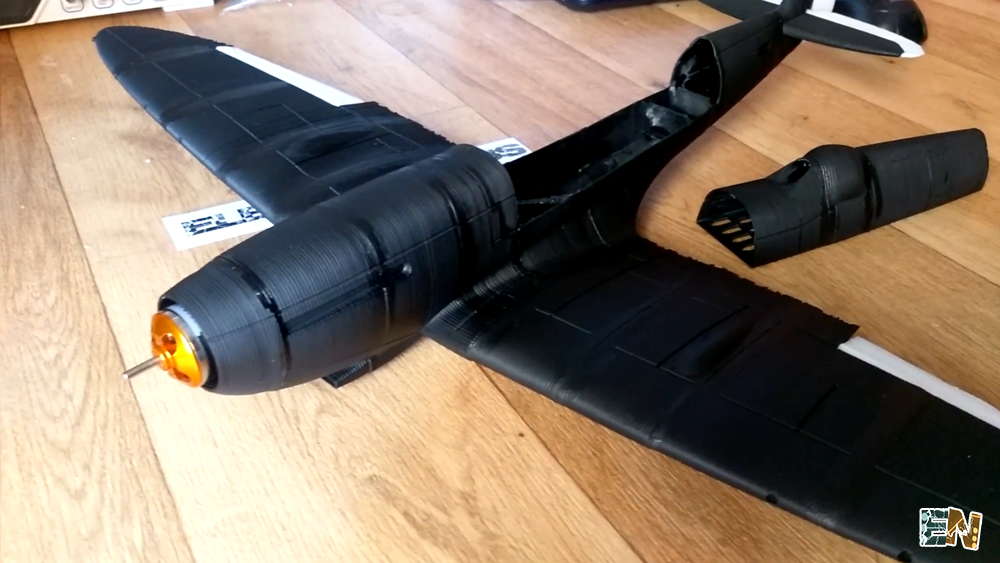
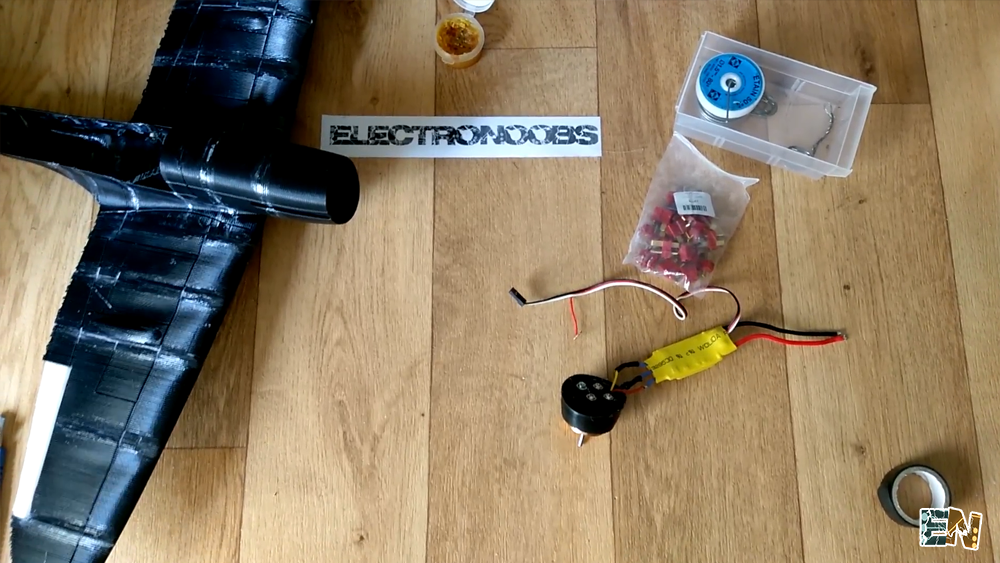
Finnaly we screw in place the 22 11 brushless motor and solder the ESC to it. We also solder a Li-Po battery connector to the esc. We put inside of the plane nose the esc and glue the nose tip (part 2) to the plane. Now our plane body is ready.
In the next part of the tutorial we will see how to create our radio controller and finnaly install all the electronics inside the plane and make it fly. If you ahve any question just ask in my Q&A page.