
The machine in the video is a so-called laser show machine. It cost me around 90 dollars on Aliexpress and is a lot less than I was expecting. For example it doesn’t even have music control where the laser is moving with the beat of the music. That’s why today we start making a homemade version that should be a lot better. First we will take a look inside of the commercial machine and then, make a plan on what we need for our homemade one. I’ll try to use parts that are not expensive, and like that, maybe get not just a better version but also cheaper. We will solve the supply problem, analyze the sound with a microphone and an Arduino. We have to find 3 different color lasers, merge the light into just one and then see how to move the light and create shapes. This project will be made out of 2 parts. So guys, let’s get started.
Well, we have two options. Use the PCB or the 3D part with external coils. In the video, my PCB had errors and I had to use external coils. But I've solved those errors so you could download from belwo the PCB and try it out. Get the 3D files, links for the coils and the GERBER files for the PCB and test the same project. See the connections and download the test code.
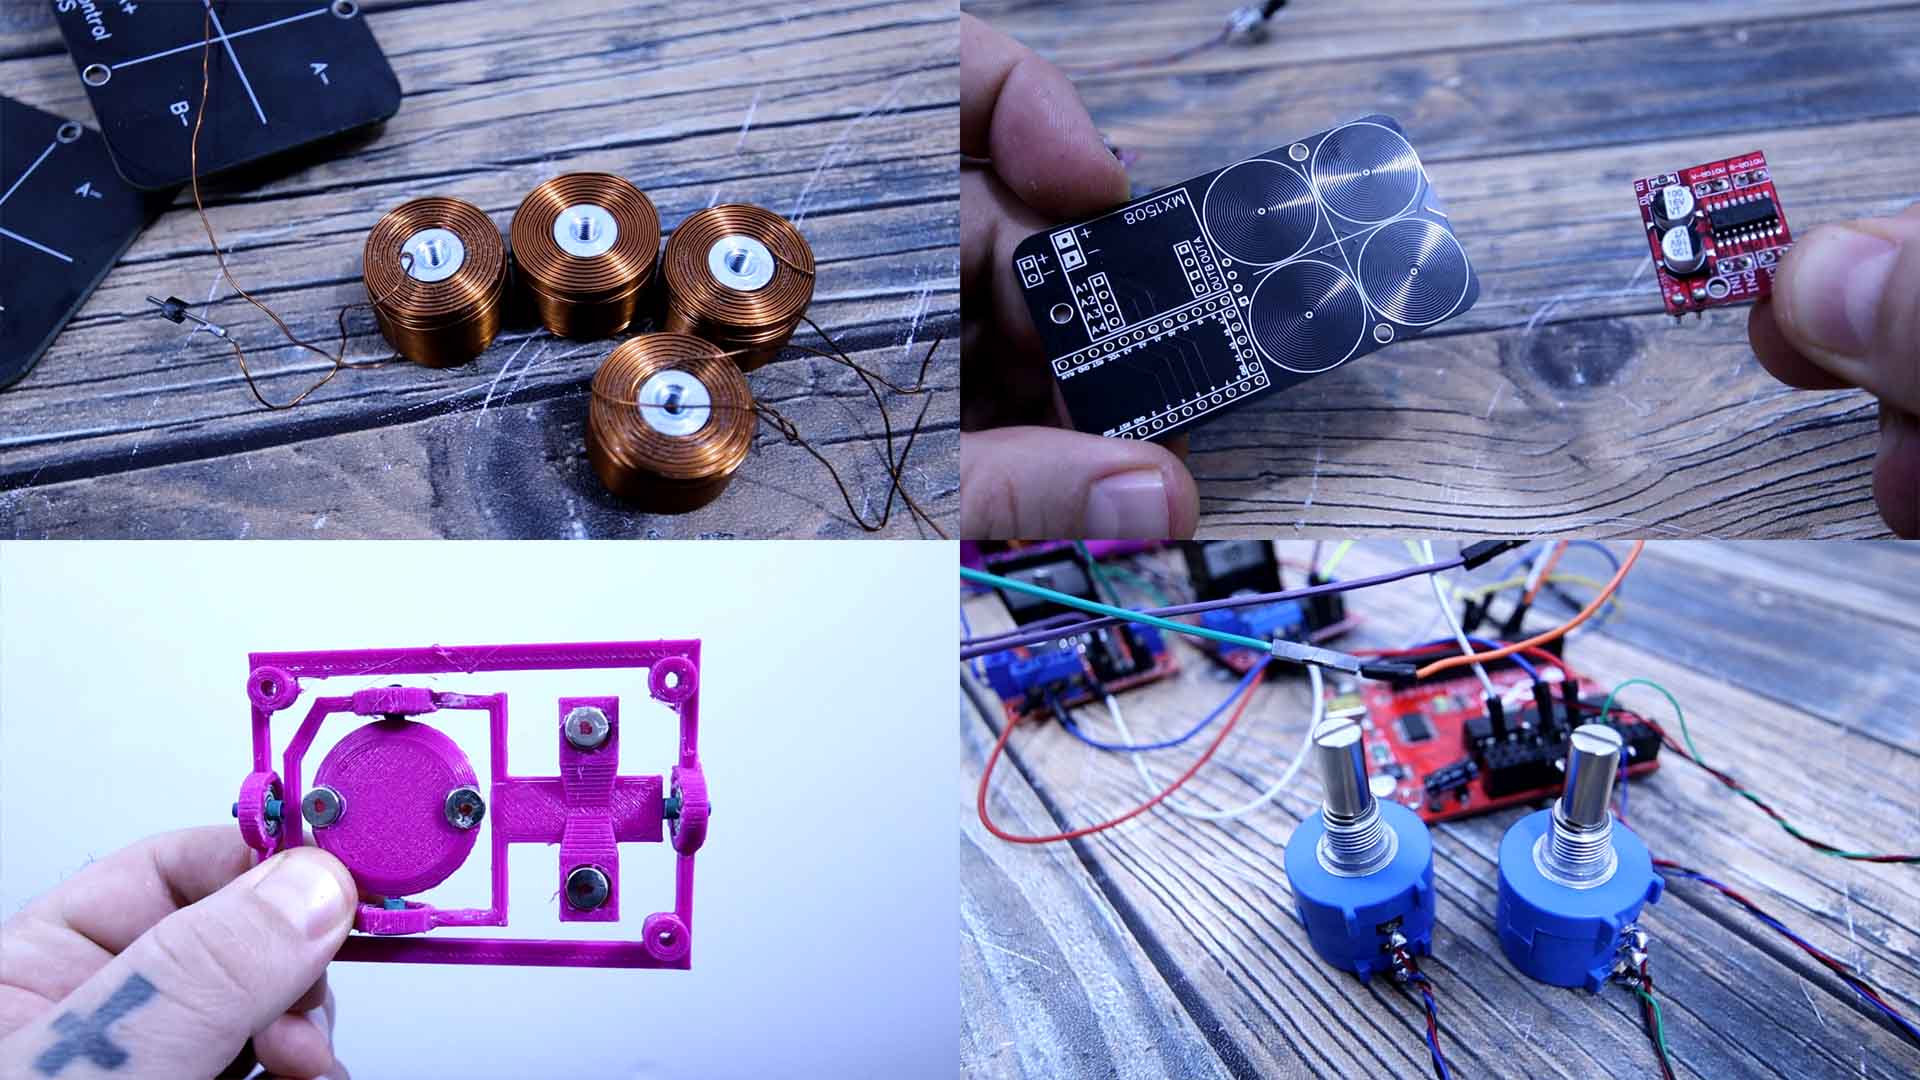
The Arduino reads the values of potentiometers connected on A0 and A1. Then applies a PWM signal on the H-Bridges and control the magnetic field of the 4 coils. That's how we control the position by pushing or pulling the magnet on the 3D support. Supply the PCB at 7V to 12V and test the code.
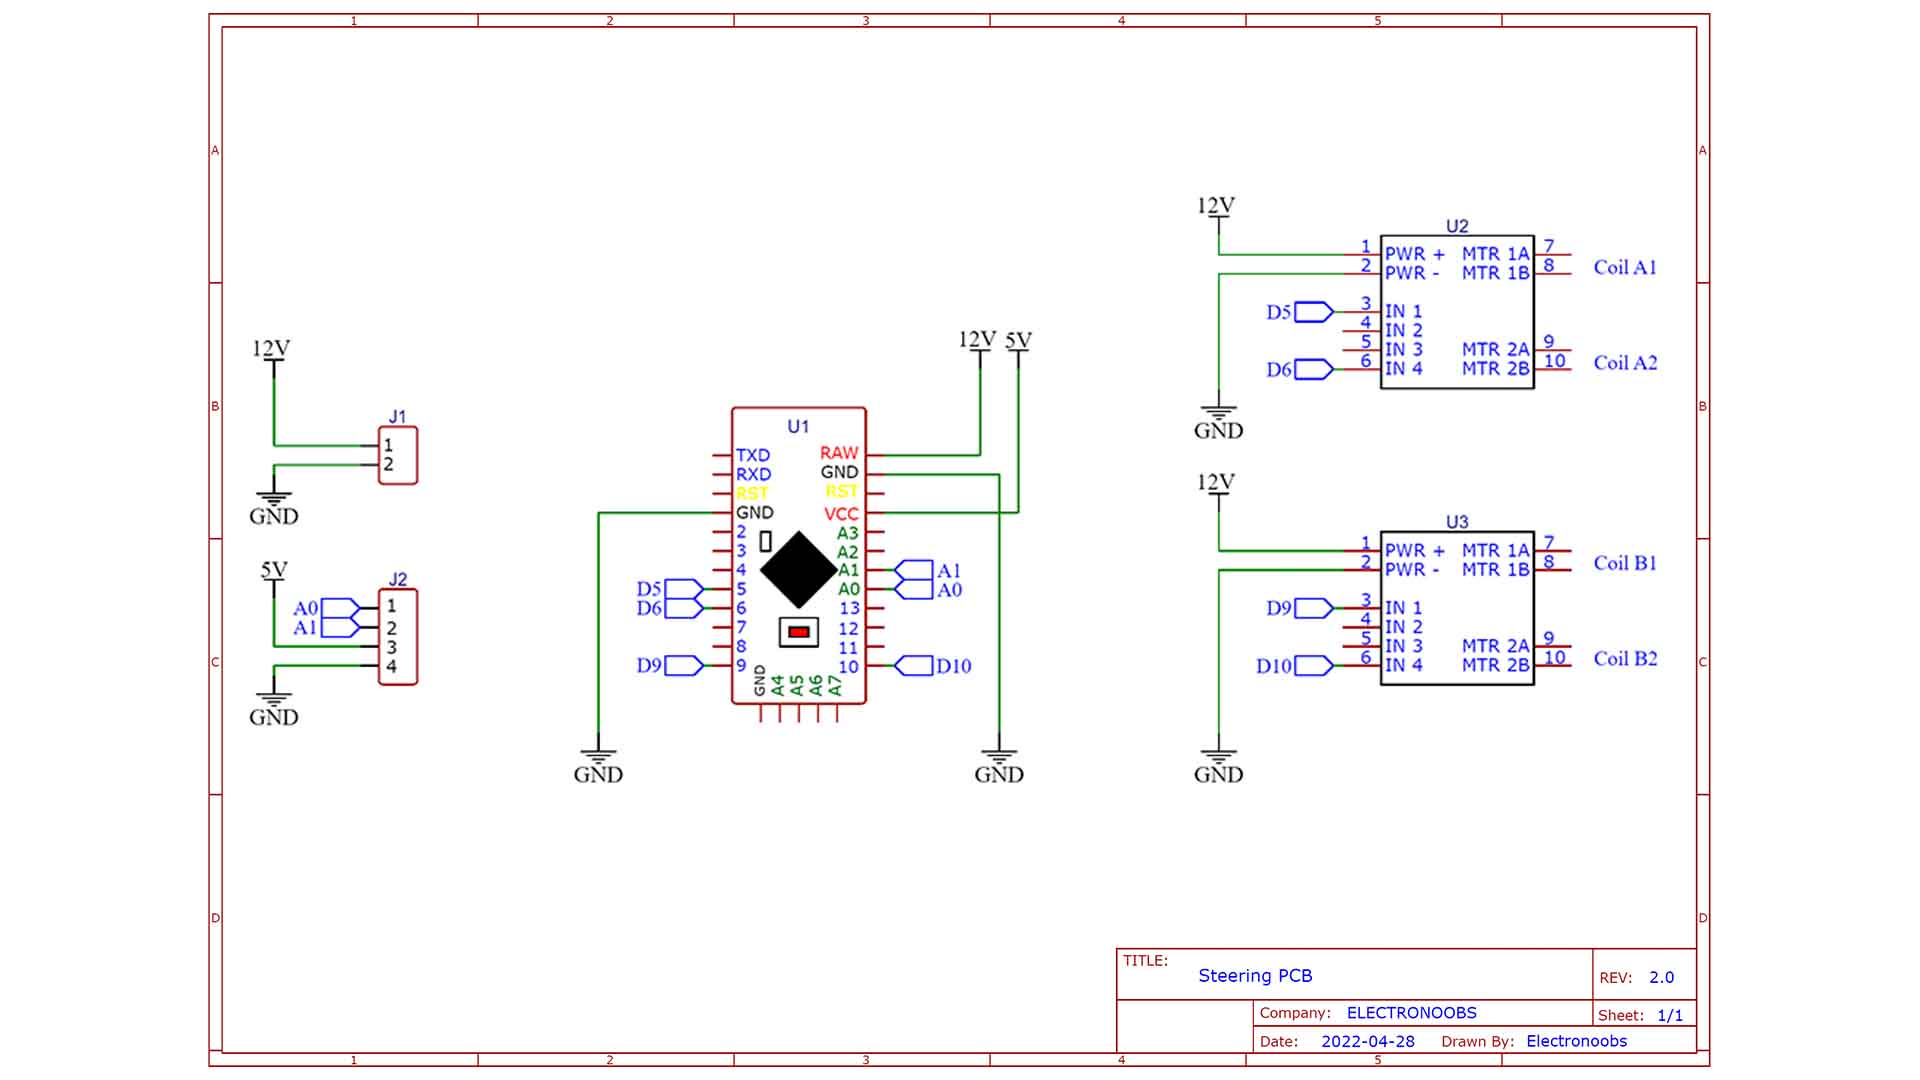
The code is simple. Define the pins for the PWM signal and set the PWM frequency to be the same for all pins. Read the potentiometer value. Map that value from 0 to 255. Aplly the signal to the oposite coils and that's it. One coil will have the value from 0 to 255 and the oposite coil will have the range from 255 to 0, in that way we balance the position.
int Ypos = 5;
int Yneg = 6;
int Xneg = 9;
int Xpos = 10;
int pot1 = A0;
int pot2 = A1;

void setup() {
  pinMode(Ypos, OUTPUT);
  pinMode(Yneg, OUTPUT);
  pinMode(Xneg, OUTPUT);
  pinMode(Xpos, OUTPUT);
  digitalWrite(Ypos, LOW);
  digitalWrite(Yneg, LOW);
  digitalWrite(Xneg, LOW);
  digitalWrite(Xpos, LOW);
  pinMode(pot1, INPUT);
  pinMode(pot2, INPUT);

  // Pins D5 and D6 - 31.4 kHz
  TCCR0B = 0b00000001; // x1
  TCCR0A = 0b00000001; // phase correct
  // Pins D9 and D10 - 31.4 kHz
  TCCR1A = 0b00000001; // 8bit
  TCCR1B = 0b00000001; // x1 phase correct
}

void loop() {
  int Y_axis = map(analogRead(pot1),0,1024,0,255);
  int X_axis = map(analogRead(pot2),0,1024,0,255);
  analogWrite(Xpos, X_axis);
  analogWrite(Xneg, 255-X_axis);

  analogWrite(Ypos, Y_axis);
  analogWrite(Yneg, 255-Y _axis);

  delay(20);
}//End of void loop
So guys, I can now move the mirror using magnets and coils instead of stepper motors. I still have to wait for the good PCB to arrive and make this mirror control even smaller. The new PCB will be able to control each coil separately. But I was able to test the PCB around and at least I know that it has enough magnetic force to move the magnets. I’ve also noticed that it gets a bit hot and that might be a problem. In order to stay cool we have to use a fan and try to dissipate more heat from the PCB. Maybe using heatsinks. Also, we should use lower voltage but that will lower the magnetic force as well. Since this is still in the prototype phase, I won’t build the laser machine yet.
If my videos help you, consider supporting my work on my PATREON or a donation on my PayPal. Thanks again and see you later guys.


