
Below you have the full tutorial where I go through each step. But in this post we will see just how receive data from an Arduino using the UART port and use taht data to control the angle of a gauge on the screen. Make sure you go to NEXTION.com and download their editor because we will work with that software. In this psot you will also have the TFT files I've created and the pictures, videos or anything else that you need, ready for download.
Let’s start with something easy. First go to this link and download NEXTION editor software. Once downloaded and installed, run this software. Go to file and select new and give this new project a name. Next it will ask you what model of display you have. In this case, mine is this one (NX1060P101-011C-I) of 10 inches. Then select the orientation. In my case I leave it at 0 in horizontal mode. Click OK and start the project.

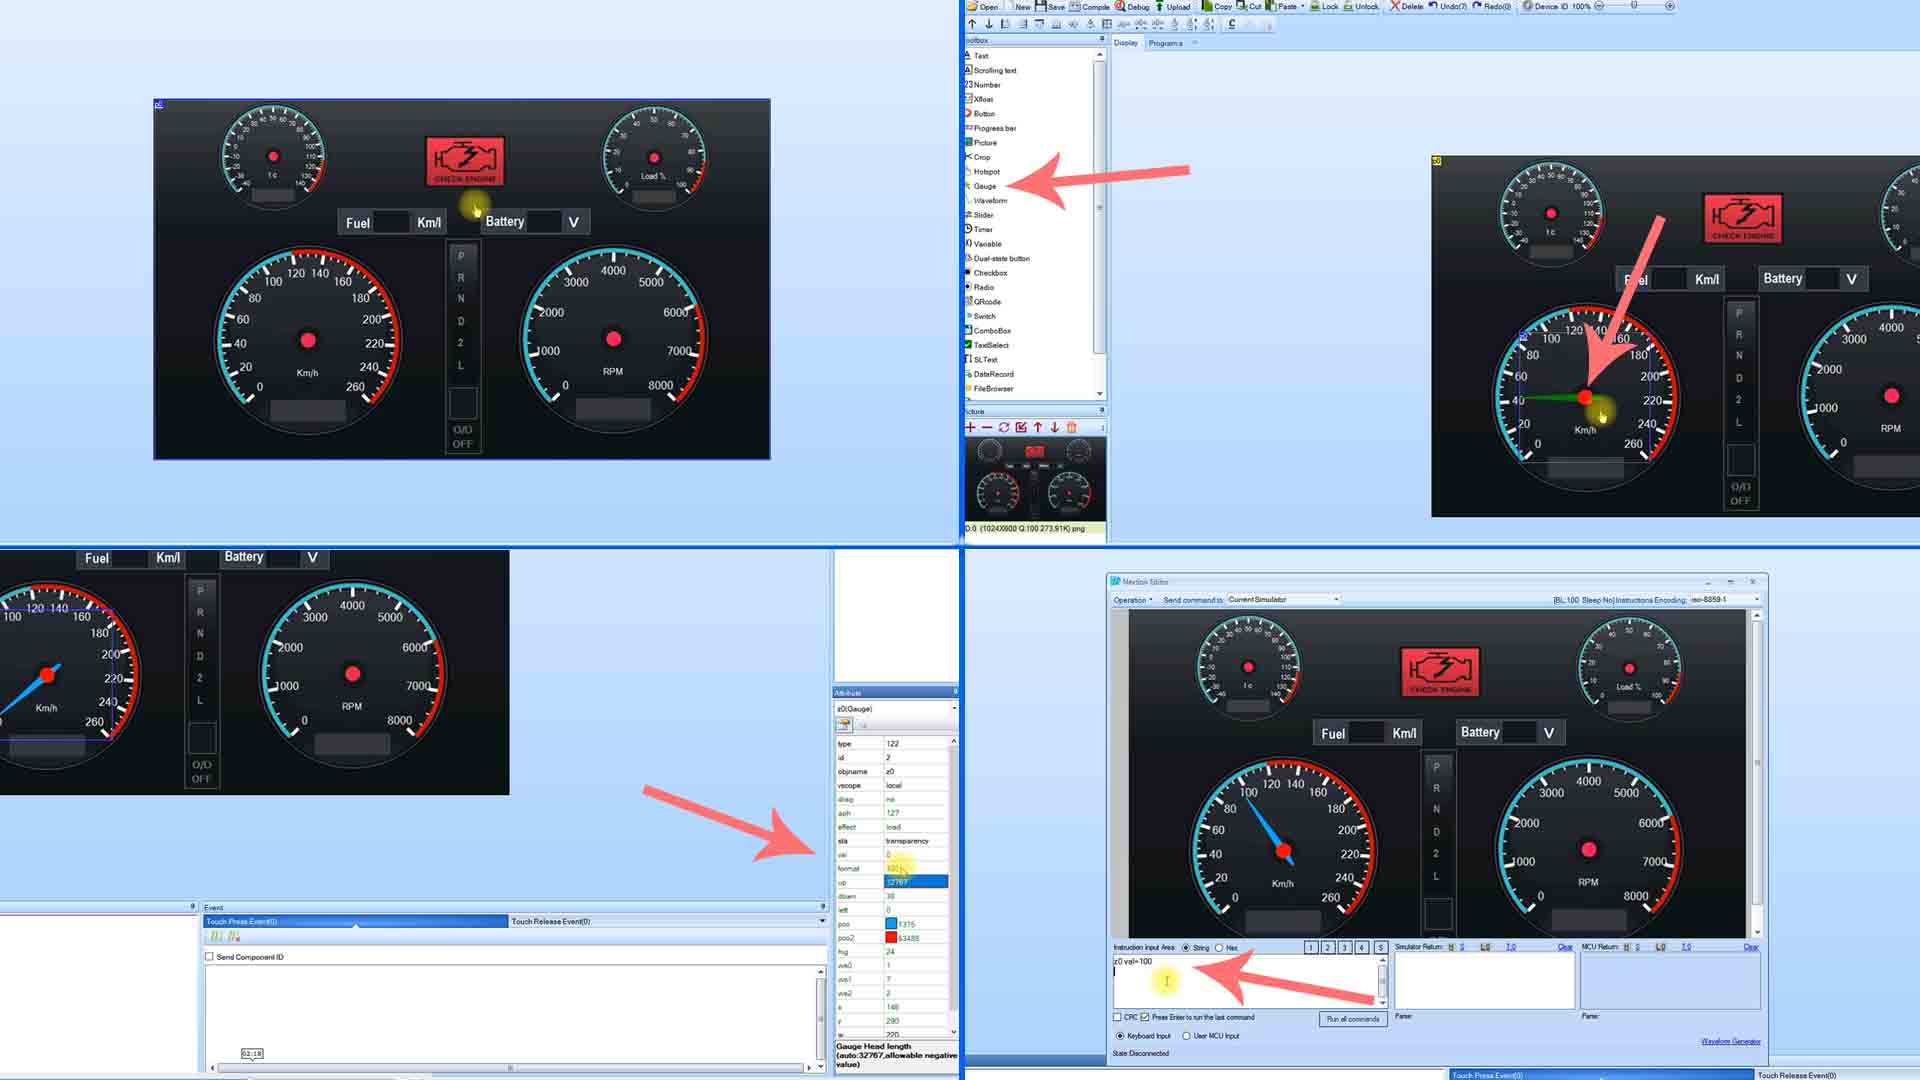
The next example is to see how to receive data from the Arduino. I create a new project and for the page 0 I set its background to a picture that I’ve prepared in Photoshop and has the design of some gauges. As you cans see we have 4 gauges but they don’t have the needle, so we have to add taht from the nextion toolbox. For that I go in the toolbox and insert a gauge. In the attributes I set the size, the colors and the offset in order to start from 0 since my "0" is not at 0 degrees . An now, as you will see, when I change the “val” variable from the attributers, the angle of the needle will change. The object name is z0. Click debug. There type z0.val equal to 100 for example. As you will see, the needle will rotat 100 degrees. So now all e have to do is to print this line (z0.val equal to 100) from the Arduino where we type z0.val= and then, the number of degrees. We can read that number from a potentiometer for our example.
I connect the Tx and Rx wires from the screen to my Arduino. I also add a potentiometer so we could read some values. In the Arduino code, I read the potentiometer and map its value from 0 to 260 degrees since that’s the maximum of my gauge. Then I sue the serial print to send z0.val equal to and then I print the value from the potentiometer. Then we must send 3 full bytes with serial write, that’s how the display works. So now, as you can see, I can control the position of the needle with the potentiometer, just by sending the values from the Arduino.
int pot = A0;

void setup() {
  pinMode(pot, INPUT);
  Serial.begin(9600);
}

void loop() {
  int val = map(analogRead(pot),0,1023,0,260);
  Serial.print("z0.val=");    //Send the object tag
  Serial.print(val);          //Send the value

  //We need to send 3 full bytes after each value
  Serial.write(0xff);
  Serial.write(0xff);
  Serial.write(0xff);
  delay(5);
}In the same way, we could also change the number below the gauge. I could add a new number and select a font and color. This number object name would be n0. So, from the Arduino we could also send that (n0.val=) and change the value of the number. We have 4 more gauges on this design, so we could control multiple parts at the same time. This is a nice example of using the Arduino together with this display. One interesting idea is to use this screen for a home automatization project where you control the graphic part on the screen, but the rest is controlled with an Arduino and maybe WIFI or Radio connection. I have that project on my to do list. I hope you like this tutorial and maybe you have learned something new. If my videos help you, consider supporting my work on my PATREON or a donation on my PayPal. Thanks again and see you later guys.


