
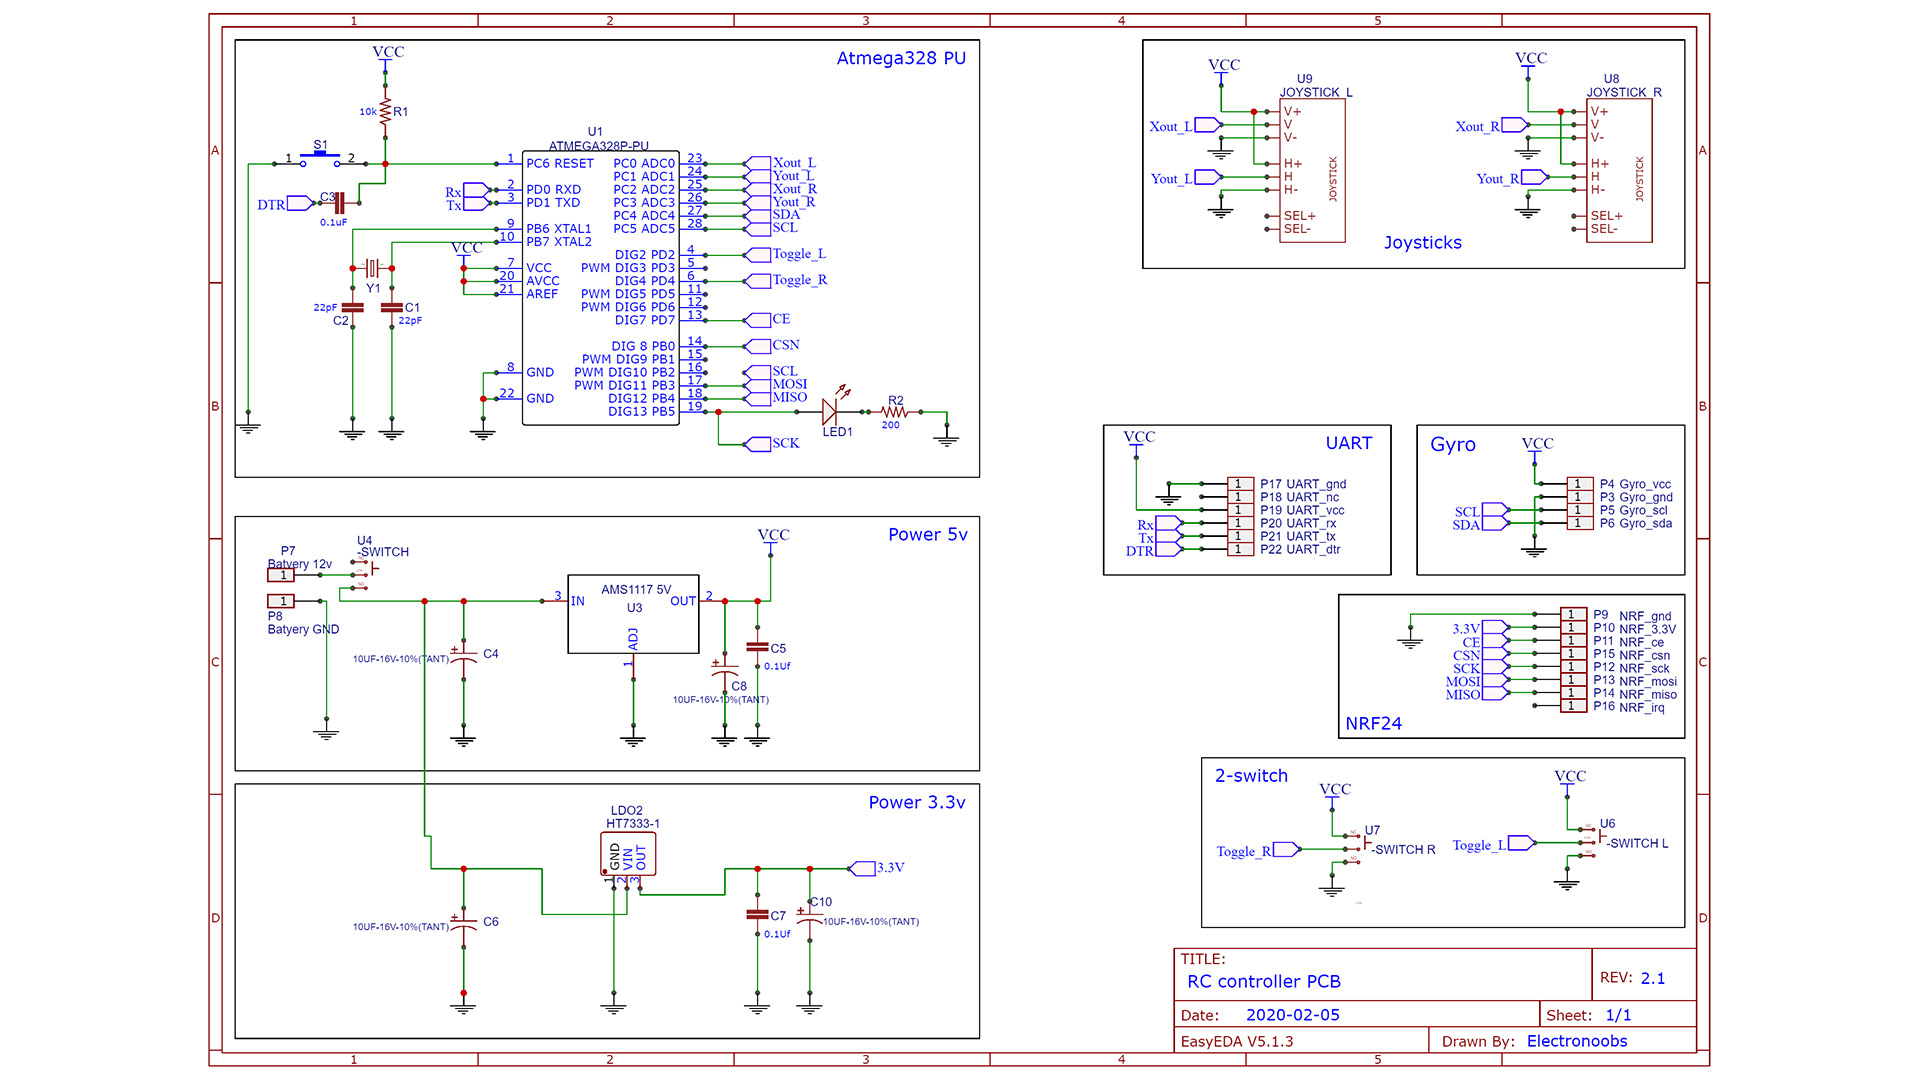
Go below and download the radio controller code. Open it in Arduino IDE. Select Arduino UNO board and uplaod it to the PCB using the FTDI programmer once again. Now you can test if you can receive values to the MultiWii platform with the drone conencted as you can see below. you might need to tune a little bit the joystick values in order to be exactly in the middle. If not, use my previous radio controller with digital adjustment from this tutorial.
/*A basic 6 channel transmitter using the nRF24L01 module.*/
/* Like, share and subscribe, ELECTRONOOBS */
/* http://www.youtube/c/electronoobs */

/* First we include the libraries. Download it from
   my webpage if you donw have the NRF24 library */

#include <SPI.h>
#include <nRF24L01.h>             //Downlaod it here: https://www.electronoobs.com/eng_arduino_NRF24_lib.php
#include <RF24.h>

/*Create a unique pipe out. The receiver has to
  wear the same unique code*/

const uint64_t pipeOut = 0xE8E8F0F0E1LL; //IMPORTANT: The same as in the receiver!!!

RF24 radio(7, 8); // select  CE and CSN  pins

// The sizeof this struct should not exceed 32 bytes
// This gives us up to 32 8 bits channals
struct MyData {
  byte throttle;
  byte yaw;
  byte pitch;
  byte roll;
  byte AUX1;
  byte AUX2;
};

MyData data;

void resetData()
{
  //This are the start values of each channal
  // Throttle is 0 in order to stop the motors
  //127 is the middle value of the 10ADC.

  data.throttle = 0;
  data.yaw = 127;
  data.pitch = 127;
  data.roll = 127;
  data.AUX1 = 0;
  data.AUX2 = 0;
}

void setup()
{
  //Start everything up
  radio.begin();
  radio.setAutoAck(false);
  radio.setDataRate(RF24_250KBPS);
  radio.openWritingPipe(pipeOut);
  resetData();
}

/**************************************************/

// Returns a corrected value for a joystick position that takes into account
// the values of the outer extents and the middle of the joystick range.
int mapJoystickValues(int val, int lower, int middle, int upper, bool reverse)
{
  val = constrain(val, lower, upper);
  if ( val < middle )
    val = map(val, lower, middle, 0, 128);
  else
    val = map(val, middle, upper, 128, 255);
  return ( reverse ? 255 - val : val );
}

void loop()
{
  // The calibration numbers used here should be measured
  // for your joysticks till they send the correct values.
  data.throttle = mapJoystickValues( analogRead(A1), 13, 524, 1015, true );
  data.yaw      = mapJoystickValues( analogRead(A0),  1, 505, 1020, true );
  data.pitch    = mapJoystickValues( analogRead(A3), 12, 544, 1021, true );
  data.roll     = mapJoystickValues( analogRead(A2), 34, 522, 1020, true );
  data.AUX1     = digitalRead(4);
  data.AUX2     = digitalRead(2);

  radio.write(&data, sizeof(MyData));
}


