
Now we can install the Magic Mirror. for that 1. run the terminal on the Pi. You can find all the steps here on the original psot as well on https://docs.magicmirror.builders/getting-started/installation.html Then 2. copy the next link and paste it on the terminal and hit enter.
2.
When that process is finish, 3. copy the next line and paste taht in the terminal and hit once again enter and wait to finish.
3.
Now we have to clone the repository and check out the master branch. For that 4. copy the next line and paste it into the terminal and hit enter. Now we have a clone of the files for the magic mirror on our raspberry pi. Let' go to the next step. Don't close the terminal yet!
4.
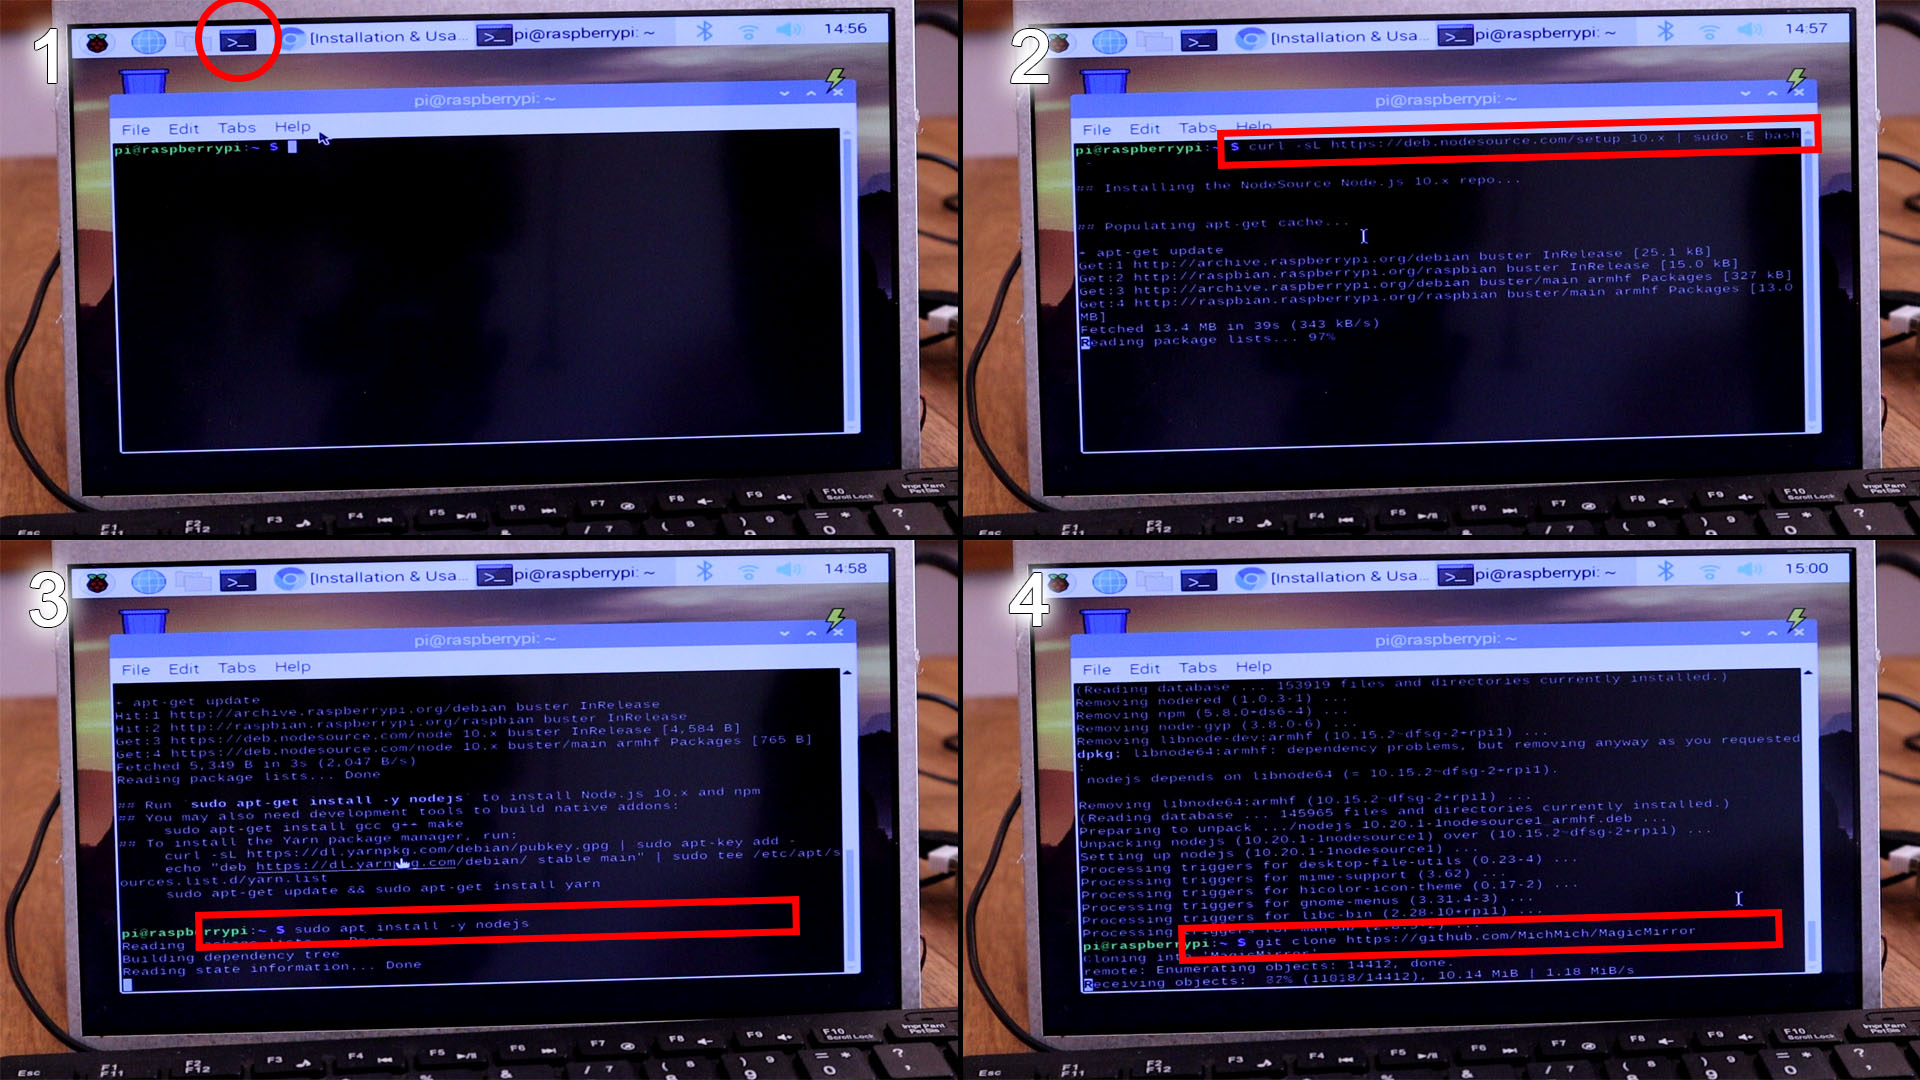
Now, we have to open the folder where magic mirror is and for that 5. we type the next line on the terminal and hit enter. Then 6. type the npm install and taht will install magic mirror.
5.
6.
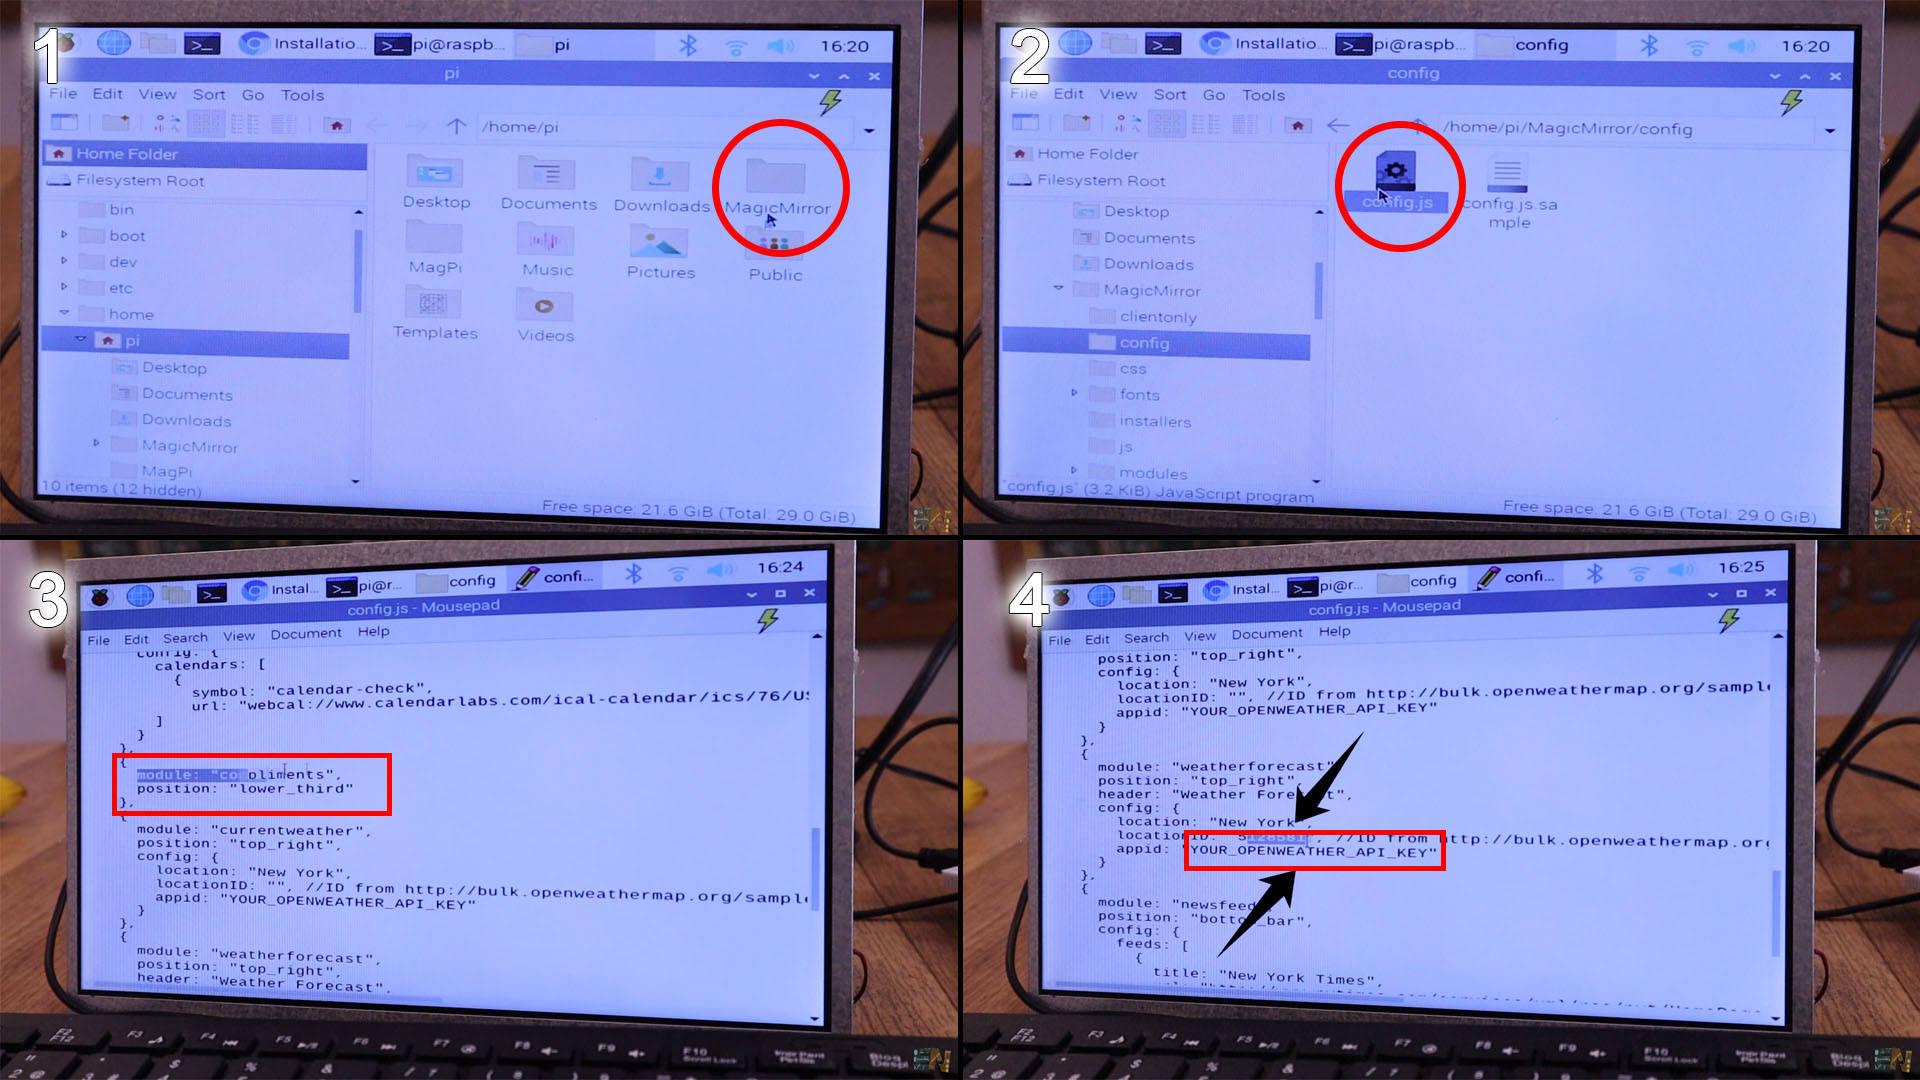
Later we will change the config file, but for that we make first a copy of this file just in case. For that, 7. copy the next line, paste it into the terminal and hit enter.
7.
Finally, we can now run the magic mirror platform and for that 8. copy the next line, paste it on the terminal and hit enter.
8.

Magic Mirror works but it has the default data. We want to place our data for time, weather and calendar. 1. Go to the the pi directory, to the MagicMirror Folder, open the config folder and there 2. open the config.js file with the text editor. Is time to add our data. First, in my case I delete the greatings block because I don't want that. 3. Delete from bracket to bracket. Go to the next link and create an account. Then go to APIs and create a new API and copy that code and 4. paste it in the config.js file.
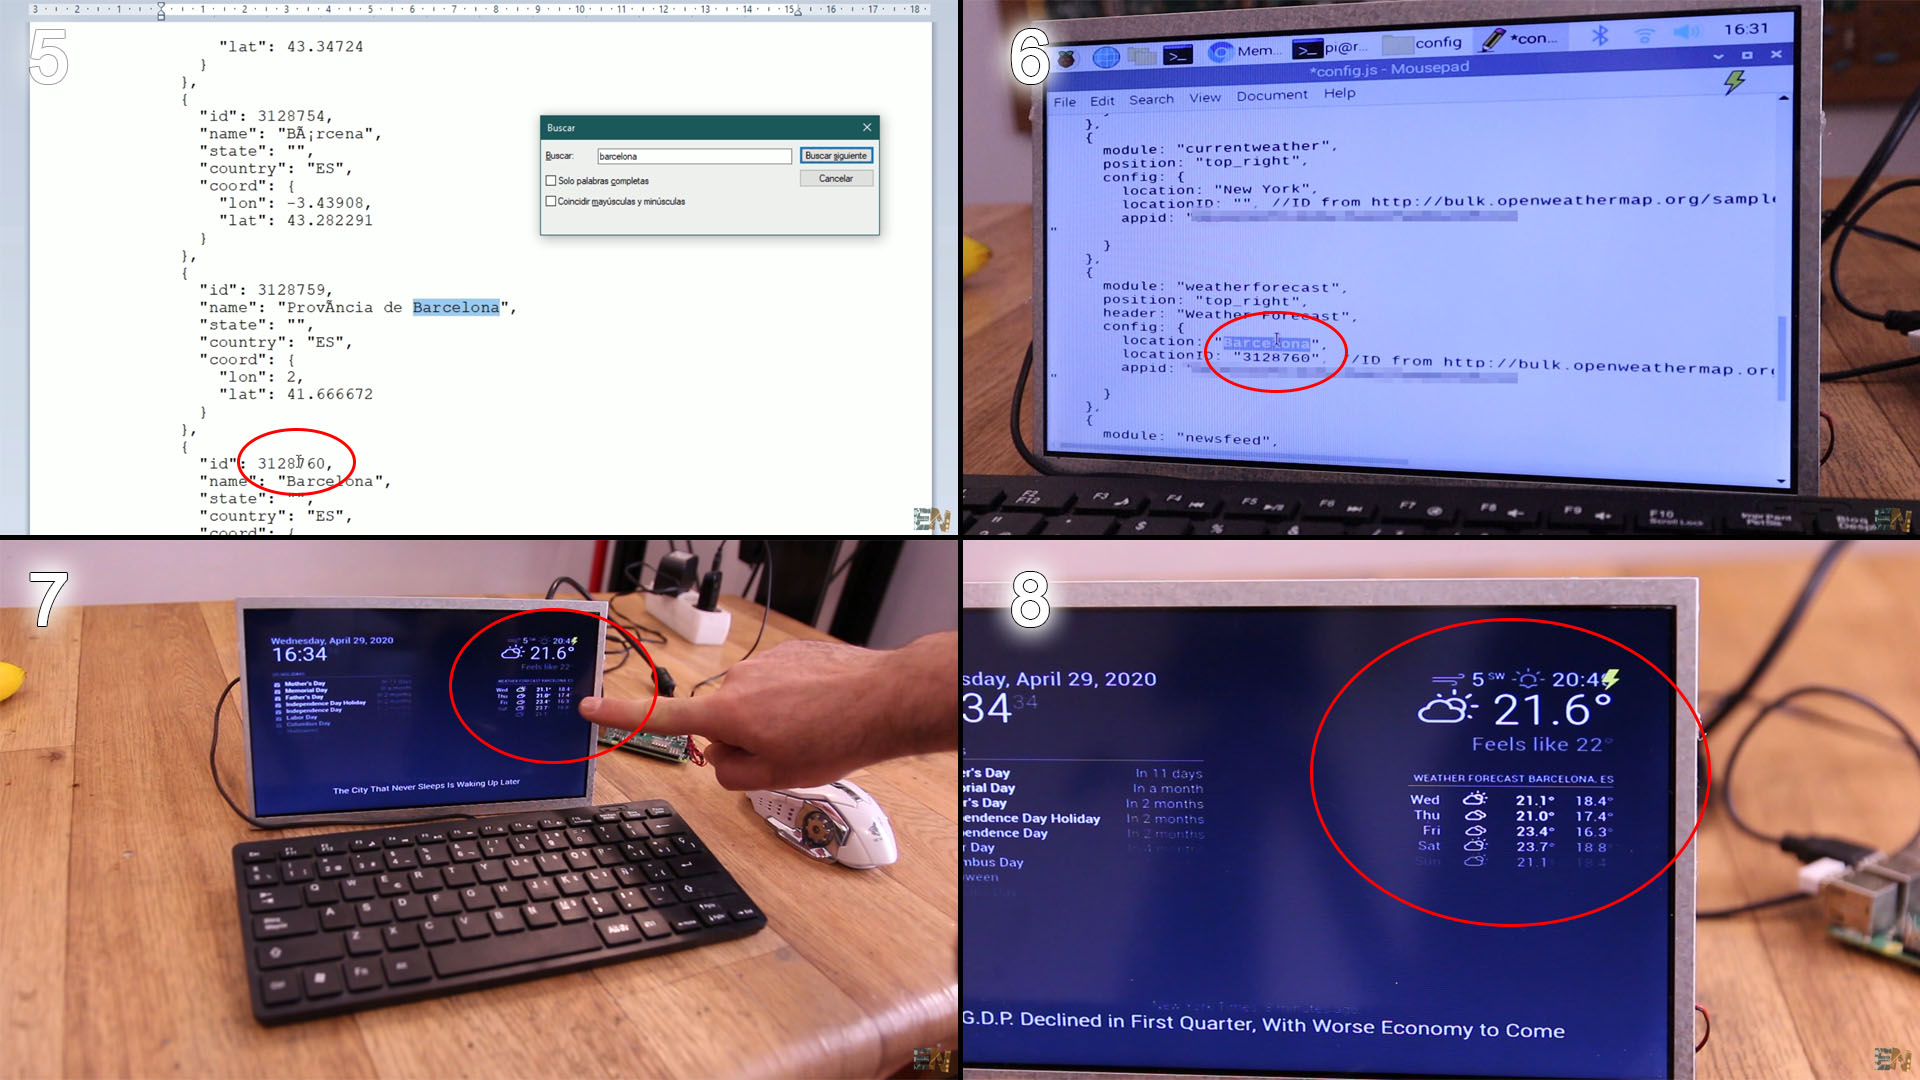
Go to openweathermap.org: https://home.openweathermap.org/api_keys
Below one the City List file and press CTRL+F for Find. 7. Search for your city, in my case Barcelona. 6. Copy the city ID and paste it in the config.json file as you can see below. Now save the file and go back to the termianl and type agin npm start and magic mirror will start but now with your local weather data.
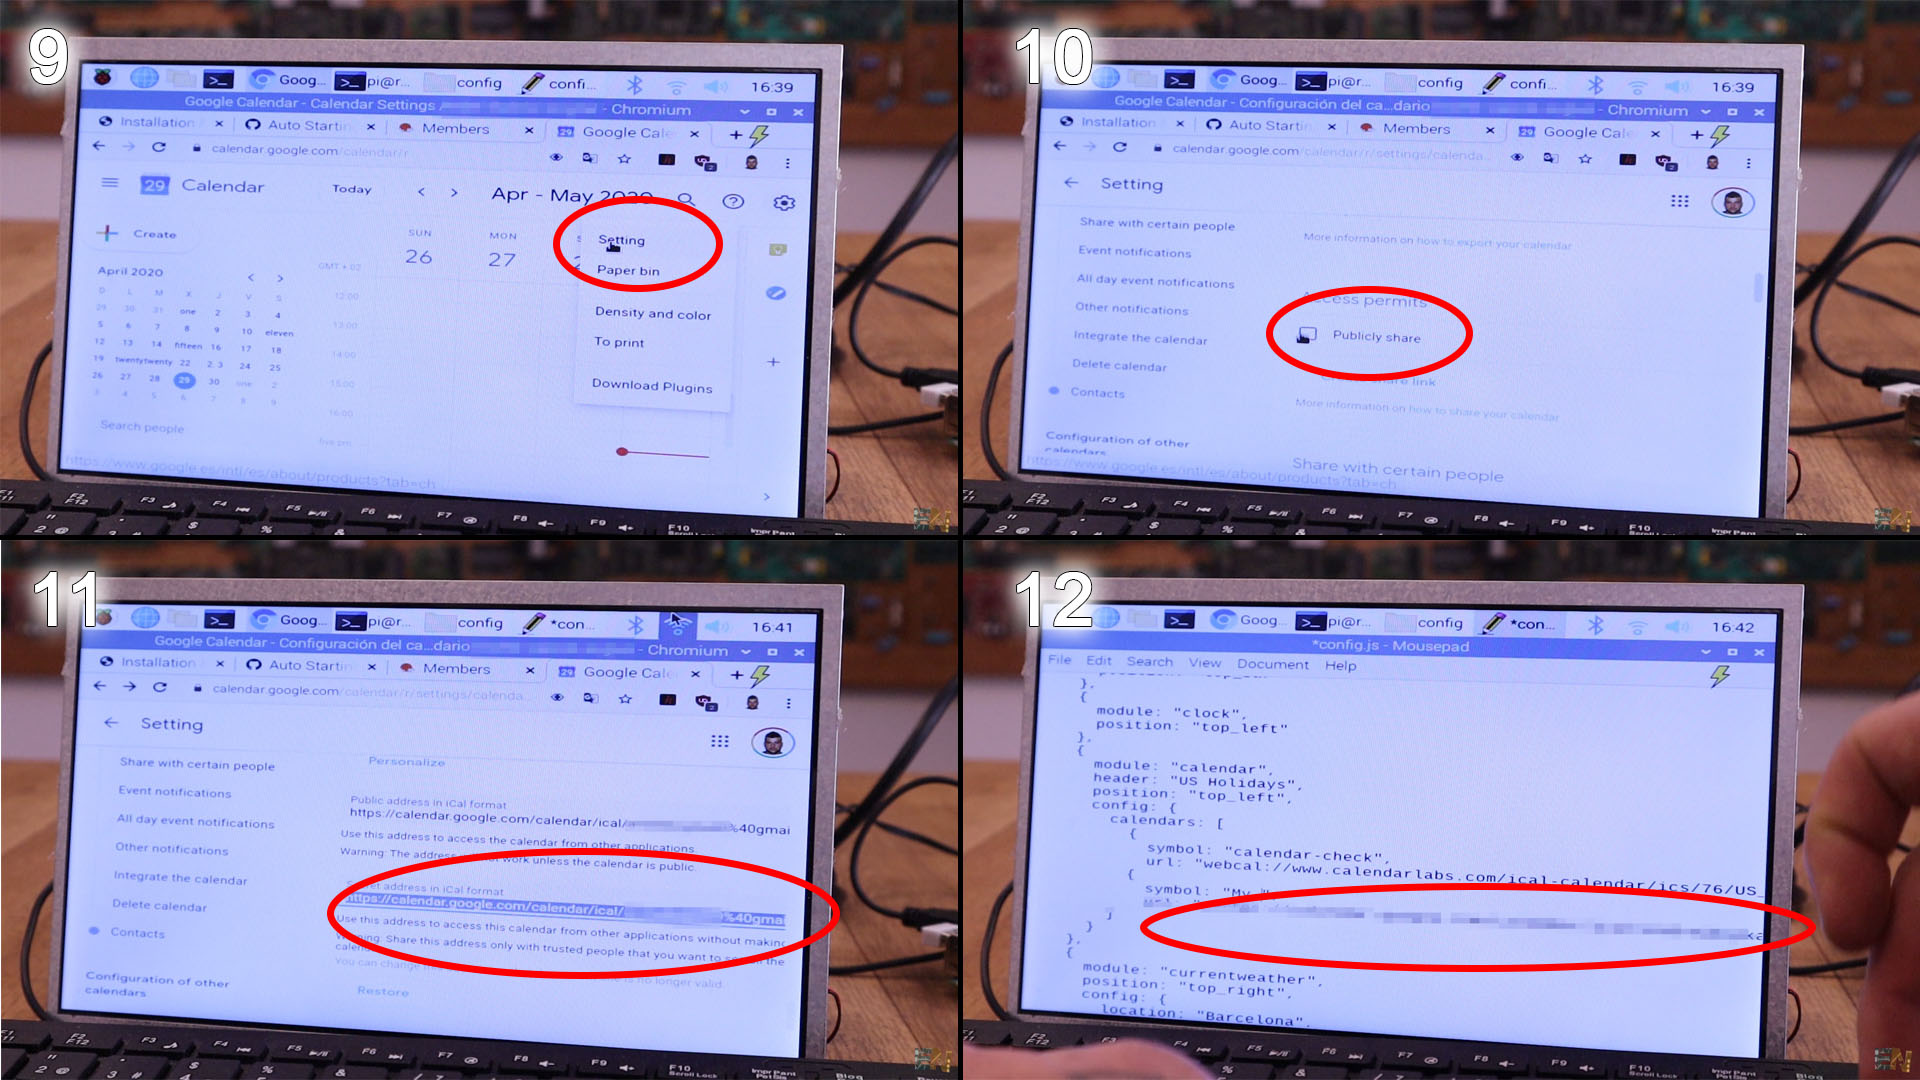
Ok, close Magic Mirror again by pressing ALT and then file, and quit. Open config.json again. We need to add our agenda. For that we need a google calendar account. Go to the link below and if you don't already have a google mail, create a new account. Then go to calendars, 9. click the settings gear and select settings. On the lft side, on my calendars, select your calendar. 10. First enable public share by checking the checkox. Go below on this same apge and 11. copy the public link in an iCal format. 12. Paste that link in the config.json file on the calendar block url. Save the file adn run again magic mirror. Your google calendar should now appear. If you want to also keep the US holiday calendar, just copy adn paste that block in the config.json file.
https://calendar.google.com/calendar
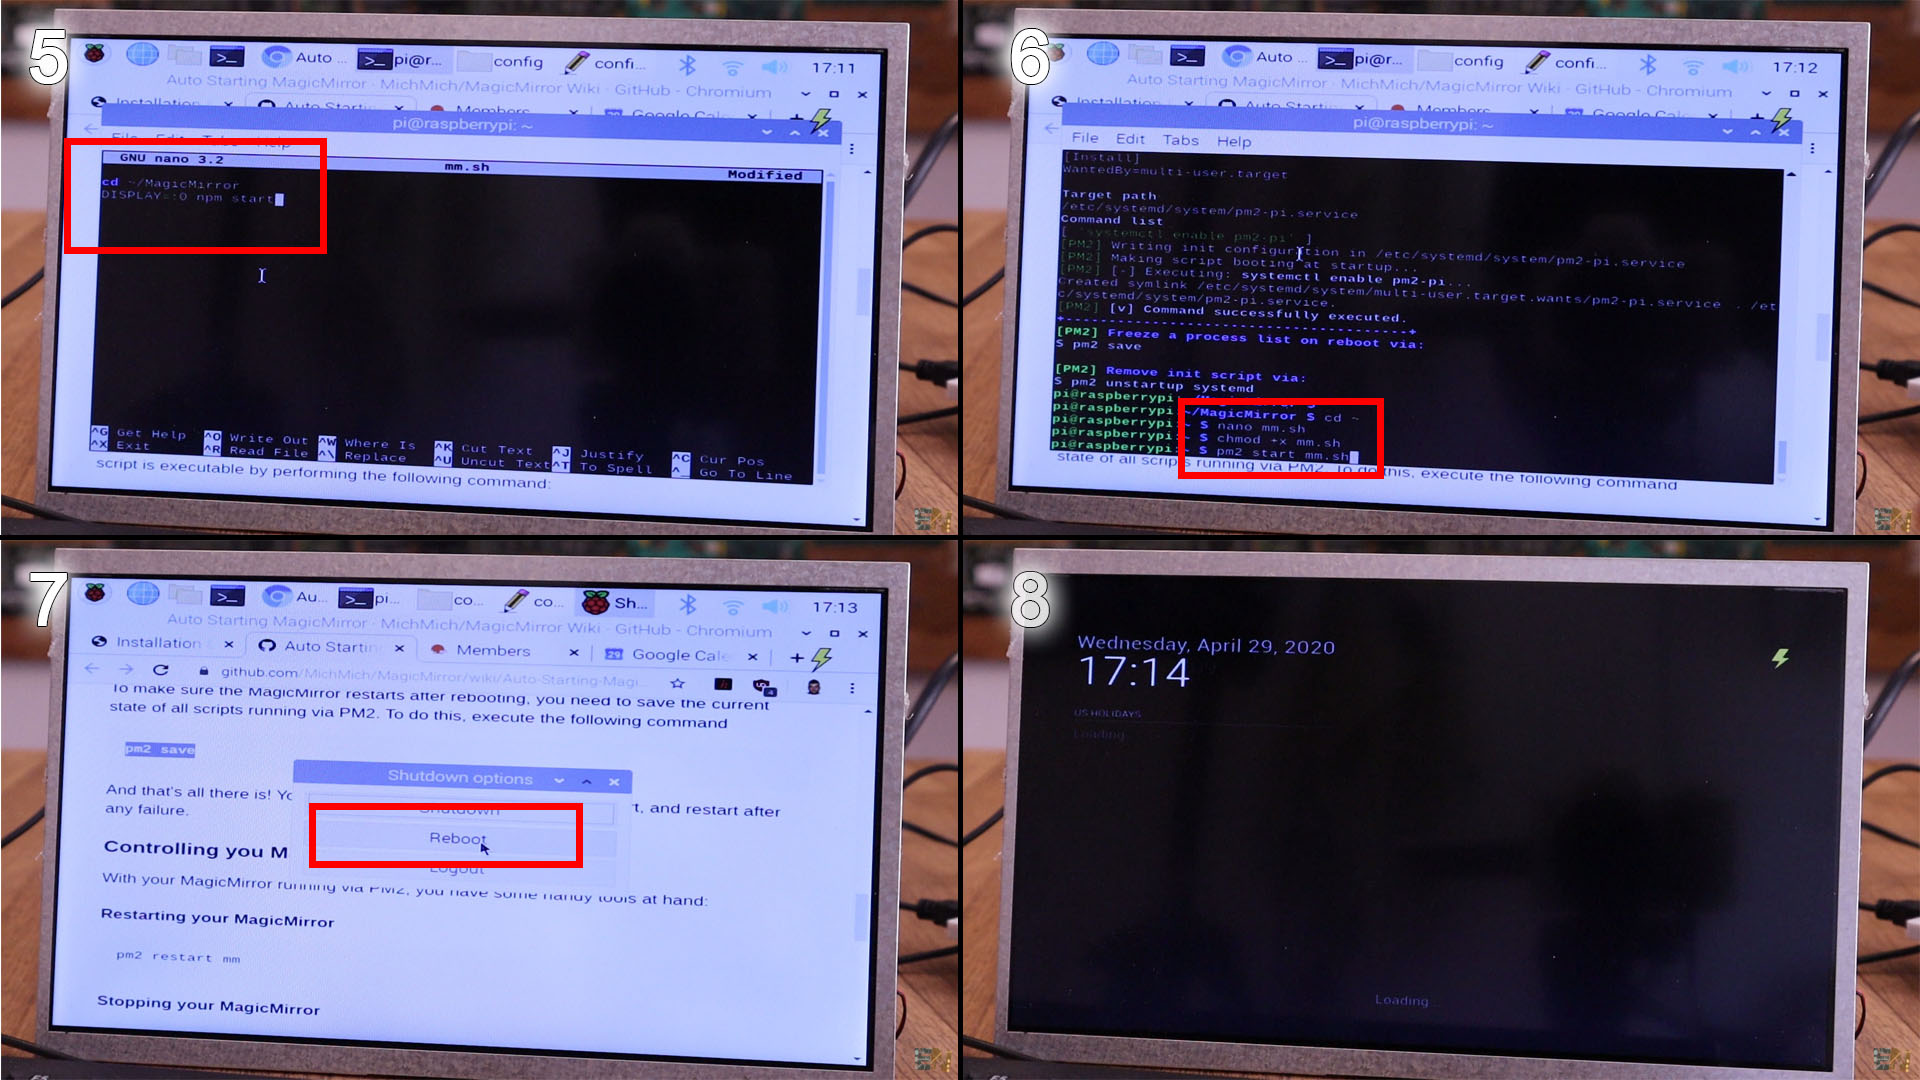
Ok, magic mirror works but we want it to auto start when we reboot the Pi because we won't have the keyboard and mouse. For taht we wull use the PM2 method. So, go back to the terminal and 1. paste the next line and hit enter. That will Install PM2 using NPM.
1.
Then 2. copy the next line and paste it and hit enter.
2.
This action will give you a link to copy and paste. So, 3. copy that link, paste i on the terminal and hit enter. Once that action is ready, 4. copy the next link, paste is and hit enter.
4.1
4.2
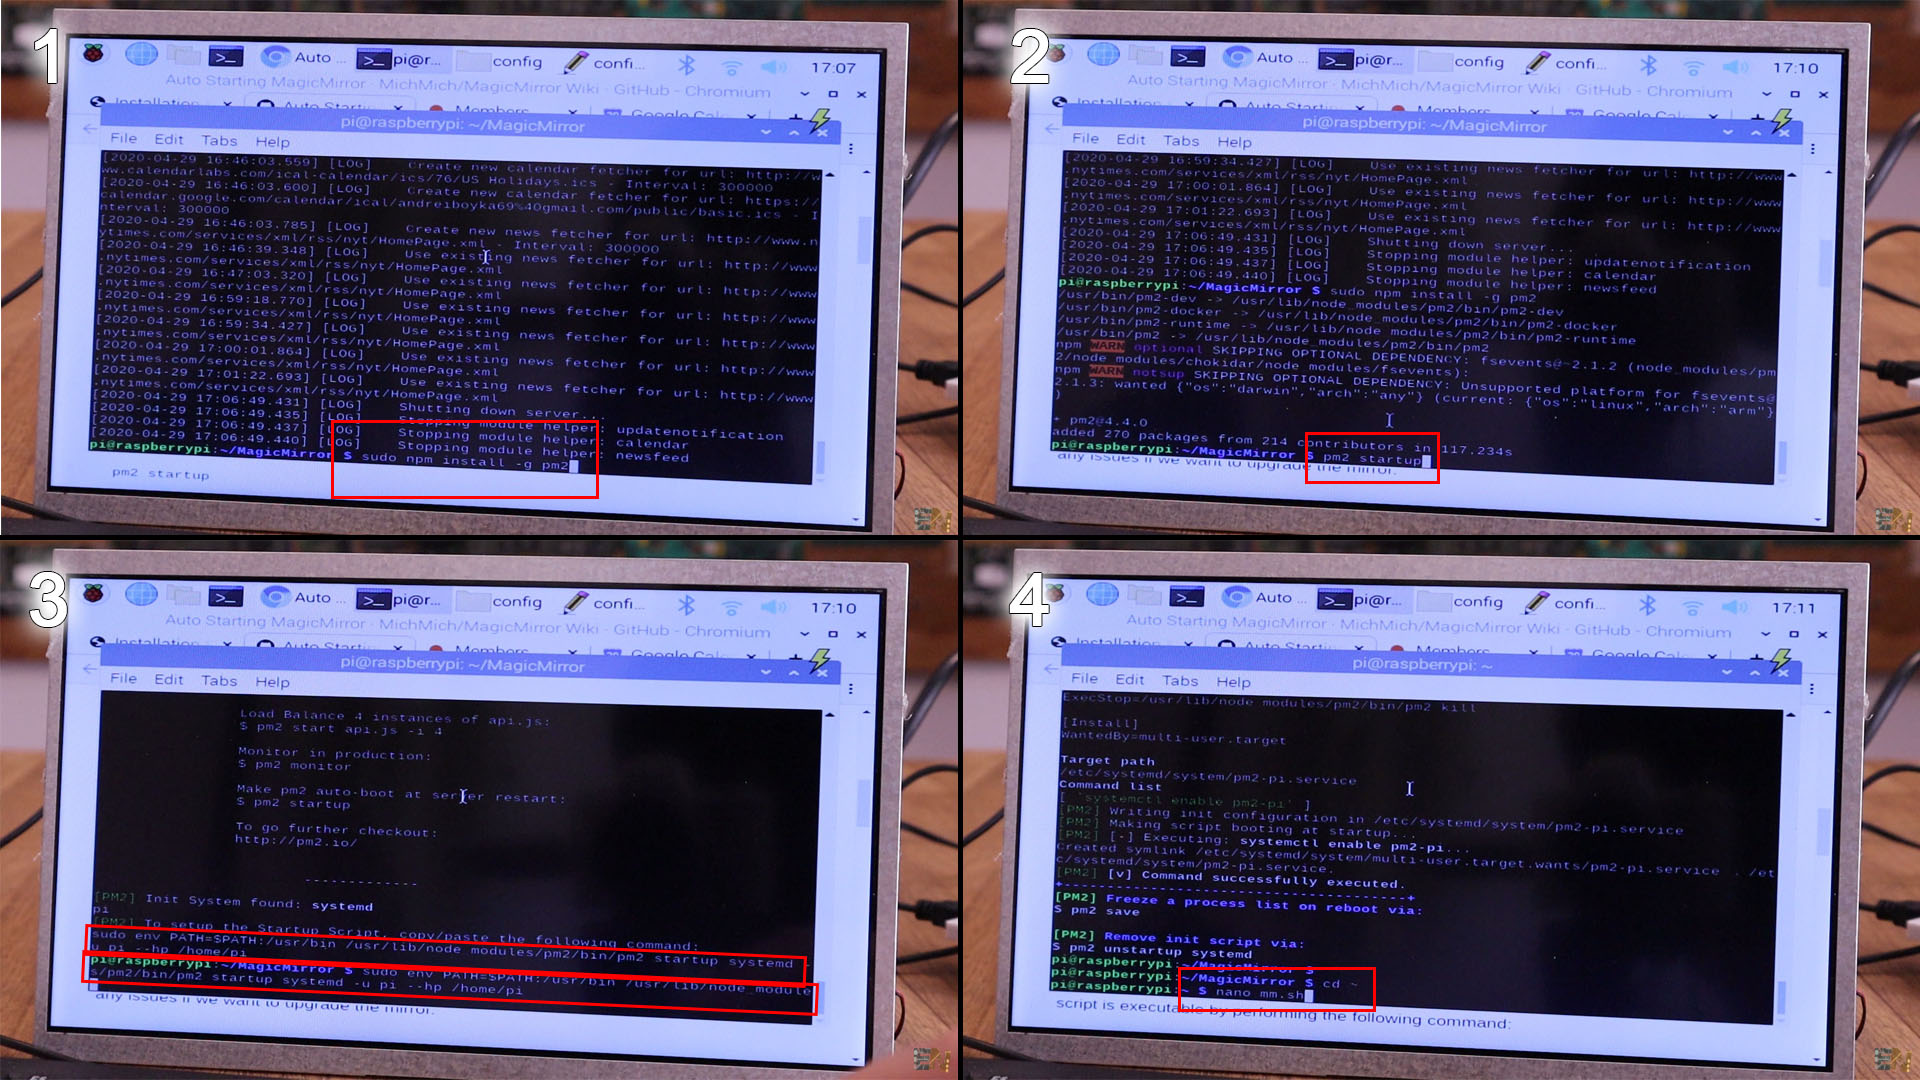
That will open the mm file. In that file 5. copy the next lines and paste it there in the file. To save type CTRL+O and hit enter and then typoe CTRL+X for exit.
5.1
5.2
In the terminal, now 6. copy and paste the next line and hit enter.
6.
Then 7. copy and paste the next line and hit enter. Then copy adn paste the save line adn that's it. Reboot the pi and magic mirror should start automatically after a few seconds.
7.1
7.2
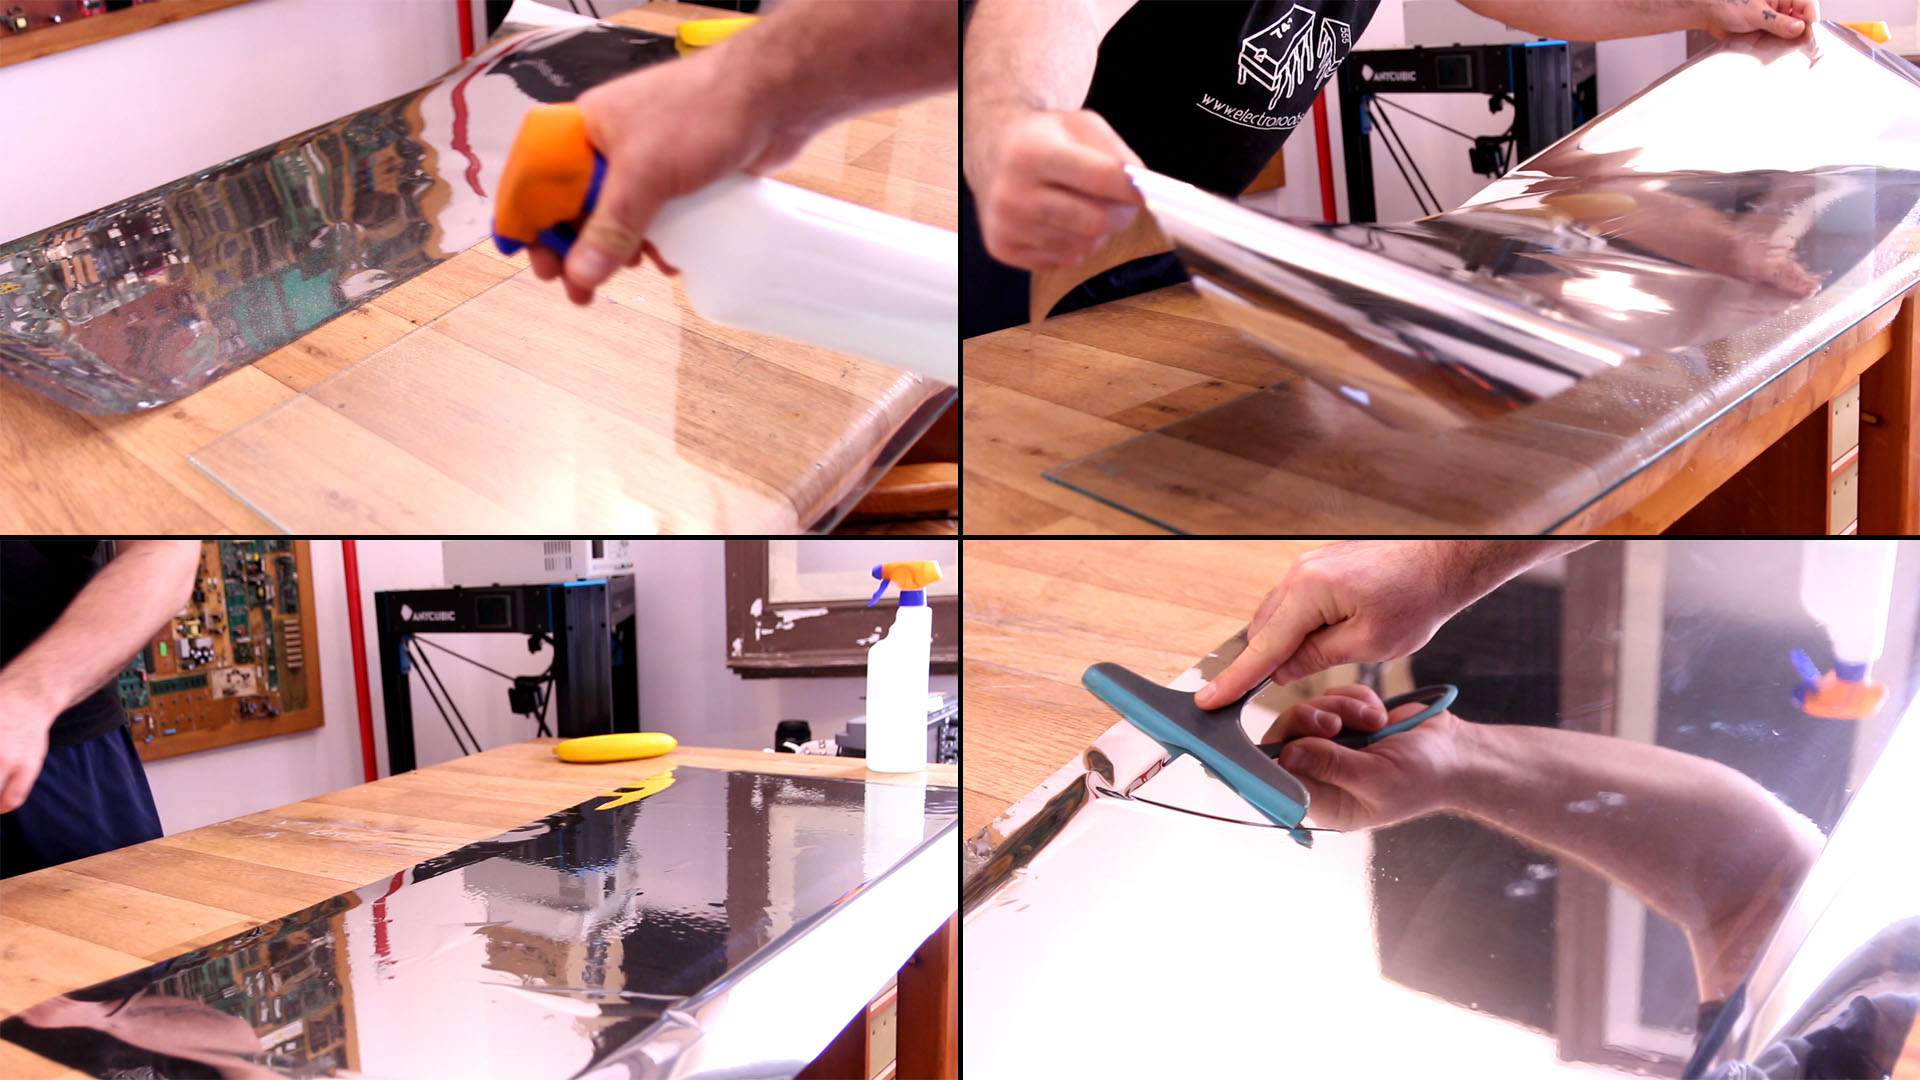
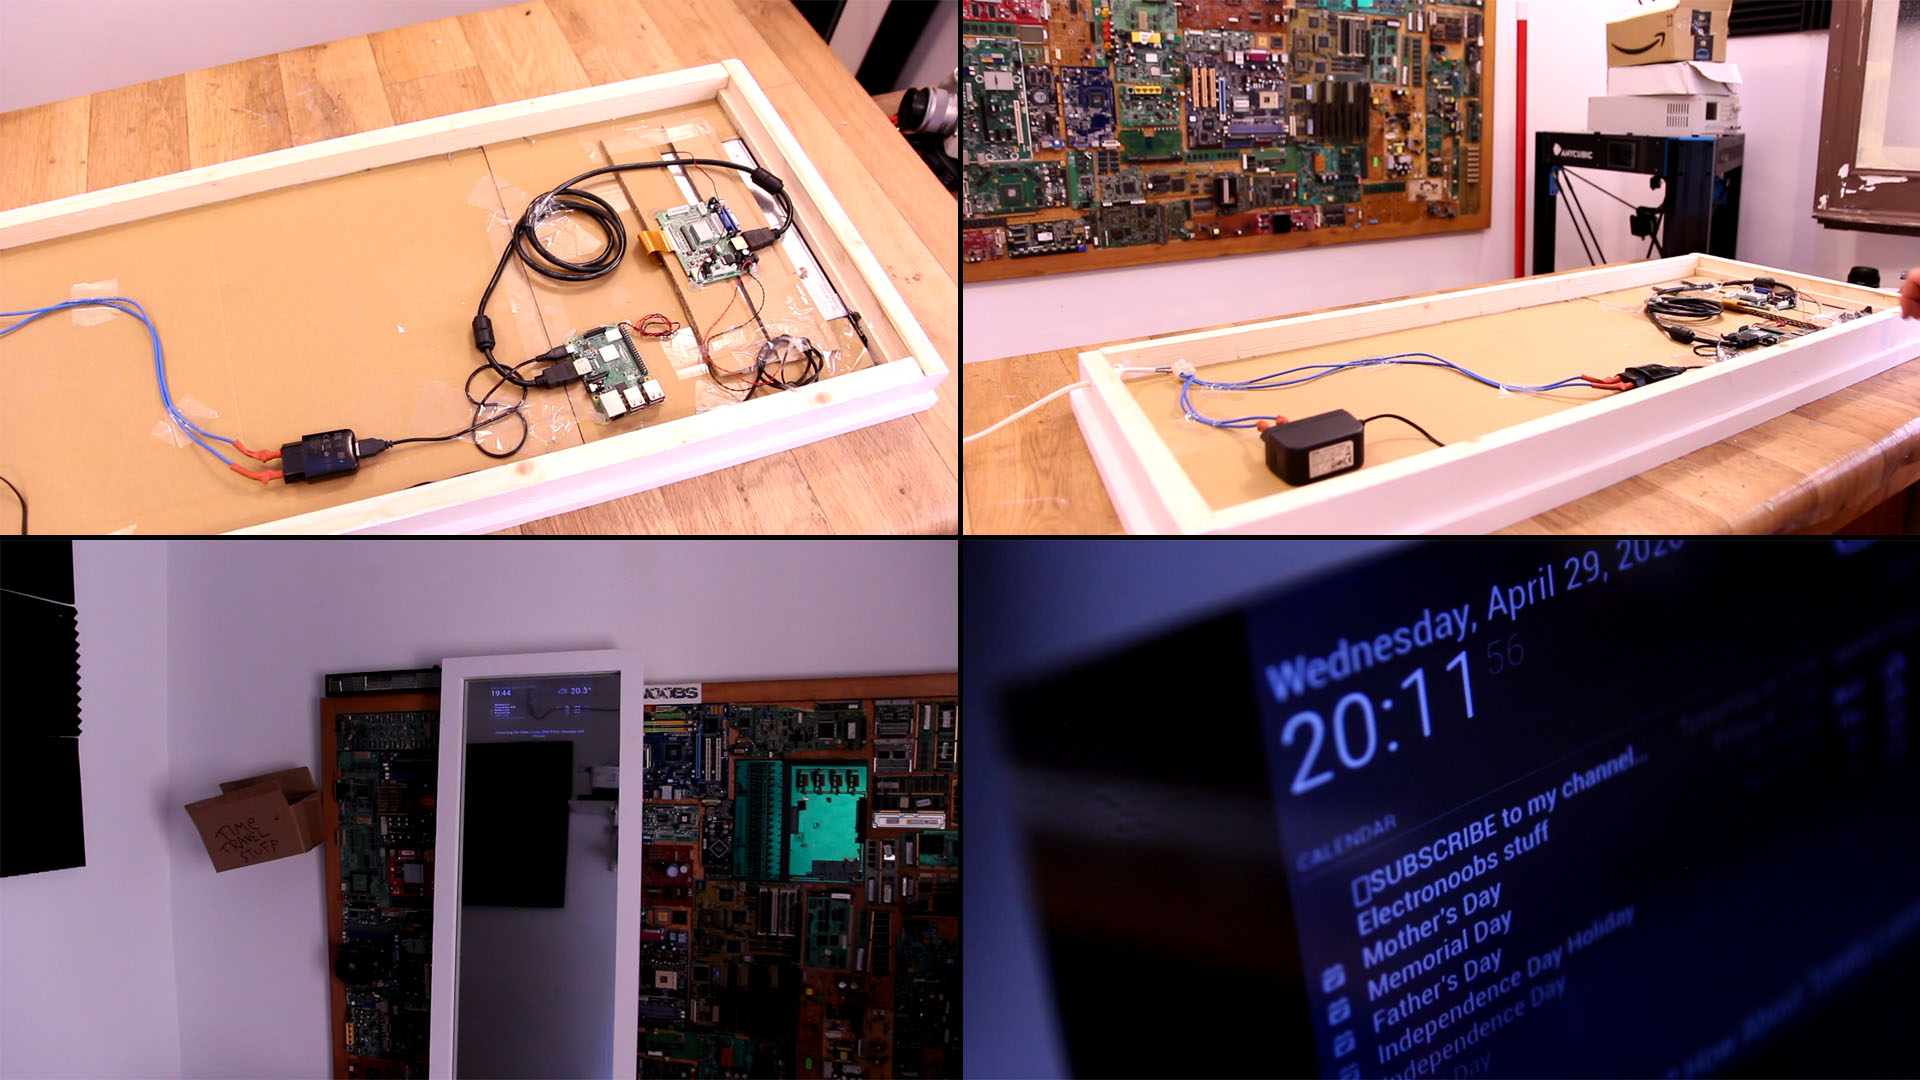
We have the frame and electronics but we don't have the one way glass. For taht get the glass and clean it very, verry well. Apply soap-water over the glass and then peal the sticky sife of the one way film. Glue that film on top of the glass. using a plastic or rubber spatule, remove all the water below the film and make sure there are no more bubbles. Then cut the excess of film and the one way mirror is ready.
Make the border of the screen is a black so it won't reflect any light. Then palce glass inside the frame and using the 20x20mm wood fix it in palce with nails. Over the glass place the screen. In my case I want it on the top of the mirror. Cut some cardboard and fill the rest of the space. Take out the cardboard and paint it black. Palce it back adn then decide where to place the electronics. make the connections and that's it. Pass a wire through the frame and connect it to the power adaptors of 12 and 5V.
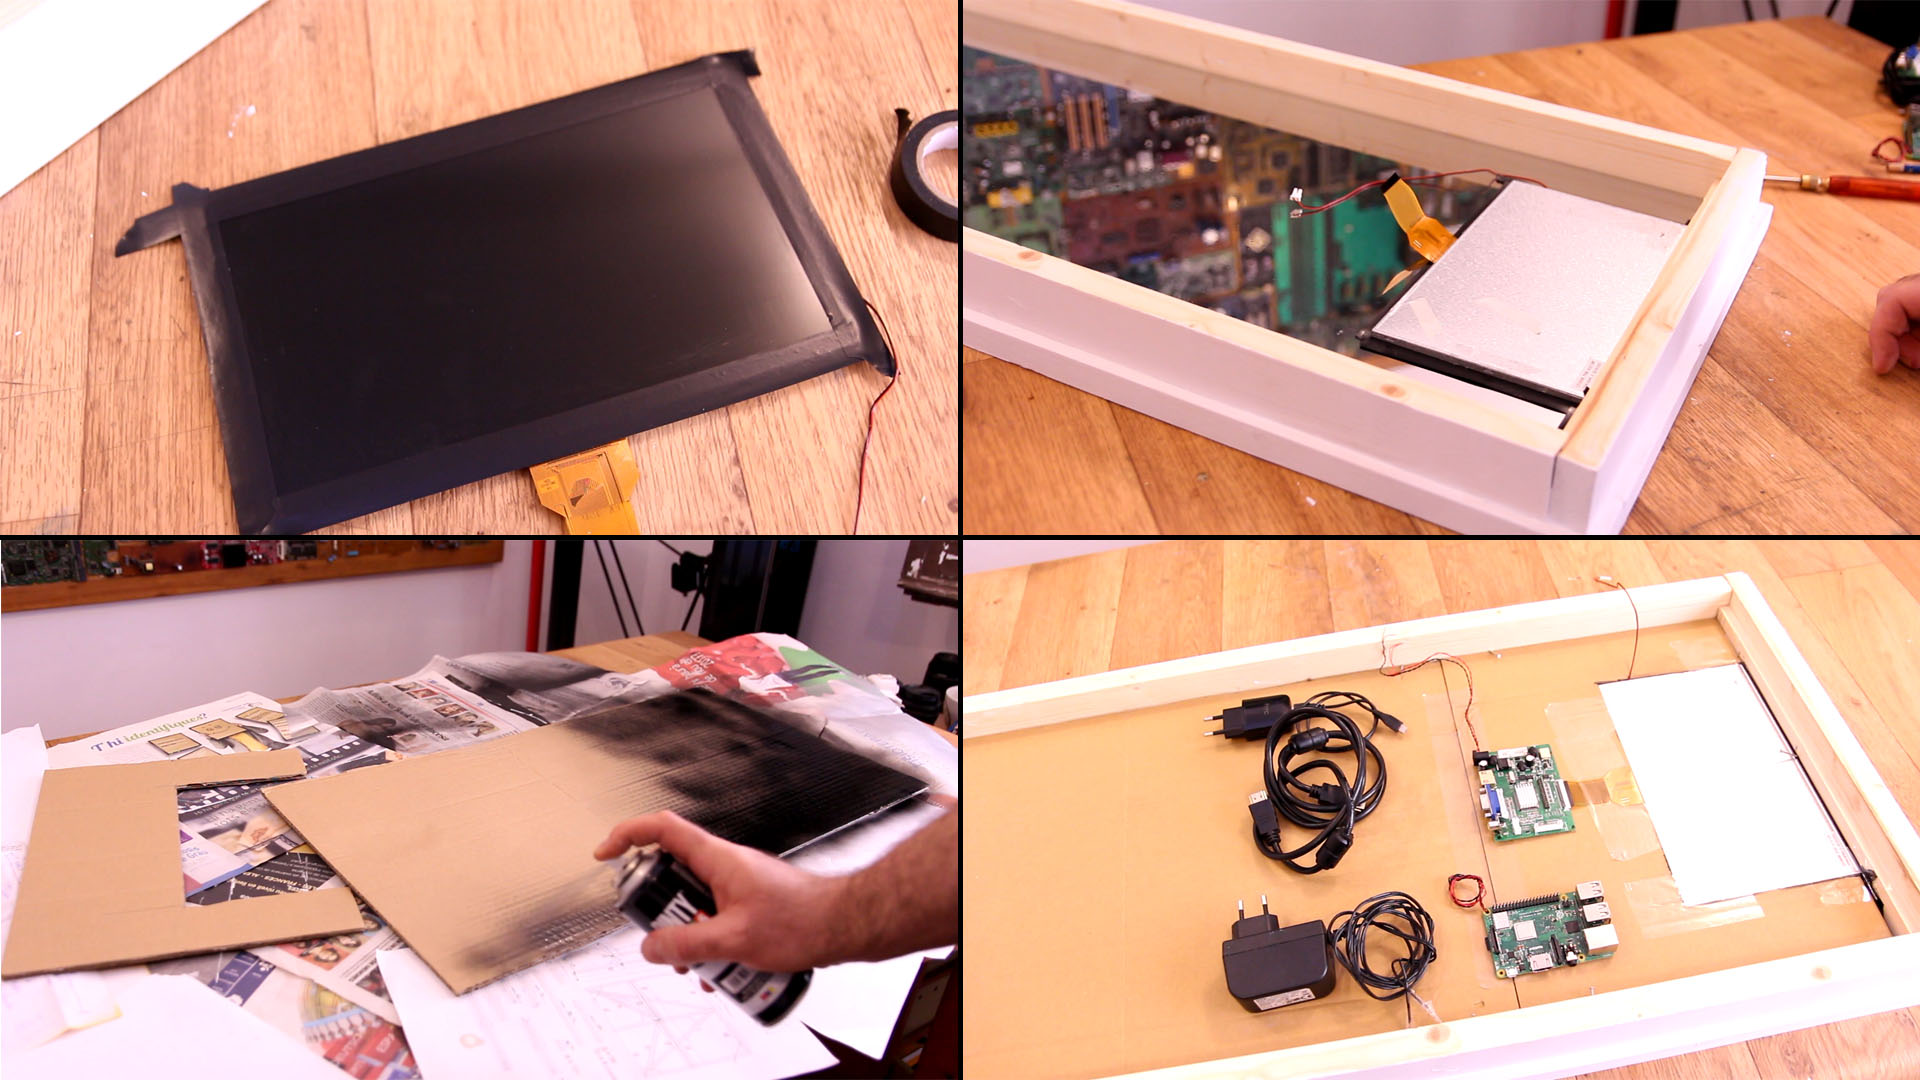
I use glue, tape and zip ties adn fix everything in place. Flip the mirror, connect it to 220V and observe the magic. See more details on the original creators page here https://docs.magicmirror.builders/getting-started/configuration.html.
See the full video tutorial below. If you want to support me, consider my PATREON page or if you want, consider helping me on PayPal. I hope this project will help you and teach you something new. Thanks again!


