
 About me
  History
  Let's learn
  Contact us
  Arduino tutorials
 Circuits tutorials
  Robotics tutorials
 Q&A
Q&A Blog
Blog  Arduino
  Circuits
 Robotics
  Modules
  Gadgets
  Printers
  Materials
  3D objects
  3D edit
  Donate
  Reviews
  Advertising


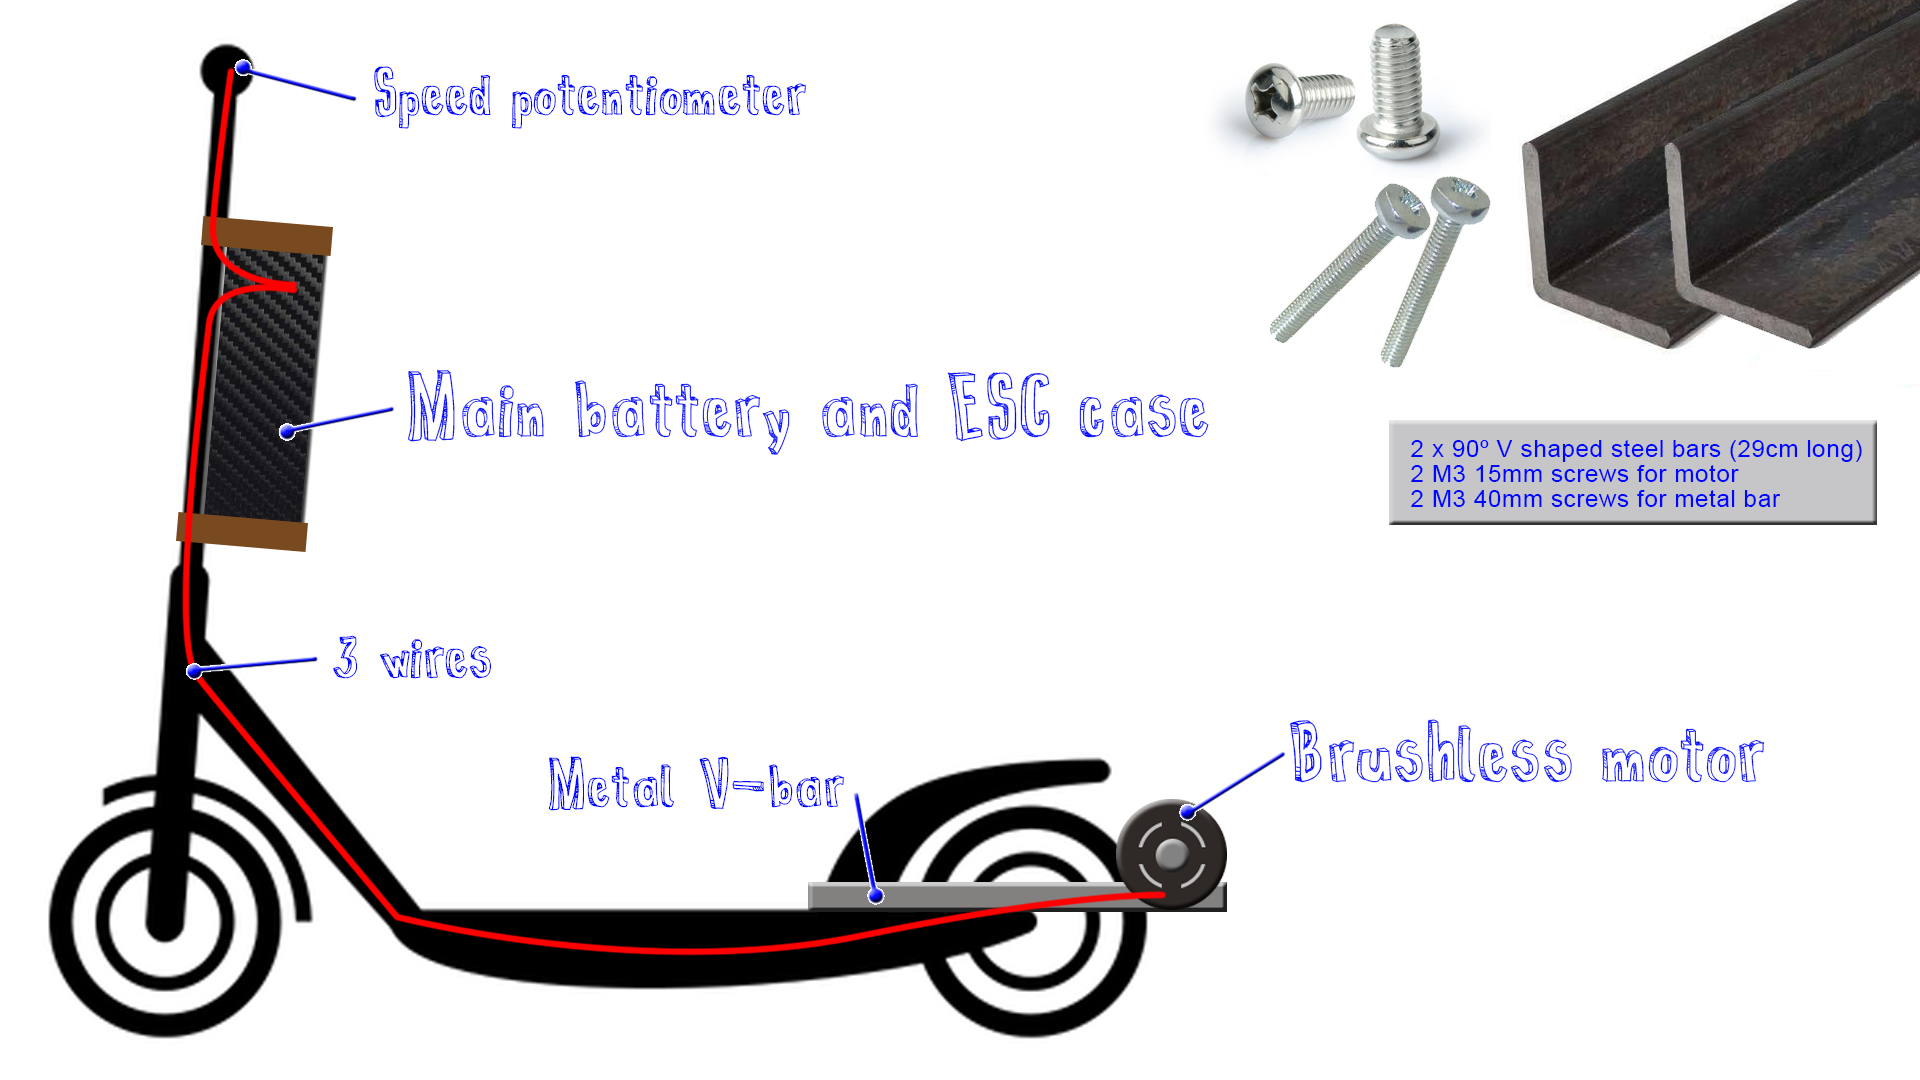
Homemade electric scooter
In this part we will mount the metal body that will support the brushless motor. We will also talk about the pulley system and how the one way bearing works. Make sure you read all the steps and all downlaod all the files that you need. Thank you.
3. Building the support
Ok, the most difficult part of this project is to fit the motor next to the wheel and make sure that there will be a good connection between the wheel and the 3D plastic pulley. So I first cut a 90 degreee V-shaped steel bar 29cm long. I make two wide holes in that bar so I could later move the abr close or farther from the scooter body in order to perfectly fit the pulley on to the wheel.
Ok now I fit the bar on the scooter body adn drill the two holes in to the scooter body. Once I do that I measure the distance where I have to screw in place the brushless motor. I drill holes for that as well and screw the motor in place. Make sure the metal bar won't touch the motor shaft.


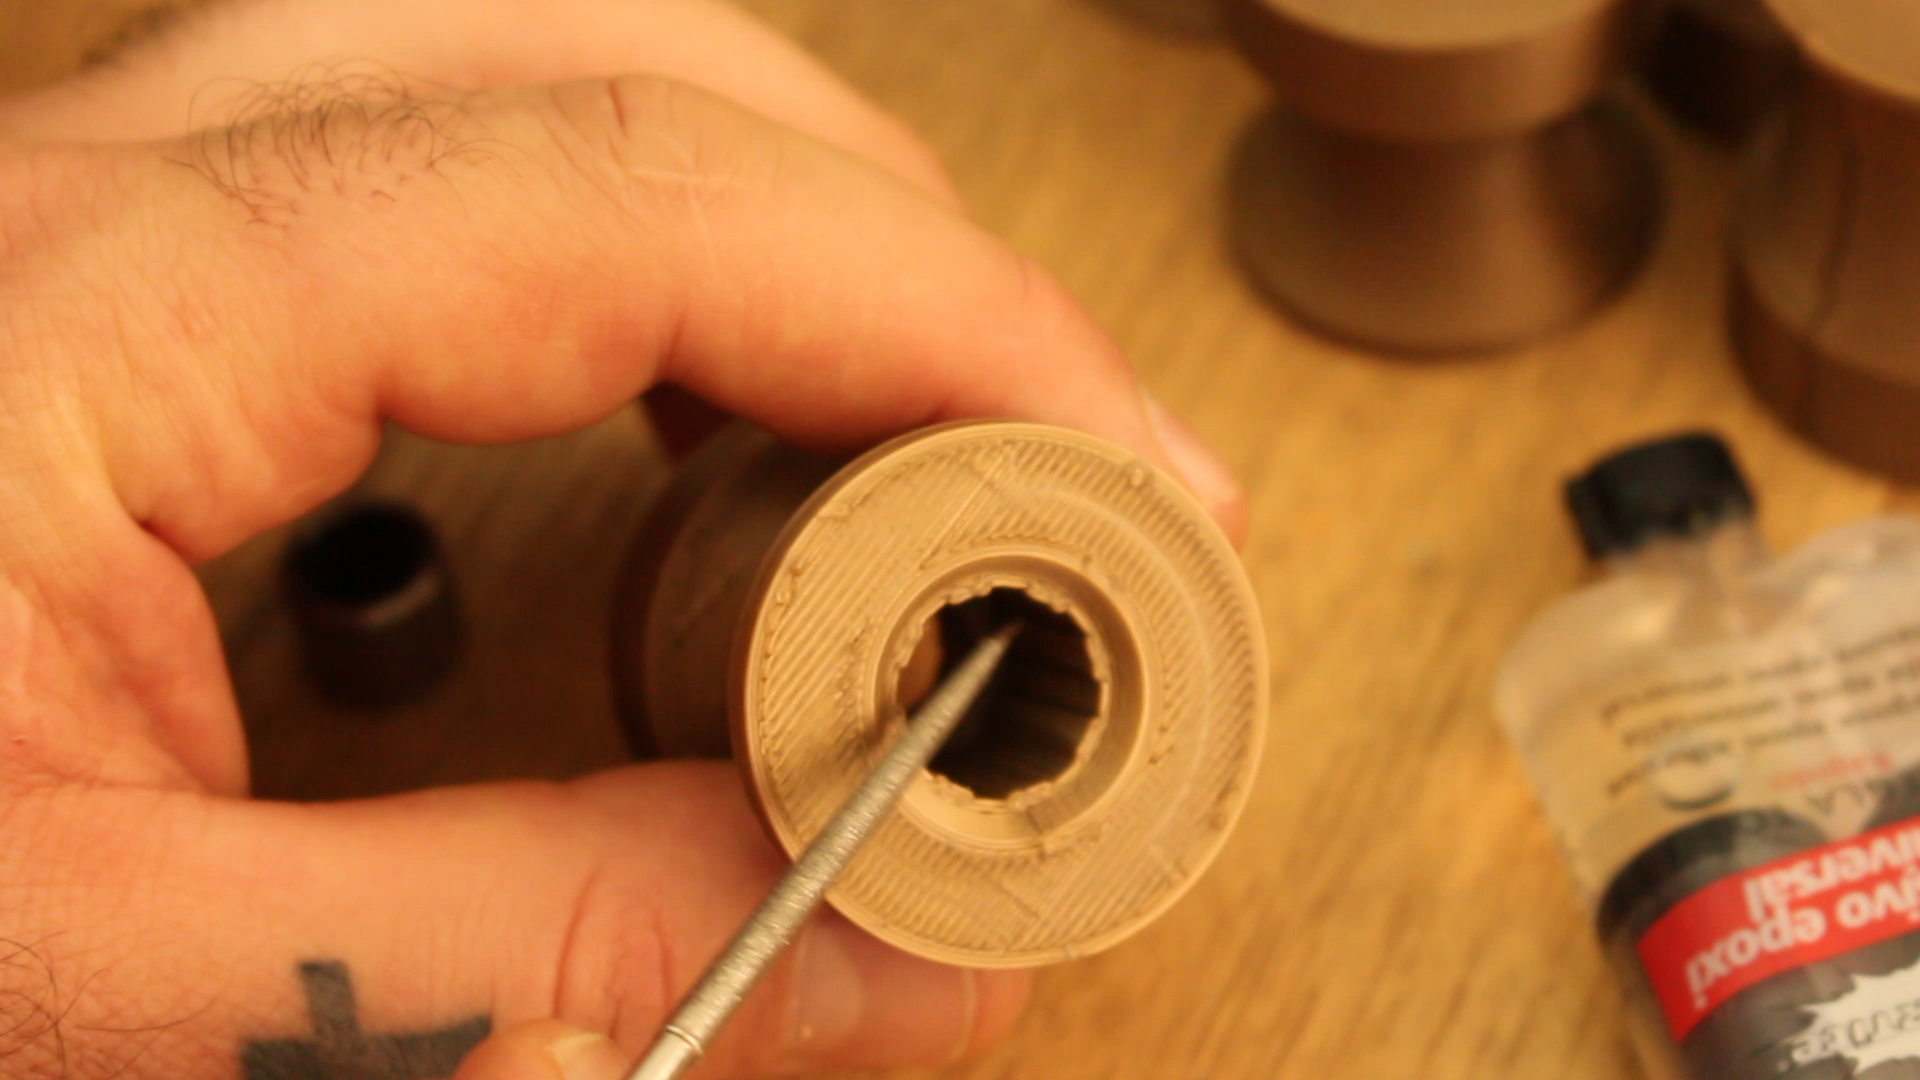
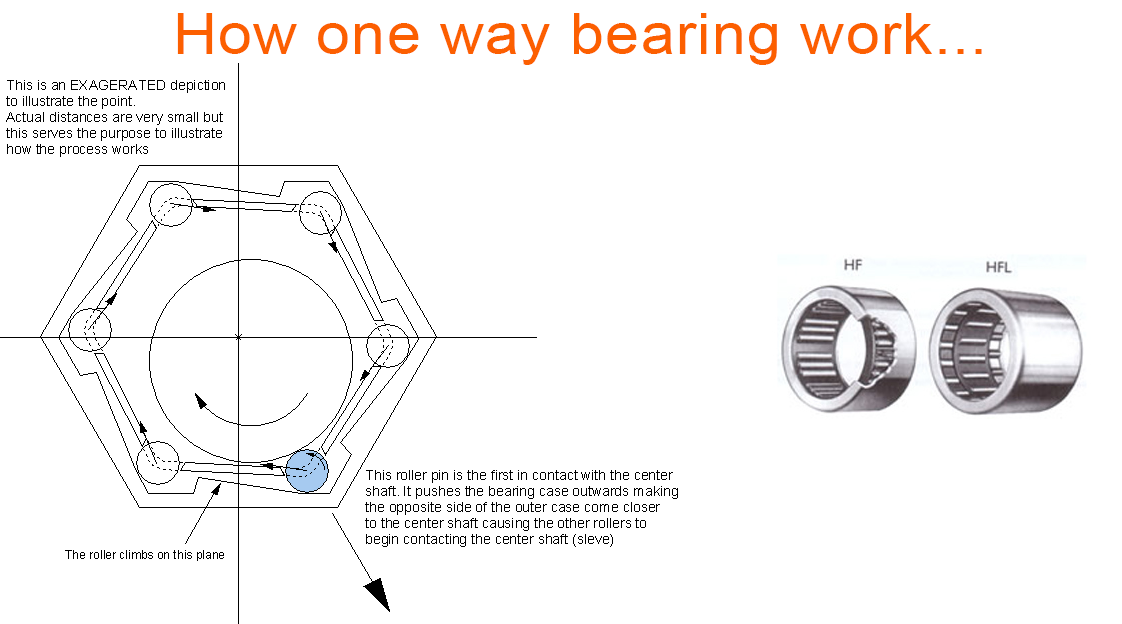
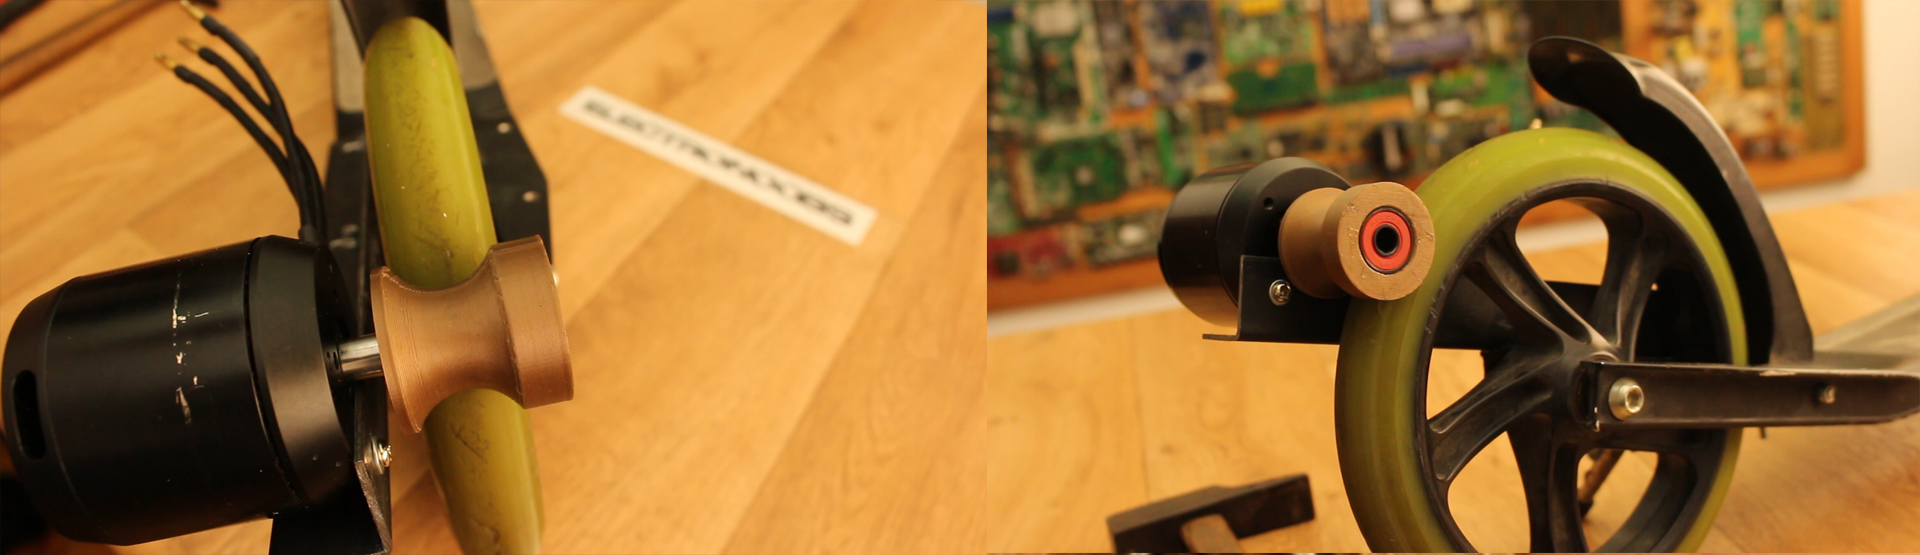
Ok now let's talk about the pùlley. The pulley has to be centered with the wheel so the curved shape will fit perfectly. On one side we have a normal bearing that could rotate in both ways. On the other side we have two one way berings that will act like a clutch. Since those bearings are round shaped, we should use double component epoxy and glue those inside of the pulley. As you can see in the picture below, the bearing hole of the pulley has some vertical bars in order to improve the glue effect.
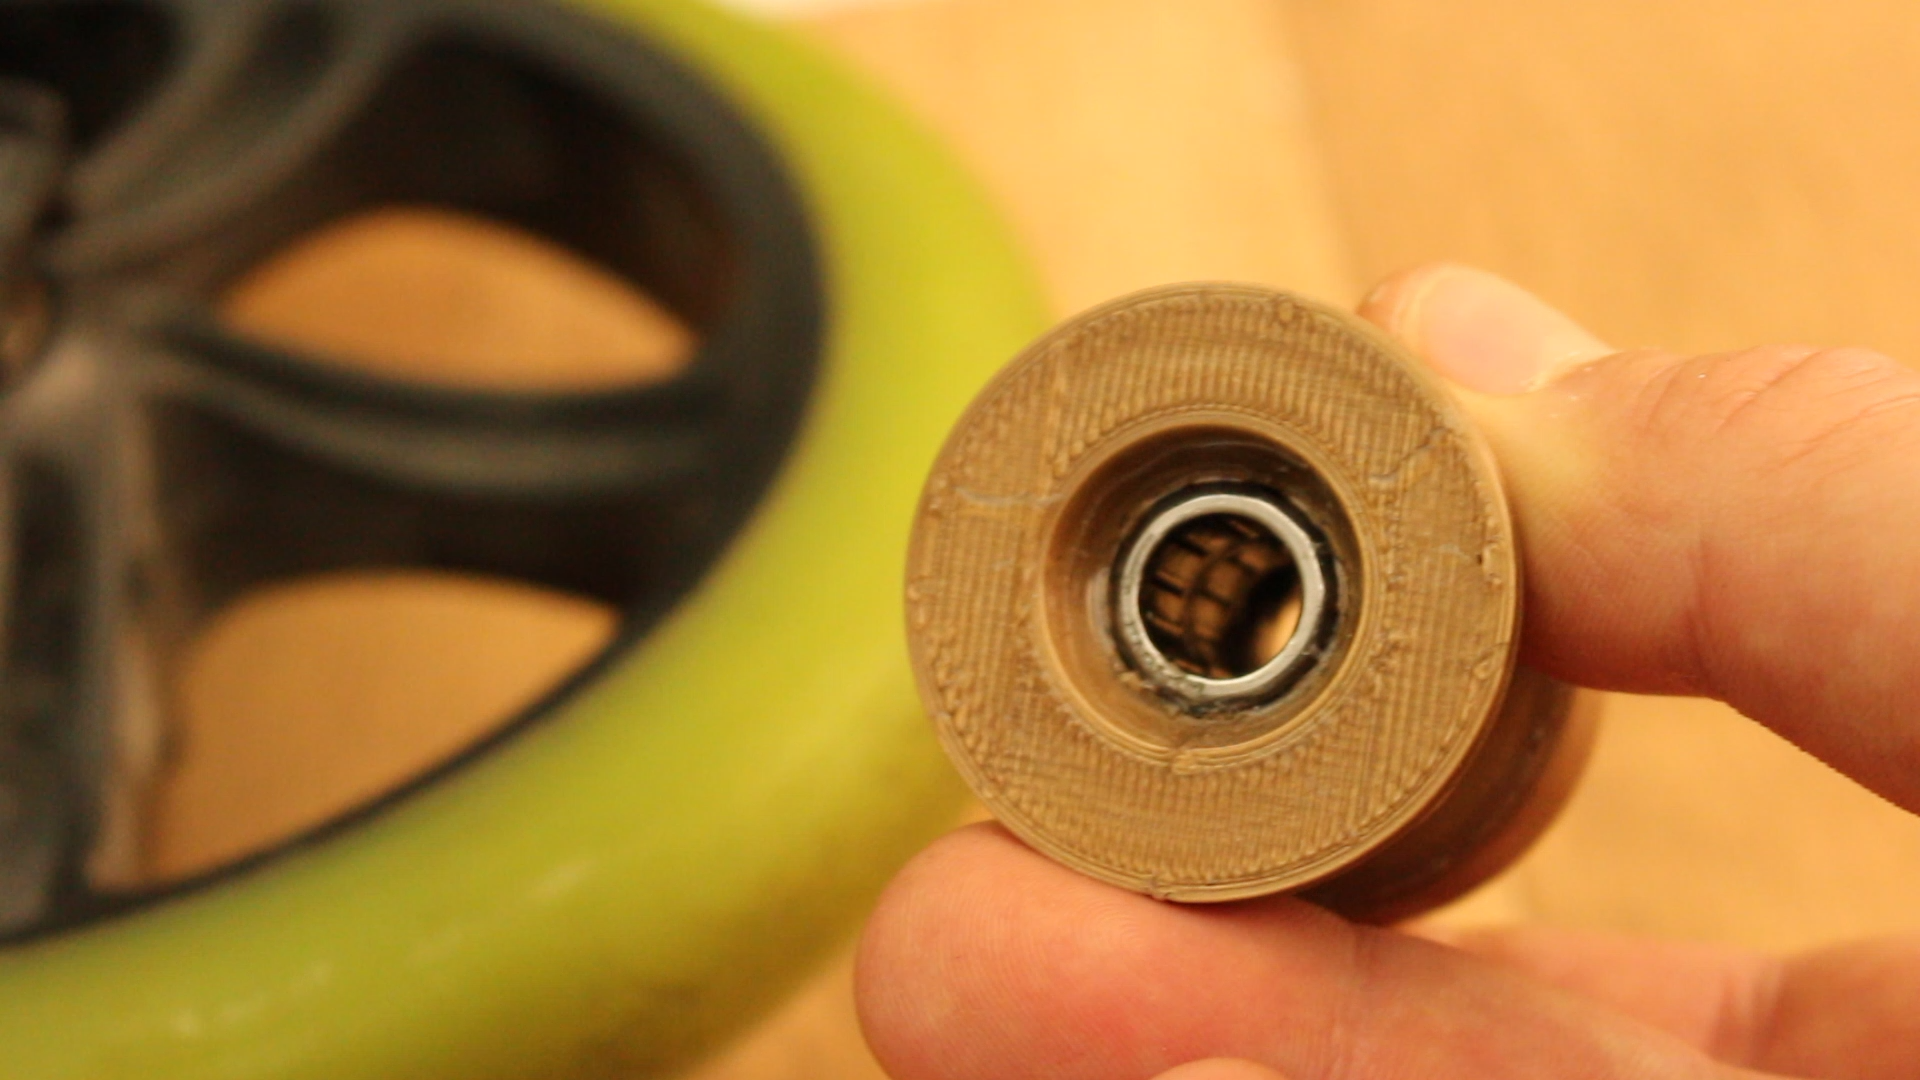
I make sure the bearing spin direction is correct and I glue the bearings inside of the pulley using double component EPOXY and now that the pulley is prepared, we should fit it on the 1cm diameter shaft of the motor. Now the system is ready. On the other side of the pully we have a normal 22mm bearing so if you think is necesary add the second V-shaped metal bar on to the other side with a screw that will fit inside of the 22mm bearing. This second bar is optional since the curved shape of the pully won't let it get out if it's well presed agains the wheel.
So add the pulley and put it a little bit on top of the wheel and now tight the metal bar screws so it will get pressed against the wheel. You could also use a small hammer and press it a bit more before tighting the screws. The pully has to be not to tight but not to loose neiter.
Ok, no the most difficult part is done. We have the motor in place. Using your hand test if the motor could spin freely in the oposite direction and if it will apply force to the wheel in the good direction. That's the point of using a one way bearing. So the motor won't create backward voltage while you are not accelerating.
Now let's see the final aprt where we will join all the electronics together and fit everything in the main battery case that we will build as here. Also check the full part list below in order to know what you'll need for the next part.
Full part list here: