
 About me
  History
  Let's learn
  Contact us
  Arduino tutorials
 Circuits tutorials
  Robotics tutorials
 Q&A
Q&A Blog
Blog  Arduino
  Circuits
 Robotics
  Modules
  Gadgets
  Printers
  Materials
  3D objects
  3D edit
  Donate
  Reviews
  Advertising


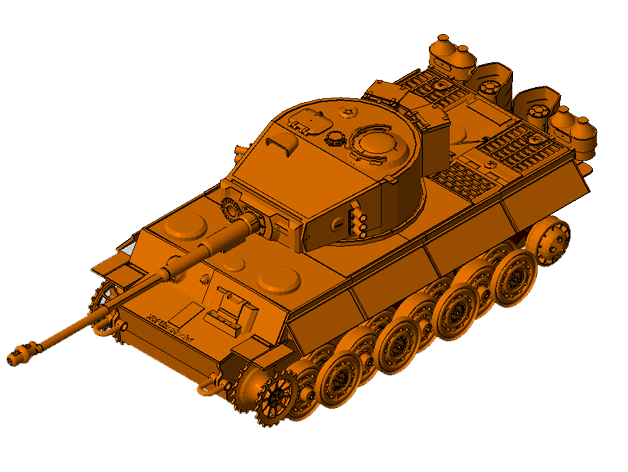
3D Tiger 1
In the next table you can see the main parts of the 3D printed Tiger 1. Each of those main parts is composed by a lot of other parts. You can download all the STL parts in the downloading page. Extract the zip file and open each of the subfolders. You will find 5 parts. The main bottom base box, the top frame, the turret and cannon, the track system and finally a folder with all te remaining details.
| PHOTO | DESCRIPTION | QUANTITY | MATERIAL | COMMENTS |
|
Tiger 1 full body | 1 | PLA | An example of the final full construction |
|
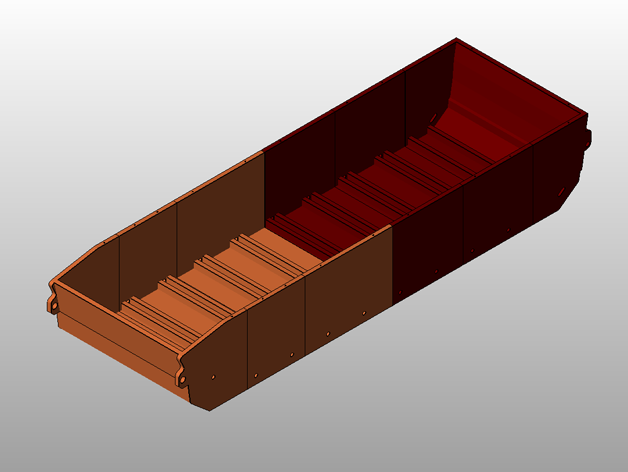
Bottom base | 1 | wood | Main bottom base. It's the only part made of wood. |
|
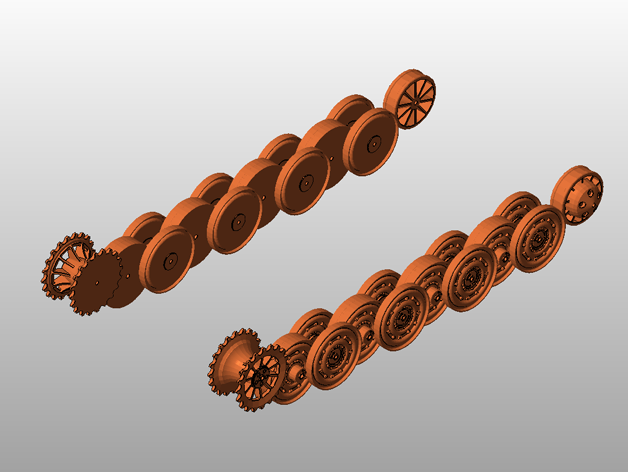
Track system | 1 | PLA | All the weels from the track system. All parts are printed separately |
|
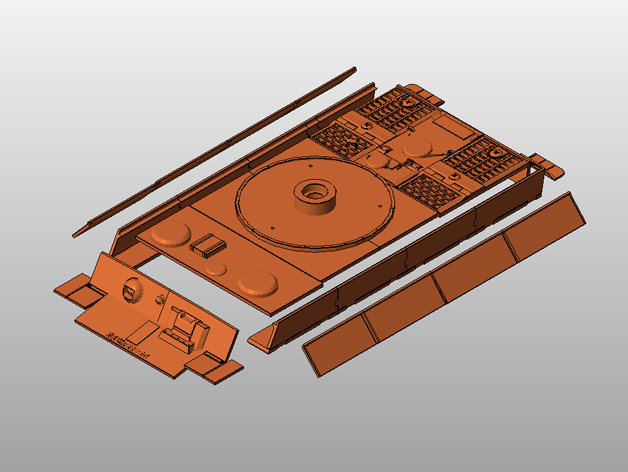
Top frame | 1 | PLA | All the parts from the top frame. Print them separately. Some details are missing. |
|
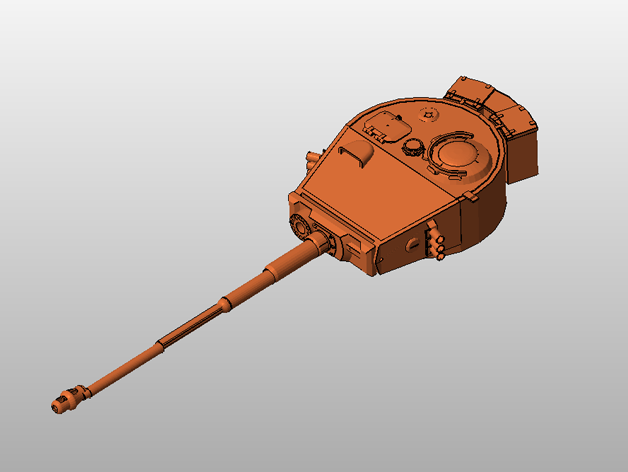
Turret and cannon | 1 | PLA | All the turret and cannon files. There are more parts inside, be carefoul! |
|
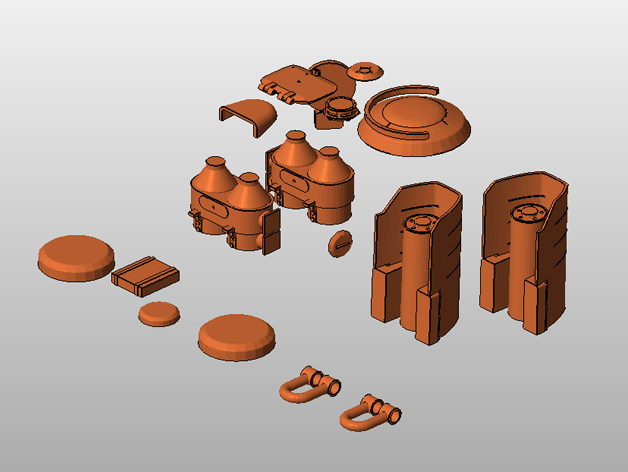
Details | 1 | PLA | Some of the details files. There are a lot more! |
Bottom base
We will start by mounting the bottom base. This part is made of wood because it has to be strong and it is very big to print. If you go to the Bottom base folder you will find all the dimensions that you need in order to cut some wood board. I've used a 3mm thick wood board. I've printed the dimensions image to some A4 papers and glue them to a wood board and start cutting.
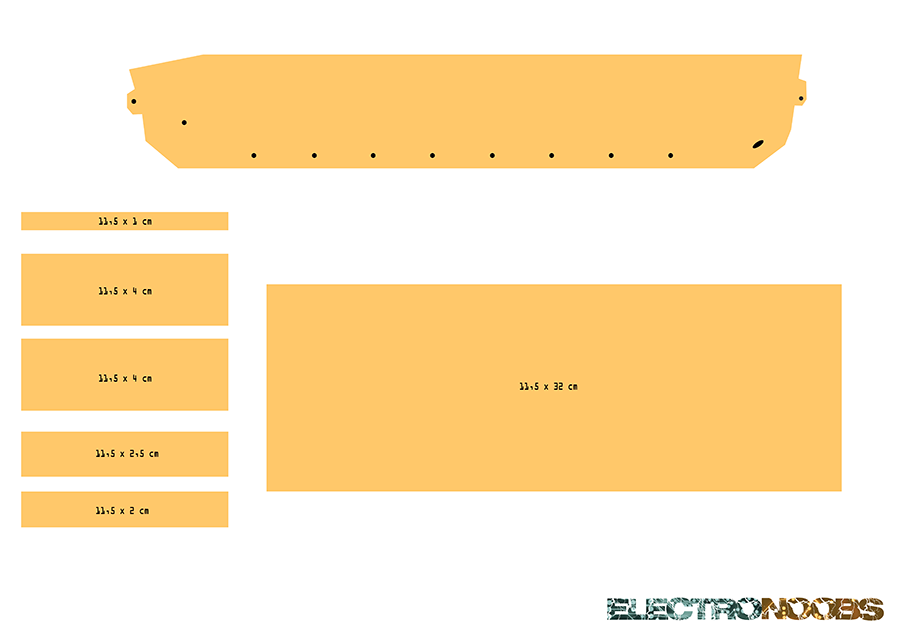
Download the A3 diensions
Print the A4 or A3 paper. Glue it to the wood board and cut the parts and drill all the holes. You can also slice the "bottom base" stl part from the bottom base folder and print it one by one but that won't give you a strong base.
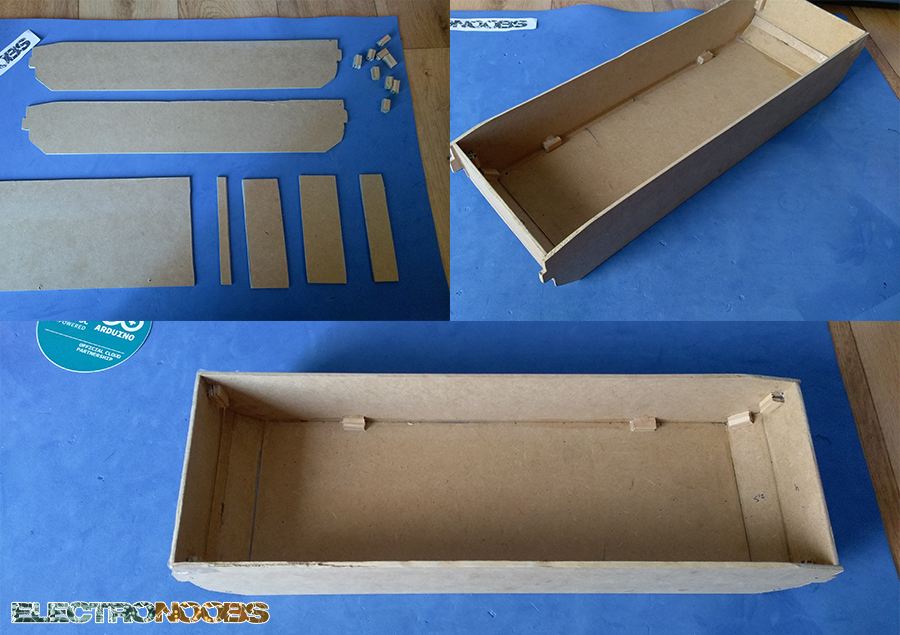
Add some wood cubes to ensure that you will have 90 degree angles between the glued parts and to make the case stronger. Once the glue is dry you can paint the case.
Go to the tank electronics part :