


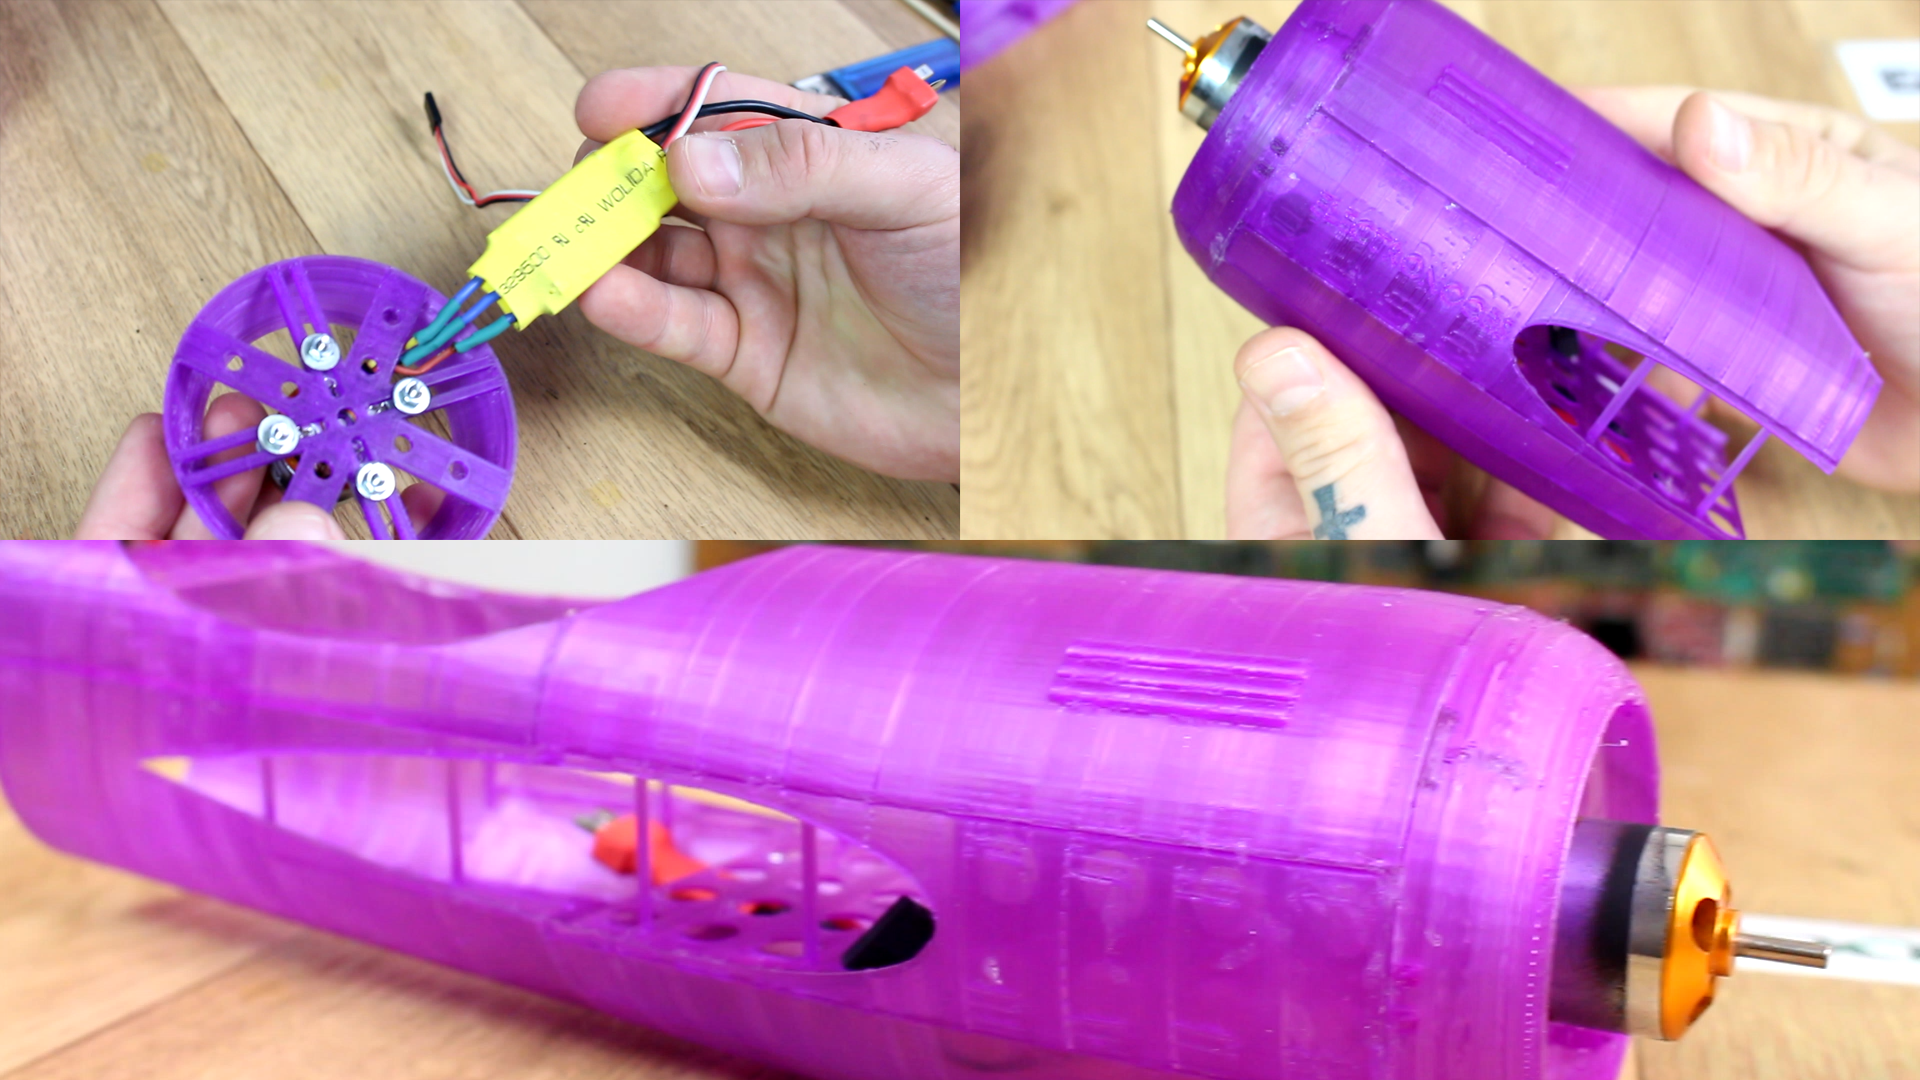
Well, we have all the parts. let's build the plane. The first step is to glue the nose and the nose tip. But, before that let's screw the Brushless motor in place and solder the ESC so we won't have to do that later.
Now that we have the main body we prepare the wings. Glue each of the 3 parts, A, B and C for each wing. Once all the glue is dry, we should add the servo motors on each wing. using a soldering iron just make a small hole for the wire and pass the servo wire twards the main body. Then you should glue the servo in place and make sure the motor is in its middle position.
Once that is ready, using plastic hinges we connect the controls to the wings. Next add the plastic printed hooks and using metal wire connect the servo to the ailerons, rudder and elevator.

Ok, now everything is ready. Final step is to glue the wings and the final parts of the wing. Put a lot of extra glue and make sure everything is well fixed in place.
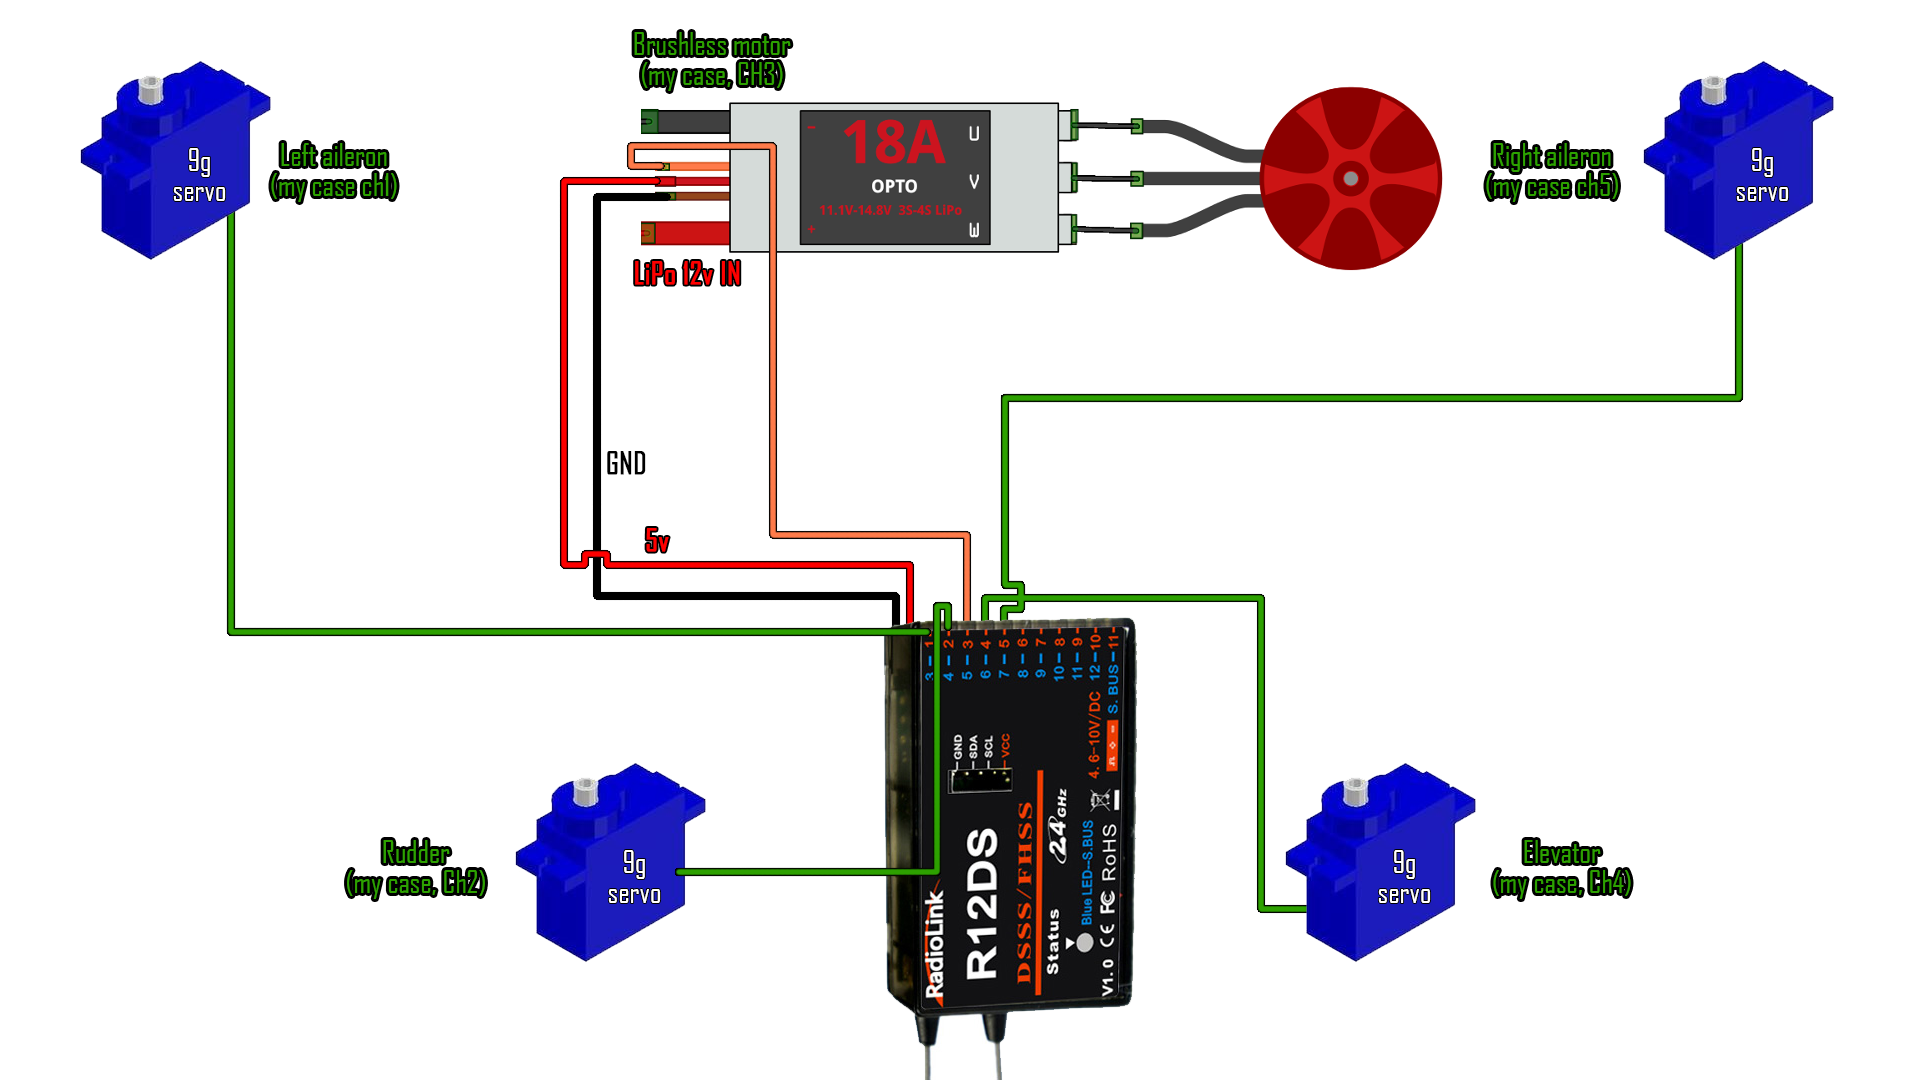
Make next connections from the radio receiver to servos and ESC. The ESC will supply 5V to the receiver. Also, the receiver has to be PWM, otherwise the servos won't work.
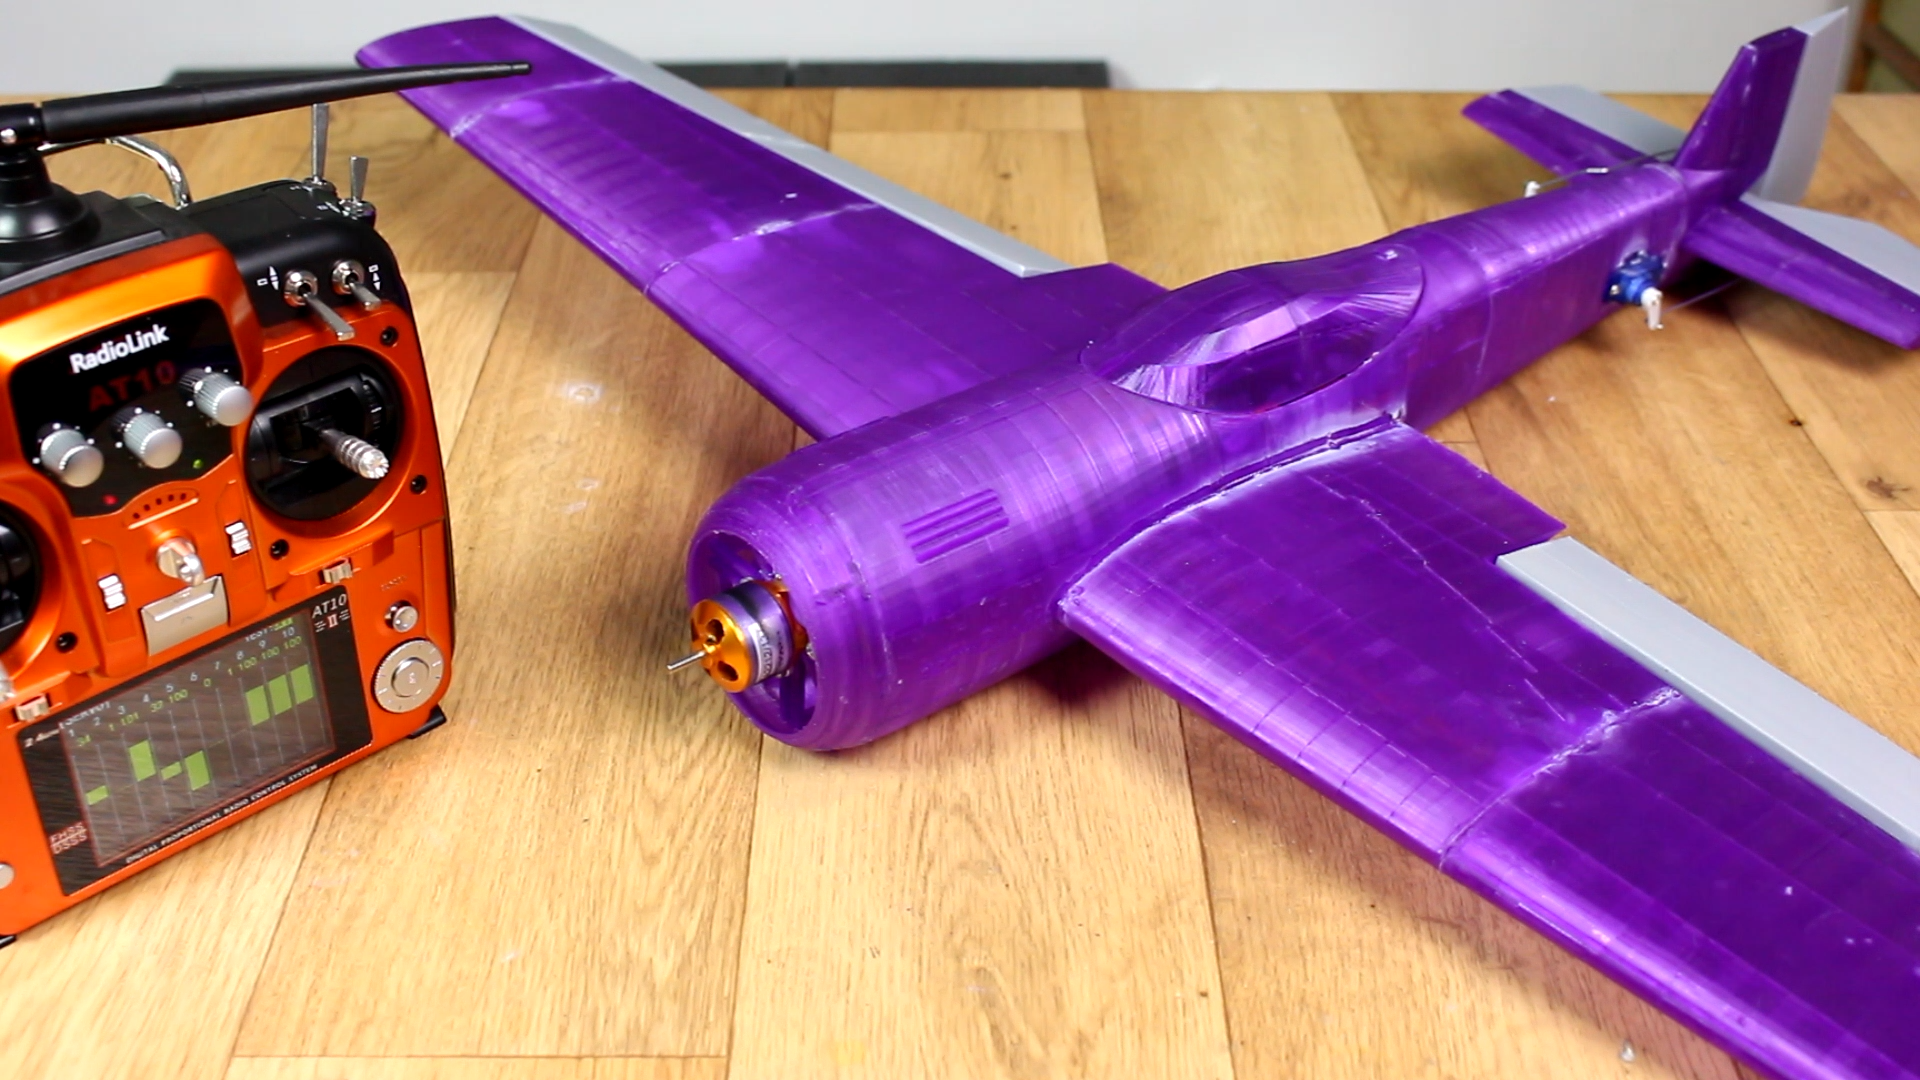
This project is missing some legs with wheels so you could land on any surface and a hole lot of other improvements, and I’ll dot hose in the second version of this plane. As I said before, I can’t test this plane right now, but maybe you guys can, so feel free to do that. This is the total weight of the plane (670grams) with the 3S lipo battery and everything inside. In has a wingspan of around 800mm and a wing surface of around 500 cm2 for each wing. The ailerons are quite big so that could result in a very fast movement of the plane.


