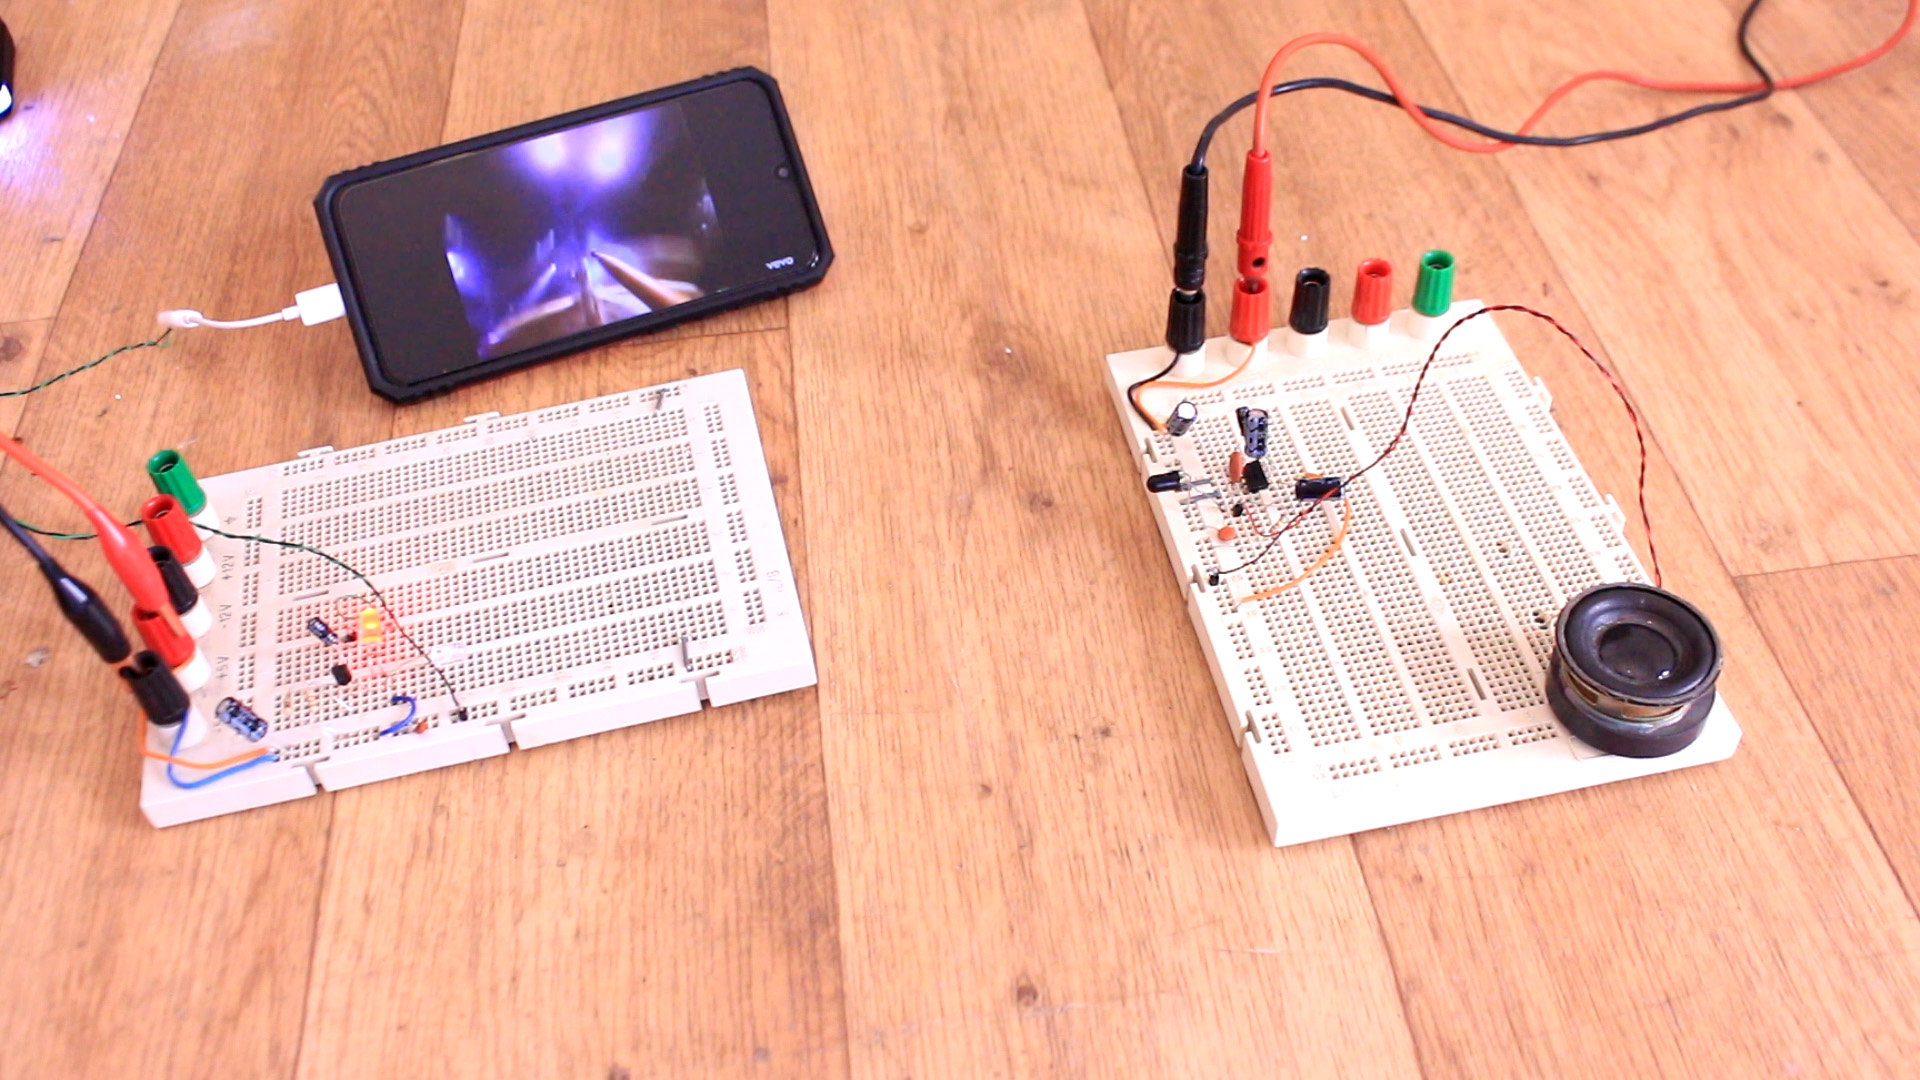
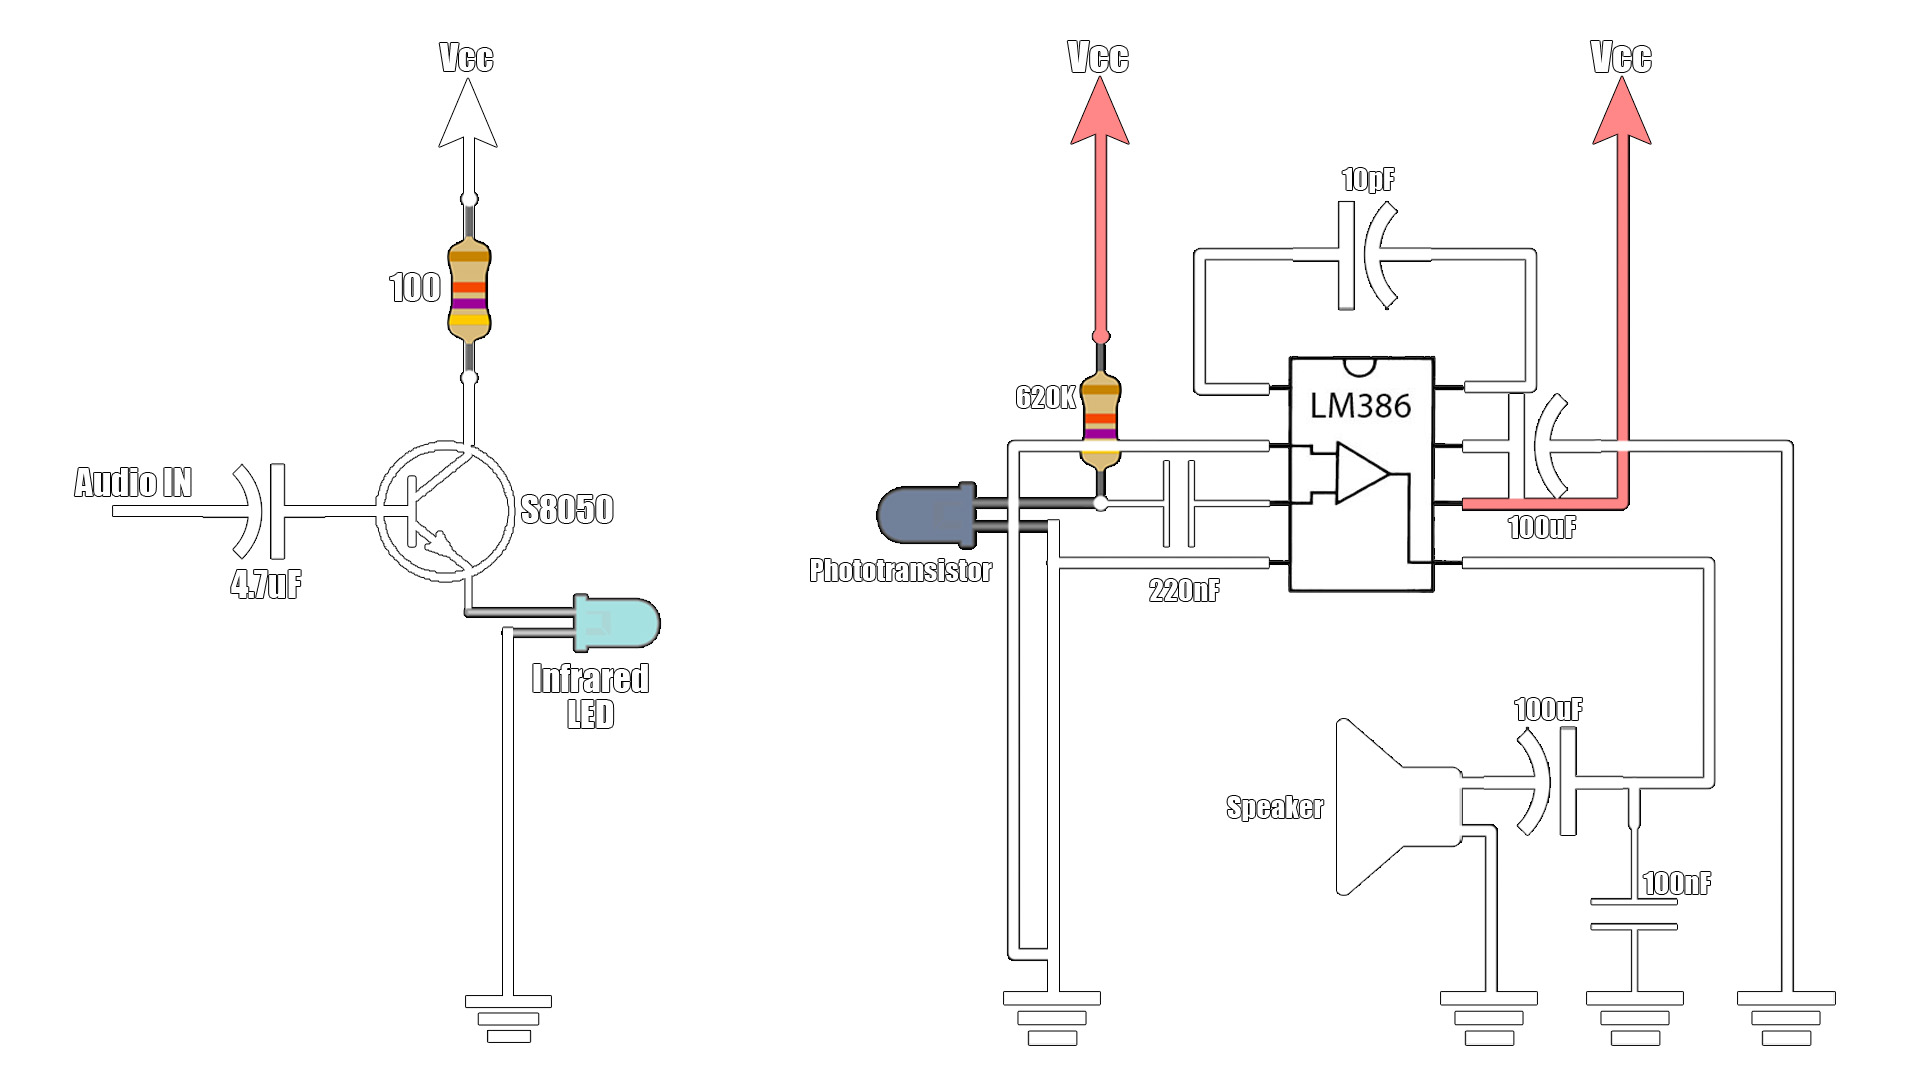
In a past tutorial here, I've showed you how you could create the high frequency high voltage for the Tesla coil. I want to make my own circuit and a way bigger coil. In order to separate the high voltage from the low voltage of the Arduino and the audio generator part, I want to use an infrared transmitter and receiver. In this way we avoid noise from the voltage arcs and also insulate our low voltage circuit and protect our hands from that dangerous voltage. Here we can see the scheamtics for the IR transmitter and receiver.
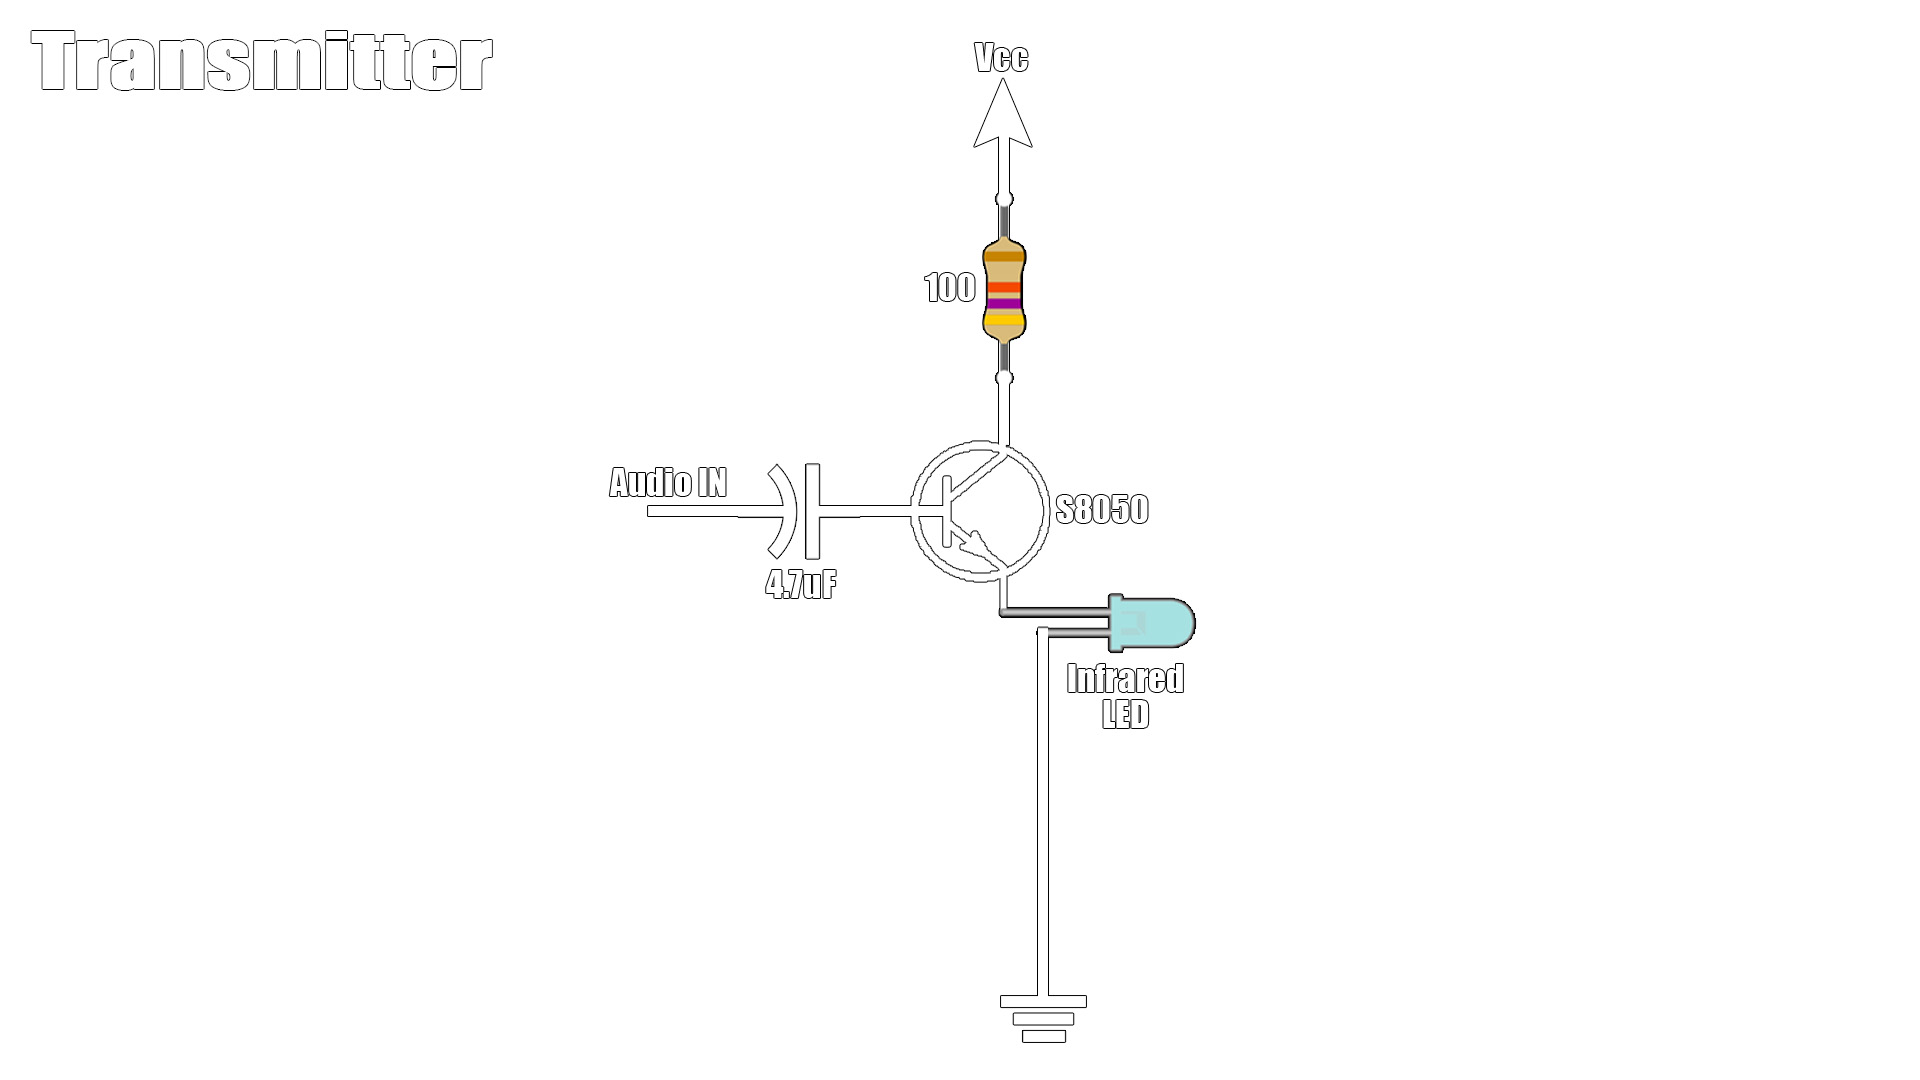
The circuit of the transmiter is more than simple. All we need is a simple BJT transistor to amplify the audio input signal and apply taht amplified signal to the infrared LED. You could test this circuit with a visible light LED first and see how it works because you won't be able to see the infrared light. So, this BJT will just pass the audio signal to light signal and then the receiver will detect that.
The receiver is also quite simple but it has a lot more connections. We start with the phototransistor. That will detect the light from the transmitter LED. The phototransistor works like a normal BJT but instead of controlling the base with electricity we control that base with infrared light. So when light touches the phototransistor it will be ON and when there is no IR light it will be OFF.
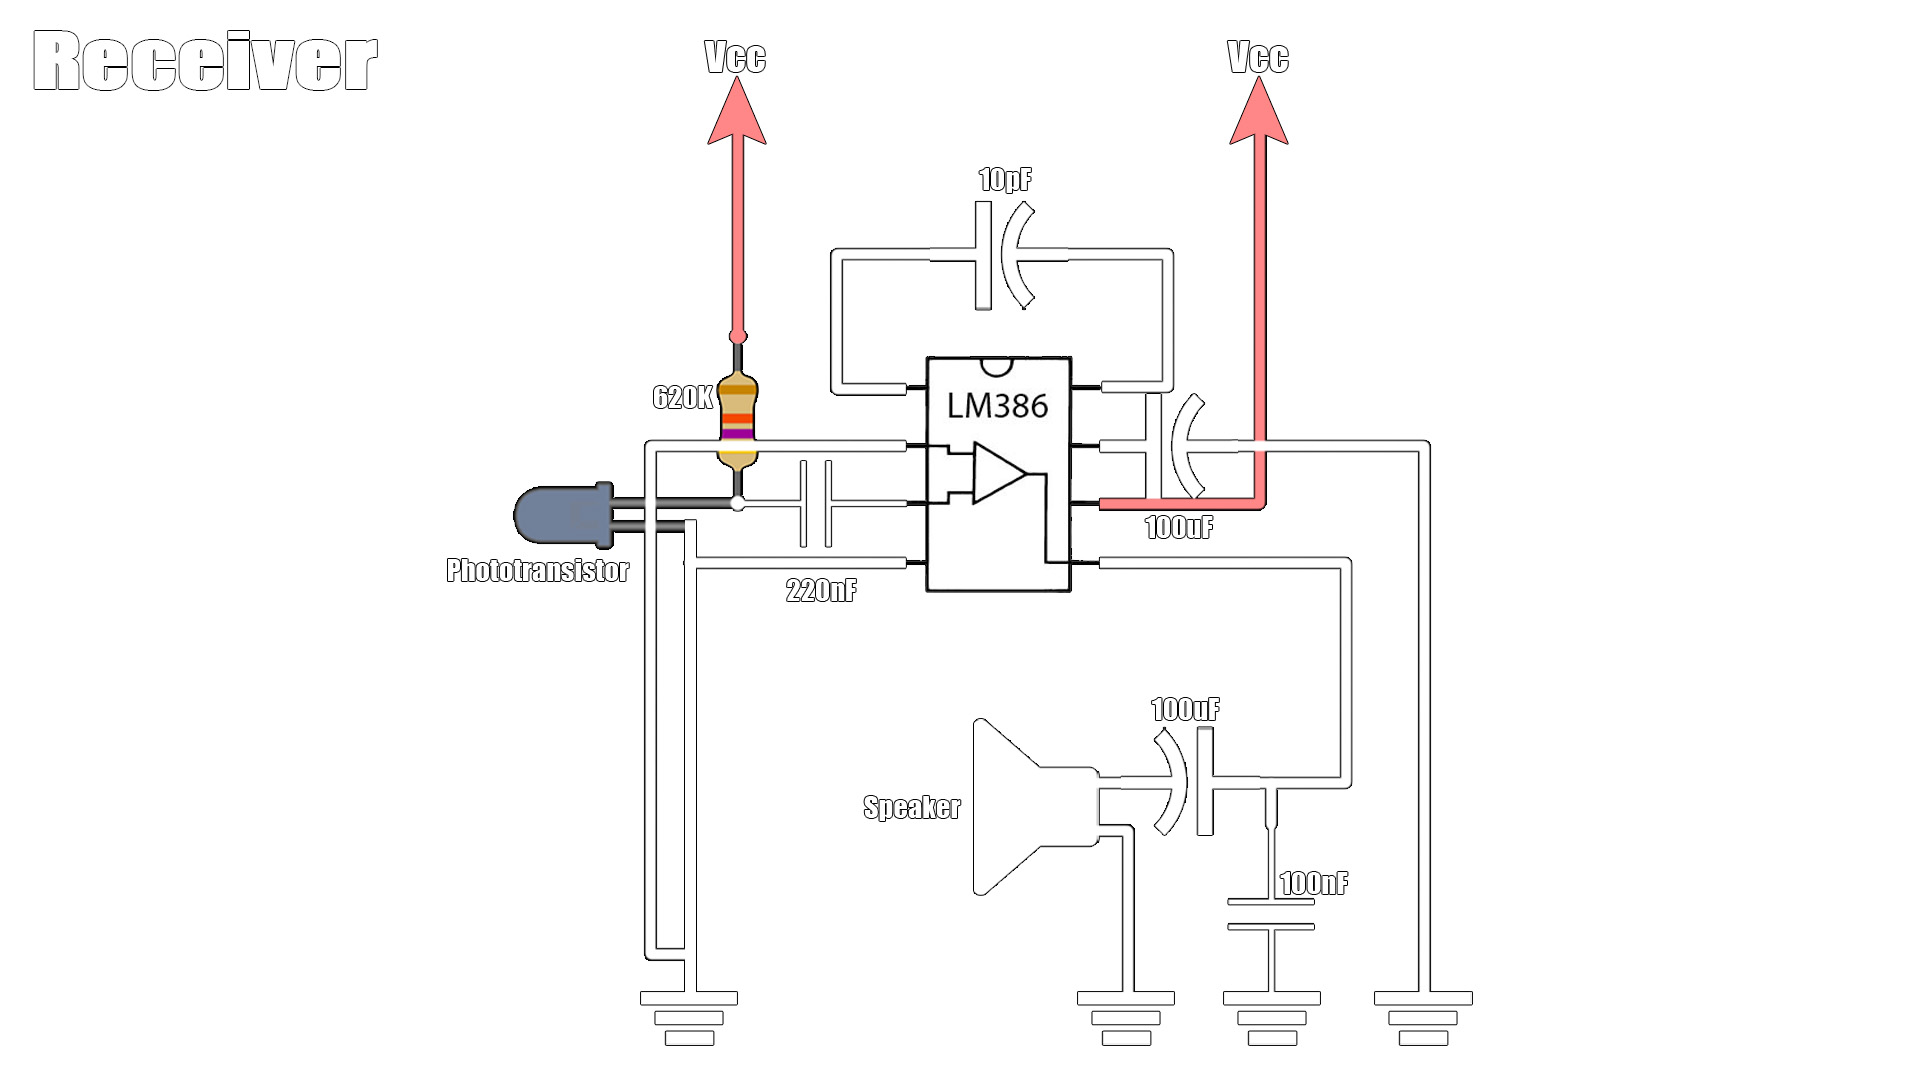
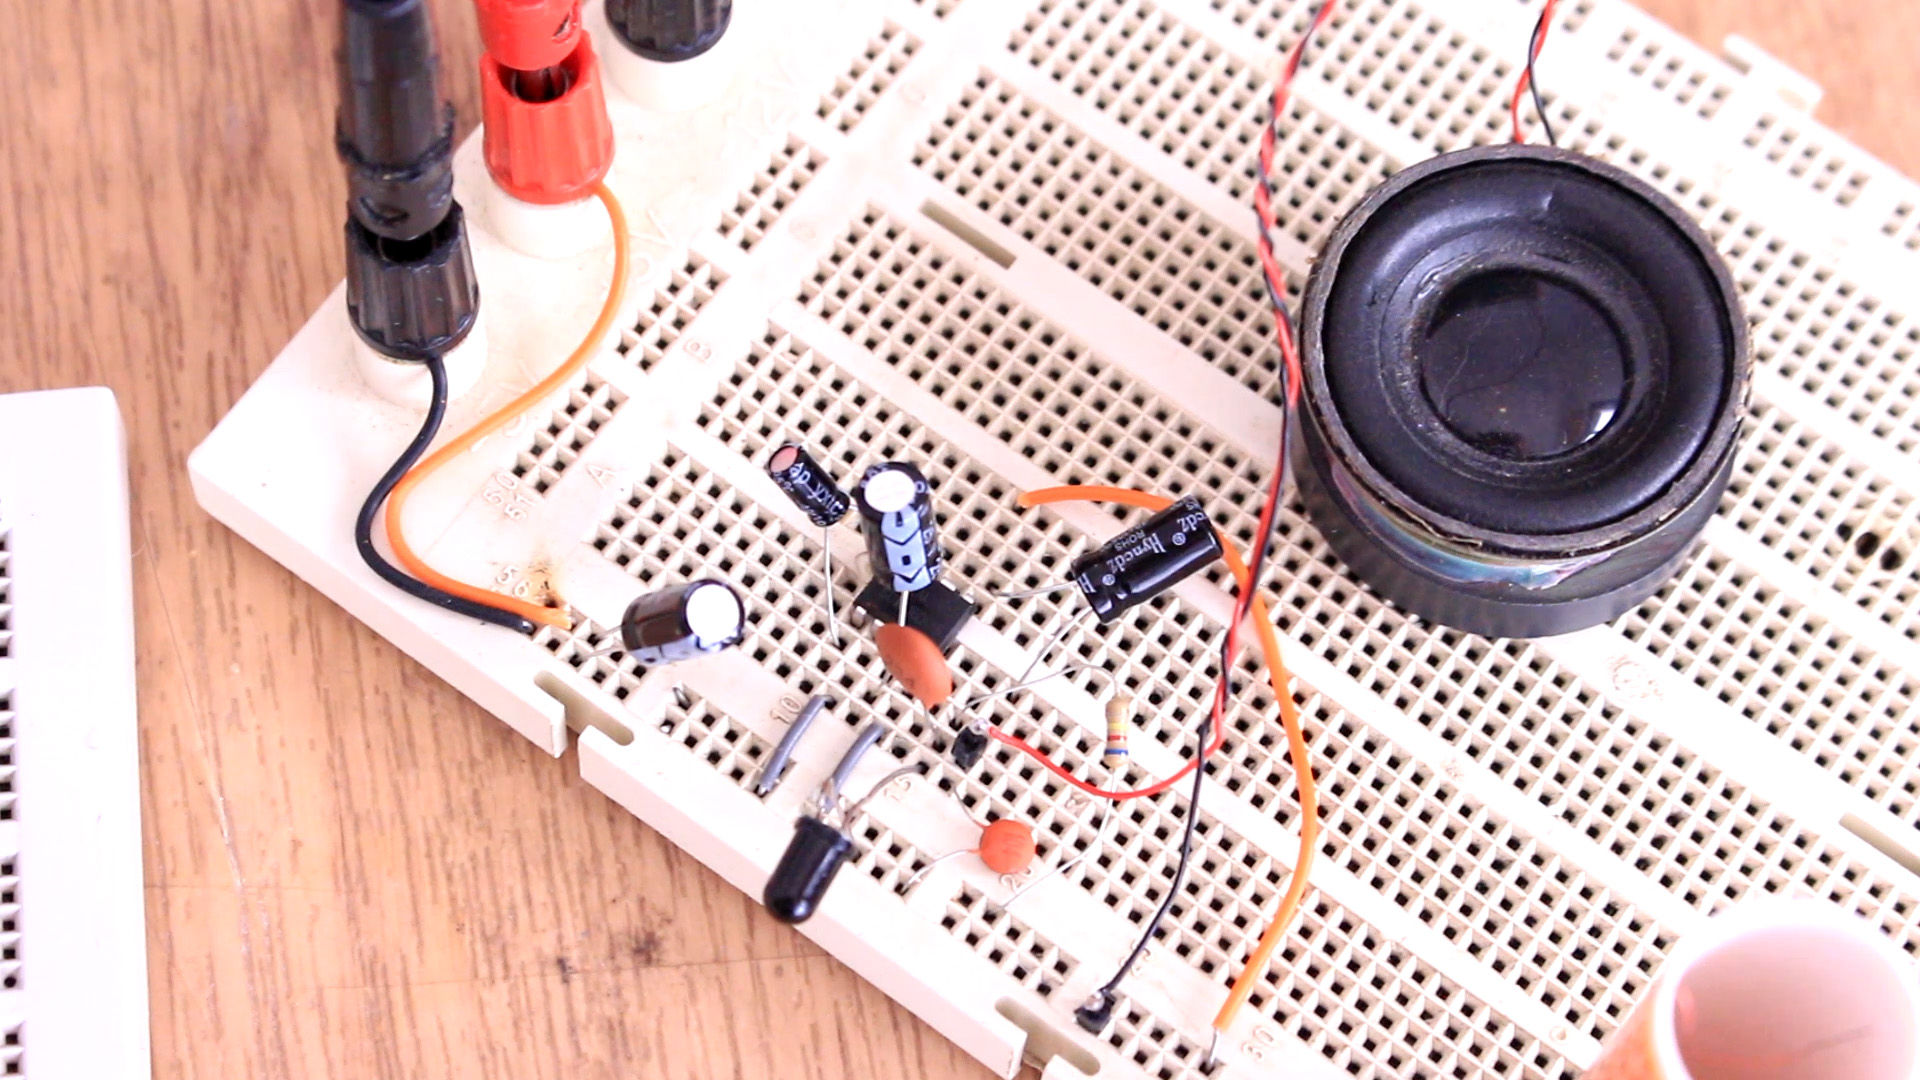
The signal from the phototransistor is not powerfull enough to be connected to a speaker or any other circuit. For that we use a simple OPAMP to amplify the received signal. In this case we have a LM386 supplied with Vcc and the signal from the phototransistor is connected to the positiv input of the amplifier. The output is connected to the speaker or to another circuit if you want. For me it will be connected to the Tesla coil we will see in a future project.
Below you have the list with all the components we need to make this including the optic fiber I want to use to send the light from the transmitter to the Tesla coil circuit.