For some time, I had that a green background curtain in my workshop. I sometimes use it when I want to change the background of my videos, because is very easy to use that effect. As I had it till now is very ugly because it stands there in the corner. For now I was using it on some sliding rollers and when I don’t use it, I put it on the side. That’s ugly and it messes up the curtain. That’s why today I will go from that system to an automatic motorized curtain with rollers that will go up and down and can be controlled with my smartphone. Youc could buy such system from AliExpress if you want but I wanted a homemade version. And this is pretty cool, right? I’ll share with you as always, for free, the 3D printed parts, the schematic and the code on this post. So guys, let’s get started.
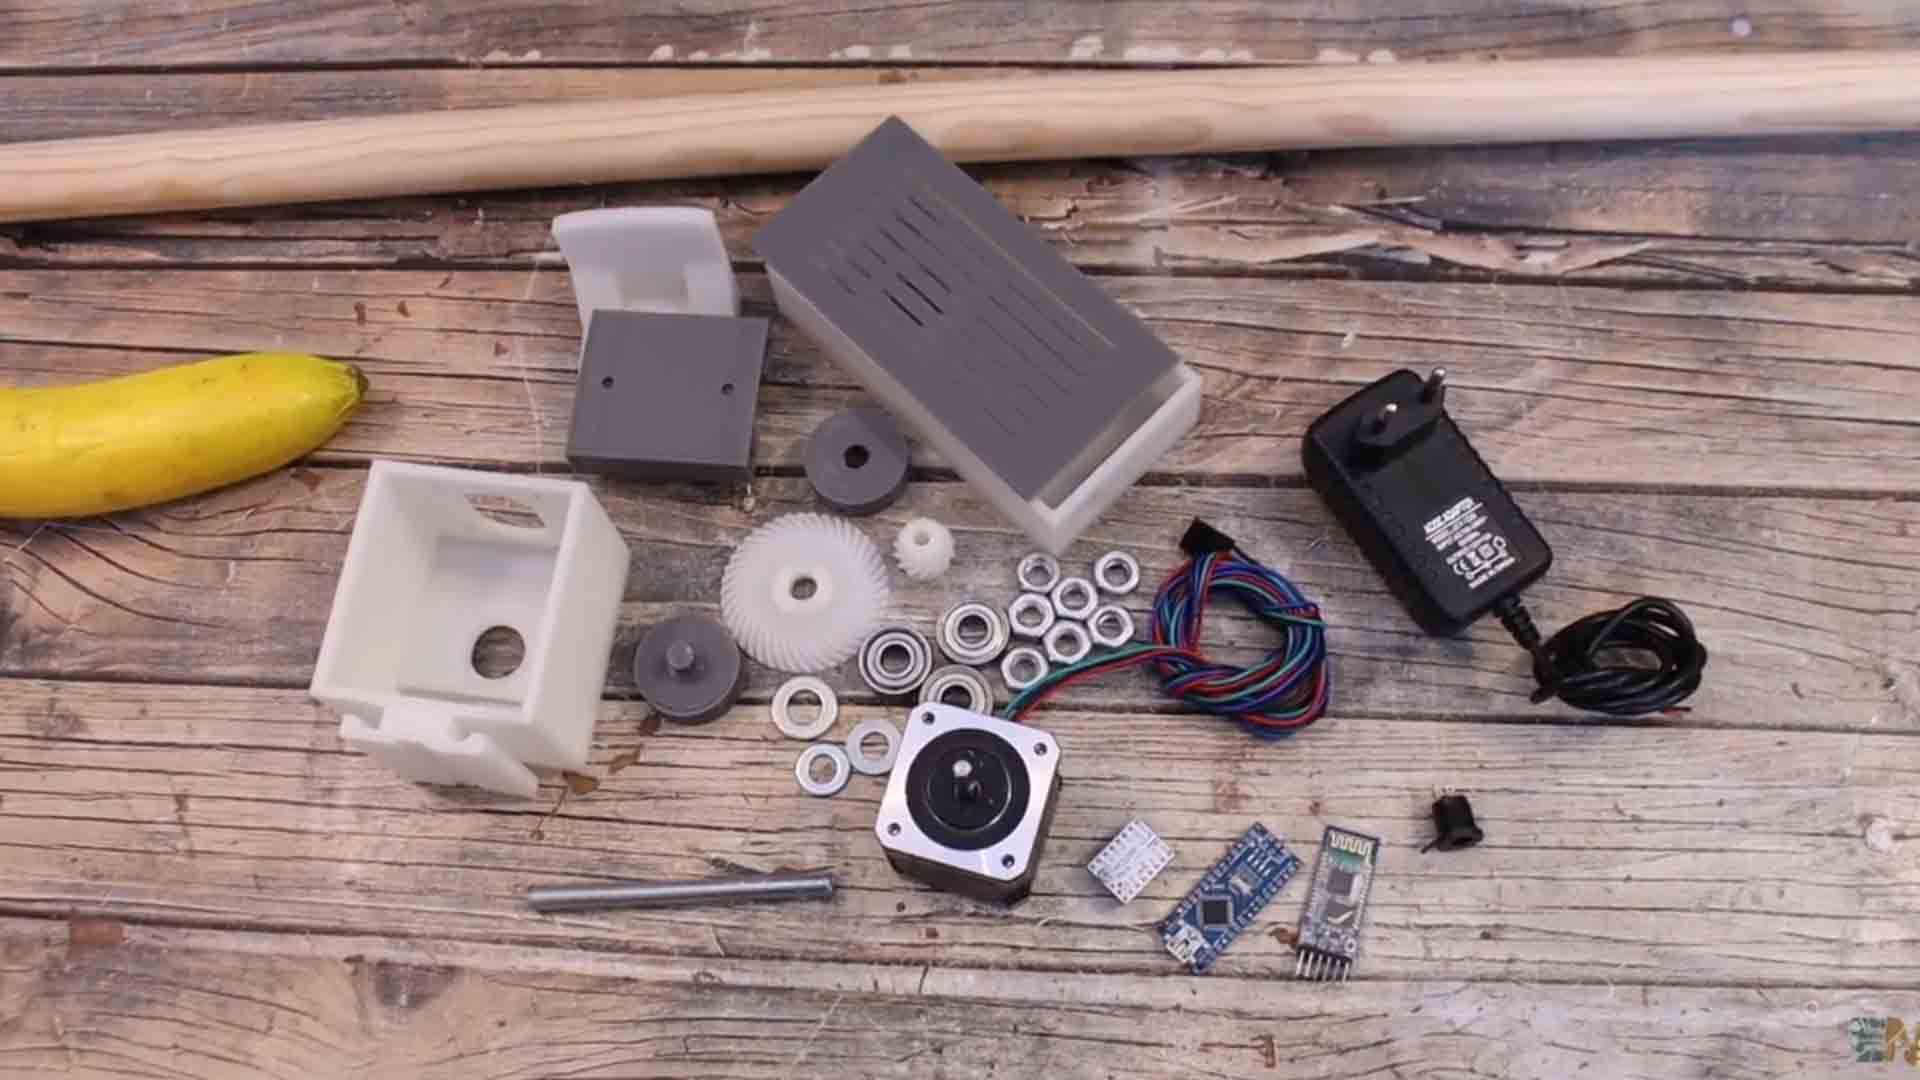
Ok sogo below and download all the 3D files that we need. They were all printed with PLA filament. Together with the 3D parts we need 3 bearings, the 608zz. WE need a threaded rod of 8mm, nuts, washers and some M3 screws. As for the electronics, we need a NEMA 17 stepper motor. The one I have is quite big so it should have enough power. To control it we need a driver. The cheap version would be those A4988 drivers. But those are very loud. For silent and smooth movement I always use the TMC2202 drivers. They only cost a few more dollars. To control the driver I will use an Arduino NANO and to receive data from the smartphone I will use a Bluetooth module, the HC-05 or 06. To supply everything I will use a 12V DC adaptor connected to a power jack. And that’s pretty much all we need so let’s start assembling this motorized curtain controller.
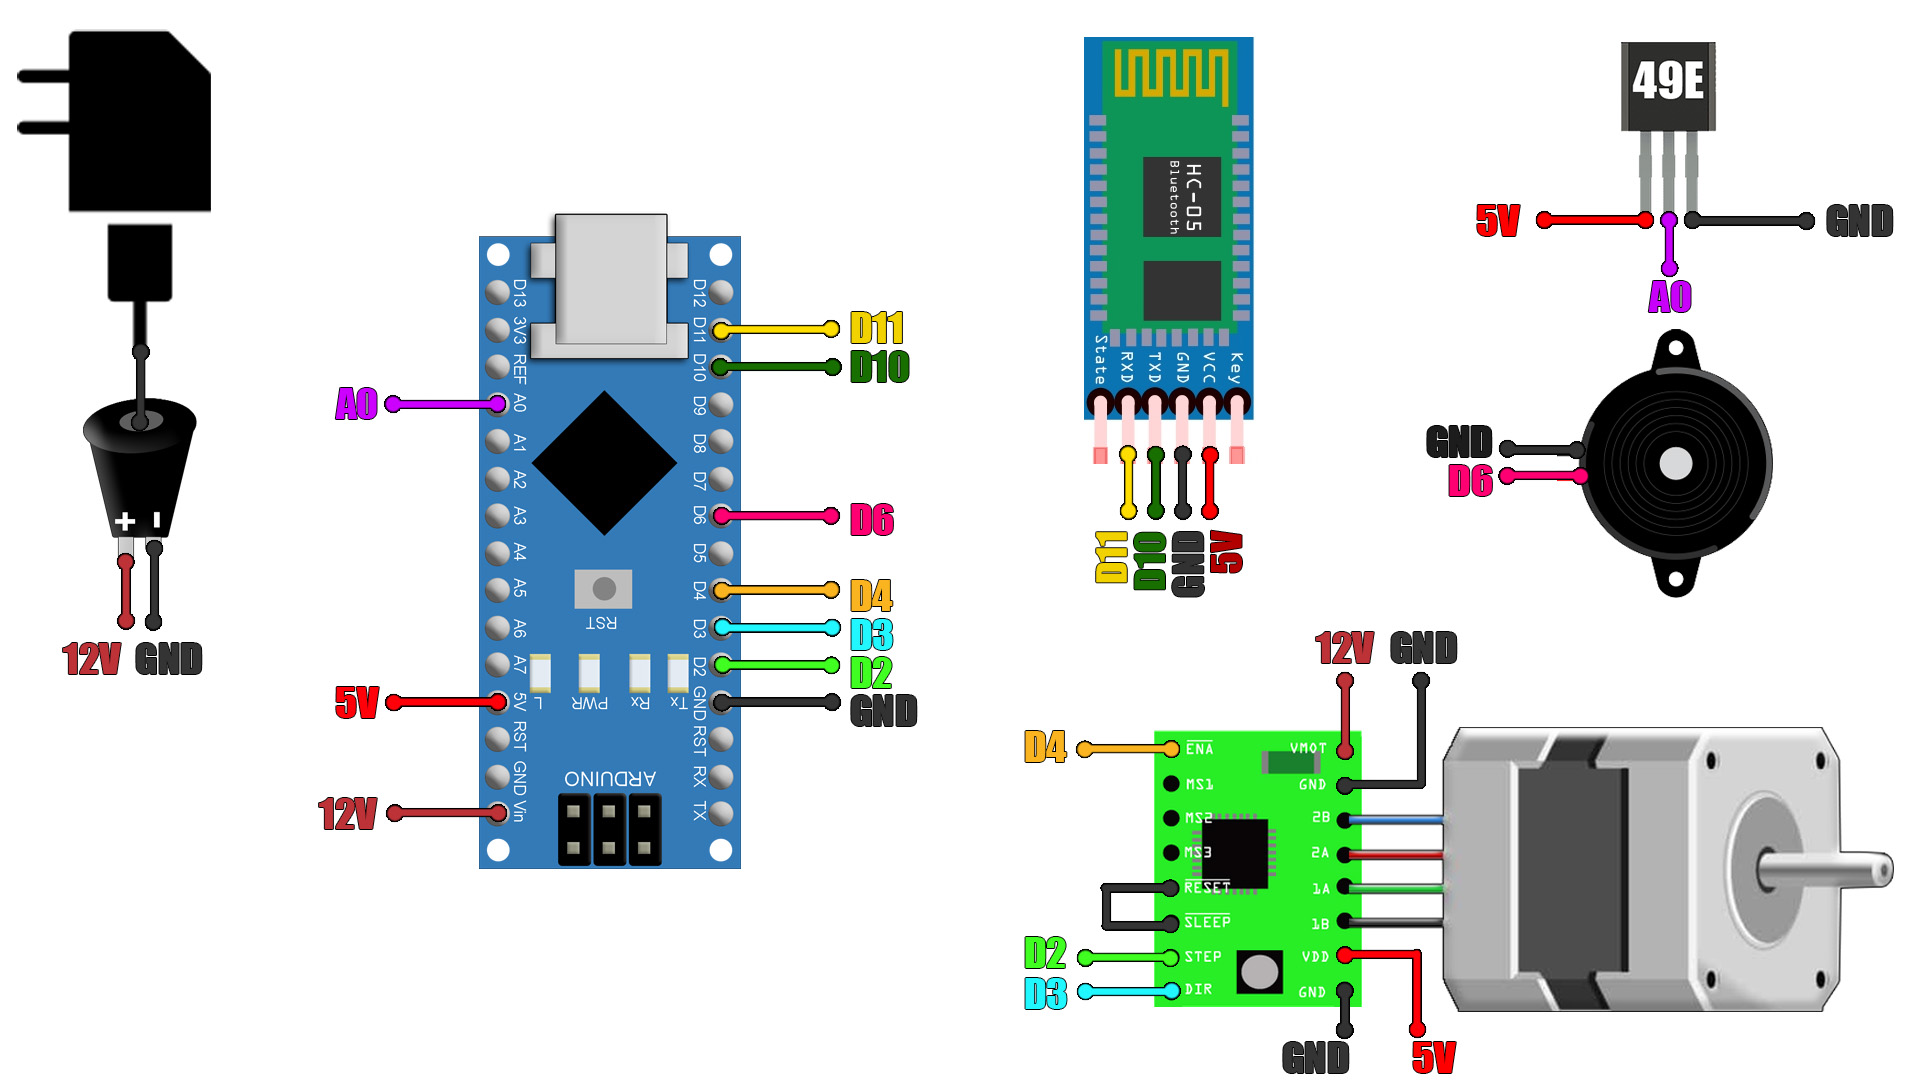
Check the scheamtic below and have it in front of you when you make the connections. Is very simple. The Arduino is connected to the stepper driver and this driver to the motor. To receive data we connect the HC05 Bluetooth module on pins D11 and D10 where we will create a software serial port. We also connect a buzzer for sound notifications. We supply the Arduino on the Vin pin with 12V and the driver as well with 12V for the motor. The driver also needs 5v supply. Supply 5V to the hall sensor and connect it to the analog input of the Arduino That's it.
We start with the 8mm threaded rod. It should be around 9cm long. On one end I add a nut, then the wood bar support and then another nut and tight them. Tight it very well so it won’t get loose. Now I add one bearing and yet another nut. Then I pass this rod through one side of the gear case. Inside I add a washer, then another thicker washer, then the big gear, another washer and another nut and we tight this on the gear.
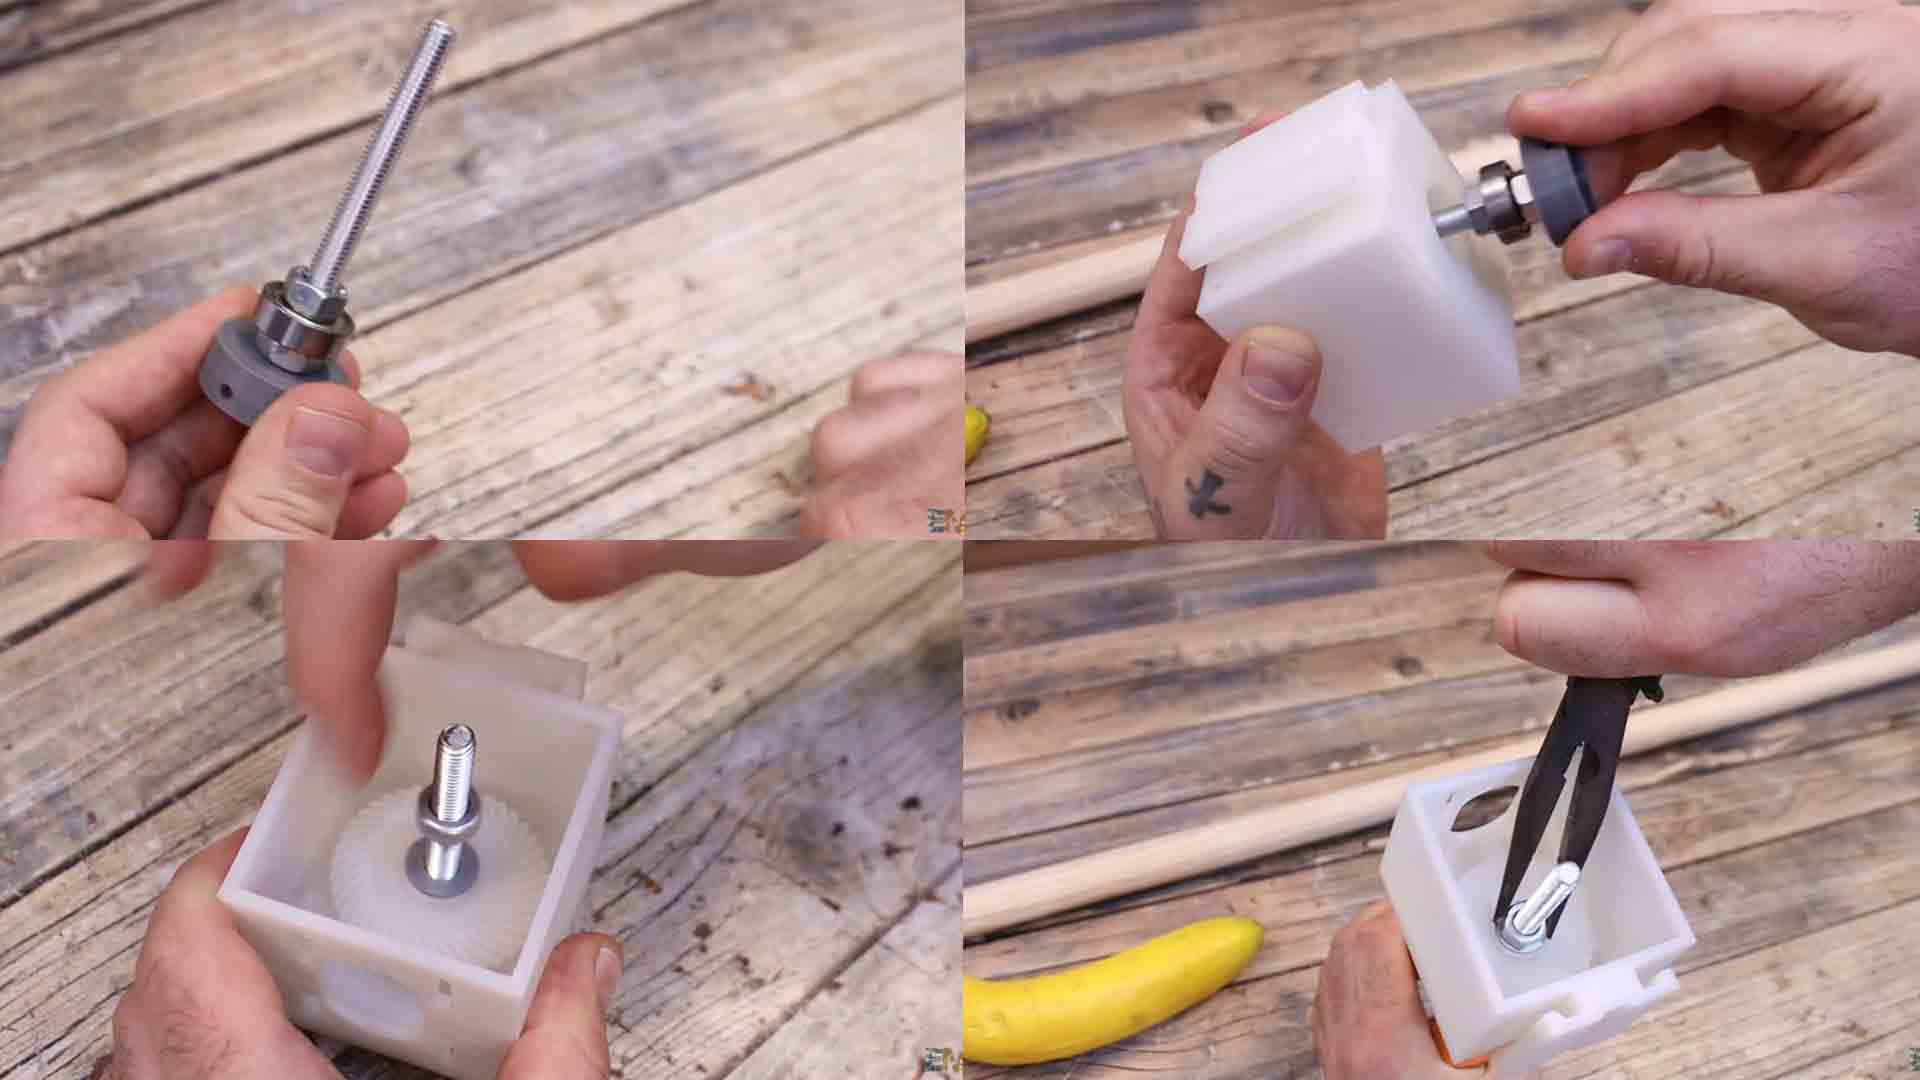
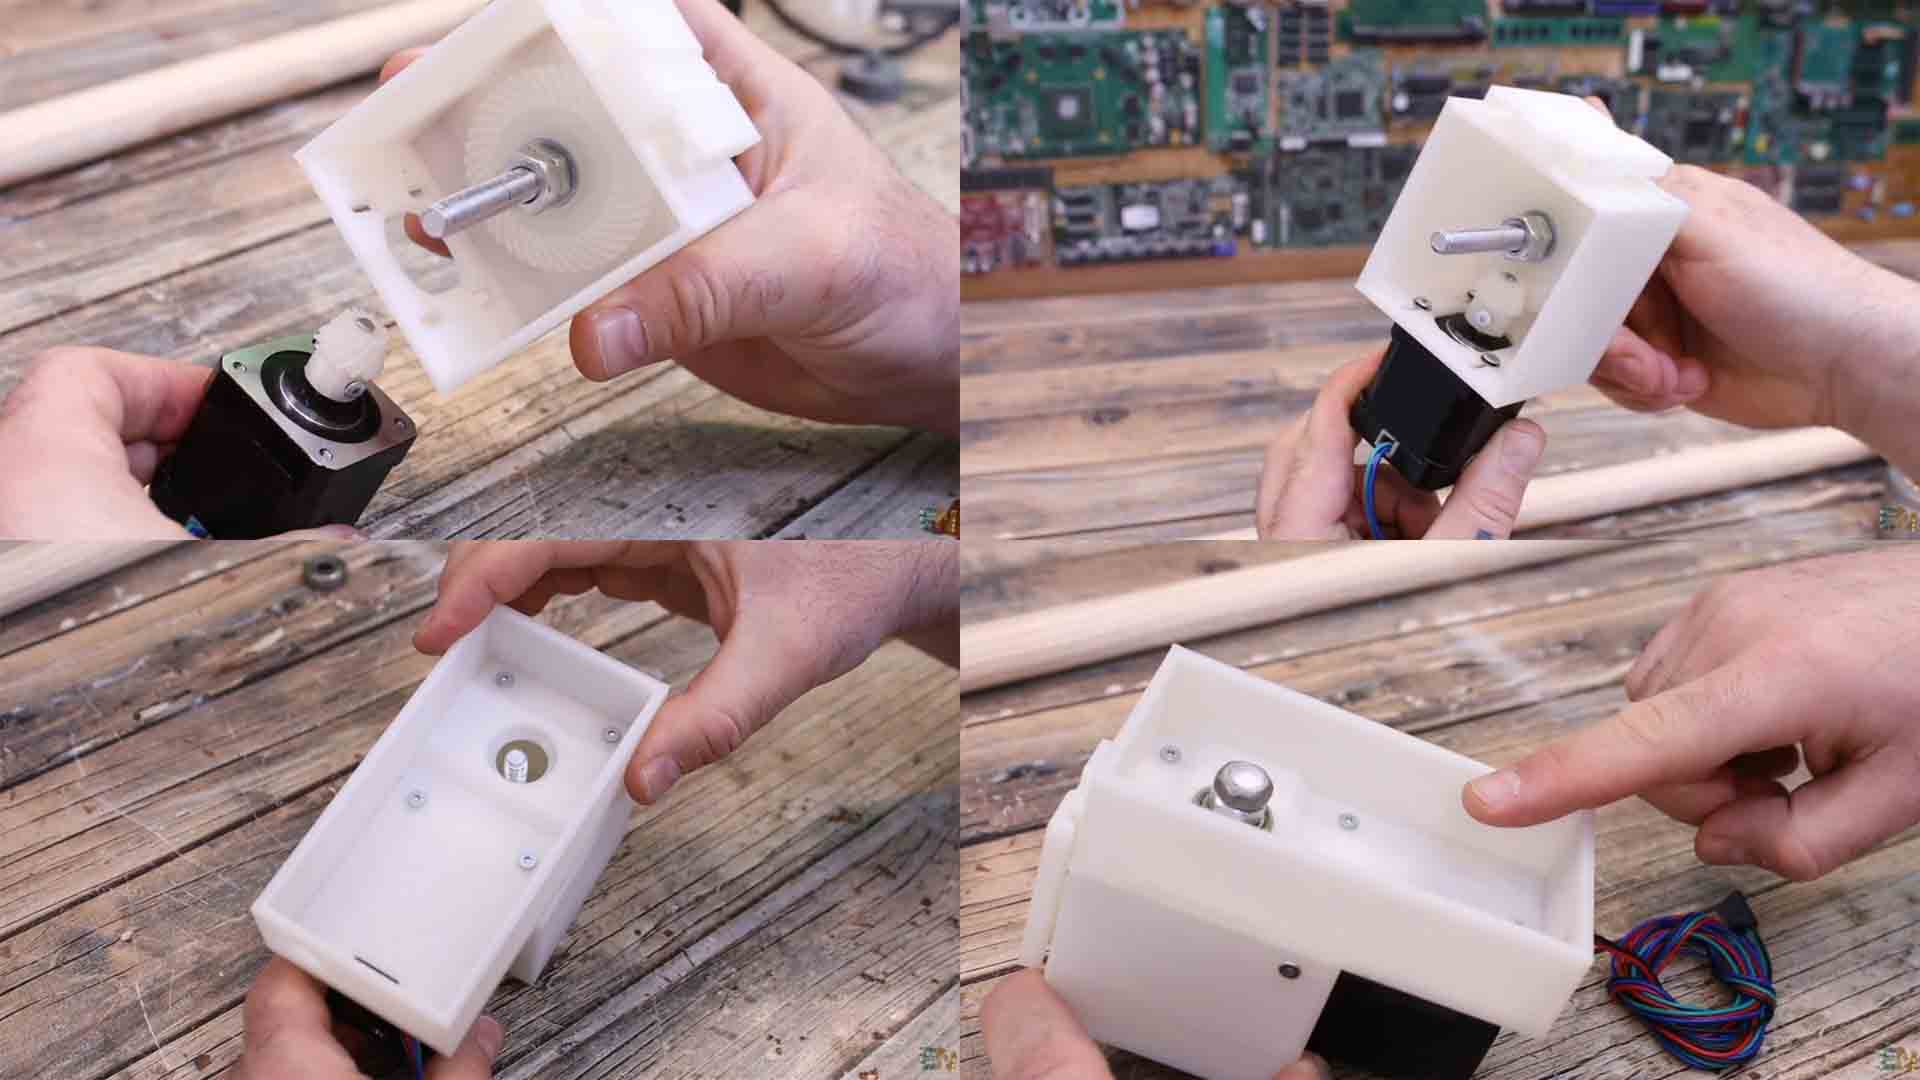
On the other side I get the small gear and the stepper motor. On the gear we add a threaded insertion. I use my soldering iron for that. Nowe I place the gear on the motor shaft and I tight a screw. The motor will go below the gear case and it will be in contact with the big gear. I add 4 screws for the stepper motor. I adjust the position of the motor so the small gear will be in good contact with the big one and then I tight the screws. At this point we can add some vaseline to the gears before we close the case. Now get the other 3D printed parts. Using small screws we first join them together. On the small part we add some threaded insertions on the sides. Now we can merge this part of the case with the rest of the gearbox. To close it, we add screws on the sides. Then we add another bearing followed by another nut. Now the gear system is done. So inside this second case we can place the electronics and then close it with this cover.
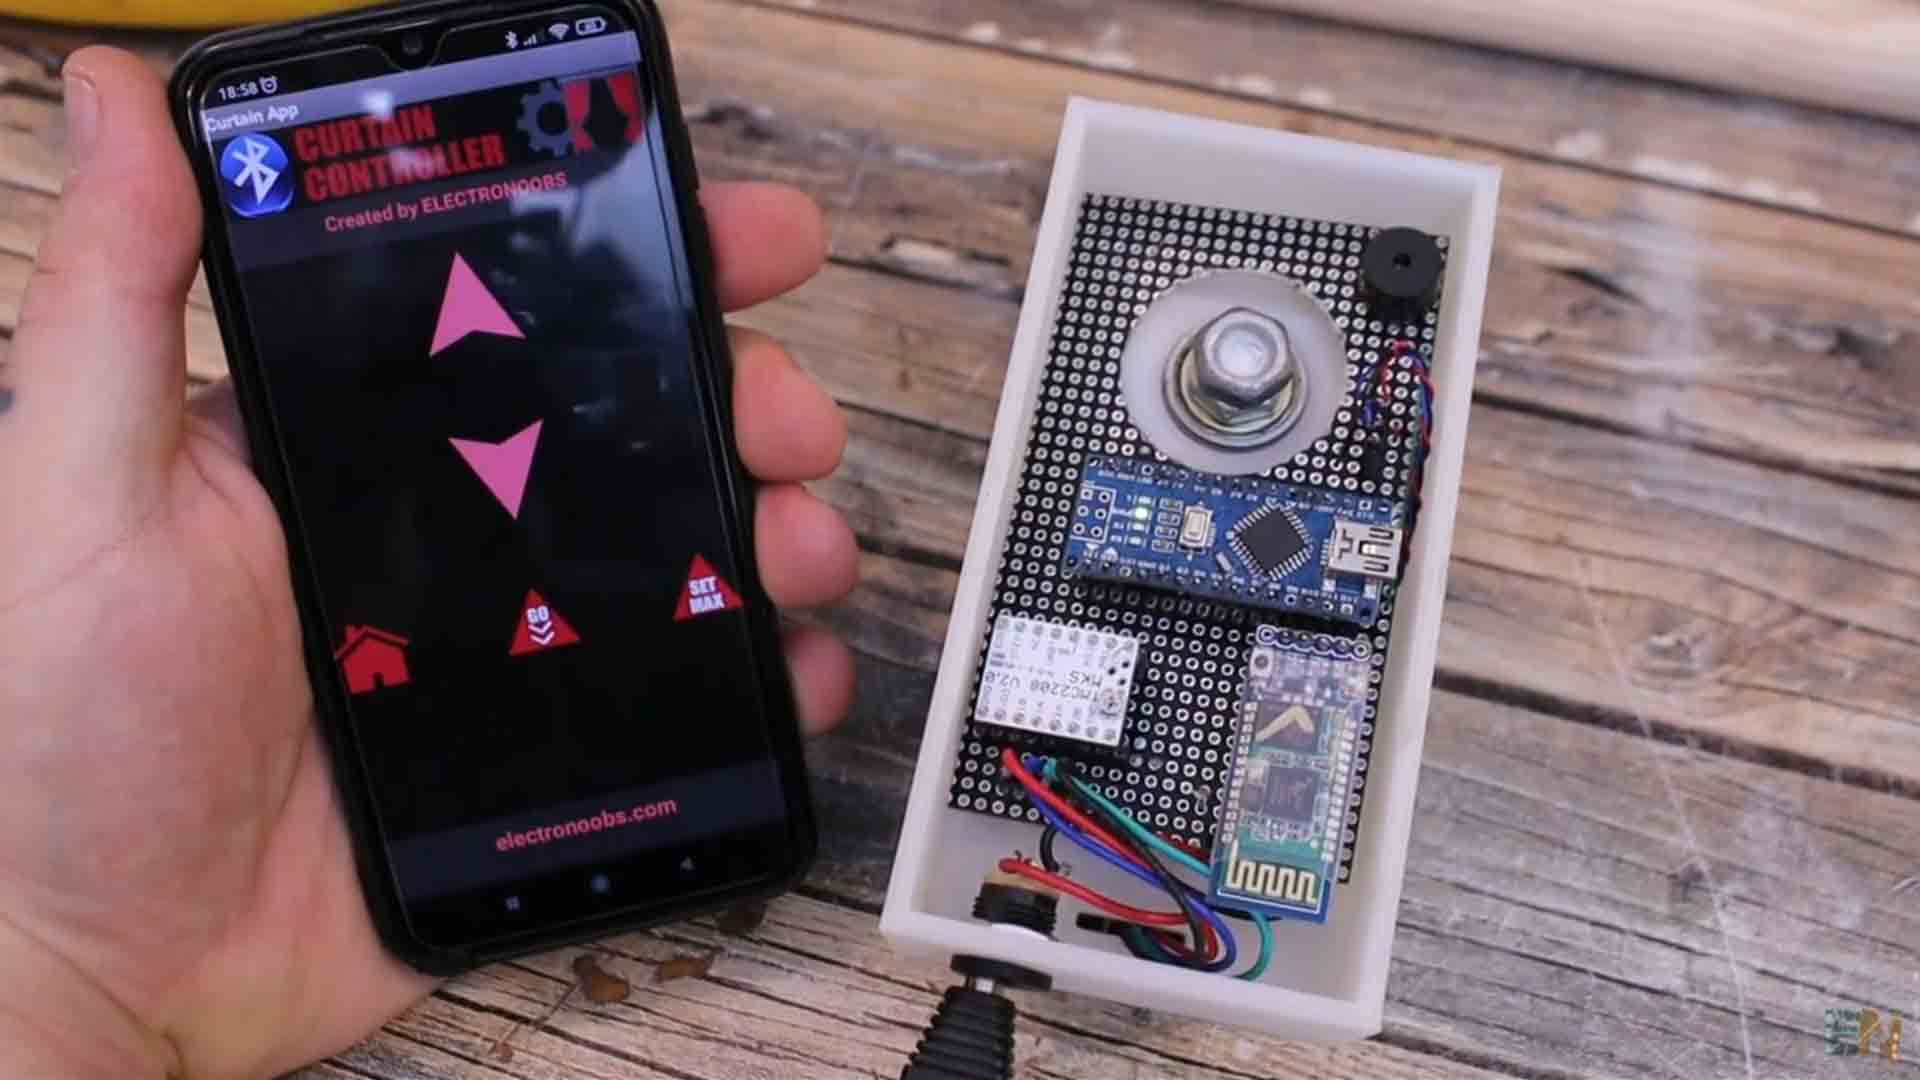
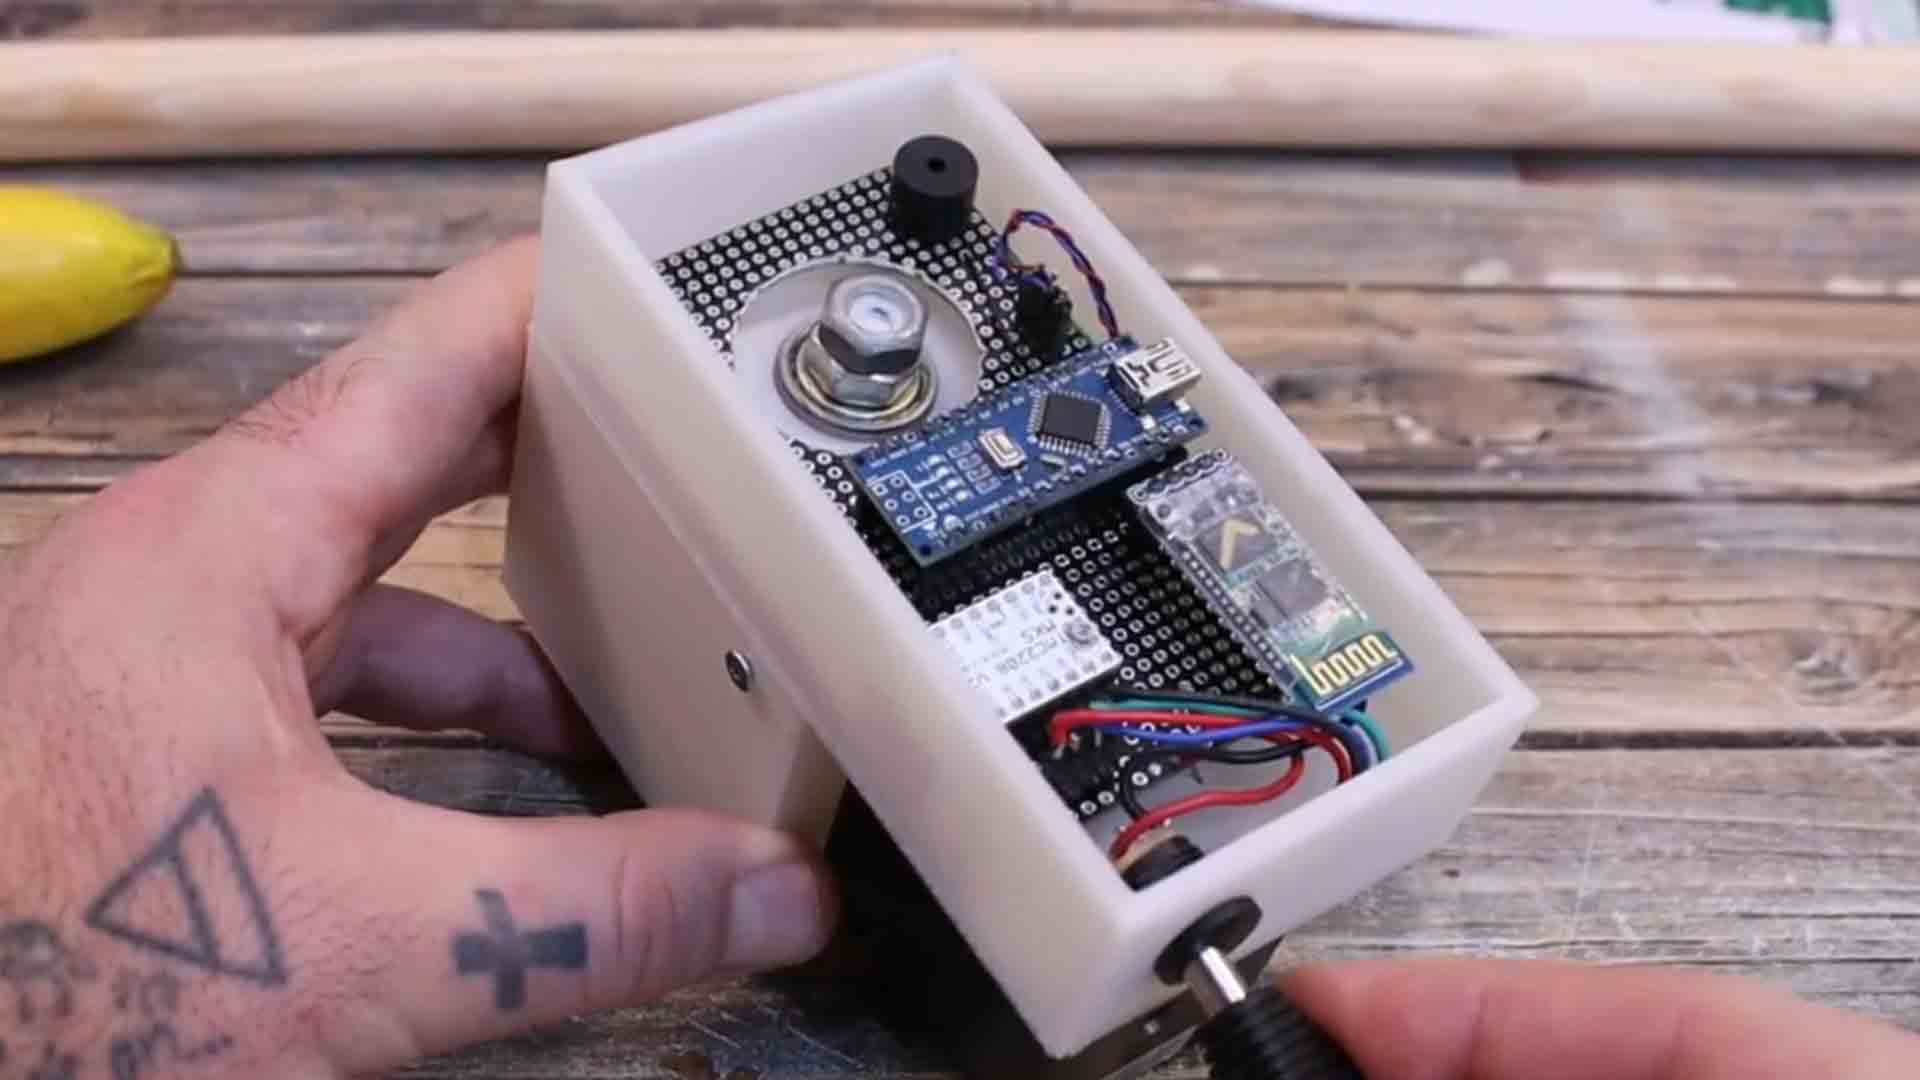
Below I add a power connector. This will supply 12V. On a piece of prototyping PCB, I add the Arduino, the driver and the Bluetooth module. First I cut the PCB to size so it will fit inside. I solder everything and make connections with small wires. My PCB is ready. The electronics are prepared and connected together. I place it inside the case. I solder wires from the 12V jack to the PCB. Then I connect the step motor wires to the driver. I’ve soldered wires to a hall sensor. It will go outside the case connected on the pins on the PCB. I will glue this hall sensor on the exterior and use it as a limit stop when the curtain is up and that would be the start position.
Now that everything is connected inside, I upload the final code that you can download from below. Also download the Android App that I’ve designed, copy it to your smartphone using a USB cable and then install it. Let’s make a test. I connect 12V and turn on the Arduino. In bluetooth, I search for new devices and I pair toi the HC-05 module using 1234 or 0000 password. Now I open my App. Press the bluetooth icon and select the HC05 module and you will see that the LED will stop blinking. I can rotate the motor up and down. When I press the home button, as you can see on the tutorial video, the motor will rotate in one direction till I place a magnet in front of the hall sensor. When that happens, it stores the home position and we can use it normally. Use the arrows on the app to lower or rise the curtain. So everything seems to work ok.
I take down the old background. I place the curtain flat on my living room floor. Then I add the wood bar and use staples to fix it in place. I add another bar on the other side as weight. I screw in place on the ceiling, the left case with the motor. THen I add the right side. I add the bearing and fix the curtain with the wood bar in place. Now I pass a plastic cover for the wires, and through this, I pass the supply wire with 12V. Now everything is ready for a test. Start the app, connect to the Bluetooth module and move the curtain up and down. If my videos help you, consider supporting my work on my PATREON or a donation on my PayPal. Thanks again and see you later guys.