Panel Cookies
DIY Compact Stereo Amplifier
Help me by sharing this post

PREVIOUS POST       NEXT POST

Author Andrei
22/07/2019
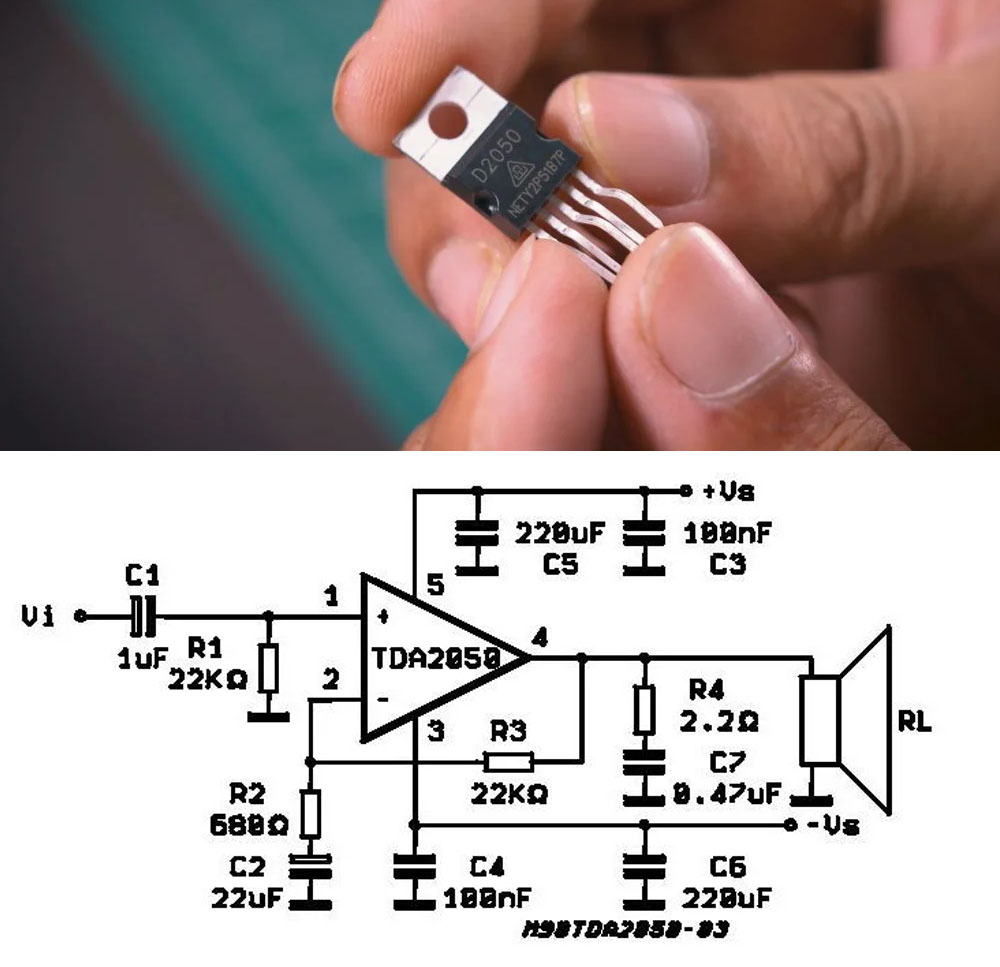
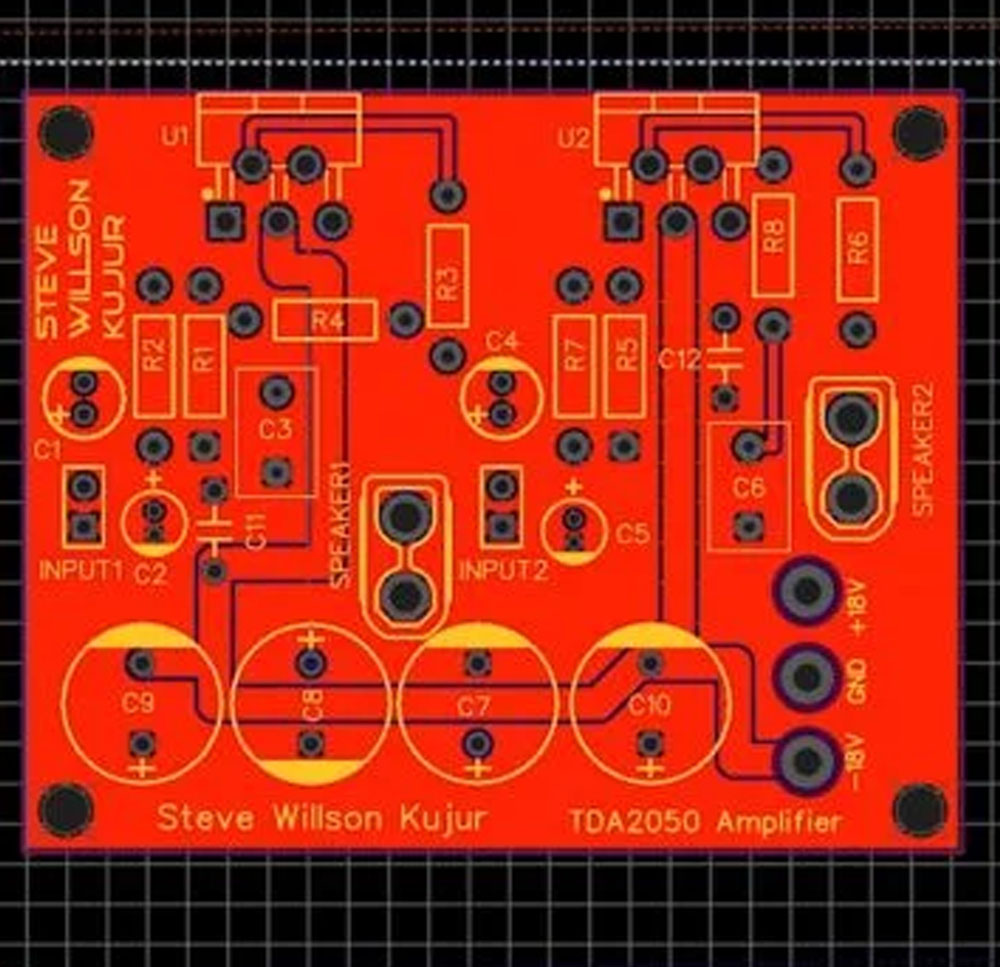
This is another project posted by Steve Willson Kujur on Instructables. A powerfull 50W Compact Stereo Amplifier PCB. How to Make a Portable Amplifier in a Very Simple Way using TDA2050 ic it is a very popular ic you can find in many home theatre system it can provide a maximum power of 30 watts at 4 ohms It needs a dual power supply 24 0 24, In this project he used 2 of it. Output Power is 30 Watt x 2 @ 4Ohms. Input Power is 16 - 24V DC. It has built-in Protection, Over Load Protection, Short Circuit Protection and Over Heat Protection. We can see the final result and the circuit diagram on the photo aside. This is quite a basic circuit based on this TDA amplifier. He Used EasyEDA To Create the PCB Using the Circuit Diagram Provided by STMicroelectronics and it took him about 2 Hours to Design. YHe used XT30 for Speaker output for easy plug and play. You can Download the Gerber Files on his original post.


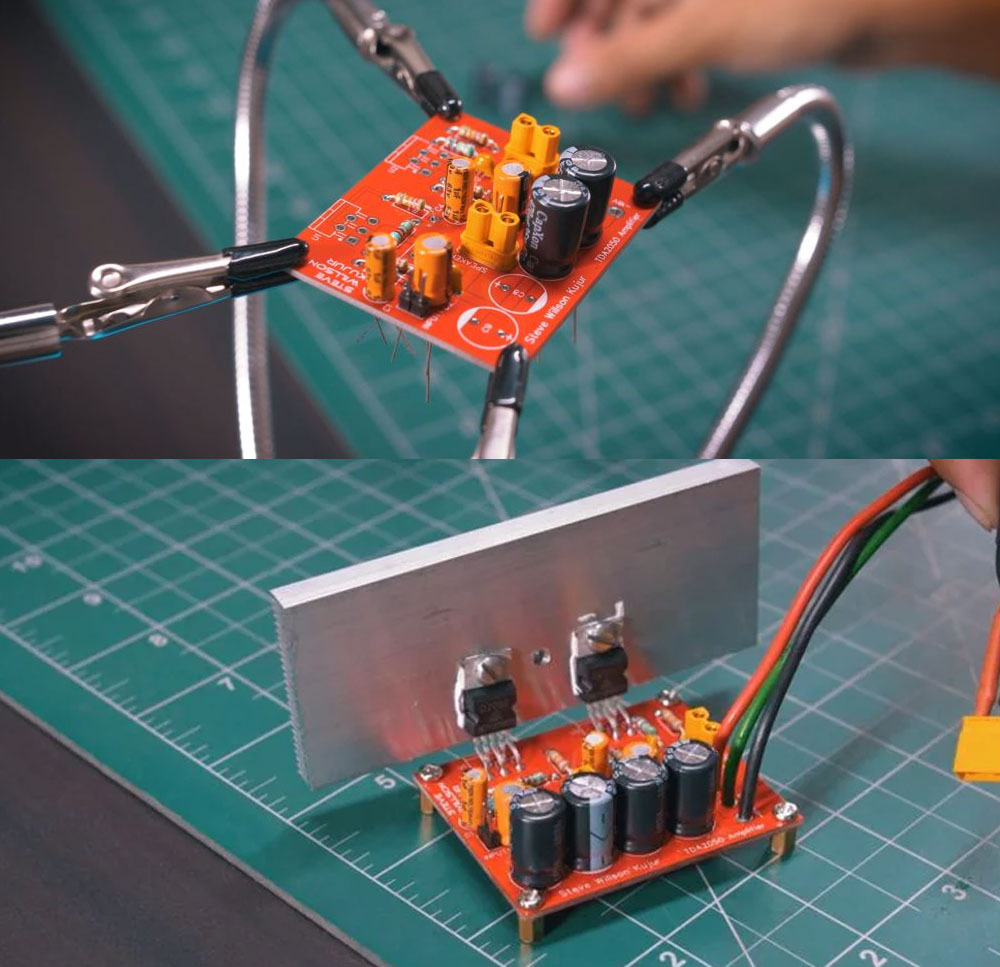
Now days is very easy to order PCBs and it doesn't cost you much, Yeah you easily do this in a Perf Board but the PCB Looks way better then Perf Board and Very Safe to Work So You can Put little work and money to get Professional Results. He gathered all the components and soldered all the Resistances first, and then Soldered the Capacitors According to the Circuit Diagram and used a Cutter to cut all the extra legs. And then he soldered the XT30 Connector and after That, he Soldered the Main Ic TDA2050 it took him about 30 minutes.

he used a Decent Size Heat Shink for Heat Dissipation it is very necessary to use a Heat Shink Otherwise You'll burn the Chip. And it is very important to use a good quality thermal compound for better heat flow. He applied a little quantity fo thermal compound to TDA2050 IC and tighten it up with heatsink.


First he connected the Speakers with XT30 Connector. Second he connected the 3 Power Supply Cable to the dual power supply and third he connected the 2 audio input cable via male header. How just power on the power supply and play the song "Enjoy". And that sthe project. Quite cool right?

Apart this post, if you have your own project and you need good quality PCBs, consider using the services of JLCPCB.com which will offer you quite good services, I use their services a lot of my PCBs.

Consider supporting ELECTRONOOBS on PATREEON.


Help me by sharing this post

PREVIOUS POST       NEXT POST


yt_link
insta_link
fb_link
twitter_link
Blog#87 - Amplifier

Last tutorials

3D Printed Headphones with PLANAR PCB
Homemade Baby White Noise Generator
Measure AC RMS with Arduino
10 Stage Coilgun - Version 2
Tesla Coil on PCB

ADVERTISERS


Affiliate Disclosure

ADVERTISERS


PCBWAY PCB service


Curso Arduino Online nivel bajo