
Most makers begin by considering the electronics when creating an IoT device: microcontrollers, sensors, batteries, and connectivity. However, there is a practical issue that comes up quickly, where do you store all these parts, and how do you secure them?
Enclosure design comes in here. A good case is not a box. It guards against dust and moisture, makes a device portable, and enables users to operate it comfortably in the field. 3D printing is the easiest method to make custom enclosures in the DIY world. You can find hundreds of Arduino and Raspberry Pi projects all tidily contained in printed enclosures on sites such as Electronoobs.
However when you go beyond a hobby project and into an industrial prototype, then the task becomes more difficult.
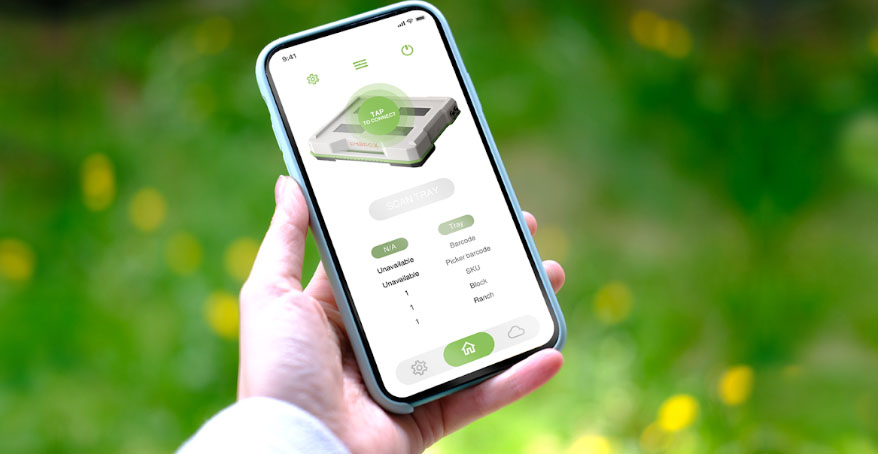
This article will walk you through the steps of designing and 3D-printing durable enclosures for IoT devices. As an example, we’ll take a closer look at the Scanning Suitcase, the Scanning Suitcase - one of Embrox Solutions’ custom IoT solutions, a handheld device built to support farmers during harvesting.
Electronics in IoT devices are fragile. A naked Raspberry Pi or Arduino board on your desk might work fine, but in the field it faces:
Dust and humidity that can short-circuit components.
Shocks and vibrations when the device is carried around.
Temperature swings that affect batteries.
User handling — devices need to be ergonomic, not just functional.
Enclosures solve these issues. They provide:
Physical protection (walls, seals, reinforcements).
Energy efficiency (a well-designed case reduces heat loss or improves cooling).
Ergonomics (comfortable grip, display visibility, easy access to ports).
For DIY projects, even a simple 3D-printed box makes your device feel like a finished product. For industrial IoT, it’s absolutely essential.
Designing a case for an IoT device is not as simple as “print a box.” Some typical challenges include:
Space optimization – components must fit tightly, but wires still need room.
Heat management – batteries and processors generate heat, which needs ventilation.
Mounting and repair – a good design allows easy assembly and disassembly.
Material choice – PLA is cheap, ABS is stronger, PETG is flexible; each has trade-offs.
Field use – in agriculture, healthcare, or energy, the case must survive outdoor conditions.
DIY builders often learn these lessons through trial and error. In professional projects, these decisions are critical from the start.

A real example is one of the projects at Embrox Solutions known as the Scanning Suitcase. This machine was constructed to be used in the field: farmers required a handheld system that could monitor workers, harvesting times, and packing information in the field.
The challenge was to create a compact device that could:
Recognize QR codes rapidly, even outdoors.
Work a full day on a single charge.
Upload collected data to the cloud.
Remain portable and ergonomic for farm workers.
Here’s where enclosure design made the difference:
The engineering team created a custom ergonomic mechanical case, light enough to carry all day.
To save space, mirrors were integrated inside the case, reducing its profile while keeping multiple cameras aligned.
The enclosure had to host a Raspberry Pi, an Arducam adapter, multiple cameras, LED backlighting, a custom battery gauge, and power boards — all neatly arranged.
Ultimately, the Scanning Suitcase was not electronics + code. The enclosure made of 3D printing was a major contributor to ensuring that it could be deployed as a practical IoT device in the field.
If you want to follow a similar process for your DIY IoT device, here’s how professionals approach it:
Start with CAD modeling – use tools like Fusion 360, FreeCAD, or SolidWorks to design the enclosure around your components.
Plan component layout – position your Raspberry Pi, sensors, battery, and wiring virtually before printing.
Check wall thickness – 1.5–2 mm is fine for lightweight prototypes; thicker walls (3–4 mm) for outdoor devices.
Add mounting points – screw holes, snap fits, or slots for cables.
Prototype in stages – print draft shells at low infill and layer height to test fit before making the final version.
In the Scanning Suitcase project, these steps were repeated multiple times. The team prototyped different layouts until the mirror system and LED backlighting fit perfectly.
Not all filaments are equal. Here’s a quick guide:
|
Material |
Pros |
Cons |
Best Use Case |
|
PLA |
Very easy to print Cheap and widely available Good surface finish |
Brittle, breaks under stress Low heat resistance Deforms in humid/hot environments |
Indoor prototypes, fast test prints |
|
ABS |
Stronger than PLA Higher heat resistance Can be acetone-smoothed |
Harder to print (warping) Needs heated bed/enclosure Produces fumes |
Functional parts that need durability and heat resistance |
|
PETG |
Flexible and impact resistant Weather and UV resistant Less prone to warping |
Slightly stringy during print Needs tuning for bed adhesion |
Outdoor enclosures, IoT devices for field conditions |
Recommended settings for durability:
Infill: 30–40% (for strength without wasting material).
Layer height: 0.2 mm (balance of detail and speed).
Wall thickness: at least 2 mm.
Supports: only where needed (optimize in slicer to save cleanup time).
The Scanning Suitcase prototypes used PETG, since the device needed to survive field conditions and daily use.
Once the case is printed, you need to fit in your electronics:
Plan cable routing early in CAD to avoid spaghetti wiring.
Use standoffs or printed holders for boards like Raspberry Pi.
Batteries should be fixed securely, often with Velcro or brackets.
Consider cooling and airflow if you run processors continuously.
In the Scanning Suitcase, the Embrox team used clever internal organization: mirrors reduced the overall footprint, LEDs were mounted for backlighting, and the Raspberry Pi with Arducam adapter had secure mounts inside the case.
From both DIY and industrial projects, here are some practical takeaways:
Prototype fast, iterate often – don’t wait for perfection; test fit early.
Think ergonomics – handles, buttons, or displays must be comfortable to use.
Plan for upgrades – leave space for future modules or battery swaps.
Use modular design – split your case into sections (top/bottom) for easier printing and maintenance.
Don’t underestimate cooling – even small boards can overheat in a closed box.
The Scanning Suitcase taught that enclosure design can directly affect usability and energy efficiency. Without its compact, ergonomic case, the electronics alone would never be field-ready.
With 3D printing, even a hobbyist or an engineer can create enclosures to IoT devices. Whether you are shielding an Arduino soil sensor or a multi-camera Raspberry Pi system, the electronics inside are only as good as the case design.
The Scanning Suitcase project demonstrates the way professional teams solve enclosure problems: custom mechanical design, space optimization with mirrors, heavy duty materials, and ergonomic usability. These are some of the lessons the DIY builders can use in their projects.
The next time you design an IoT device, then, don’t leave it at the breadboard. Load up your CAD program and begin printing, and then provide your creation with the sturdy enclosure that it needs.


