About me
  History
  Let's learn
  Contact us
  Arduino tutorials
 Circuits tutorials
  Robotics tutorials
 Q&A
Q&A Blog
Blog  Arduino
  Circuits
 Robotics
  Modules
  Gadgets
  Printers
  Materials
  3D objects
  3D edit
  Donate
  Reviews
  Advertising


Android bluetooth Arduino data receive

1.0 Float data read
In this part of the tutorial we will read the analog value of a potentiometer between 0 and 5 volts and save the data in a float format so it ould have decimals as well. Next we establish a bluetooth connection with the smartphone and send the read data in a text format. We create a small App in AppInventor 2 that will receive that text and diaplay the value on the smartphone screen. Easy right?
Downlaod this App here
1.1 The schematic
In the next photo below you have the schematic that you should mount for this simple part using the Arduino UNO. The potentiometer is connected to 5V and GND and the middle pin to the analog input A0 of the arduino. The Bluetooth module is the HC06 and it has a wart comunication so it will use the Tx and Rx pins.
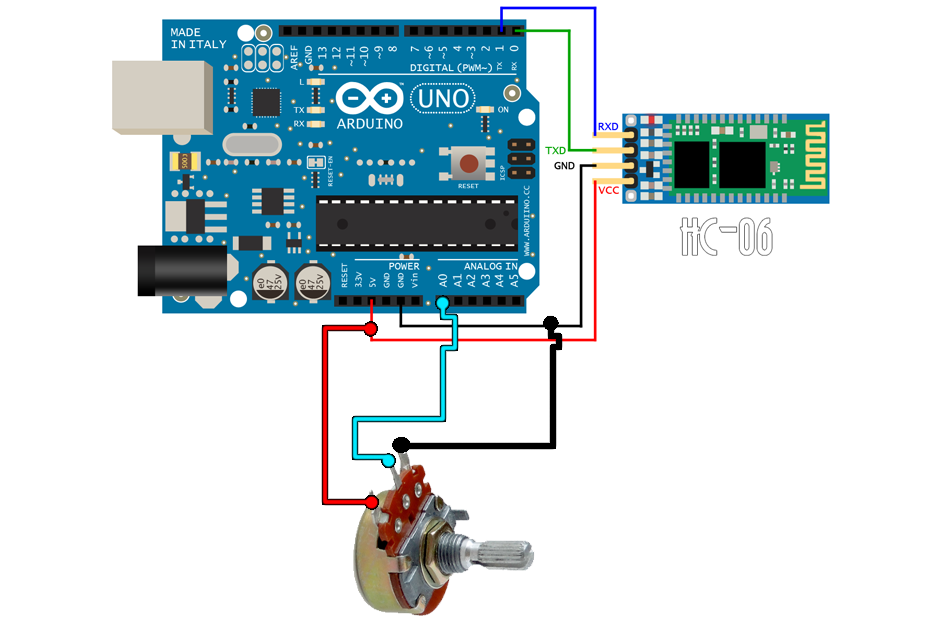
Ok, now we have the schematic that will read the values from the potentiometer. LEt's take a look over the code now.
1.2 The code
Ok guys, the first thing to do is to start a serial comunication with a baud rate of 9600 bauds since the HC06 bluetooth modules works at that speed by default.
The ADC of the arduino has 10 bits. So 2 to the 10 will give us 1024 posible points. So in order to keep the range between 0 and 5 volts which is the real voltage applied to the potentiometer, I divide that 1024 value by 205. There are two ways to send data through the serial port. Using Serial.
/* Electronoobs Bluetooth data receive with
 * Android and Arduino. Small example.
 * Remember to disconnect the Rx and Tx pins of the HC-06 when
 * uploading the code
 *
 * Subscribe: http://www.youtube.com/c/ELECTRONOOBS
 * Tutorial: http://www.electronoobs.com/eng_arduino_tut20.php
 */
//Inputs
int in = A0;

void setup() {
  Serial.begin(9600);   //Set the baud rate of the comunication
  pinMode(in,INPUT);    //Define the pin as input
}

void loop() {
  //Read the analog value
  float val = analogRead(in);

  //Divide by 205 to obtain a range from 0 to 5V
  float val2 = val/205;

  //Use serial.print to send the data in a "text" format
  Serial.print(val2);
  delay(400);//Small delay between each data send
}
In this case I've used Serial.
After each data send I add a small delay in order to make sure I'll be syncronised with the App.
1.3 The App
Ok, go to this page and enter AppInventor with your google account. Here we have to create a new project. I'll give the name "Voltage_read" to my app. Click ok and we will open the main screen of the app as we can see below.

Now, the first thing to do is to create the parts of the connection. I'll add a new horizontal arangement and inside I'll add a new list picker. This will contain the lis of all of the bluetooth devices paired with the smartphone. We will see that later. Finally I give the list picker an image icon of a bluetooth symbol.
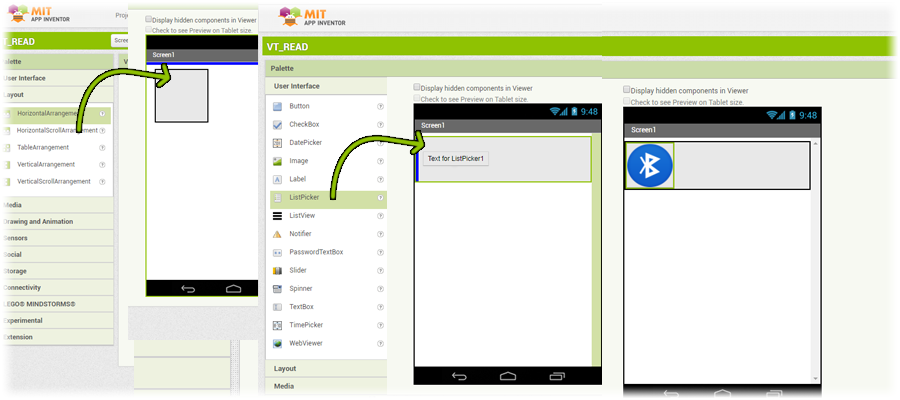
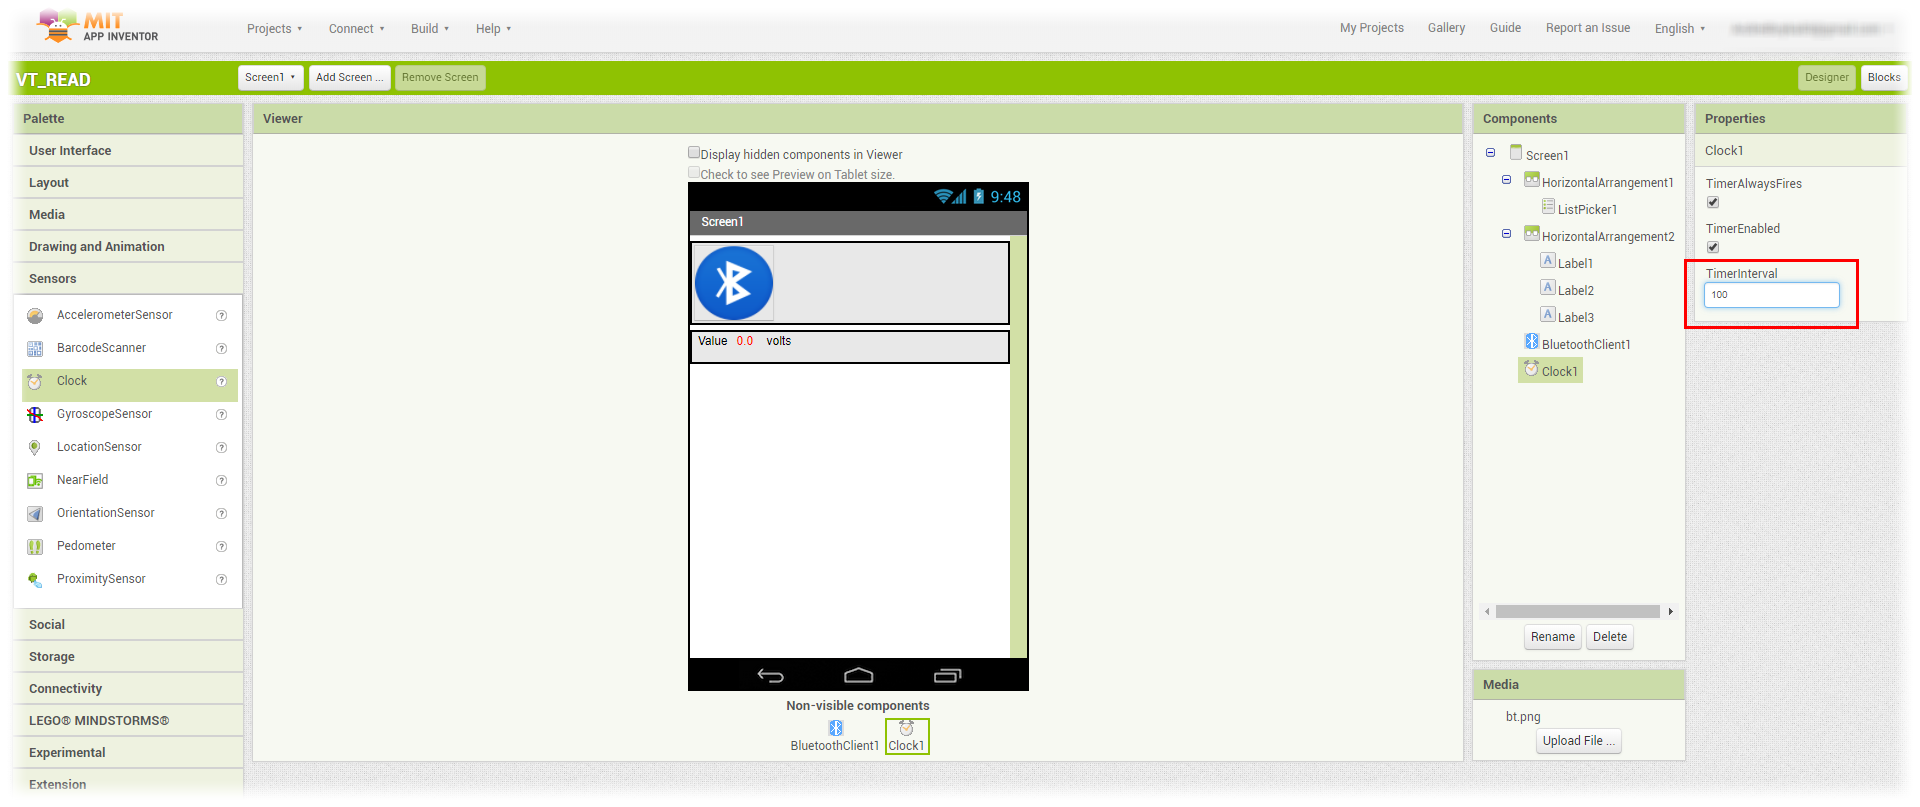
Ok, finally we add a new horizontal arrangement and inside we add 3 labels. The first will write Value, the third will write Volts and the middle one will be the received data. Finally we add the non visible components which are the clock and the Bluetooth client.
As you remember in the pat tutorial we dodn't use a clock because to send data we don't need that. In this case, to receive we do. Set the timer interval to 100ms and let's jump to the code blocks.
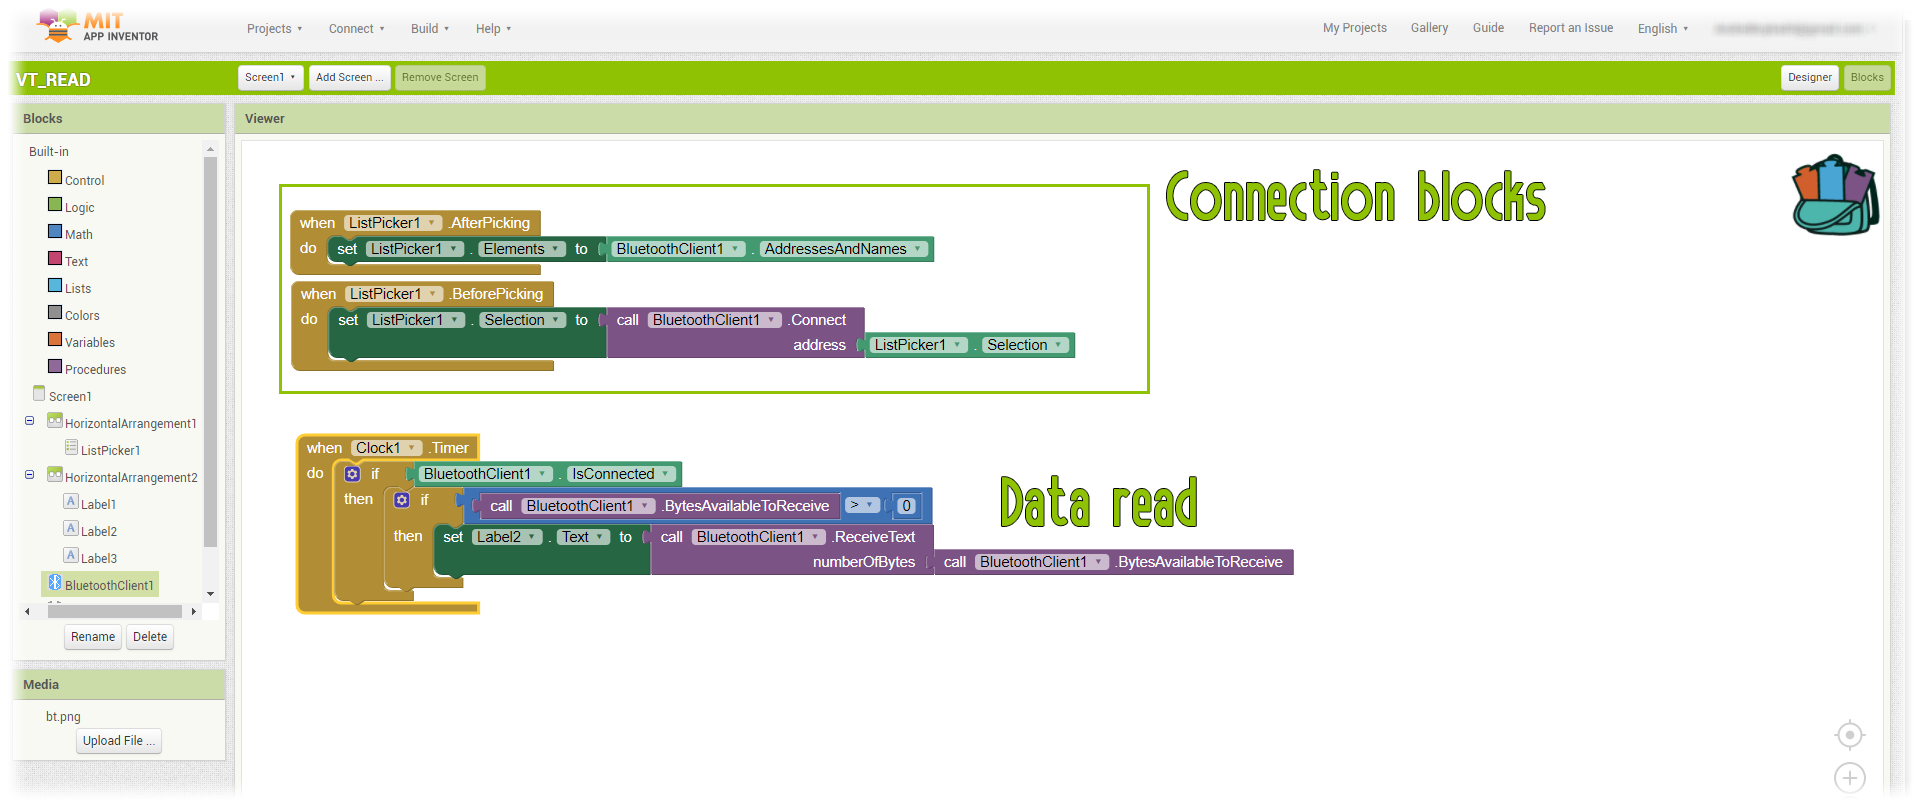
1.3.2 The App code Blocks
Now we add the code blocks. First we add the blocks for the list picker. When selected we open the list of Bluetooth devices. After that we select the device we connect.
In the bottom blocs each time the timer will loop, in this case 100ms, we first check if there is a bluetooth connection. If yes, we check if there is data comming thoards the smartphone. If yes then we set the text of the middle label to the received data. That's it. Now click build and save the app. Copy it to your smartphone and install. Make sure to enable unknown origin app in your smartphone settings.
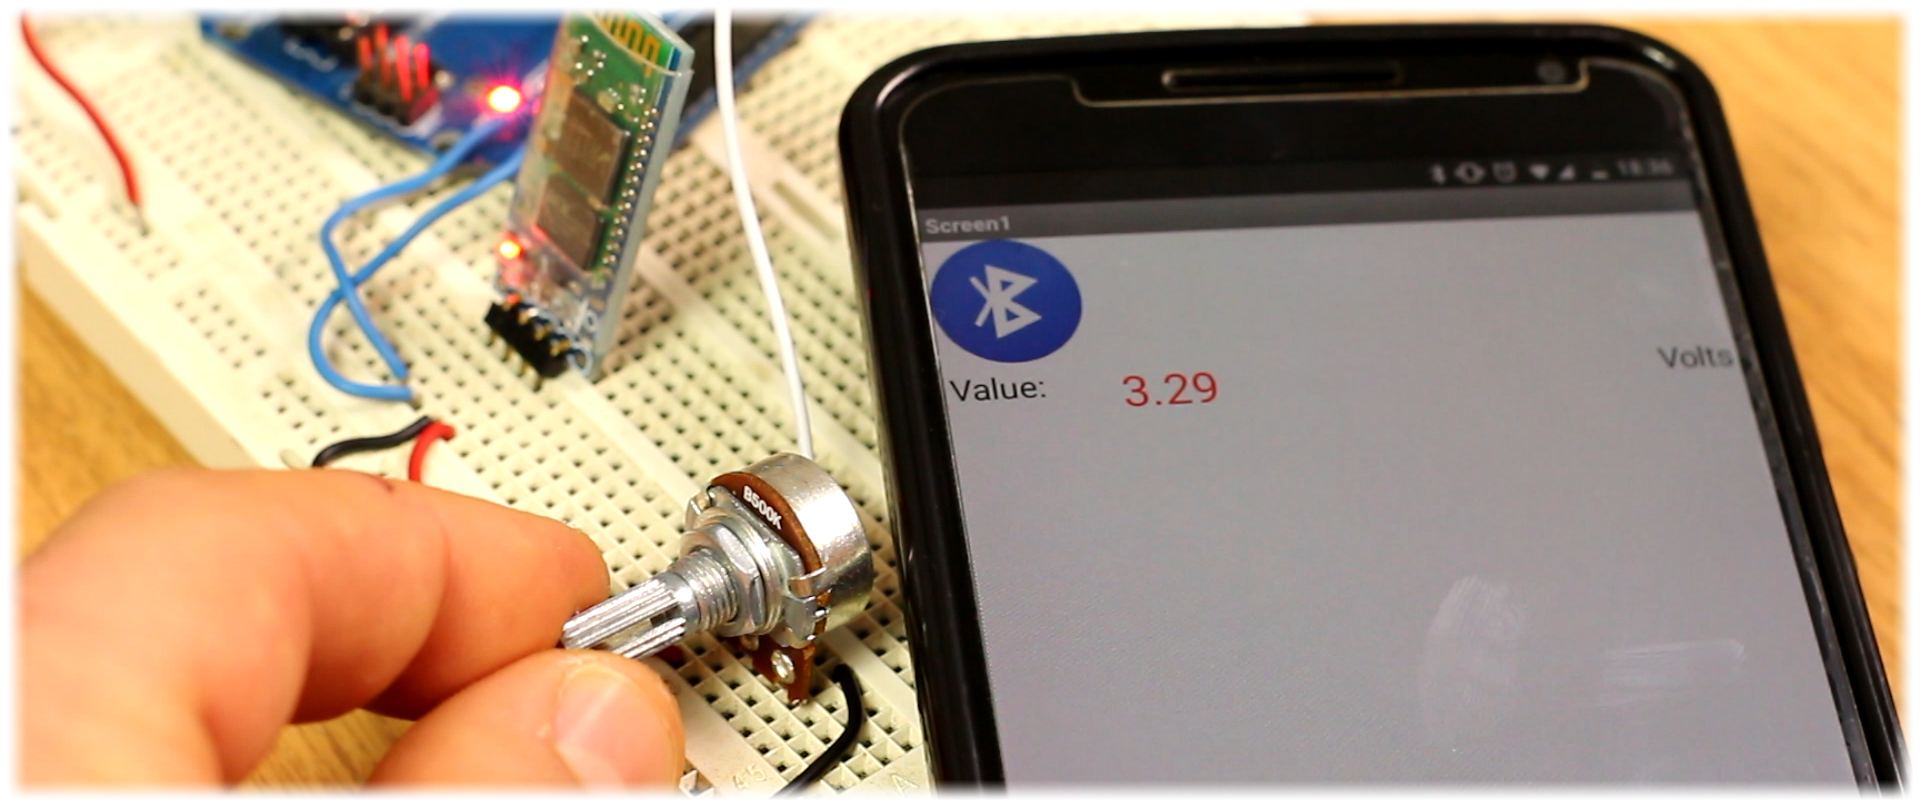
To pair to the bluetooth modue go to bluetooth settings and pair. Use 1234 or 0000 password and connect. Then open the app, select the bluetooth icon and connect to HC06. Done, now we receive data as you can see below.