
 About me
  History
  Let's learn
  Contact us
  Arduino tutorials
 Circuits tutorials
  Robotics tutorials
 Q&A
Q&A Blog
Blog  Arduino
  Circuits
 Robotics
  Modules
  Gadgets
  Printers
  Materials
  3D objects
  3D edit
  Donate
  Reviews
  Advertising


Whistling detection Arduino

2. Arduino code
2.2 LED and buzzer control
Using an if statement I detect the range. In this case between 800Hz and 1.8KHz. If the measured frequency is in that range I start a new counter called square pulse counter. You see, I don’t want just one square wave pulse to have the desired frequency because that will result in an error where any sound could trigger the circuit. I want a bunch of them one followed by the other. In this way I will make sure that the signal is the one that I want and not just a random noise. Any time that the measured frequency is not in the desired range I reset the pulse counter. In this case I need 60 pulses in a raw to have the frequency in the desired range. If I detect that then I trigger my circuit. Increasing this number will decrease the sensibility of the detecting circuit.
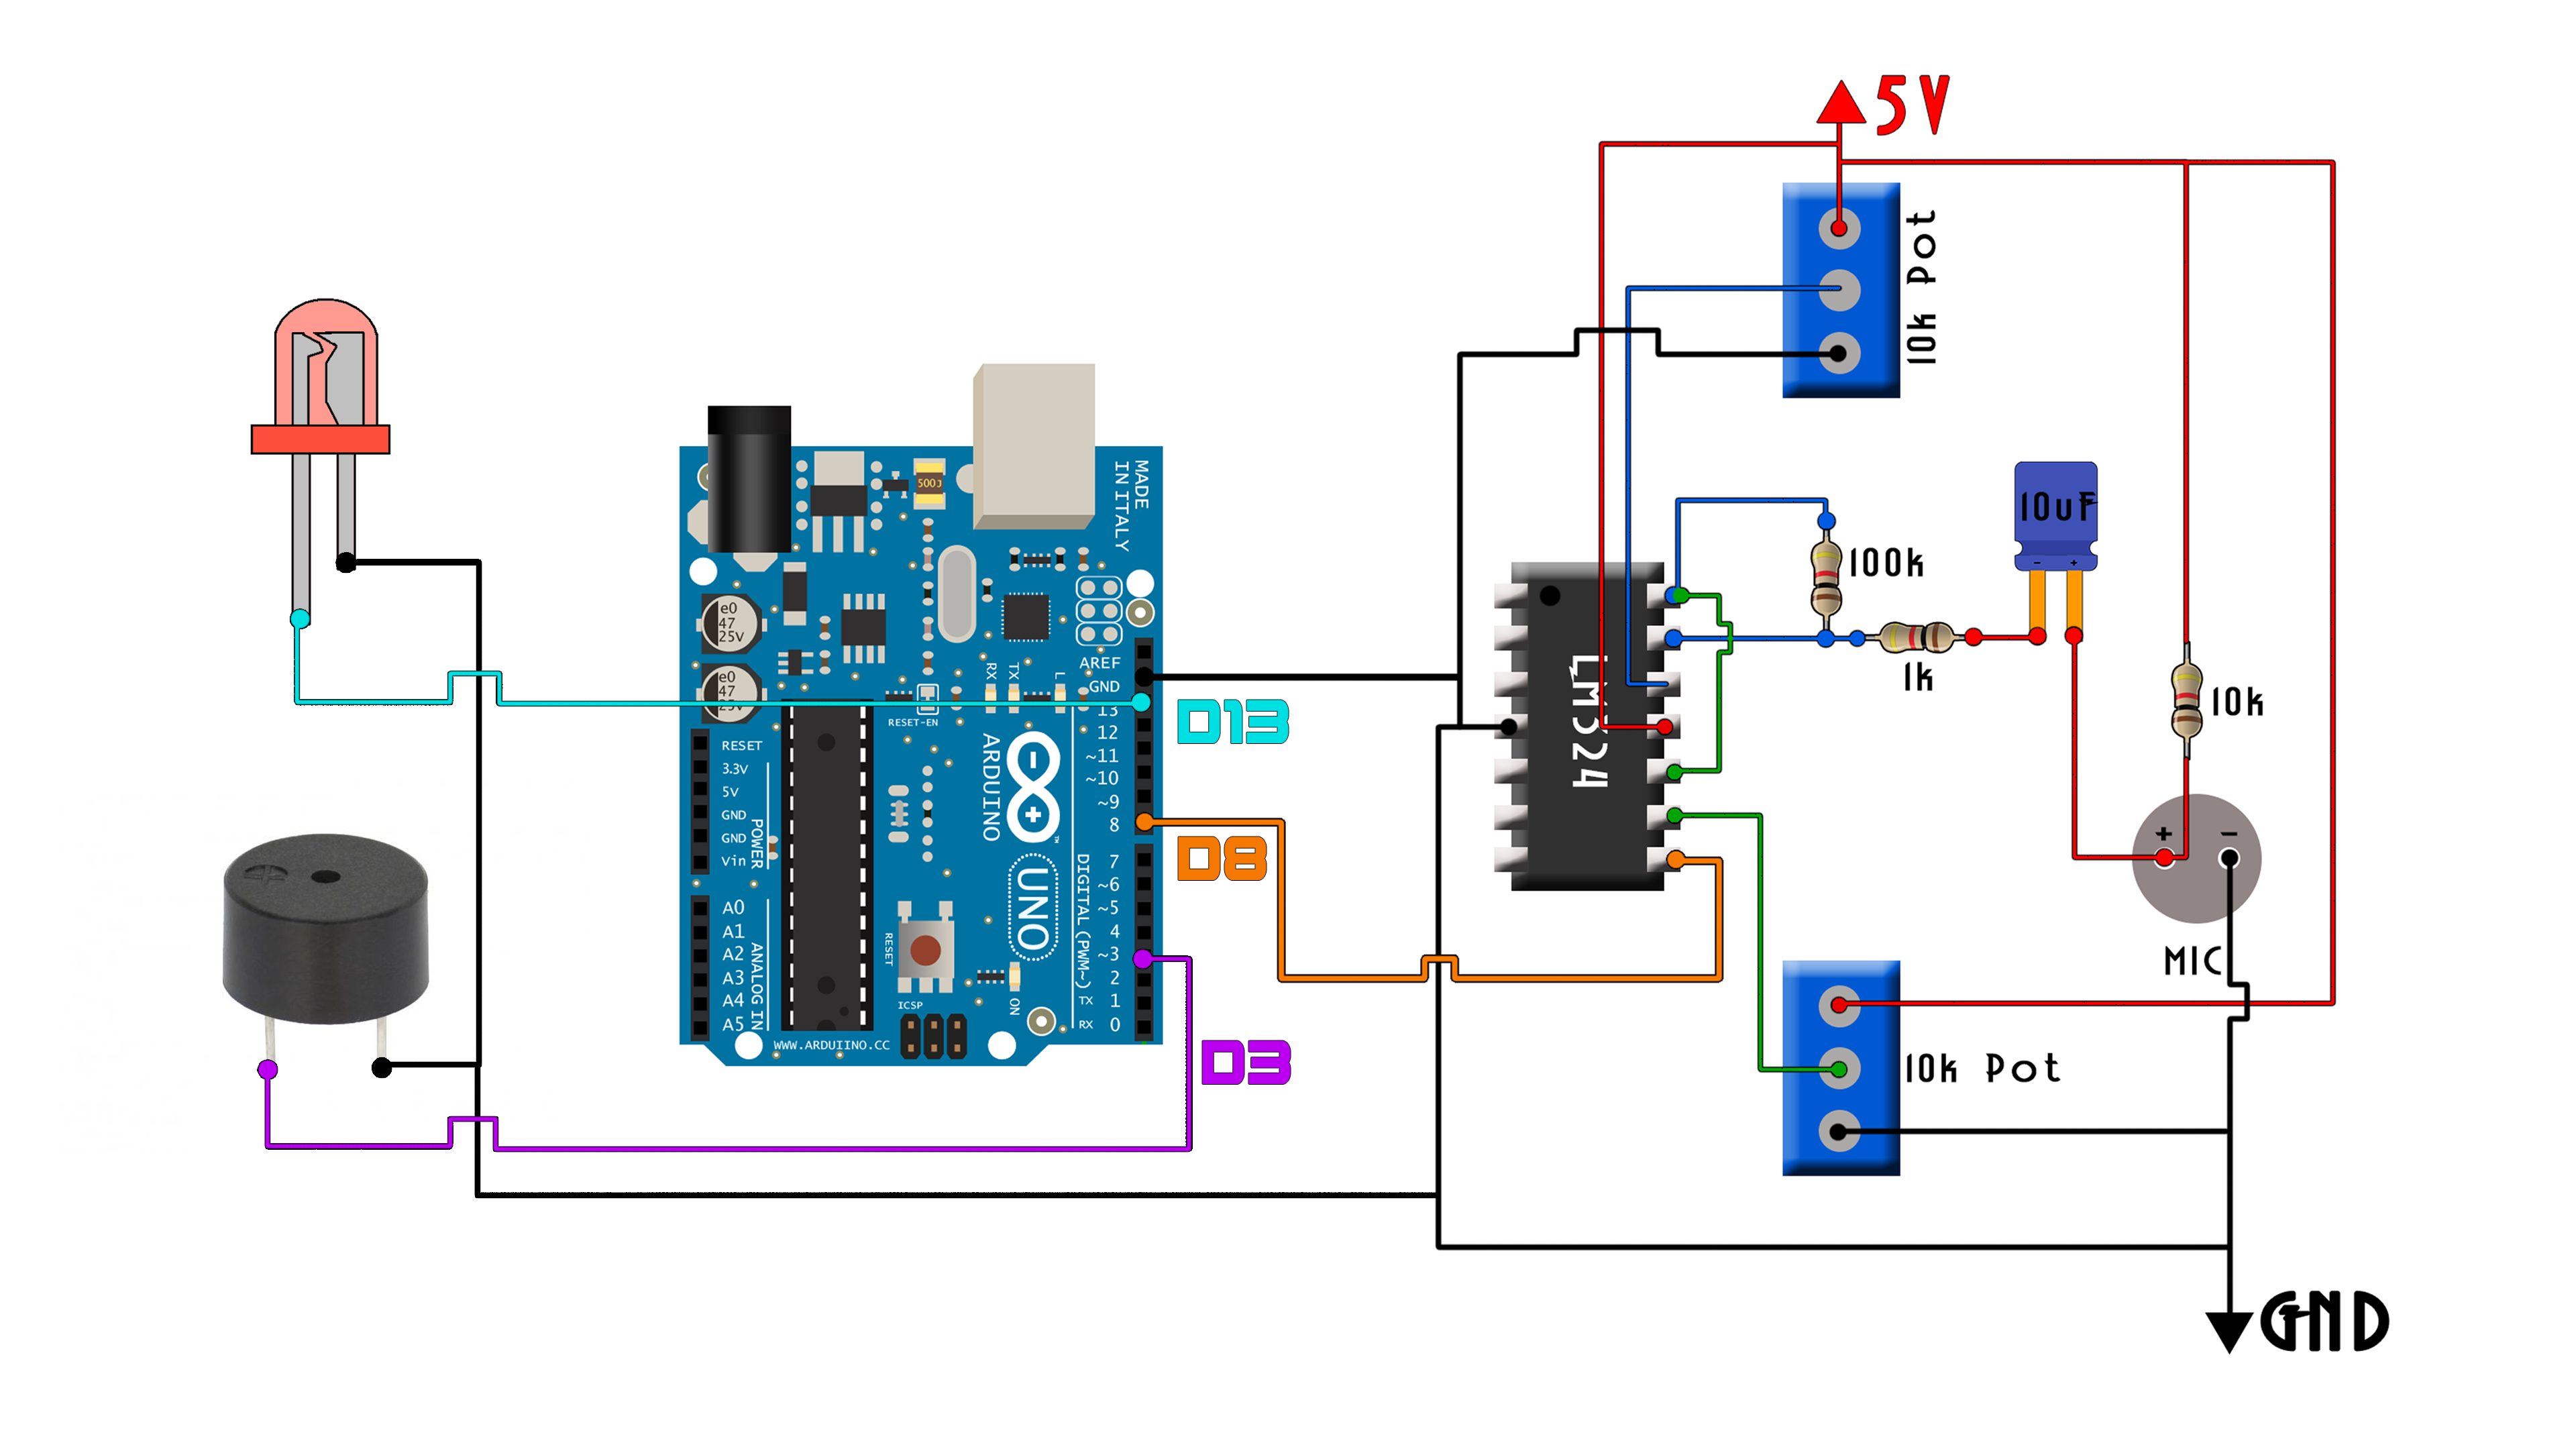
Download the code above and use it with this schematic. Once the whistle is detected I trigger the digital pin 13 which will be connected to an LED and also apply an analog signal to pin 3 connected to a buzzer. I upload the code and make all the connections and let’s give a test to this project.

There you go, I can turn on and off the LED just by whistling. The circuit is immune to random noise. I can play MUSIC, NOISE, CLAP, etc.
Only the whistle sound will trigger this circuit and that’s because the whistle sound is special. It creates a sine wave with a constant frequency, equal time on both negative and positive parts of the signal and also a defined range. So, finding random noise with the same characteristics is quite difficult, not impossible but difficult.
Now instead of an LED, I connect a relay to digital pin 13. To the relay I connect a 220V lamp. Check ehe next example for that.