
 About me
  History
  Let's learn
  Contact us
  Arduino tutorials
 Circuits tutorials
  Robotics tutorials
 Q&A
Q&A Blog
Blog  Arduino
  Circuits
 Robotics
  Modules
  Gadgets
  Printers
  Materials
  3D objects
  3D edit
  Donate
  Reviews
  Advertising


Whistling detection Arduino

2. Arduino code
2.3 Relay switch
Now instead of an LED, I connect a relay to digital pin 13. To the relay I connect a 220V lamp. Be very careful when working with high voltages and only connect the power when you’re sure that the circuit is ready or restrict your projects to lower power components as 5 or 12V.
Now any time I whistle I turn On and Off the light of my room. Isn’t that nice? The detector works from any corner of my room. I was amazed finding that it detects so well, even when I’m out of the room.
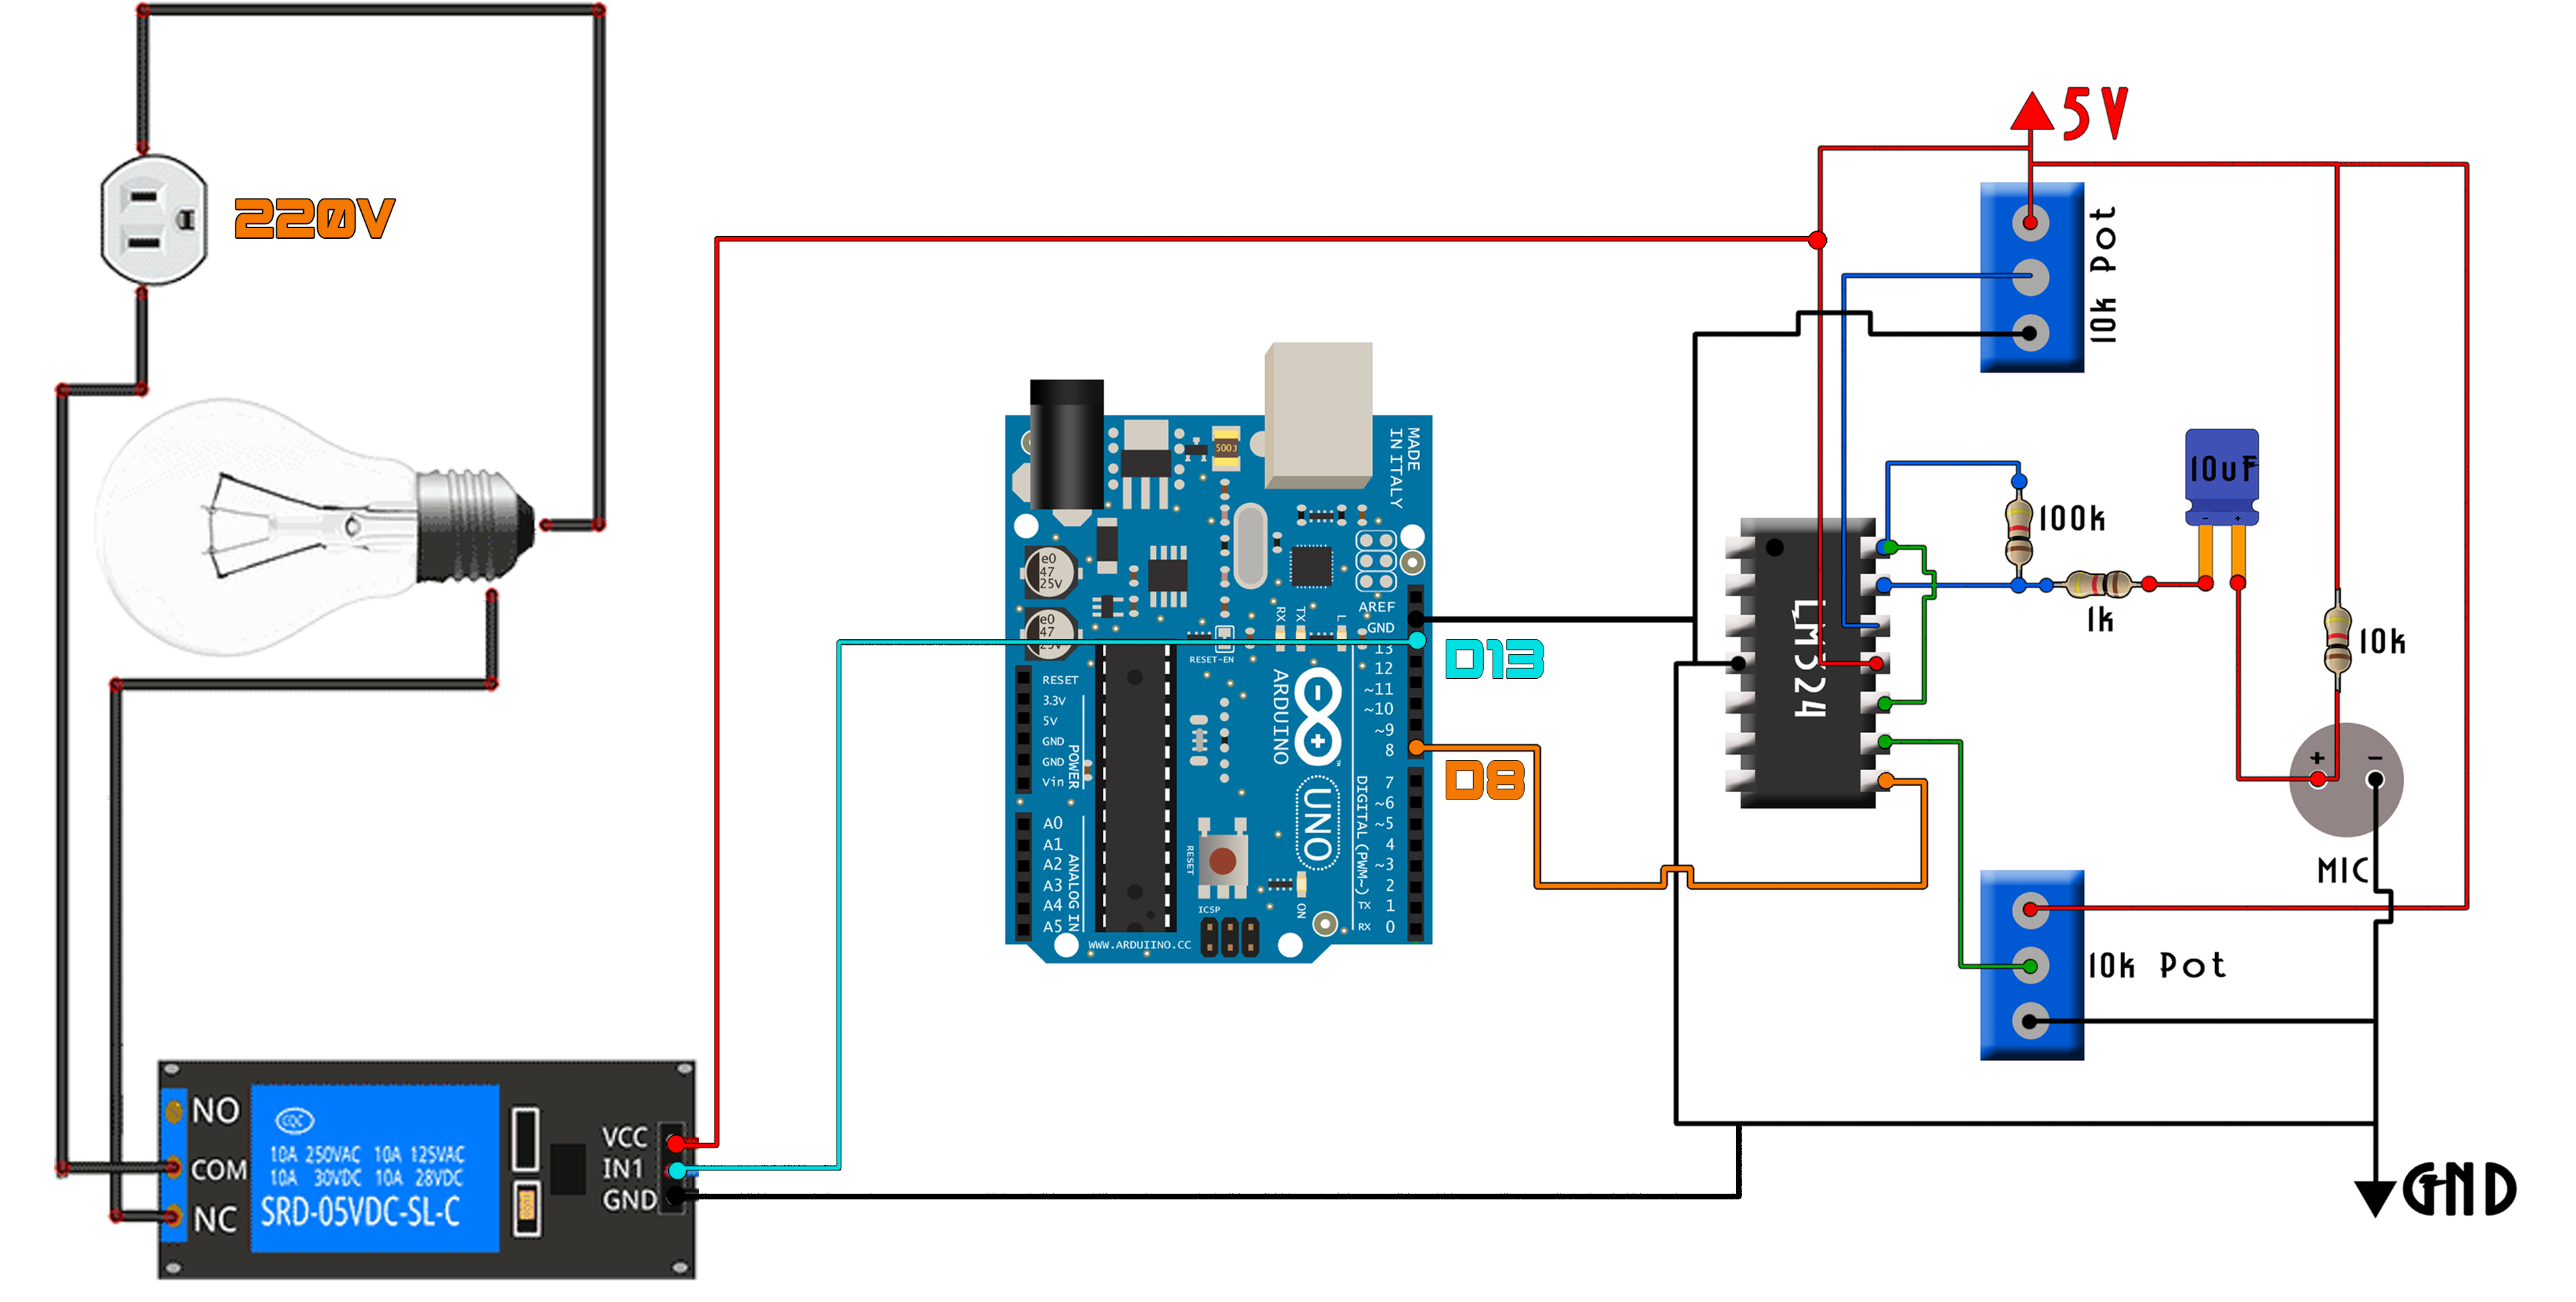
Download the code above and use it with this schematic. Once the whistle is detected, the Arduino will trigger digital pin 13 which will be connected to the relay. I upload the code and make all the connections and let’s give a test to this example.
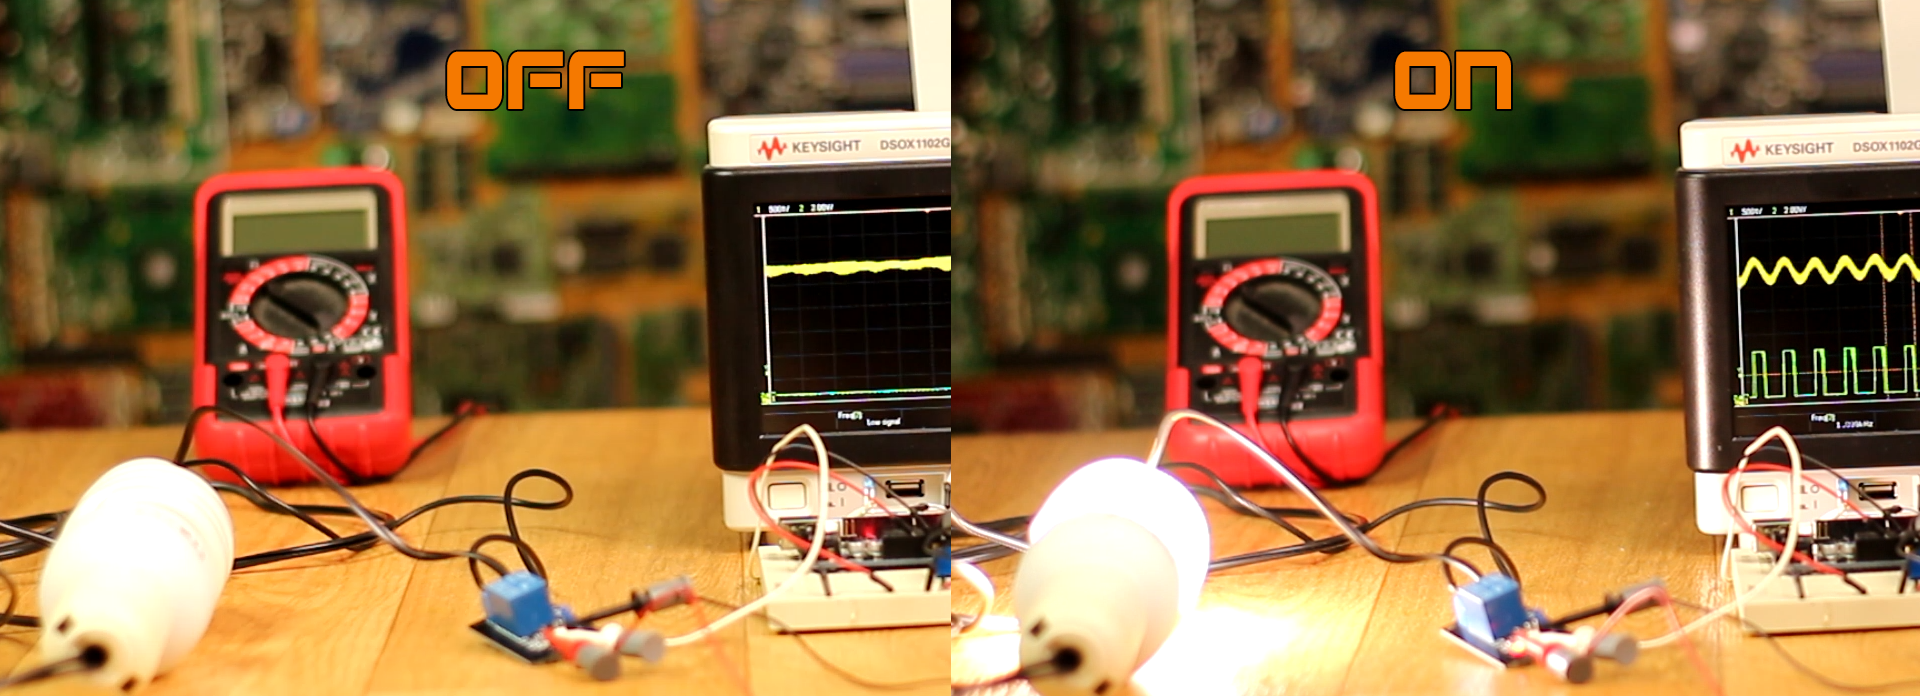
There you go, I can turn on and off the relay just by whistling. The circuit is immune to random noise. I can play MUSIC, NOISE, CLAP, etc.
You could turn on and off lights, maybe an LED strip , the music player, or make the Arduino make any other operation that you want as for example count the time that you whistle and display them on an LCD. That’s not useful but is cool because you made it.
Now instead of an relay, I connect a MOSFET and LED strip to digital pin 13. Check ehe next example for that.