I always wanted a prompter so now I've made one. We can control it fron any PC with HDMI output. It has an LCD with HDMI controller, adaptor for tripod and more. Is quite easy to build and the most expensive part is the LCD. The rest are just some wood, a piece of glass and screws. So, let's see.
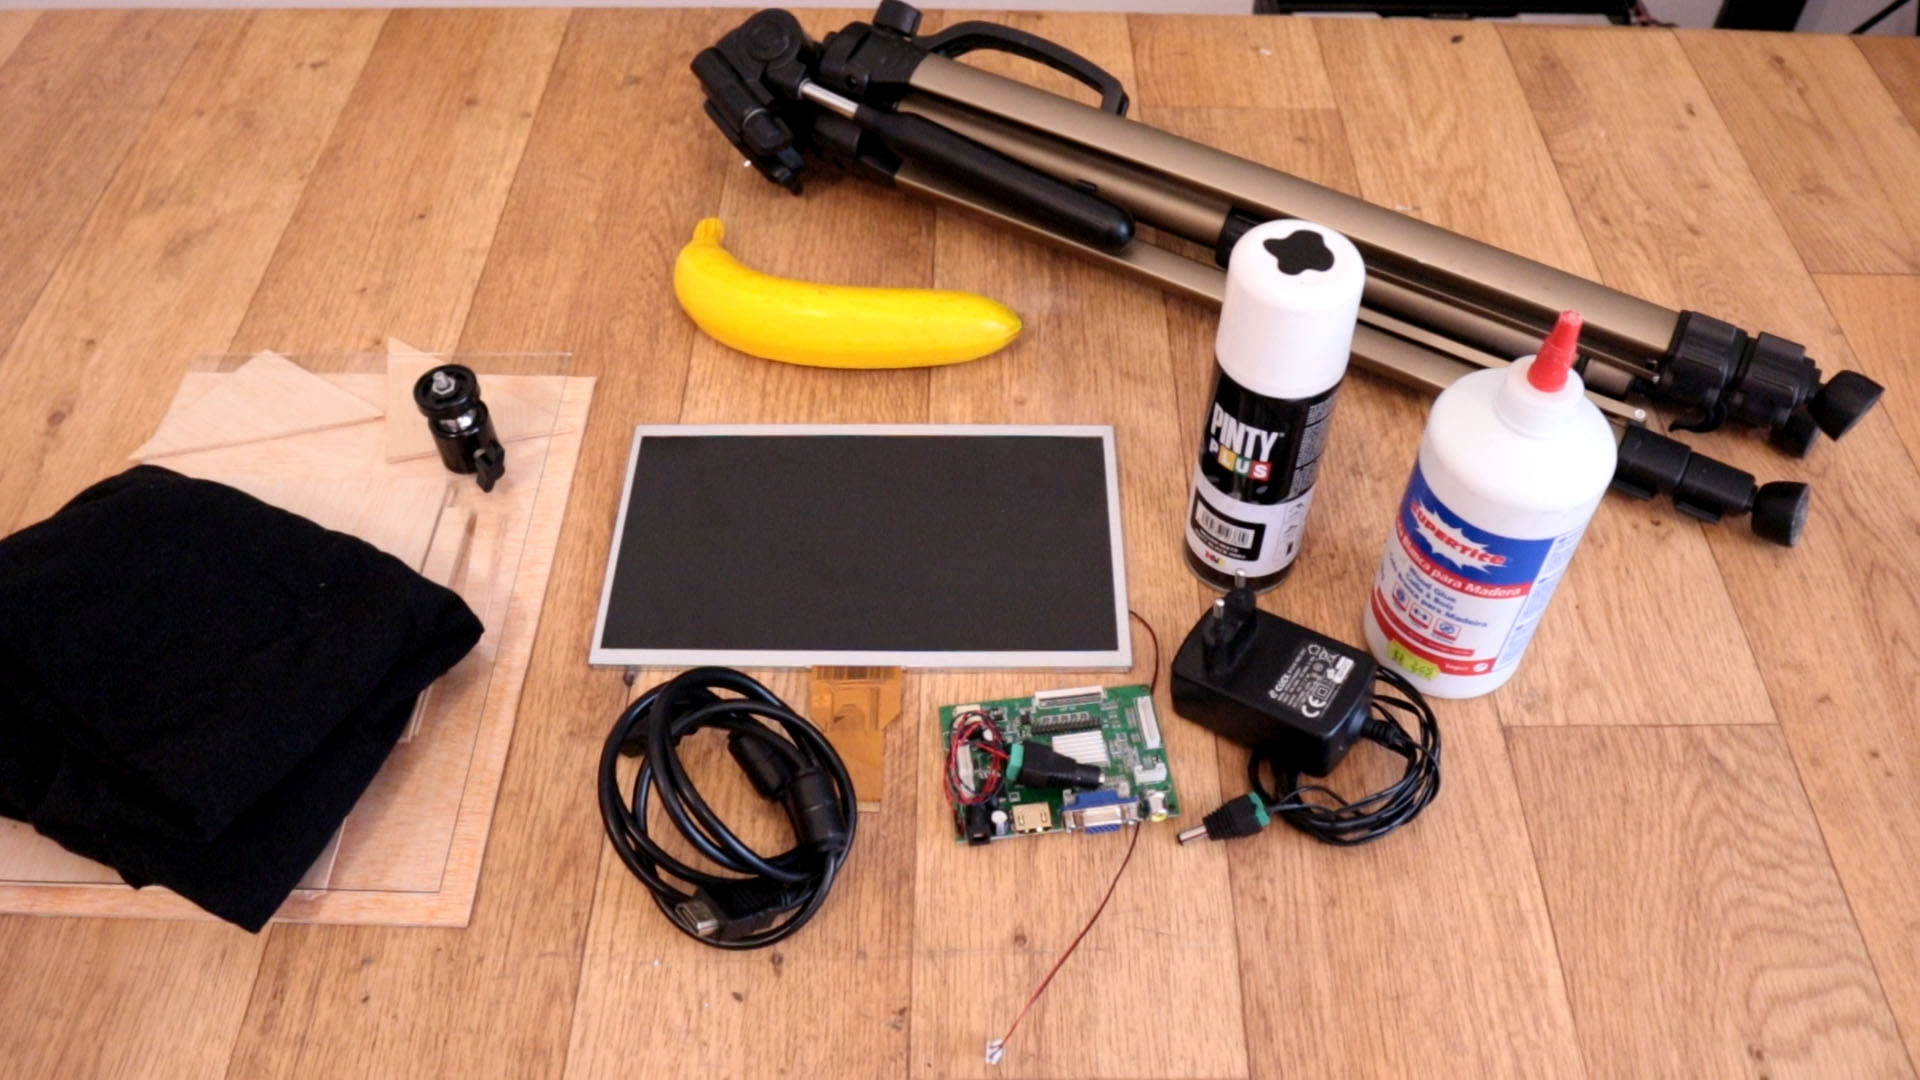
To make this project we need just a few components but more manual work. The electronics list is very small, the rest are just wood parts, glass, glue, ect. See the full part list below with waht I've used. You can always choose a different photo frame, different size, wood, tripod, etc.
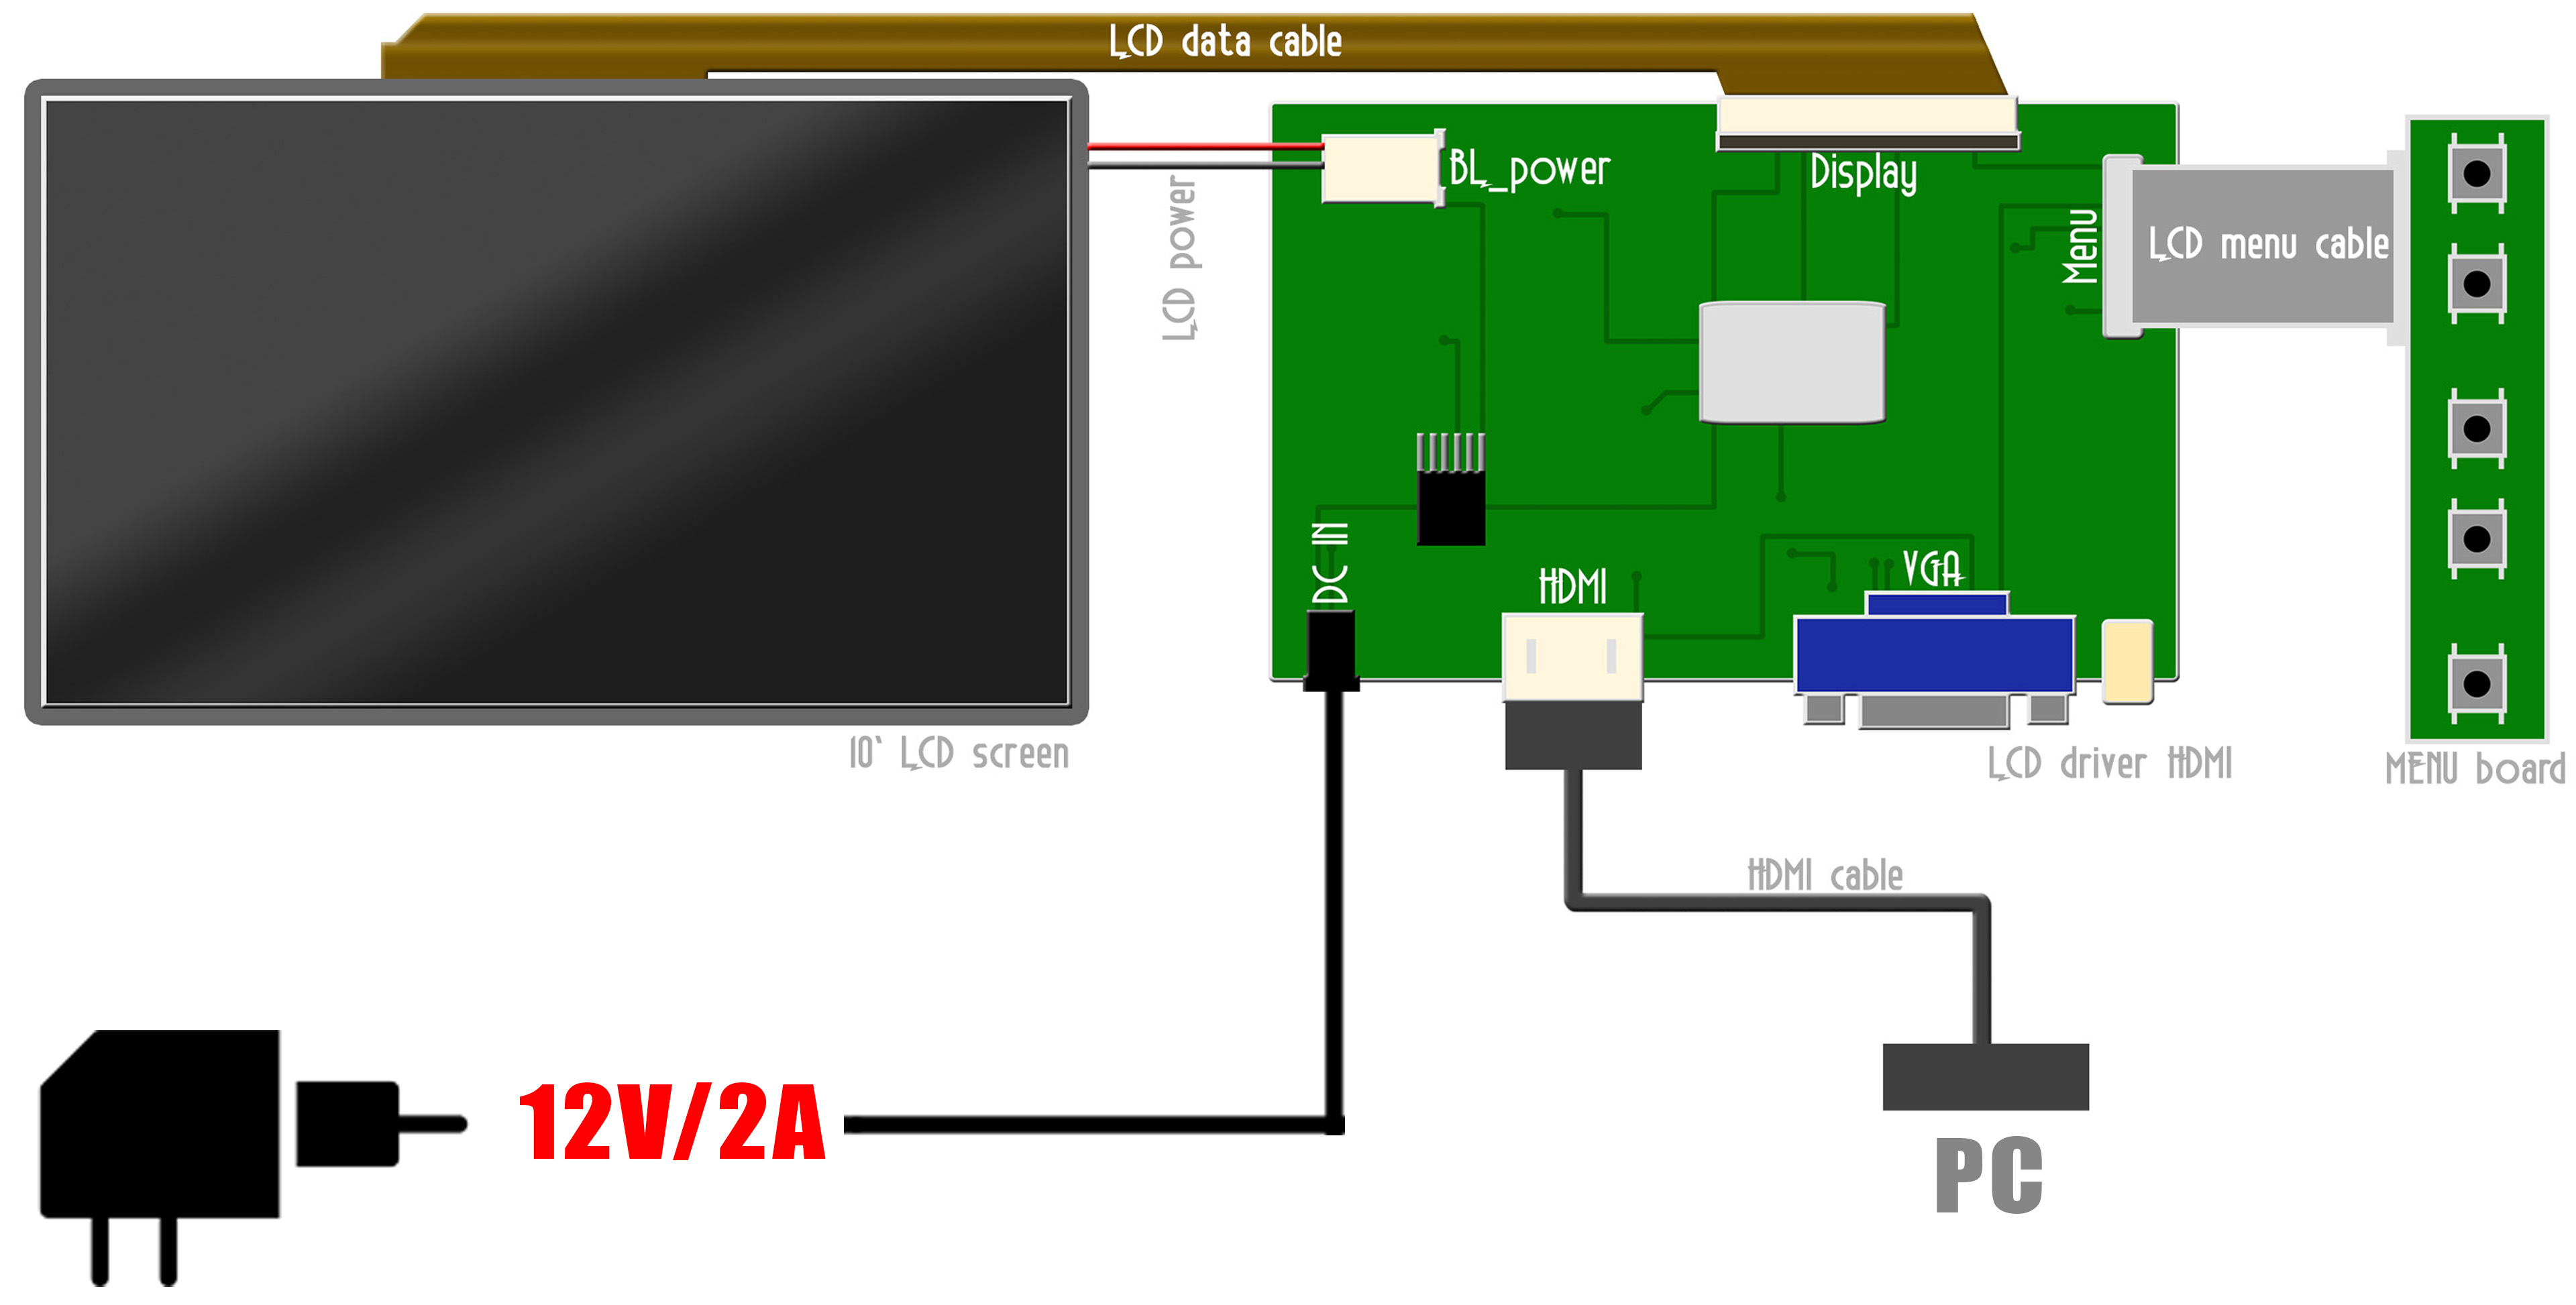
The connections are very simple. Just connect the data strip from the HDMI driver to the LCD. Also connect the 2 cabes with power for the LCD. You can extra add the menu buttons, but we usually won't need that for this project. Then connect the 12V supply to the input and output DC connectors. Make sure you won't connect it with invers poalrity! Add the HDMI cable between the driver and PC.
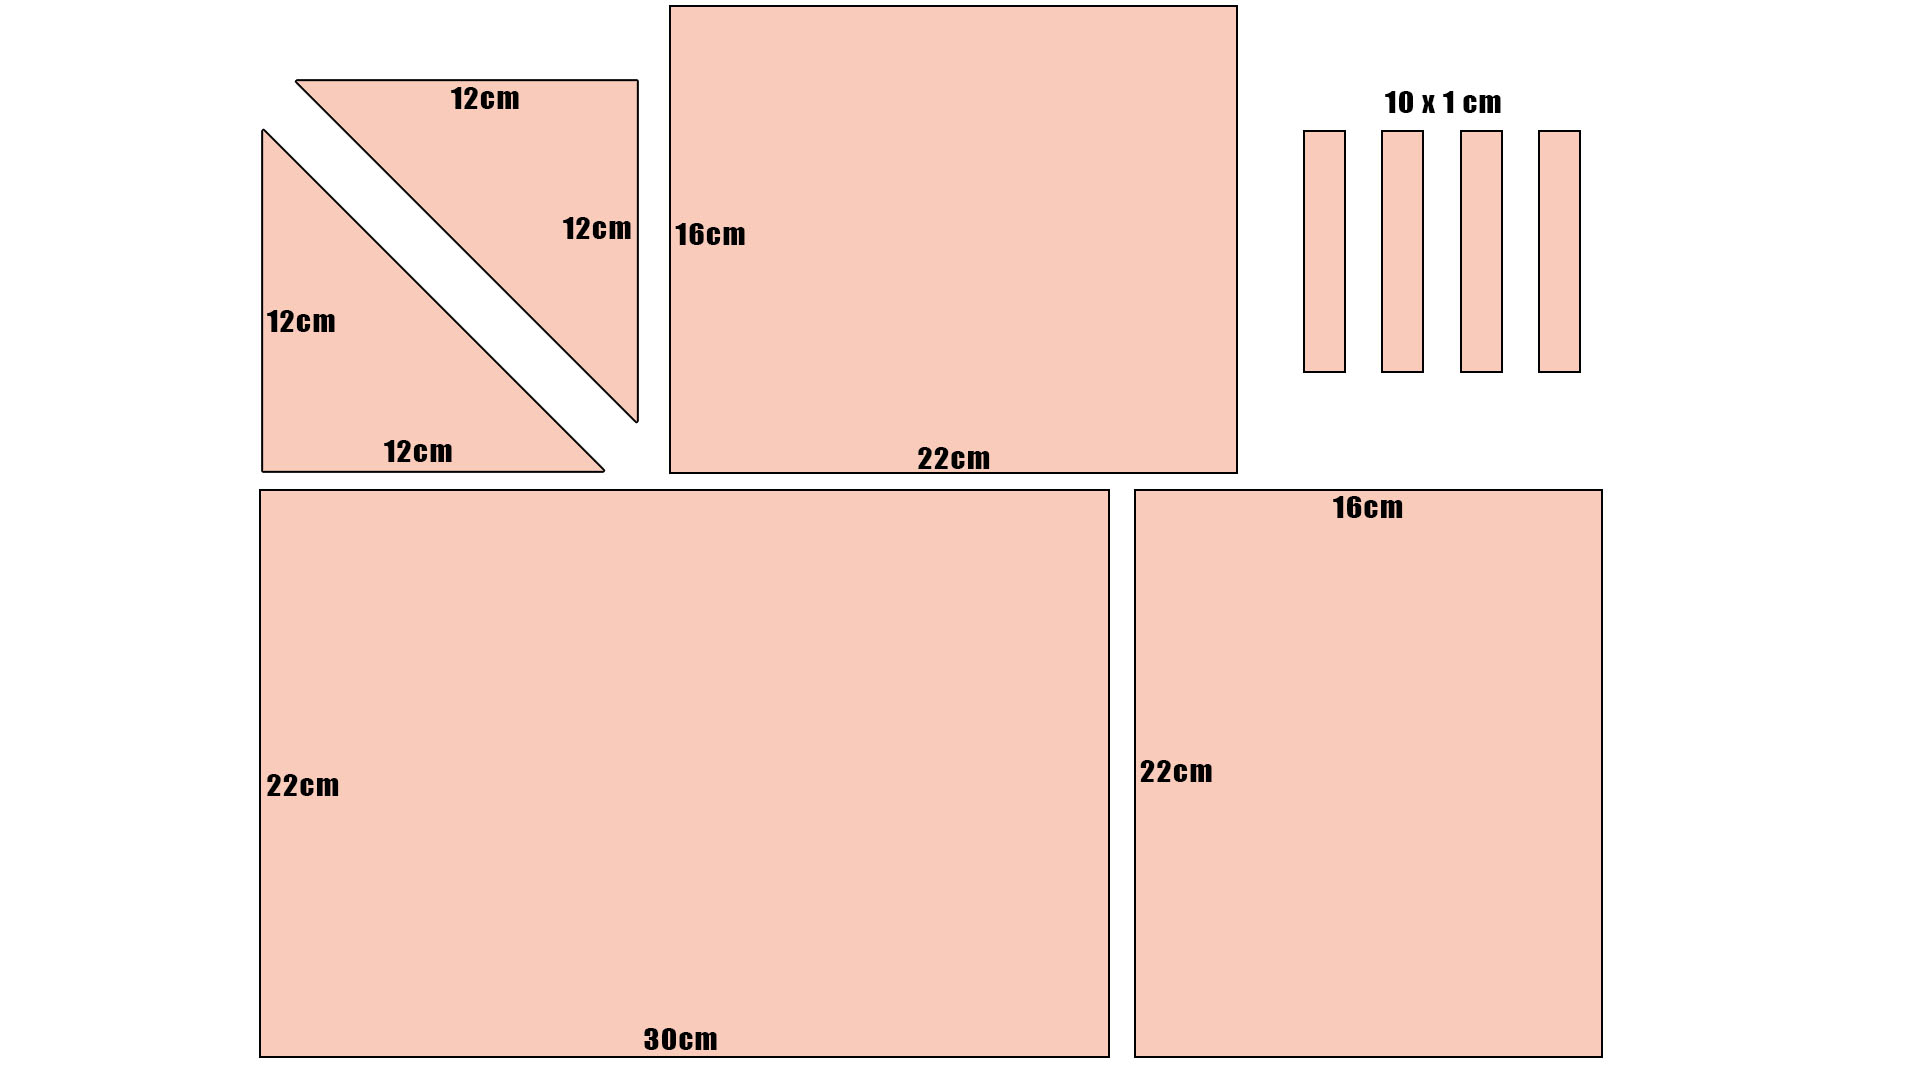
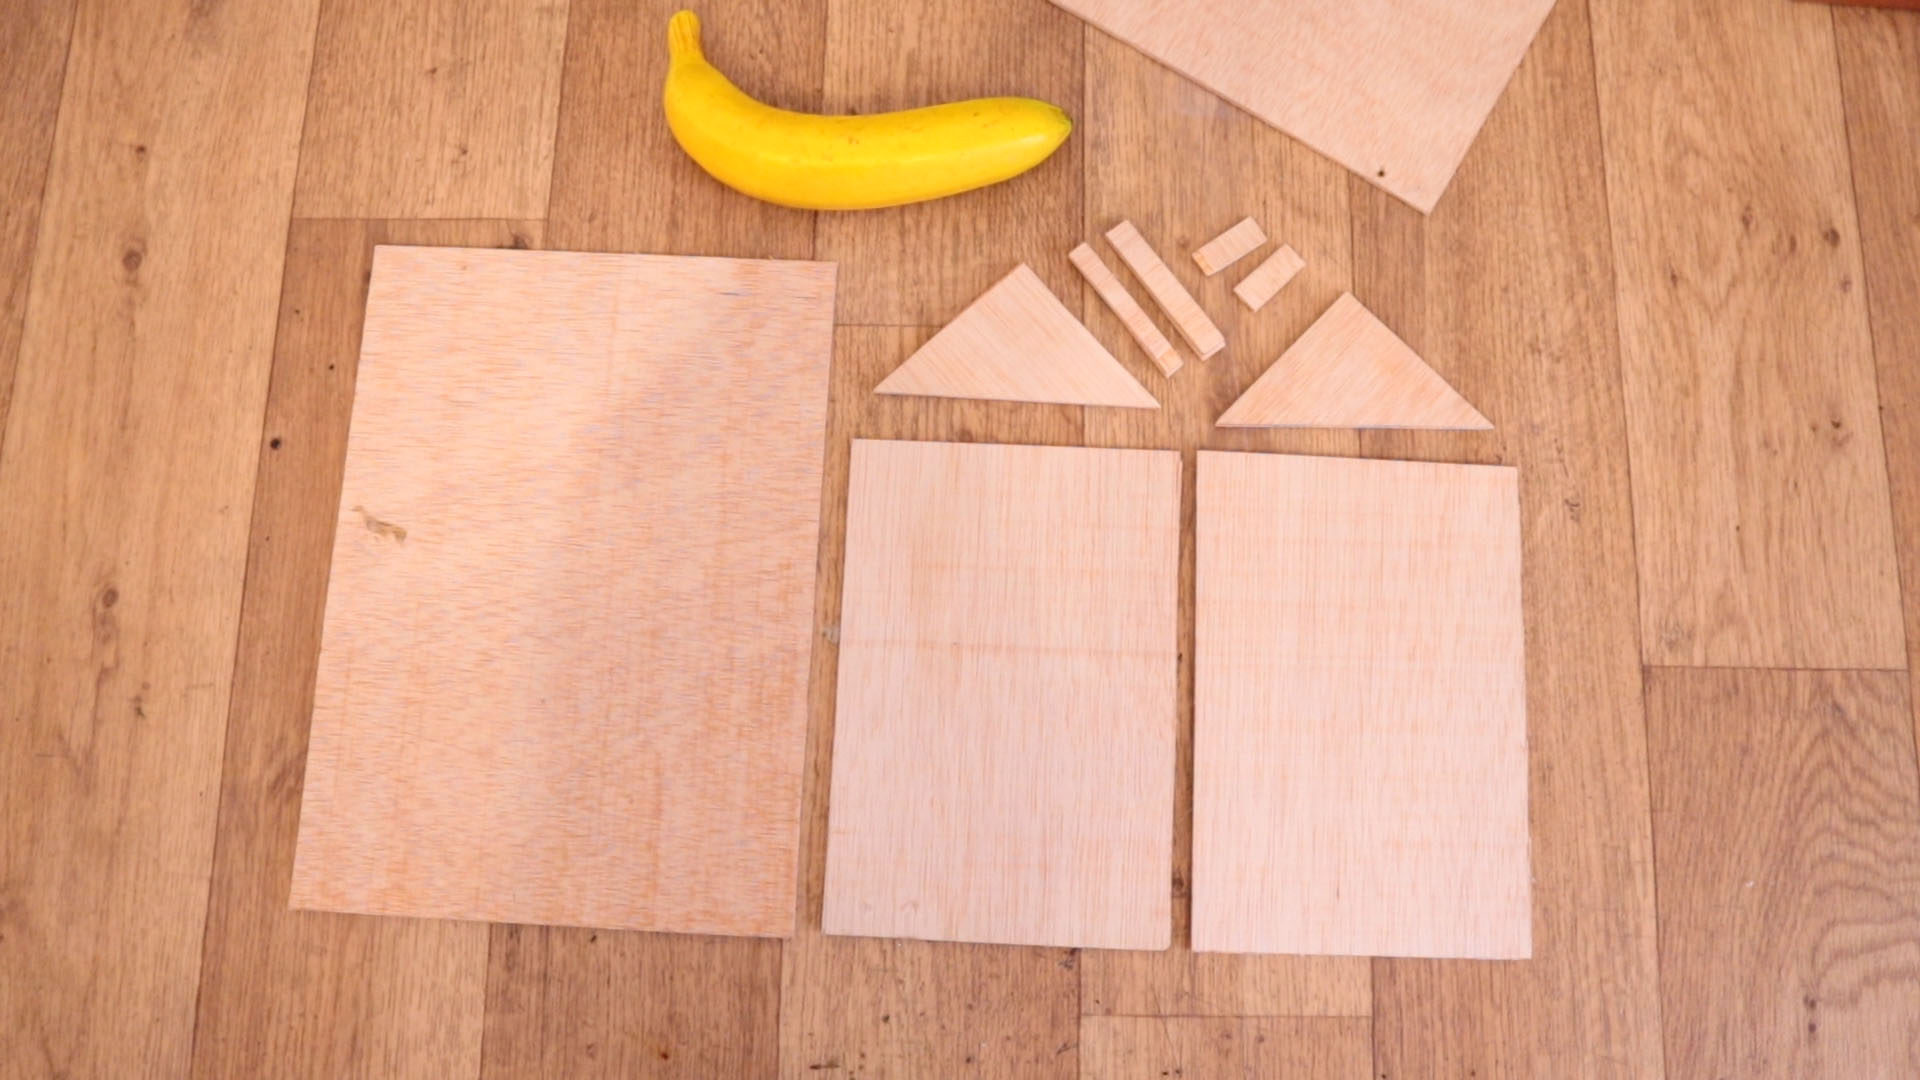
First we need to mesure the glass taht we will use, because that will give the size of the prompter. I have the glass from a simple photo frame. Just remove the back and get out the glass. In my case the glass is 20 by 30 centimeters. The size of the prompter is given by the size of your camera. I will use this prompter with my second camera which is not that big. Imagine a bigger camera, won’t fit inside, so you will have to make your prompter bigger following the same steps but with bigger measurements.
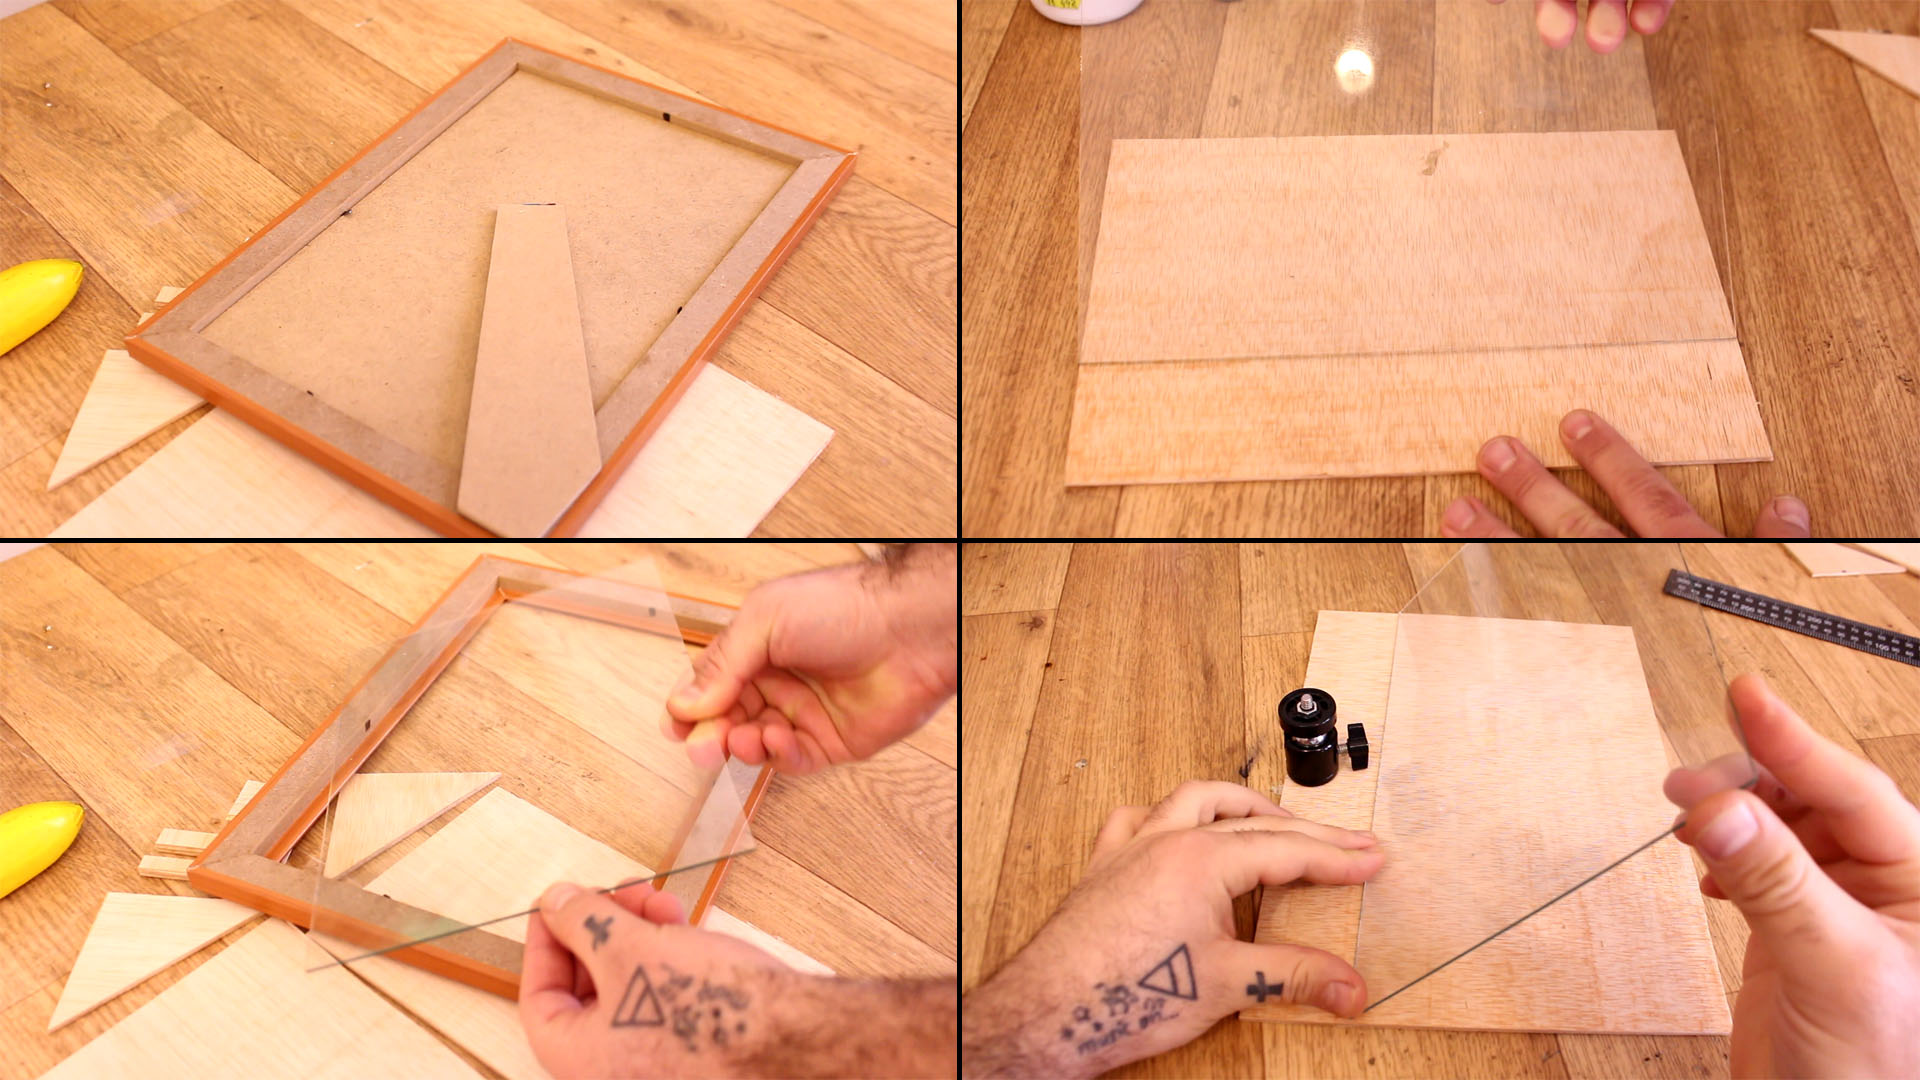
I've used plywood of 4mm thickness. Since my glass is 20 by 30 cm, I cut the base to the same width as the glass, and that is 30cm. The length is a bit bigger, in this case 22cm so the camera support will fit. For the sides I cut two more pieces of 22cm width and 16cm height. The triangles are equilater with a side of 12 cm. Cut also some small parts for reinforcement. The two triangles with 45 degrees angles will support the glass.
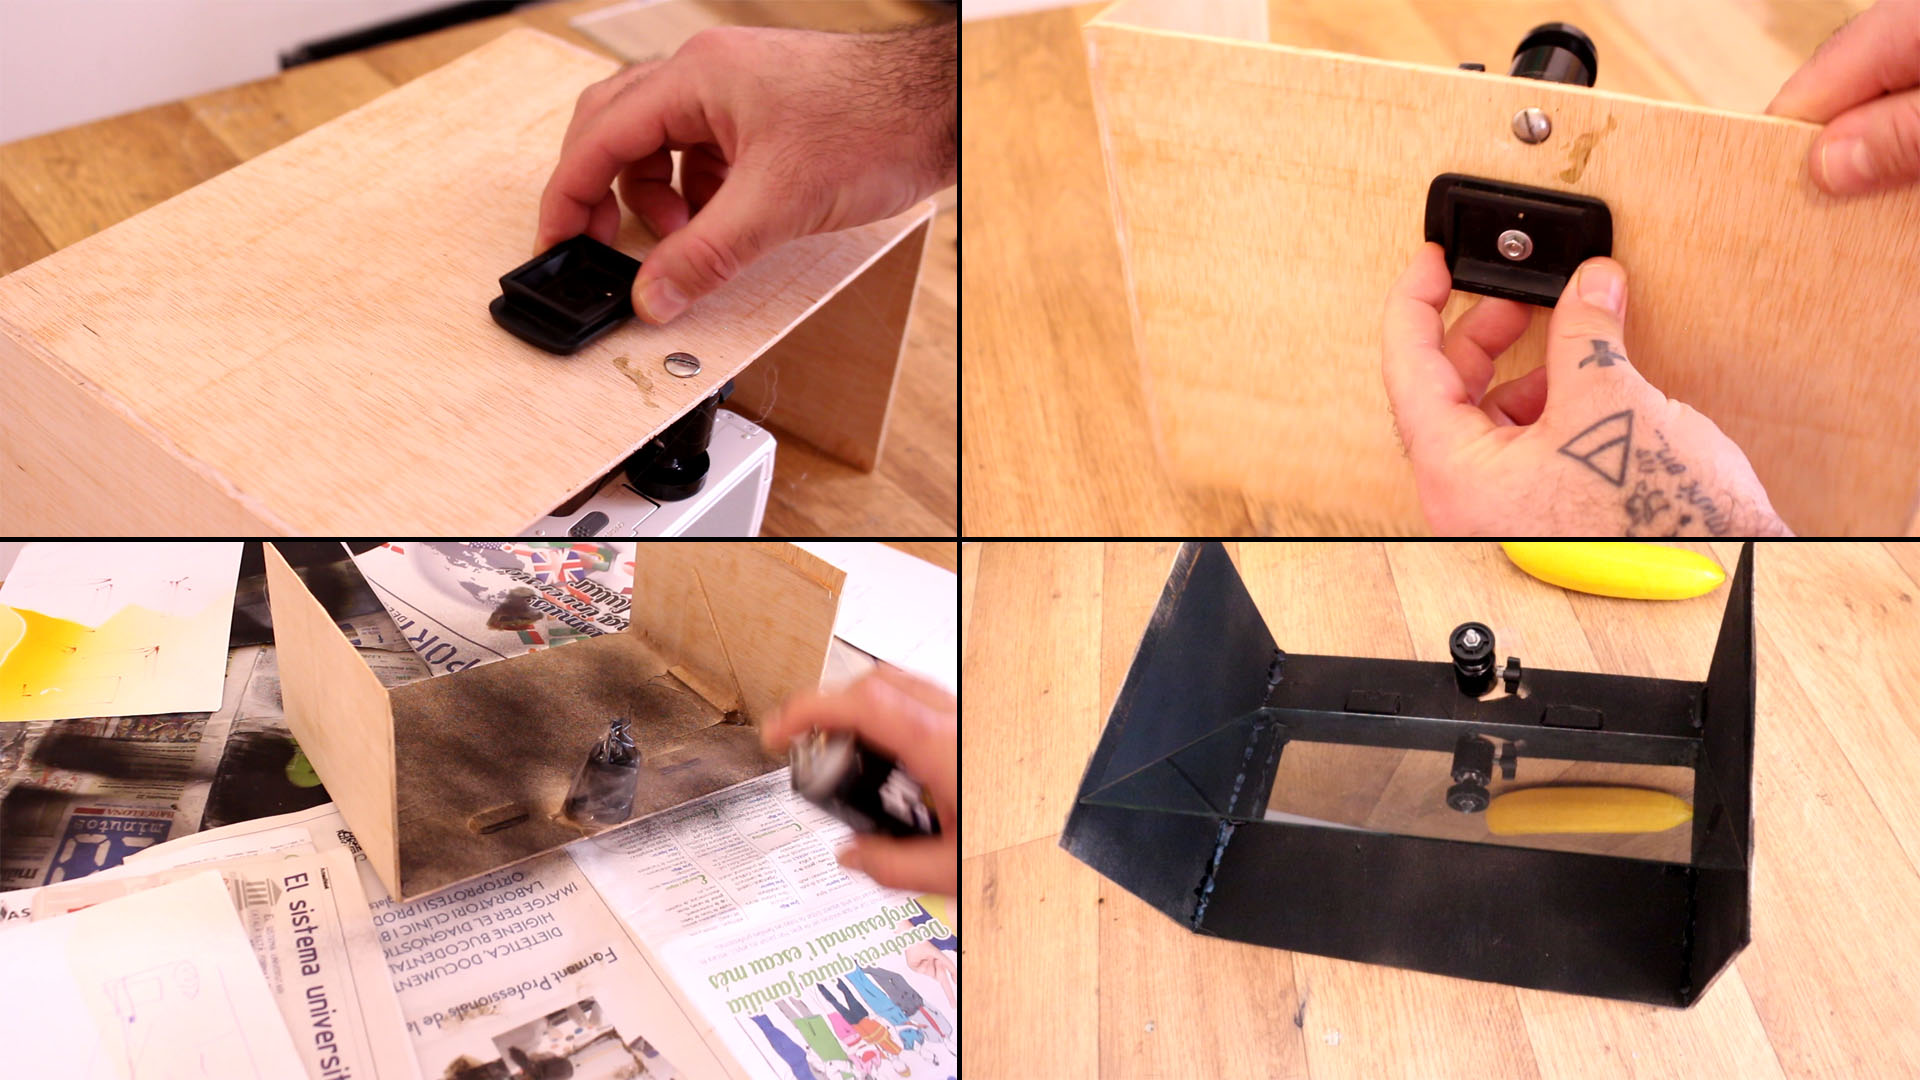
Ok, first, I measure the middle of the base plywood. Close to the edge, first screw in place the camera ball support. For that all we need is a screw on the back. Now with the camera in place, I measure more or less where to place the glass so it will stay at 45 degrees without touching the camera lens. I mark the position on the wood. Then I glue in place two small pieces of wood that will act as stops for the glass. Now I measure where to place the 45 degree triangles on the rectangles 16x22cm sides. I mark that on the plywood and then I glue in place the triangles on the sides. Then, when I will add the slides, they will support the glass at 45 degrees. Then I glue the sides, add glue, place some weights so they will stay fixed and let the glue dry. As you can see below, the small stops won't let the glass pass and the triangles will keep the glass at 45 degrees. Add extra glue and small wood parts for reinforcement.

Now we can remove the glass for a while. I flip the entire support and measure where to place the tripode mount. I screw that part in place, close to the camera, since it will be the part that will weight more. At this point you could go and paint the entire plywood interior part black, so it will reflect less light. You could use spray paint for that so it will be easier. Now you could add back the glass and the camera if you want. Make sure you clean the glass before you place it, so it won’t have fingerprints on it. Ok, now we have to add the electronics.