In this tutorial we will see how I've made my own homemade powerful smoke machine. This device works at 220V AC so be careful. It has an internal heater and through a tube we pass glycerin. This liquid, at high temperatures will create smoke. It is non toxic so don't worry. We use this liquid at parties, discos, etc. See the part list, the schematic and all you need below. Follow the tutorial step by step. It is homemade so it will ebq uite cheap!
Part list is quite simple and total price can be quite low. Some prices might be different for you depending on where you live. Also, for the tin can, cement, the case and other parts, you could reuse parts you have at home. The main components are the heater, pump, thermocouple and copper tube.

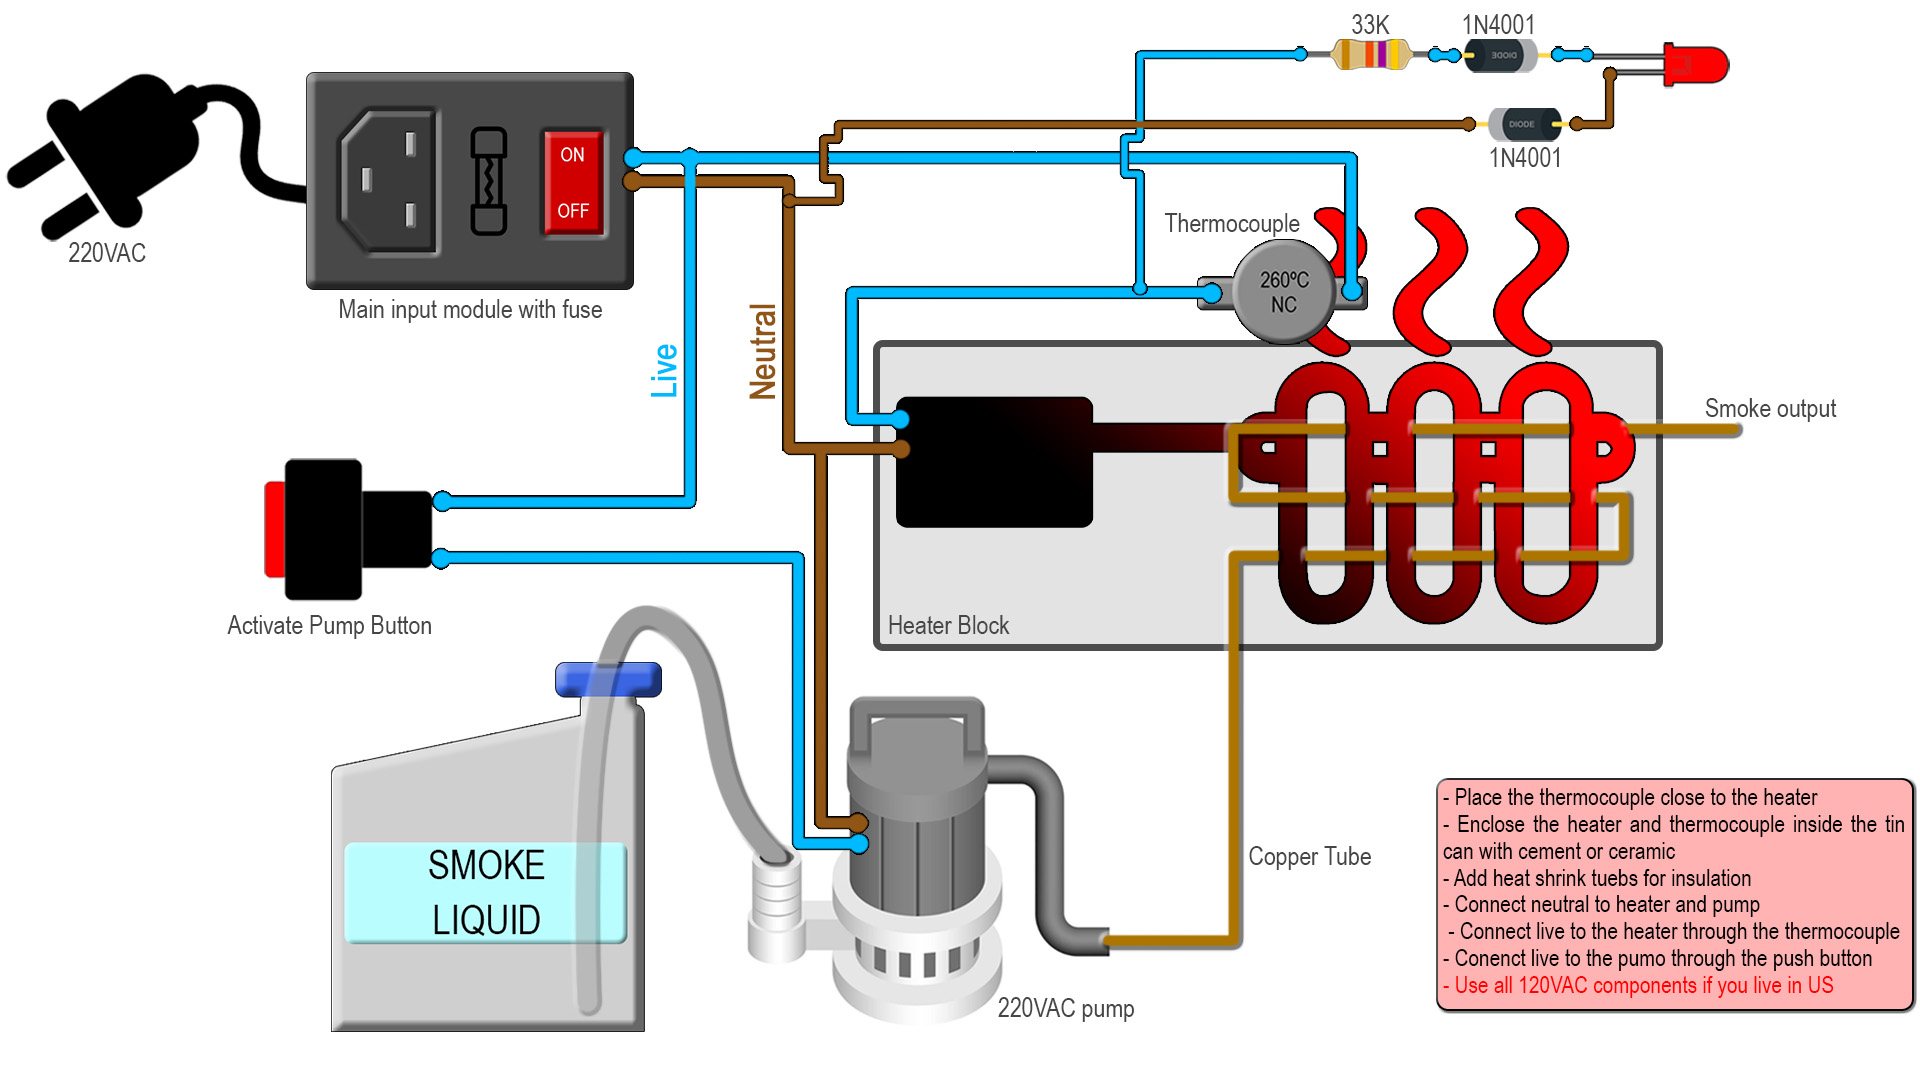
The Schematic is very simple. We start by connecting the main input plug with fuse for protection. From this connector we get Live and Neutral. Make the heater block. Wind the copper tube around the heater, place the thermocouple close to the heater, place everything isnide the thin can and add cement. See details below. The heater is connected directly to neutral but is connected to live through the thermocouple which is noramlly closed. So, when 260ºC is reached, it will get open and the heater will be disconnected. Connect neutral to the water pump and through the push button connect live. In this way, when we push the button, we activate the pump. Add the resistor, diodes and LED to the output of the thermocouple. In this way, when the thermocouple is closed, the LED will be turned on and when it is closed it will eb off.
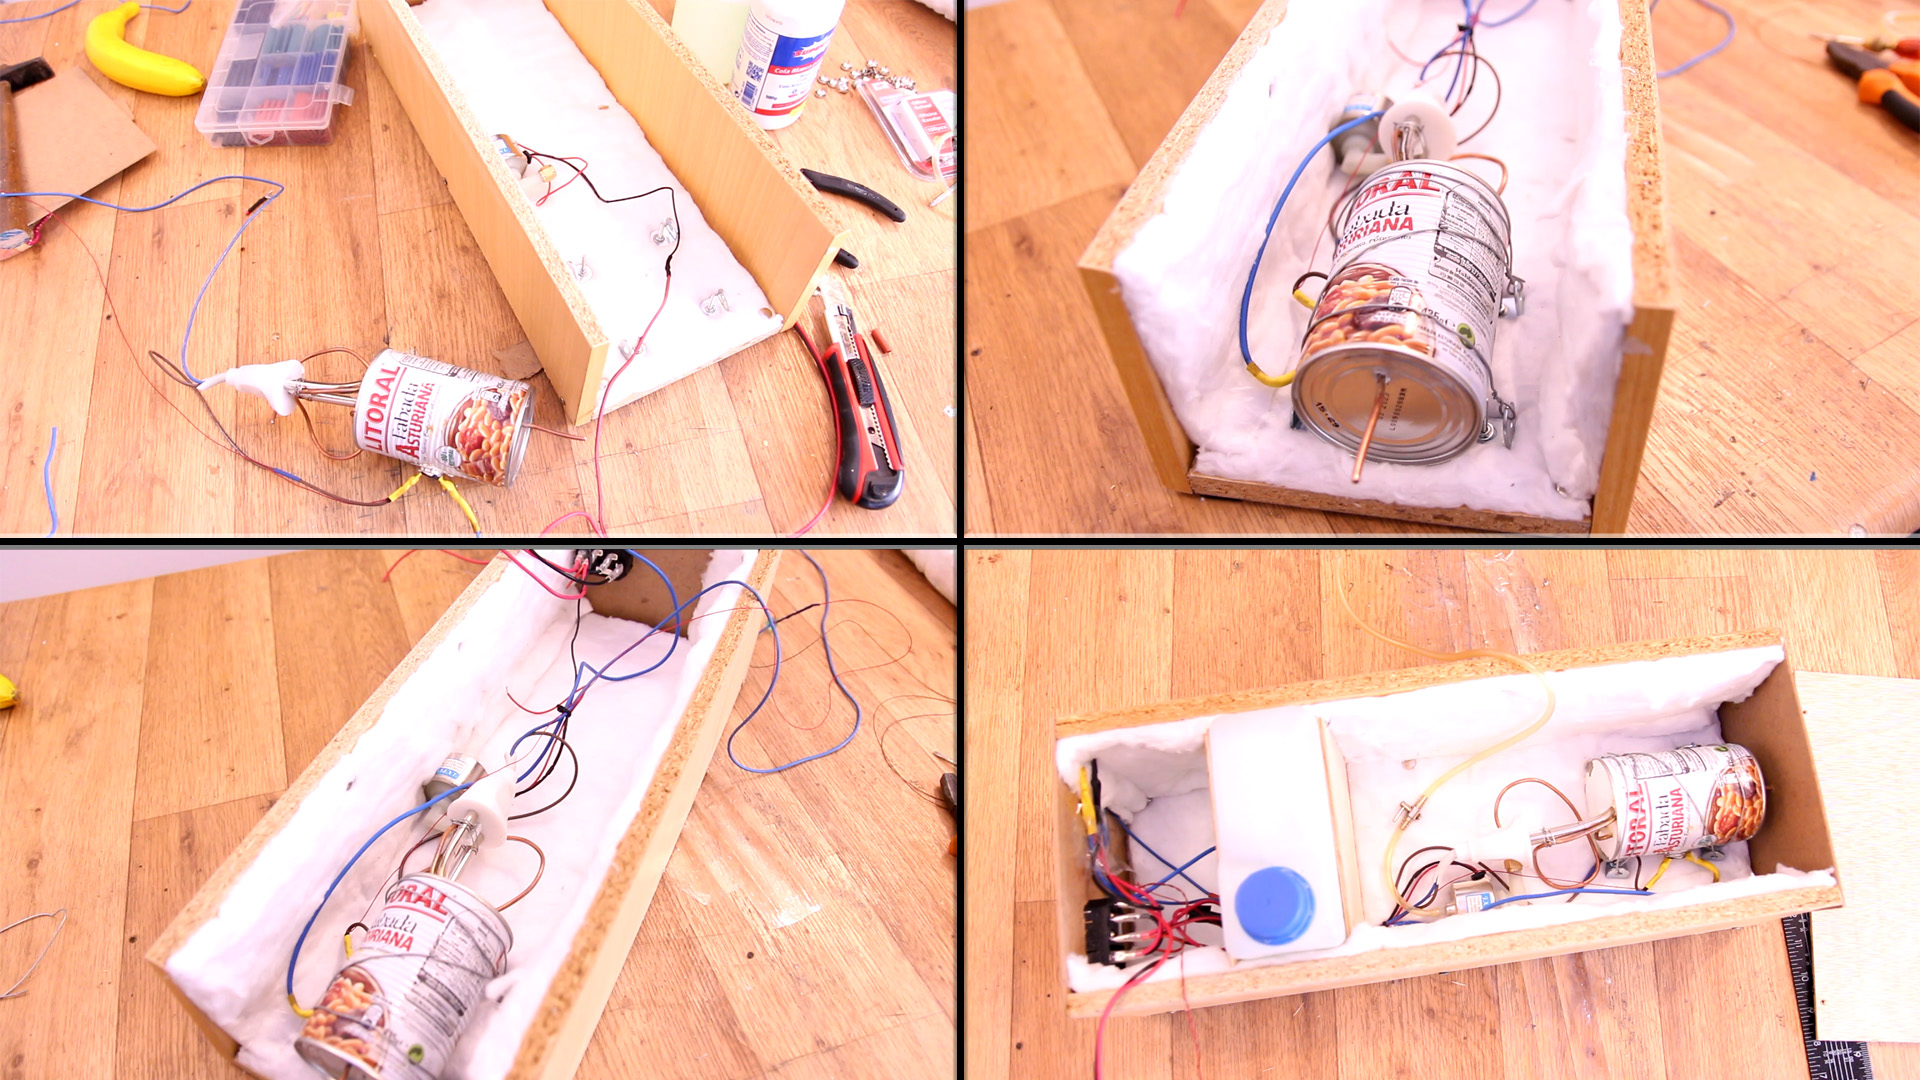
We start by making the heater block. For this part get the copper tube, the tin can, the termocouple, the heater and the cement. We start by winding the copper tube around the heater. I use some thin wire to fix it close to the heater. Leave some tubea t the input and output for later conenctions. Then, we drill a hole in the bottom of the tin can for the smoke tube to exit.
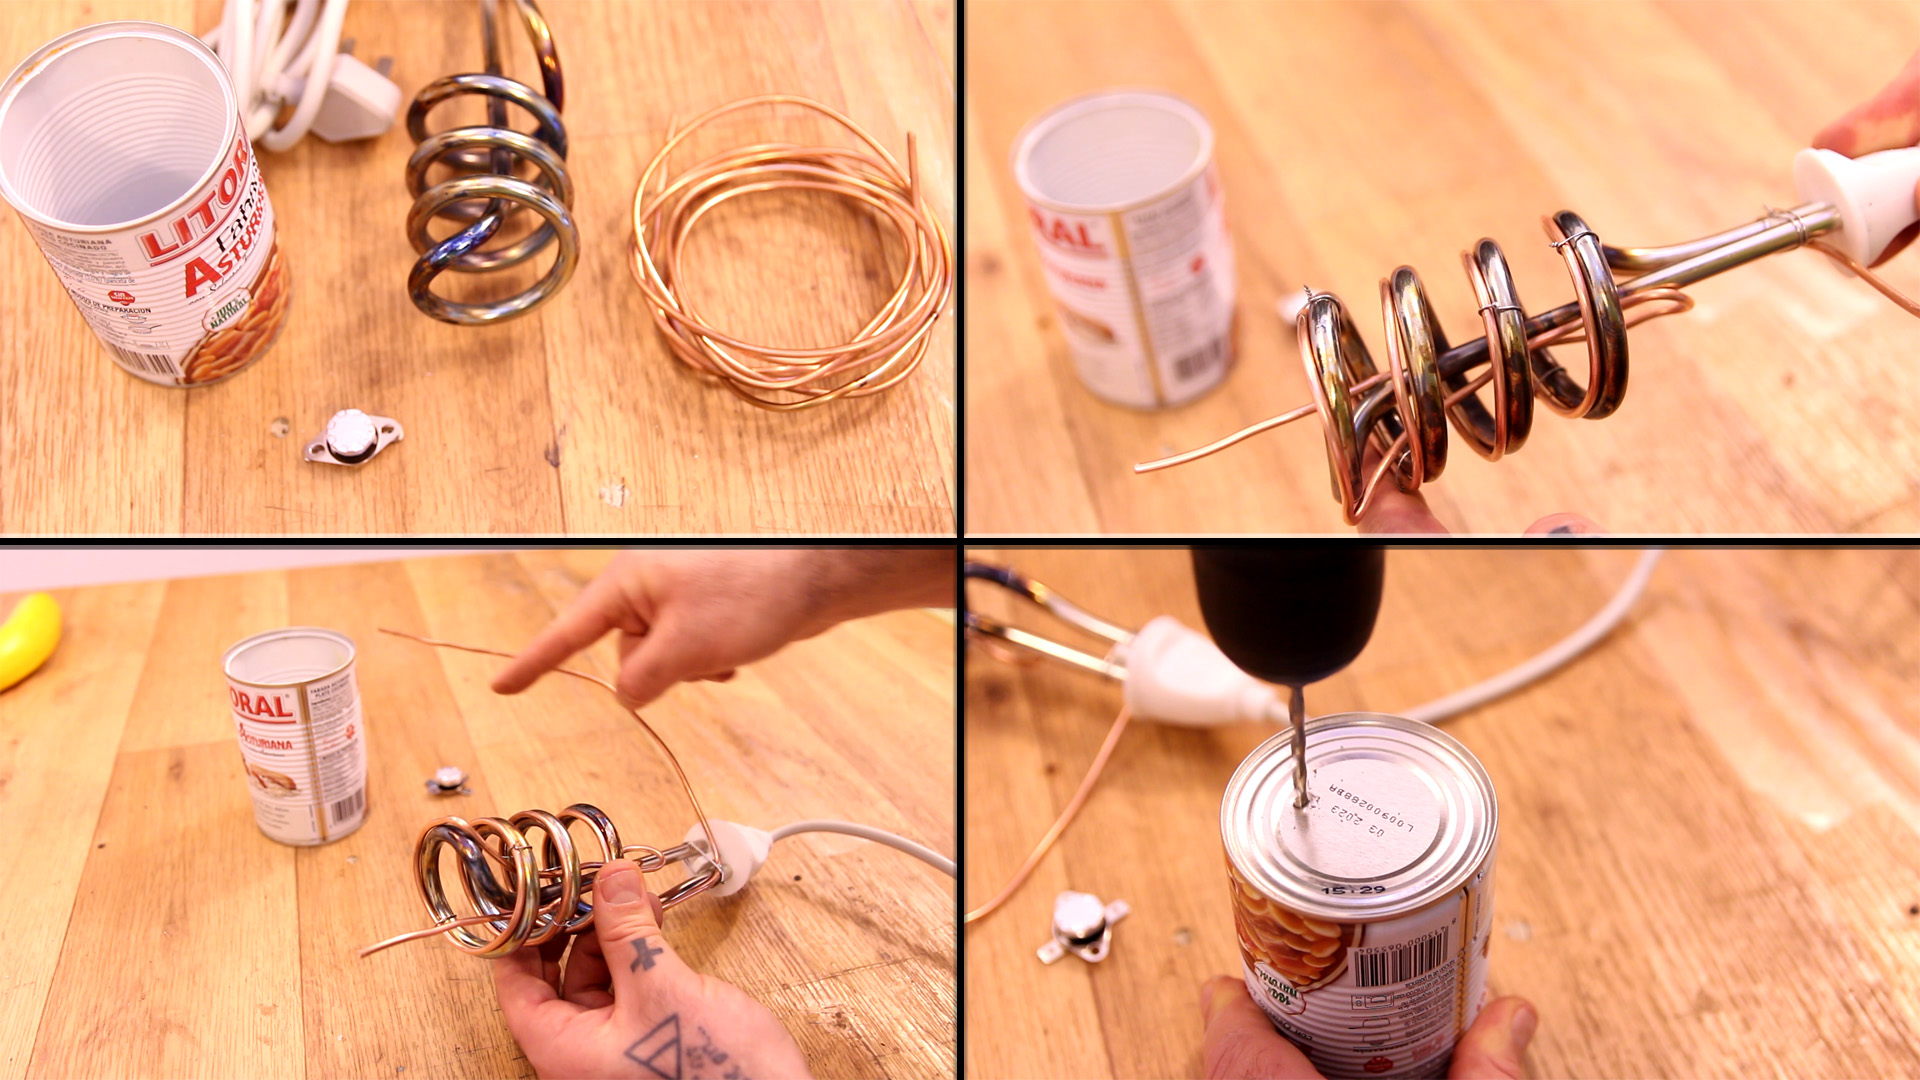
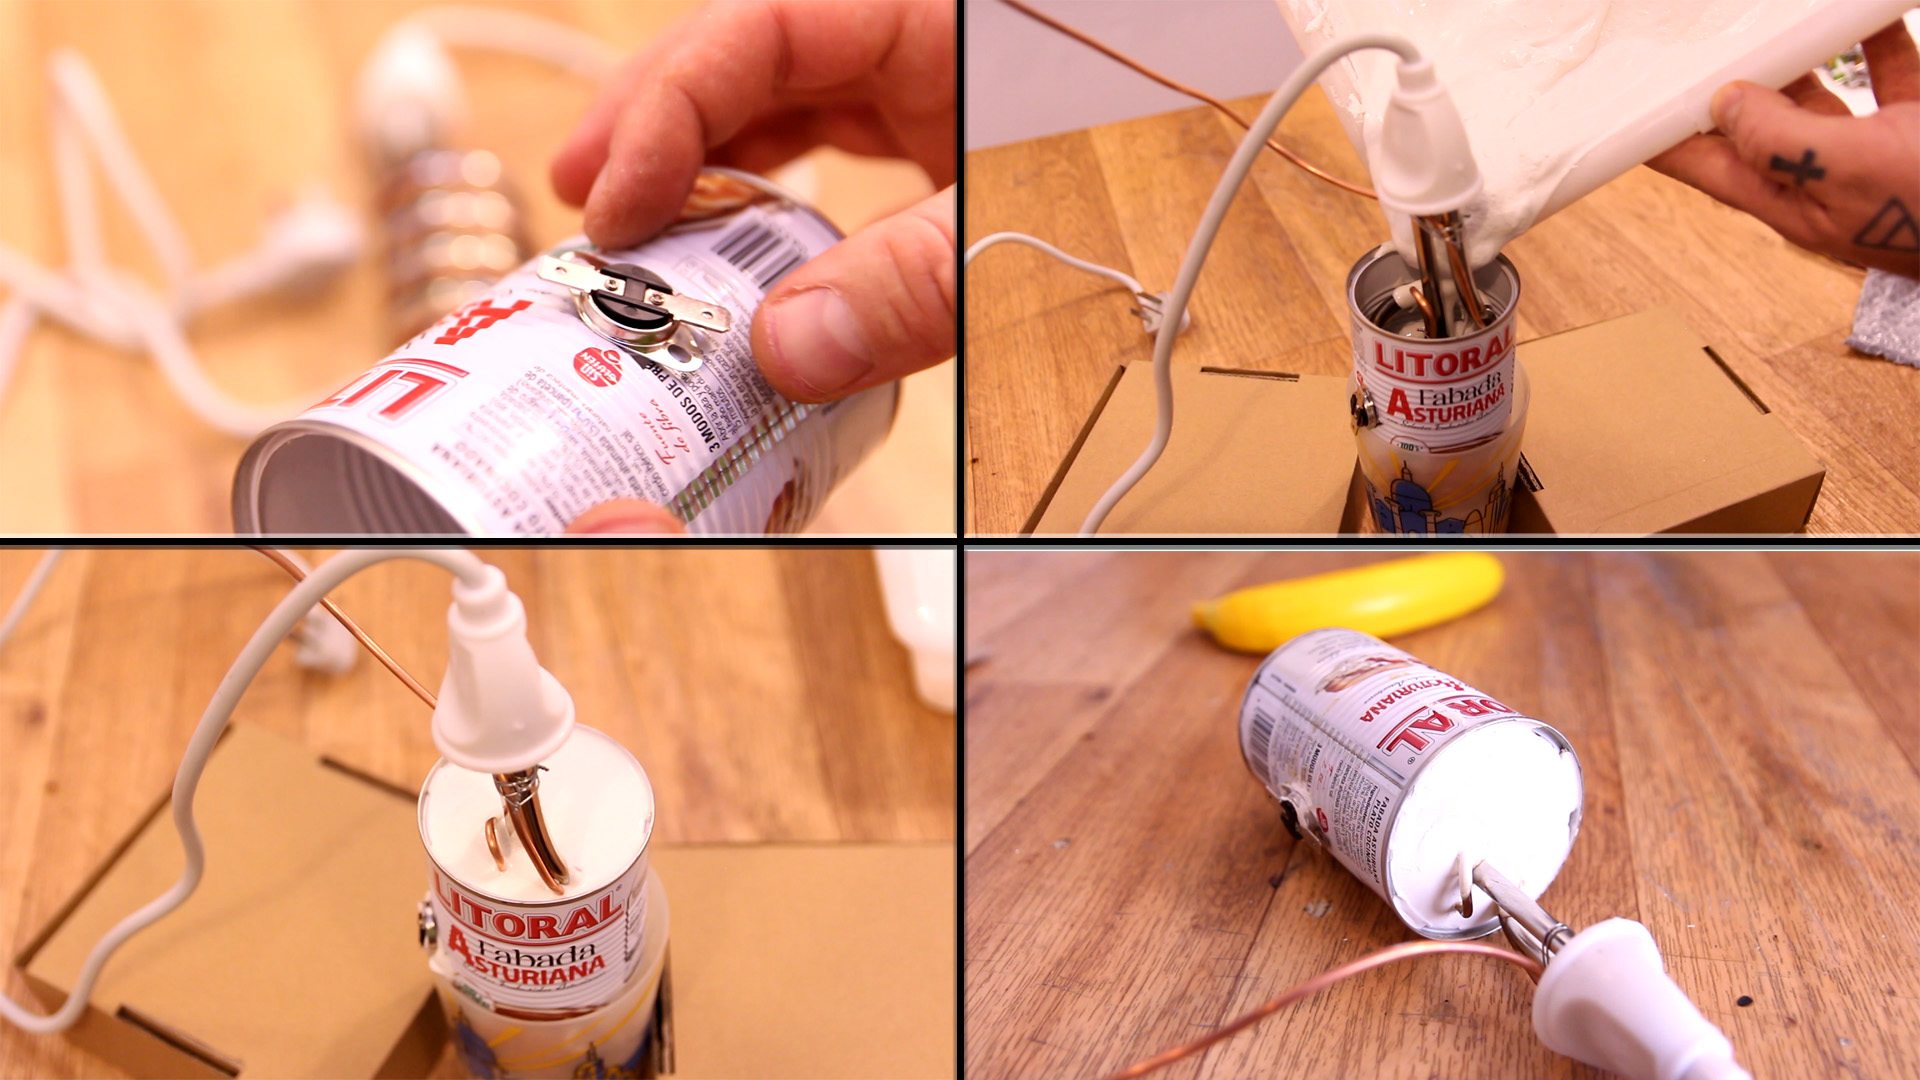
Next step is to make another hole on the side of the can. Place the thermocouple on this hole. Next, insert the heater inside the can and exit the smoke tube on the small hole on the bottom. Place the can vertically and fill it with ceramic/cement. Let the block to dry a day or more. After this you can test it. In my case, at the beginning, there was still some vapor comming out from the cement. Don't worry. Is normal till the cement is 100% dry.
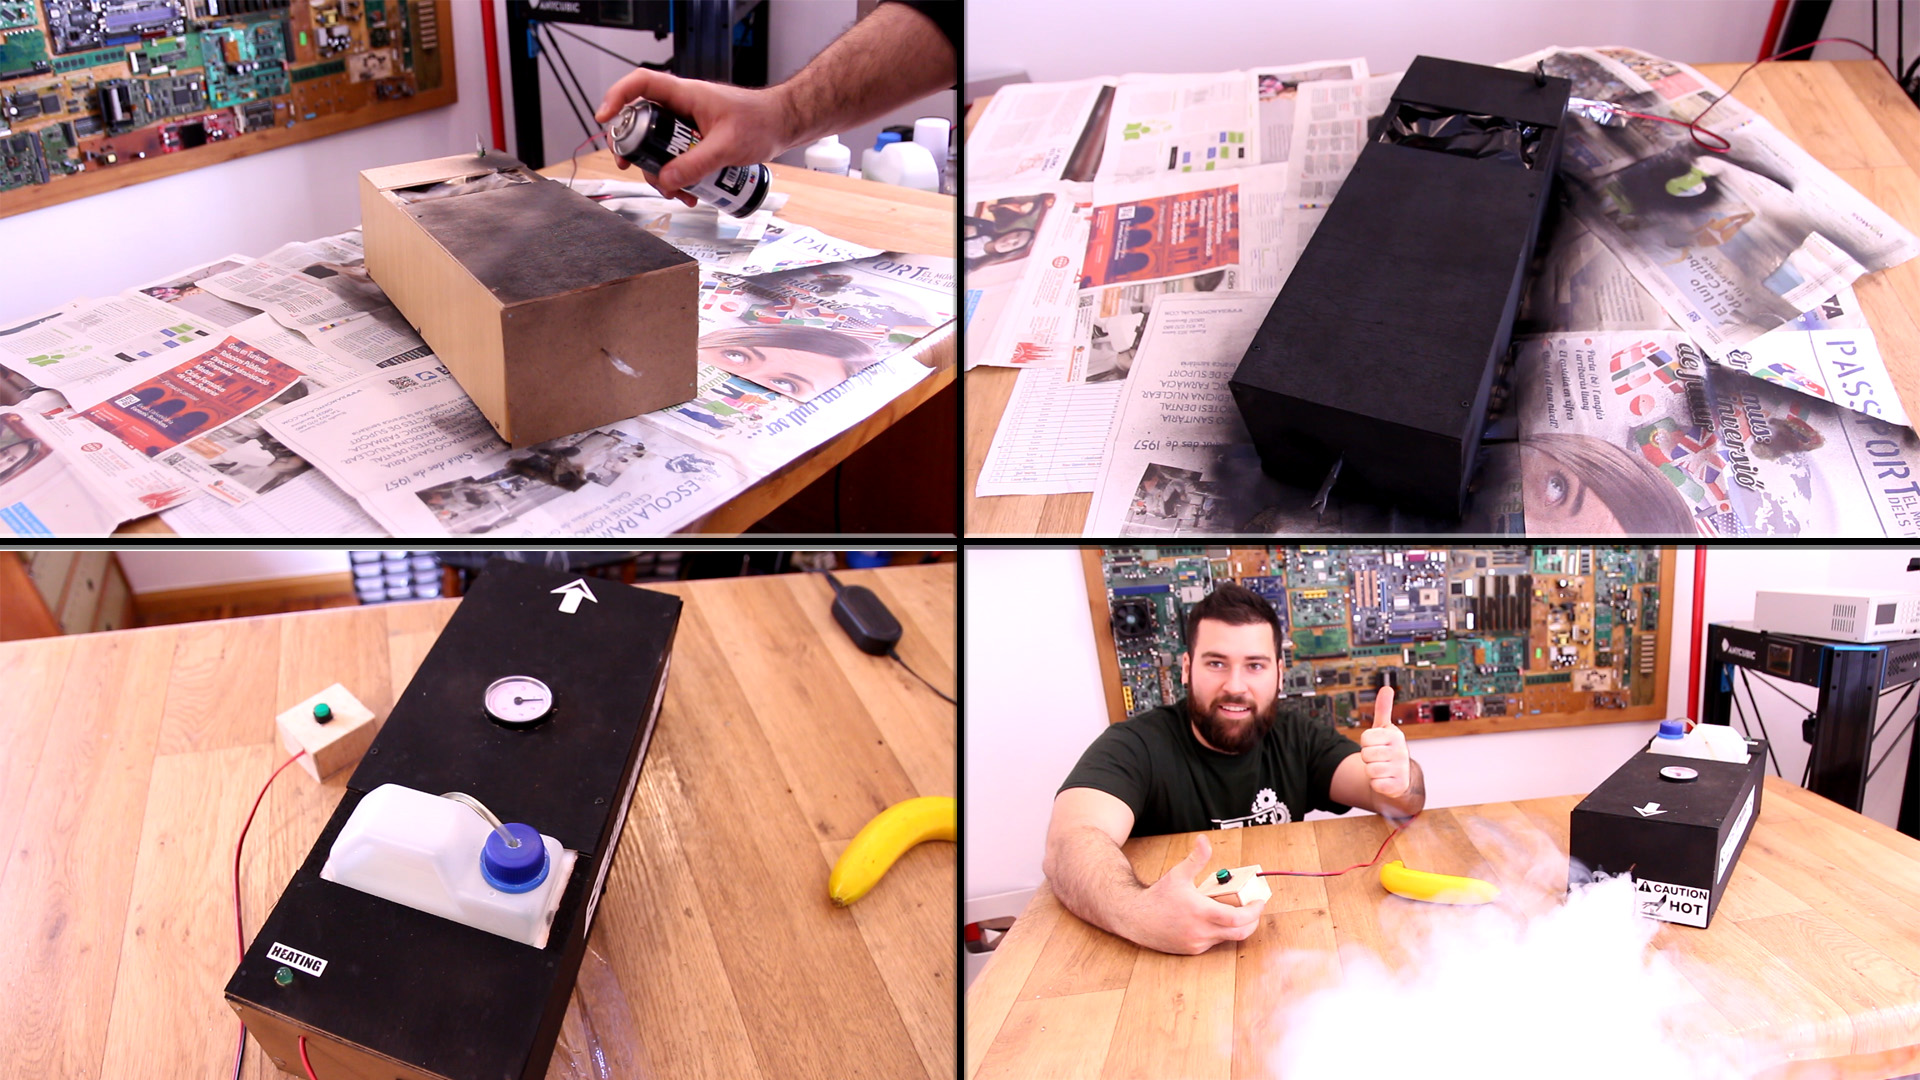
Now we have the heater block. Is time to make the case. It would be better a metal case with good insulation. But in my case, I don't have that so I will sue wood. Make measurements and cut the base wood to size. On top of this cut to size and add the insualtion Ceramic Fiber Blanket. I nail it to the wood base. Then make holes for the screws of the pump and heater block. I screw in palce the pump. For the heater block I screw 4 metal hooks. We will use those to fix the tin can in place. Add the wood sides of the case. Then we add the rear wood part of the case and we place the input plug here.

Now add wires as in the schematic to the heater, water pump, etc. Fix the heater block on the front side of the case. I've used some metal wires to do that and fix it in place on those 4 metal hooks from before. Make sure the copper tube will be long enough to be able to exit the case. Pass all the wires to the back of the case. I cut some small pieces of plywood and with those I fix in place he liquid bottle. Remember to add insualtion Ceramic Fiber Blanket ont the sides of the case as well. Make the power conenctions with the wires to the main input plug on the back of the case.
Ok, now pass the water pump cable taht goes to the button through the back side of the case. Solder the LED circuit with the resistor and diodes and place that LED on the top plywood of the case. Add a lot of insualtion Ceramic Fiber Blanket on top of the heater block. Connect the wires from the pump to the push button inside of another small plywood case that I've made. At this moment you could make a test. After taht close the case and that's it.
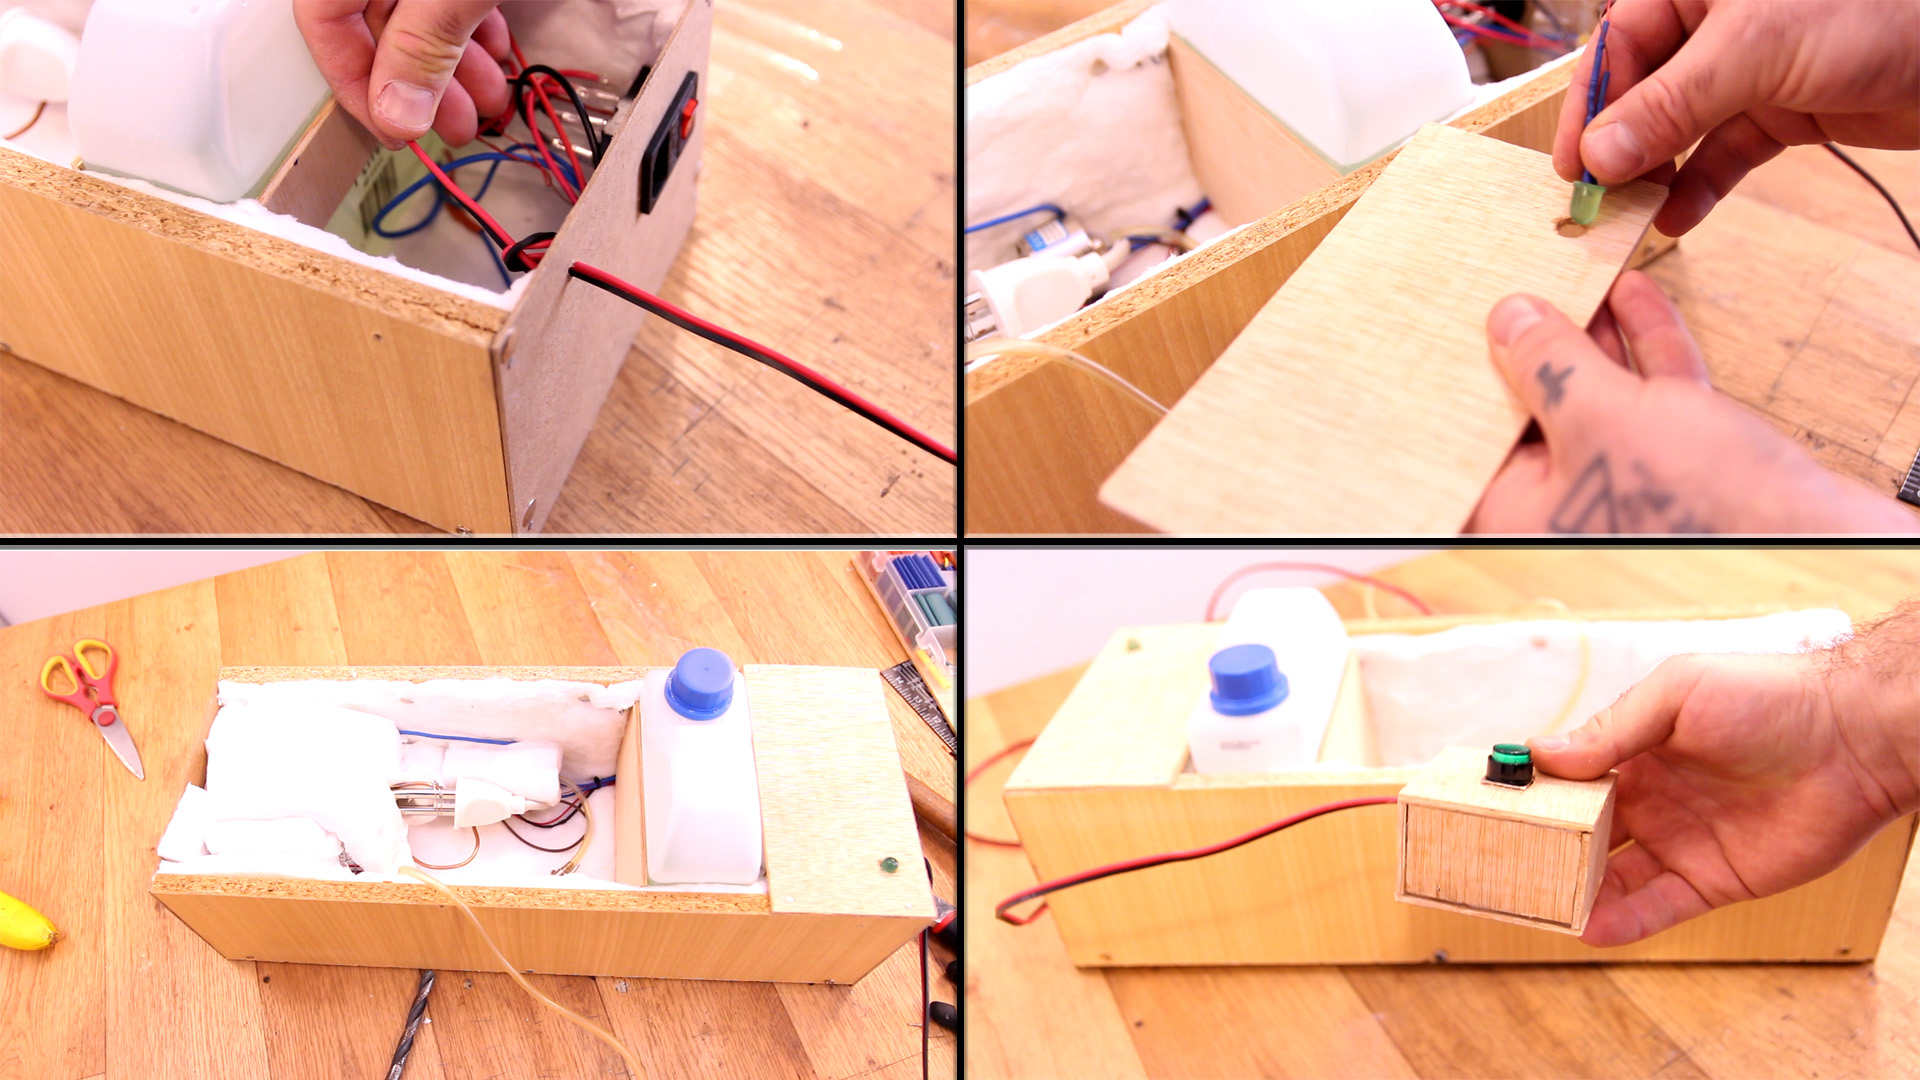
Finally, close the case. Now we paint it black with some spray paint. I also add a temperature gauge I've took out from an espresso machine. I add labels for the ehating LED and some more labels to make it look better. Press and that's it. Smoke smoke smoke.
I hope you like this project. If you consider supporting me, here is my PATREON and also my PayPal. Thank you very much.