
The MAX471 is a solid alternative to an ACS712 for measuring DC Current. Its a high side device that is powered by a load source that can range anywhere from 3 to 36 VDC. That said, a key benefit is its scale factor as it outputs 1 volt per amp measured.
This tutorial will walk you through some of the basics necessary to put this device to use.
There a few varieties available, but they are basically the same.
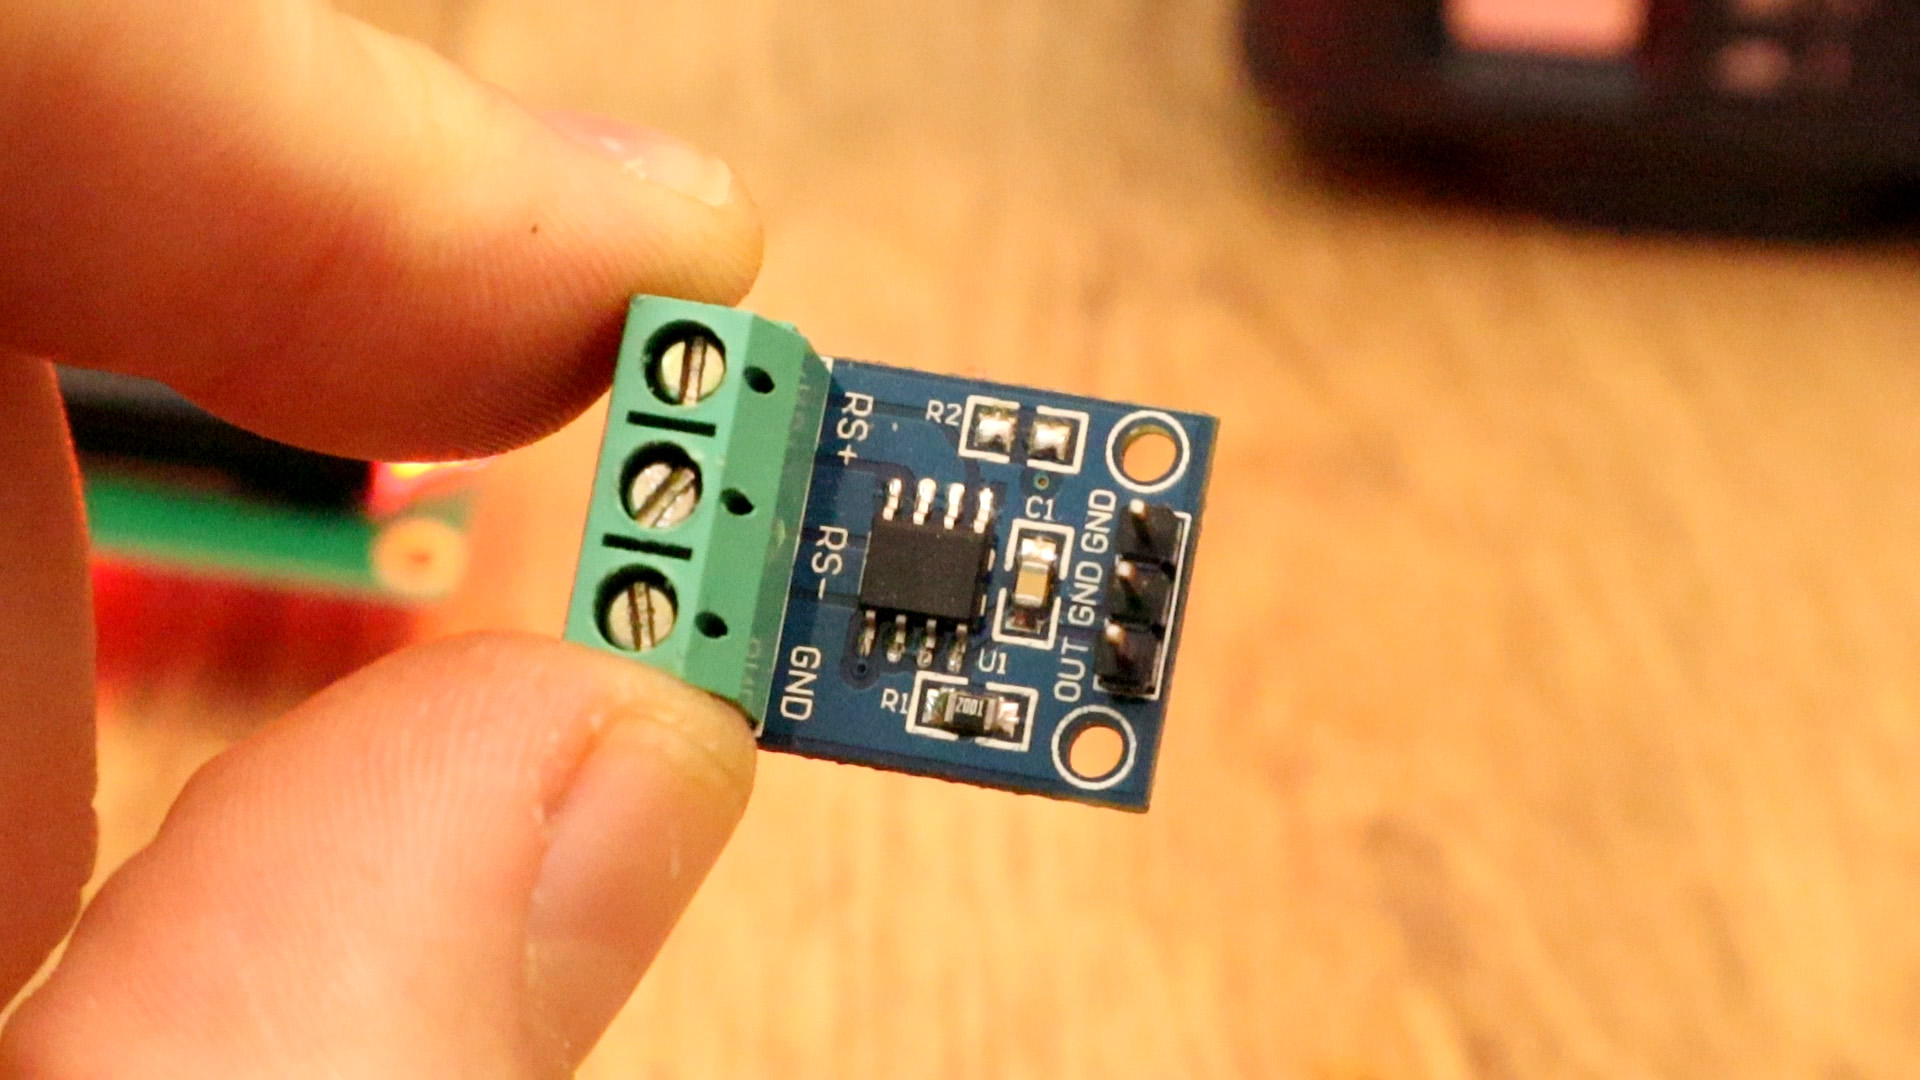
There are five pins of interest for this device. MAX471 Arduino Current Sensor Pin OutsRS+: This connects to the positive pole of your supply source. RS-: This connects to the high side of your load. GND: This is circuit common on both the input and the output side. OUT: This is an analog output that provide 1 volt DC per amp measured. The device can measure up to 3 amps DC.
The sketch is nothing more than a Simple Arduino Voltmeter that has been modified for this device. At a scale factor of 1V per Amp, it is very convenient. We print the values on the serial monitor or LCD. See codes below.
const int max471In = A0;

int RawValue= 0;
float Current = 0;

void setup(){
  pinMode(max471In, INPUT);
  Serial.begin(9600);
}

void loop(){
  RawValue = analogRead(max471In);
  Current = (RawValue * 5.0 )/ 1024.0; // scale the ADC
  Serial.print("Current = "); // shows the voltage measured
  Serial.print(Current,3); //3 digits after decimal point
  Serial.println(" amps DC"); //3 digits after decimal point
  delay(200);
}
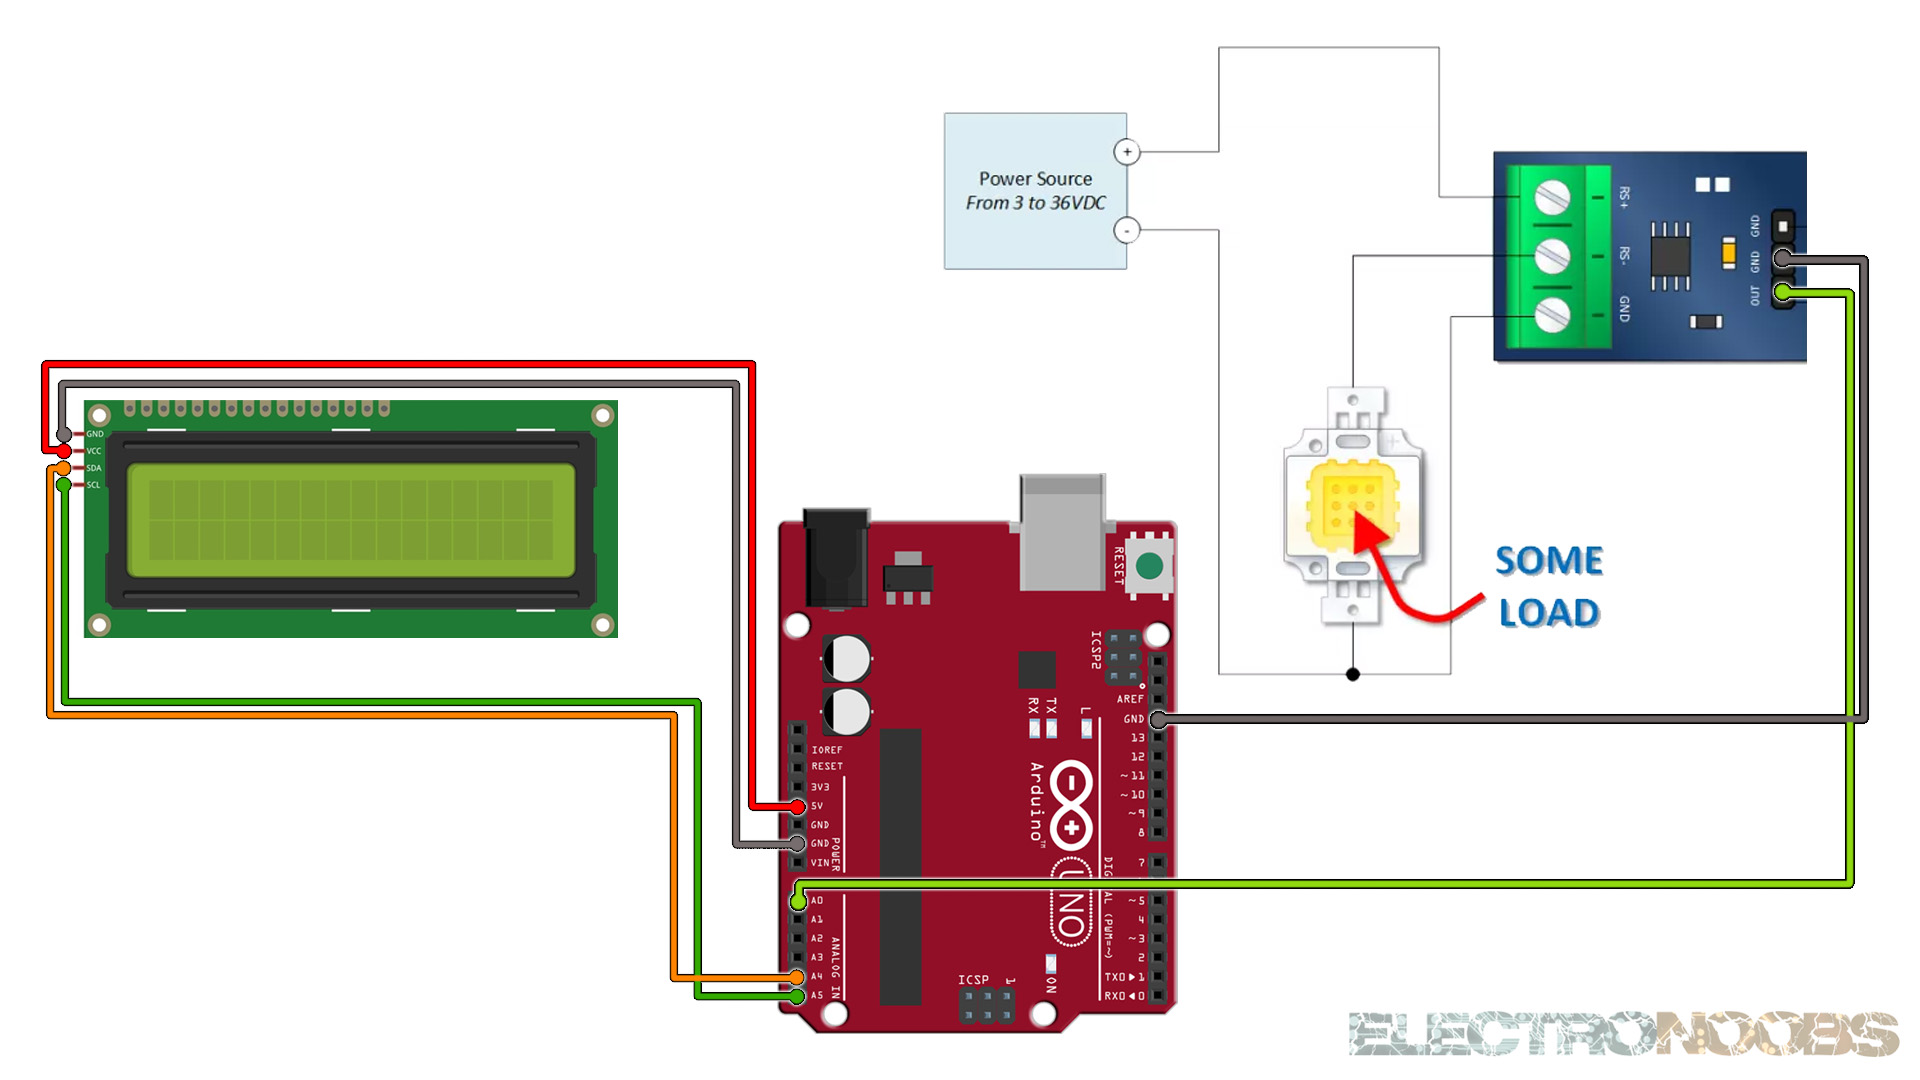
Upload the code and make the connections. Then open the serial monitor at 9600 bauds and you will have the results printed to the serial monitor. Or go below and download the code with the i2c LCD.
#include <Wire.h>
#include <LiquidCrystal_I2C.h>

// Set the LCD address to 0x27 or 0x3f for a 16 chars and 2 line display
LiquidCrystal_I2C lcd(0x27, 20, 4);
const int max471In = A0;

int RawValue= 0;
float Current = 0;

void setup(){
  lcd.init();
  lcd.backlight();
  pinMode(max471In, INPUT);
  Serial.begin(9600);
}

void loop(){
  RawValue = analogRead(max471In);
  Current = (RawValue * 5.0 )/ 1024.0; // scale the ADC

  Serial.print("Current = "); // shows the voltage measured
  Serial.print(Current,3); //3 digits after decimal point
  Serial.println(" amps DC"); //3 digits after decimal point
  lcd.clear();
  lcd.setCursor(0,0);
  lcd.print("    Current:    ");
  lcd.setCursor(6,1);
  lcd.print(Current);
  delay(200);
}
Upload the code and make the connections. Then open the serial monitor at 9600 bauds or just see the results on the LCD screen.


