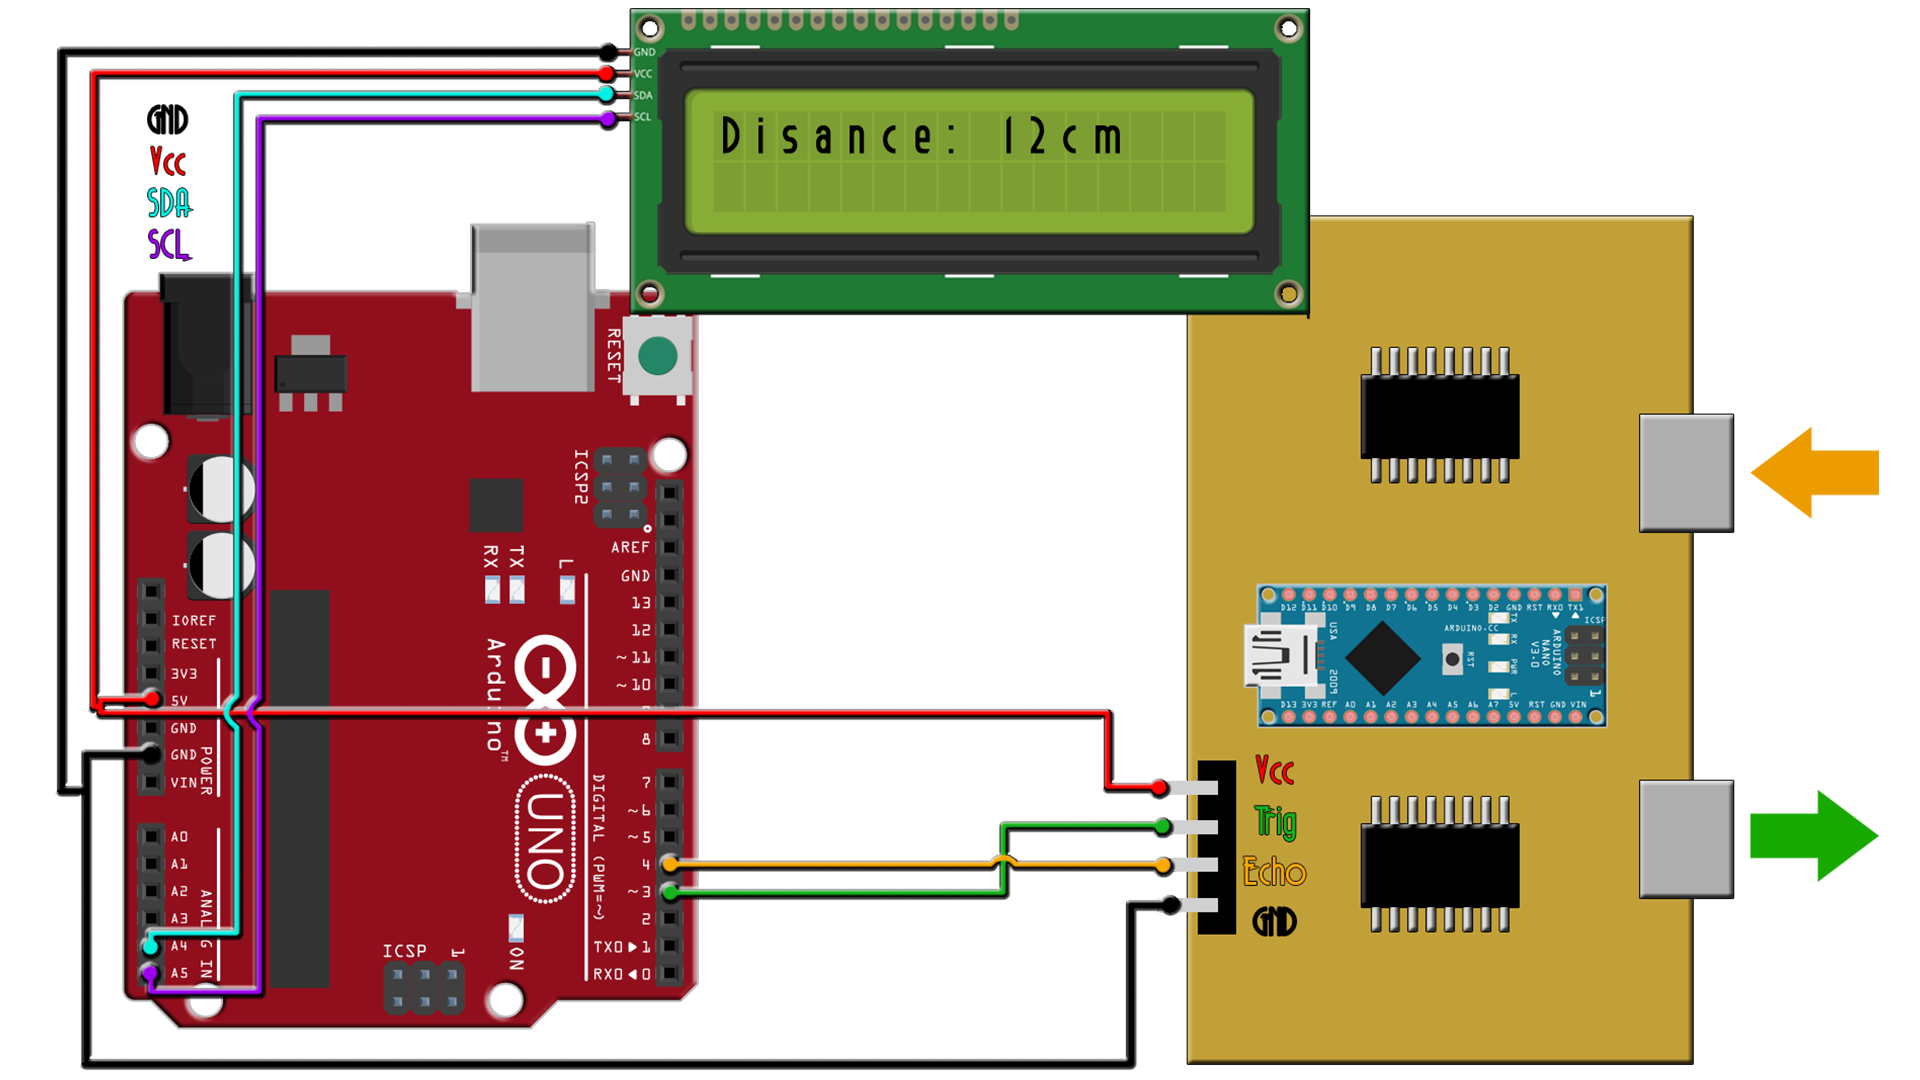
This code is for the schematic.
//LCD config
#include <Wire.h>
#include <LiquidCrystal_I2C.h>
LiquidCrystal_I2C lcd(0x27,20,4);  //sometimes the LCD adress is not 0x3f. Change to 0x27 if it dosn't work.


// define the pins
const int trigPin = 3;
const int echoPin = 4;

// defines variables

long duration;
int distance;

void setup() {
pinMode(trigPin, OUTPUT); // Sets the trigPin as an Output
pinMode(echoPin, INPUT);  // Sets the echoPin as an Input
}
void loop() {
// Clears the trigPin
digitalWrite(trigPin, LOW);
delayMicroseconds(2);
// Sets the trigPin on HIGH state for 10 micro seconds
digitalWrite(trigPin, HIGH);
delayMicroseconds(10);
digitalWrite(trigPin, LOW);
// Reads the echoPin, returns the sound wave travel time in microseconds
duration = pulseIn(echoPin, HIGH);
// Calculating the distance
distance= duration*0.034/2;
// Prints the distance on the Serial Monitor
lcd.clear();
lcd.setCursor(0,0);
lcd.print("Distance: ");
lcd.setCursor(11,0);
lcd.print(distance);
}