
 About me
  History
  Let's learn
  Contact us
  Arduino tutorials
 Circuits tutorials
  Robotics tutorials
 Q&A
Q&A Blog
Blog  Arduino
  Circuits
 Robotics
  Modules
  Gadgets
  Printers
  Materials
  3D objects
  3D edit
  Donate
  Reviews
  Advertising


Whistling detection Arduino

2. Arduino code
2.1 Frequency meter + Serial monitor
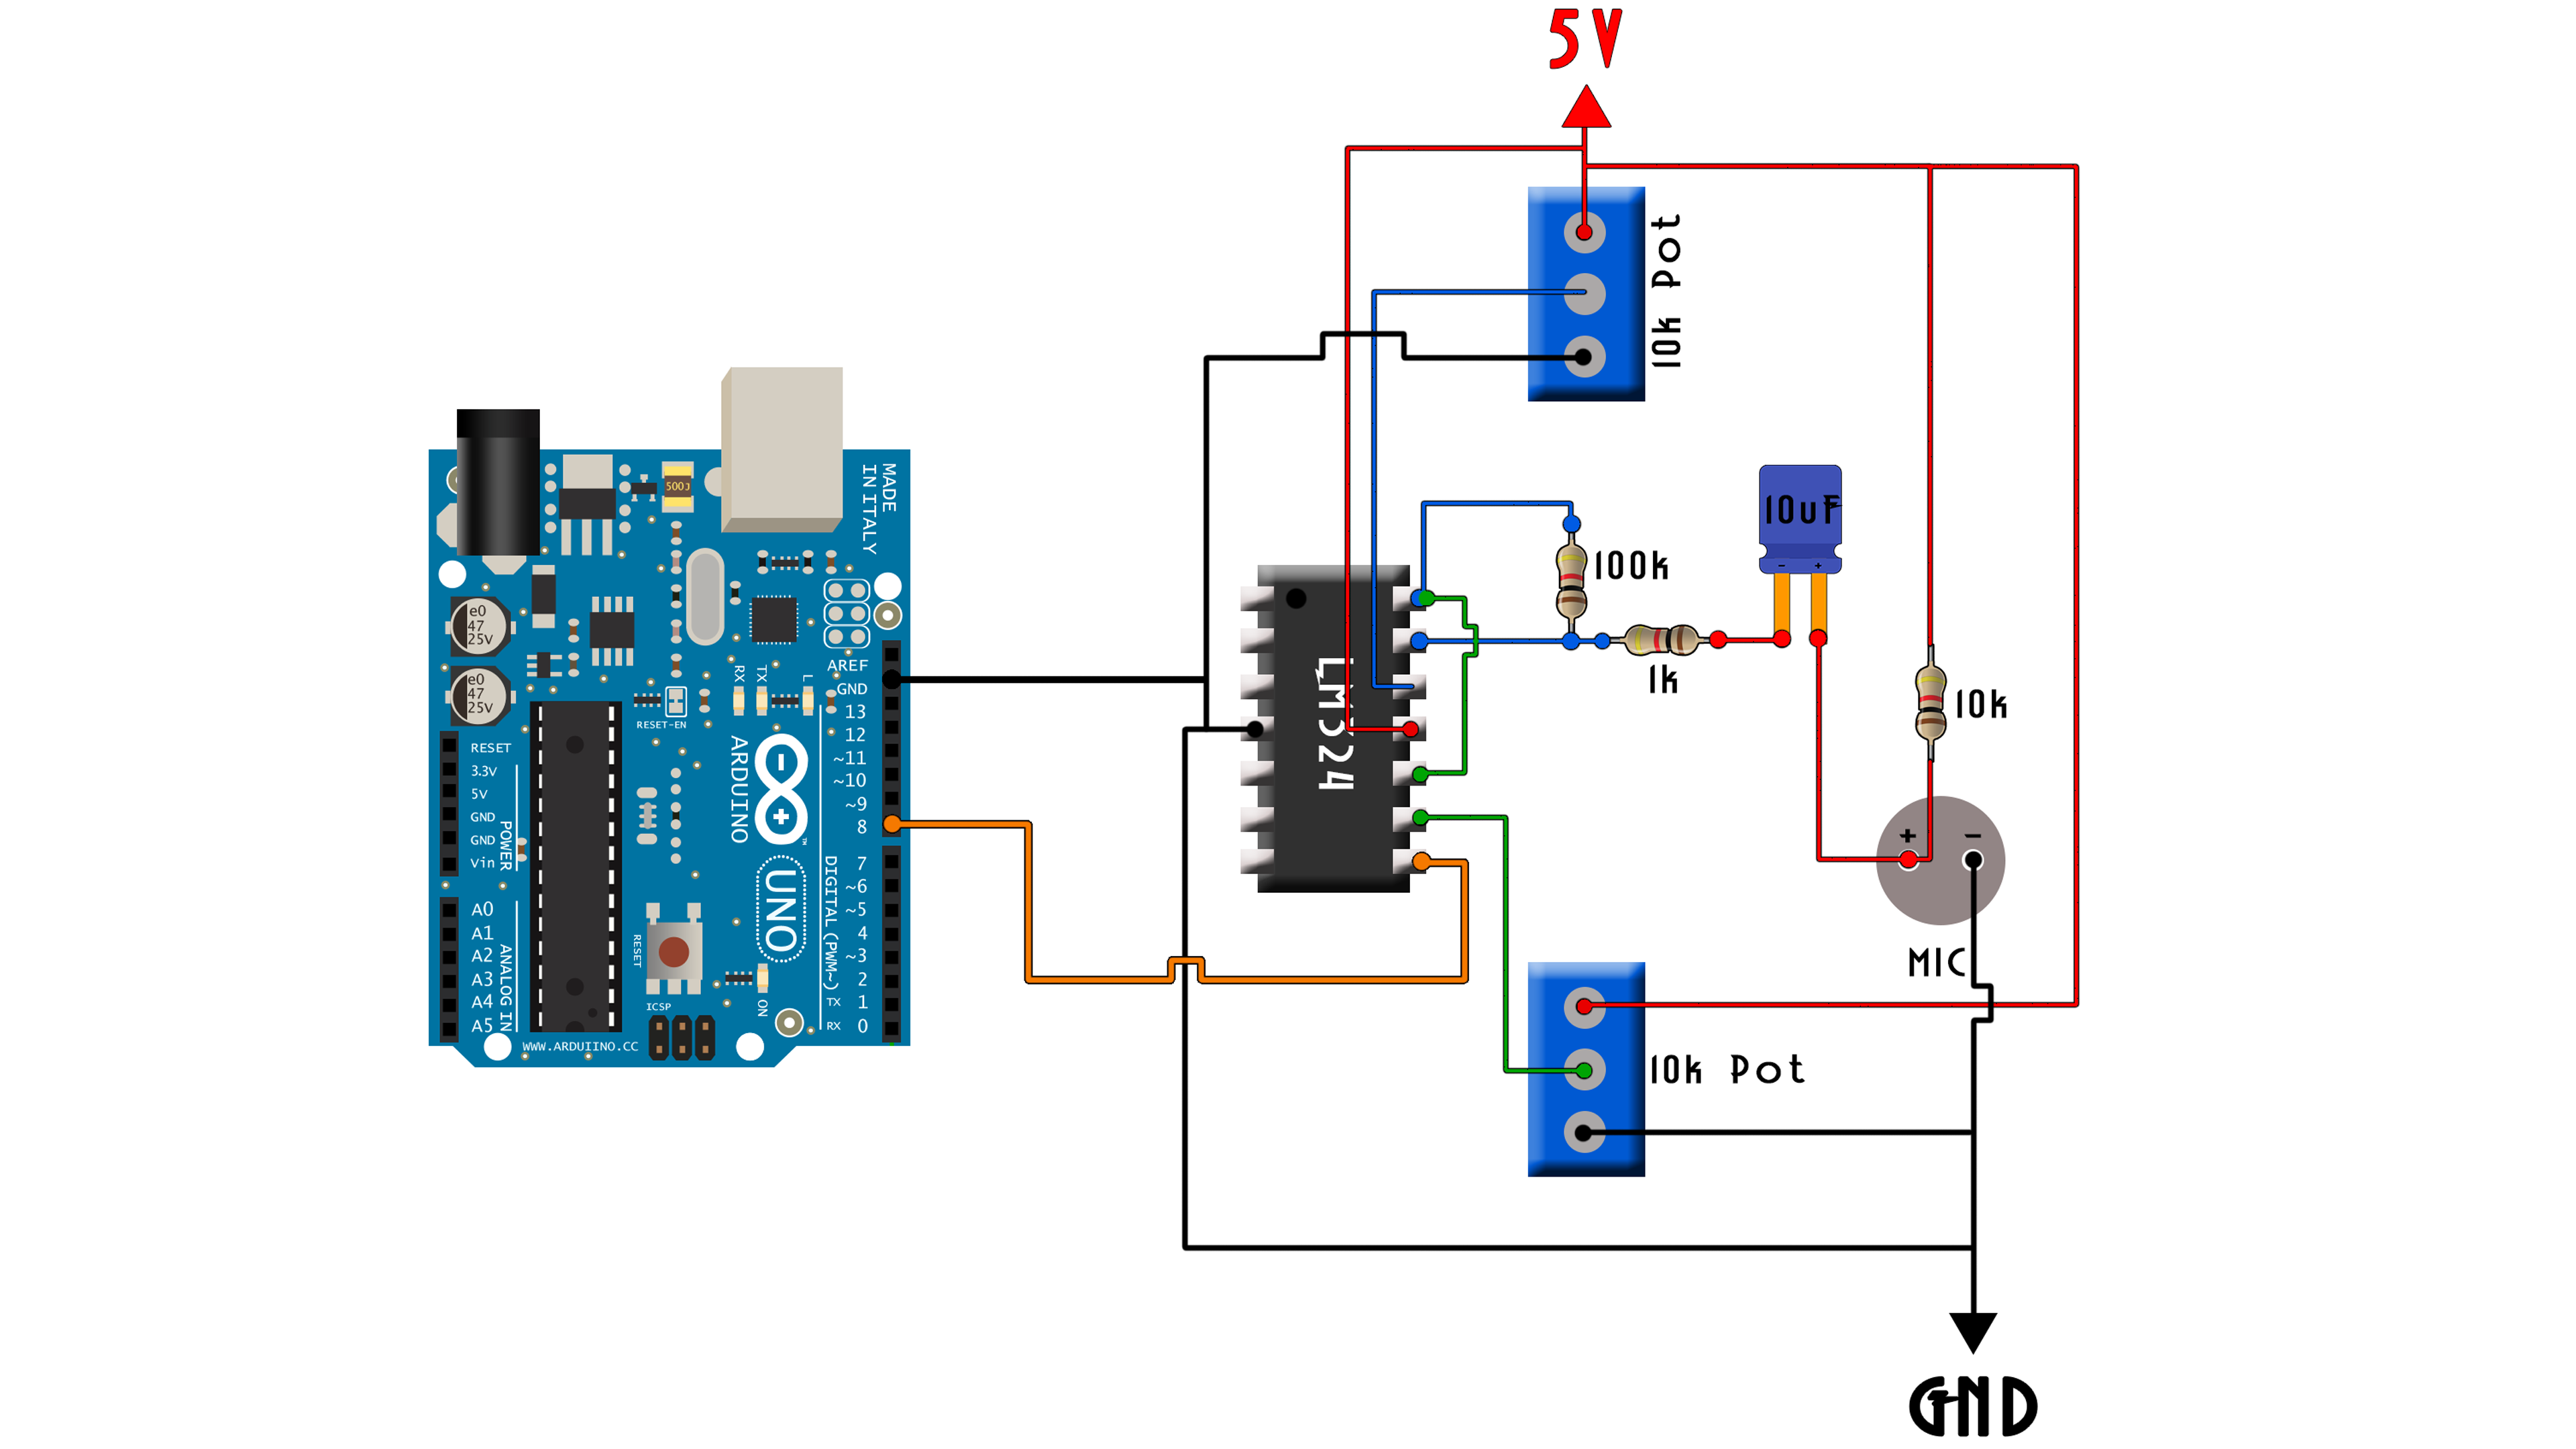
Let’s go over the Arduino part. I’ll connect the second output from the amplifier to digital pin 8. I’ve used Arduino UNO for this test but the code will work both for NANO or Mini as well. If you use Arduino MEGA you’ll have to change some registers because that one won’t use the same.
Ok so what we want is to measure the frequency of the input signal. For that we will measure the time it takes the pulse to rise and then fall back and multiply that by two since the sine wave spends the same amount of time on both sides. That time will be the period of the signal and if invert the period time we get the frequency in Hertz.
To do this I’ve used pin change interruptions and for that first add this two registers configuration before the setup loop. This will make digital pin 8 create an interruption on both state changes. Any time that digital pin 8 in this case will change its value we will enter an interruption routine or ISR. So, when the signal will rise I enter the interruption and start a time counter. When the pulse will fall I enter the interruption once again and stop that counter. The difference between the present time and the las counter value will give me the width time of the pulse.
I’ve used the micros function to count time so the value will be in micro seconds. This is the pulse width measurement interruption vector. In the void loop I multiply the measured value by two in order to obtain the full signal period as said before. Now I divide 1 by the period and get the frequency. Since I was working in microseconds I have to multiply the frequency value by one million in order to obtain Hertz from seconds not from microseconds.
That’s it, now I’ve got the frequency.
Now I print the value on the Serial monitor. Download the next code, upload it to the Arduino, connect the circuit and open serial monitor.

Now I open the serial monitor, set the bud rate of 250000 and start whistling. I detect my whistle range and note that down since I'll use it in the next part.
Now let's control something. In the enxt part we detect if we are in the correct rande and turn on adn off an LED and buzzer.