
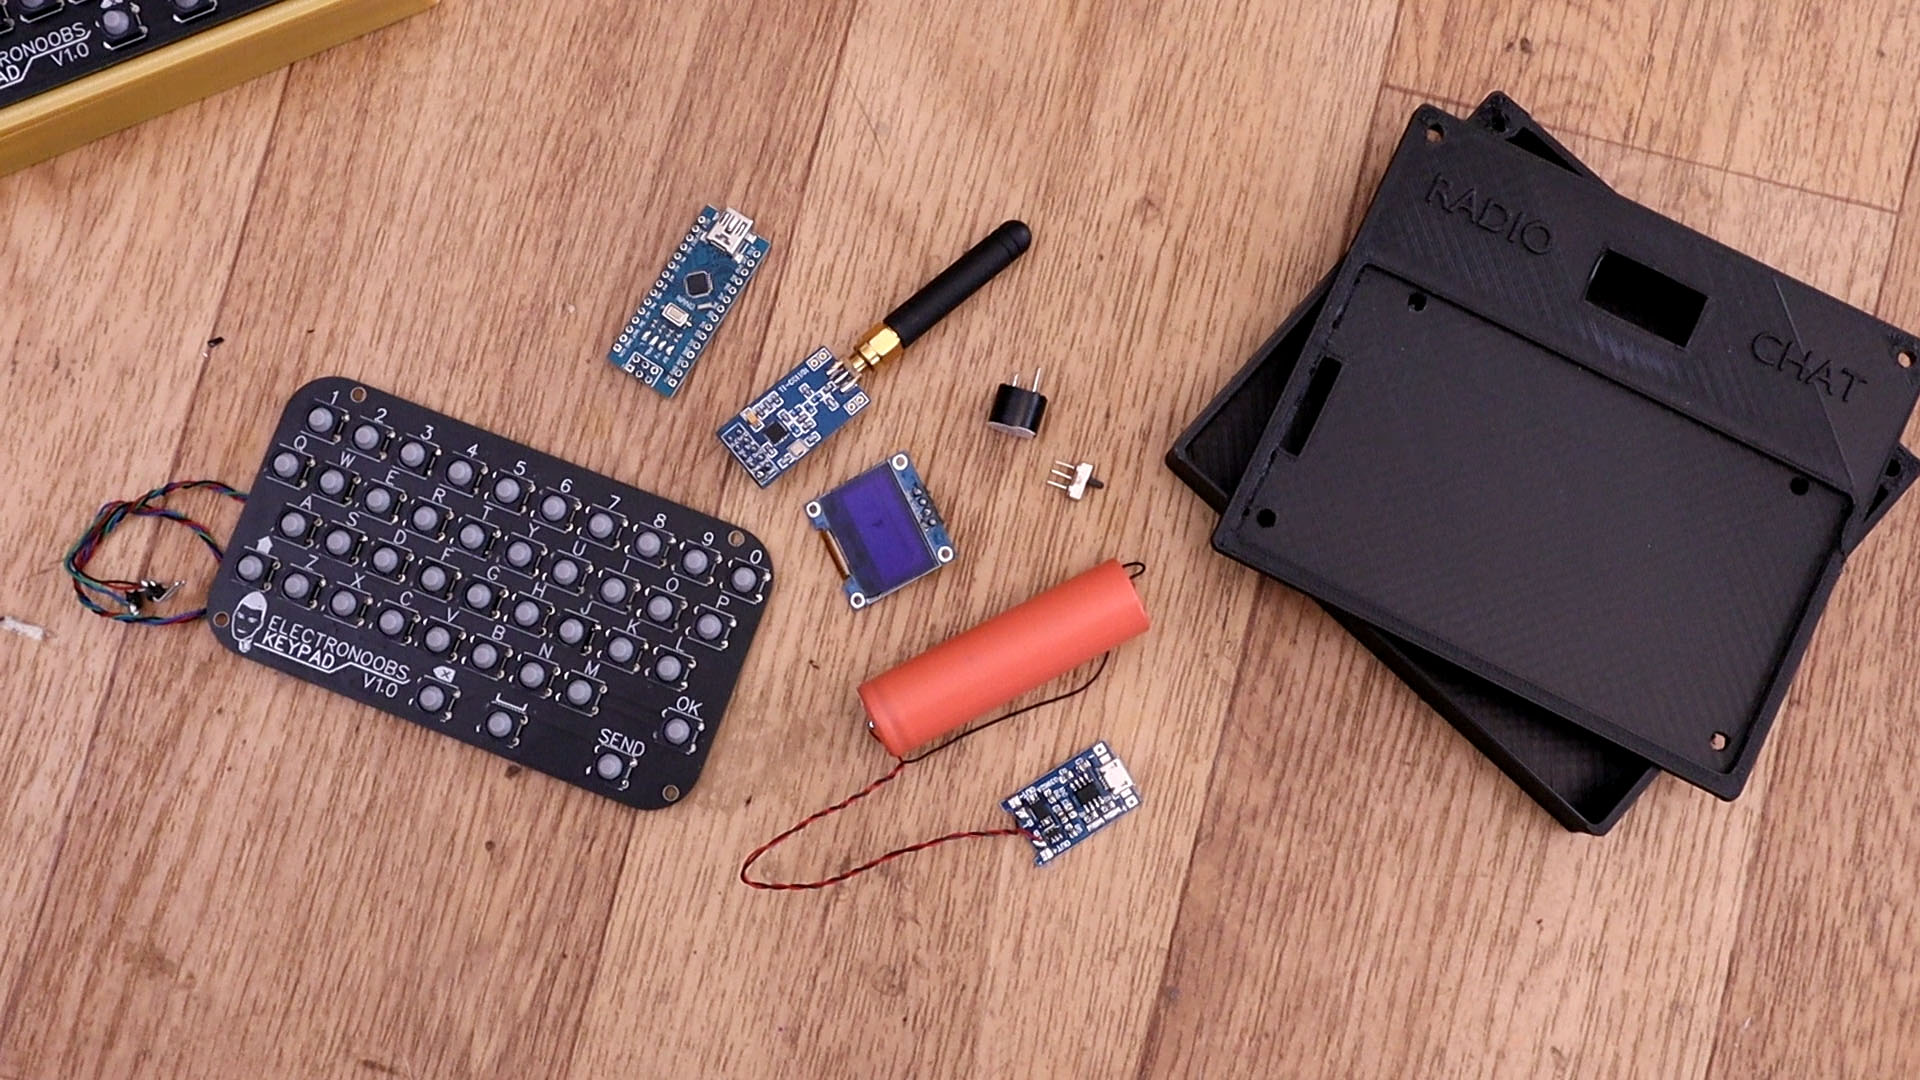
Remember the keyboard PCB we've made in this past tutorial? Well now I'll give a use to this PCB. We will make a radio based chat that will work just as a walkie talkie but with text instead of voice. So, for text, we need a keyboard and this PCB is perfect for this project. I'll make two modules so we could test the radio chat and simulate a conversation. Each module will have a 3D printed case with rechargable battrery and BMS, buzzer, radio module and the keyboard.
Have in mind that for each part below, we need it two times in order to make two radio chat modules and test the connection. See full part list for all the components. But we need the 3D printed case to place everything inside it so download the STL files and print it. Then go to the past tutorial and get the GERBERs for the keyboard PCB and make it. We need an Arduino NANO, an OLED display, the battery with a small USB charger and the radio module. I'm using the CC1101 radio module. Extra, we need a buzzer and a sliding switch.
See the schematic below. Once you have the keyboard made, the rest is very easy. Just make the connections as below.
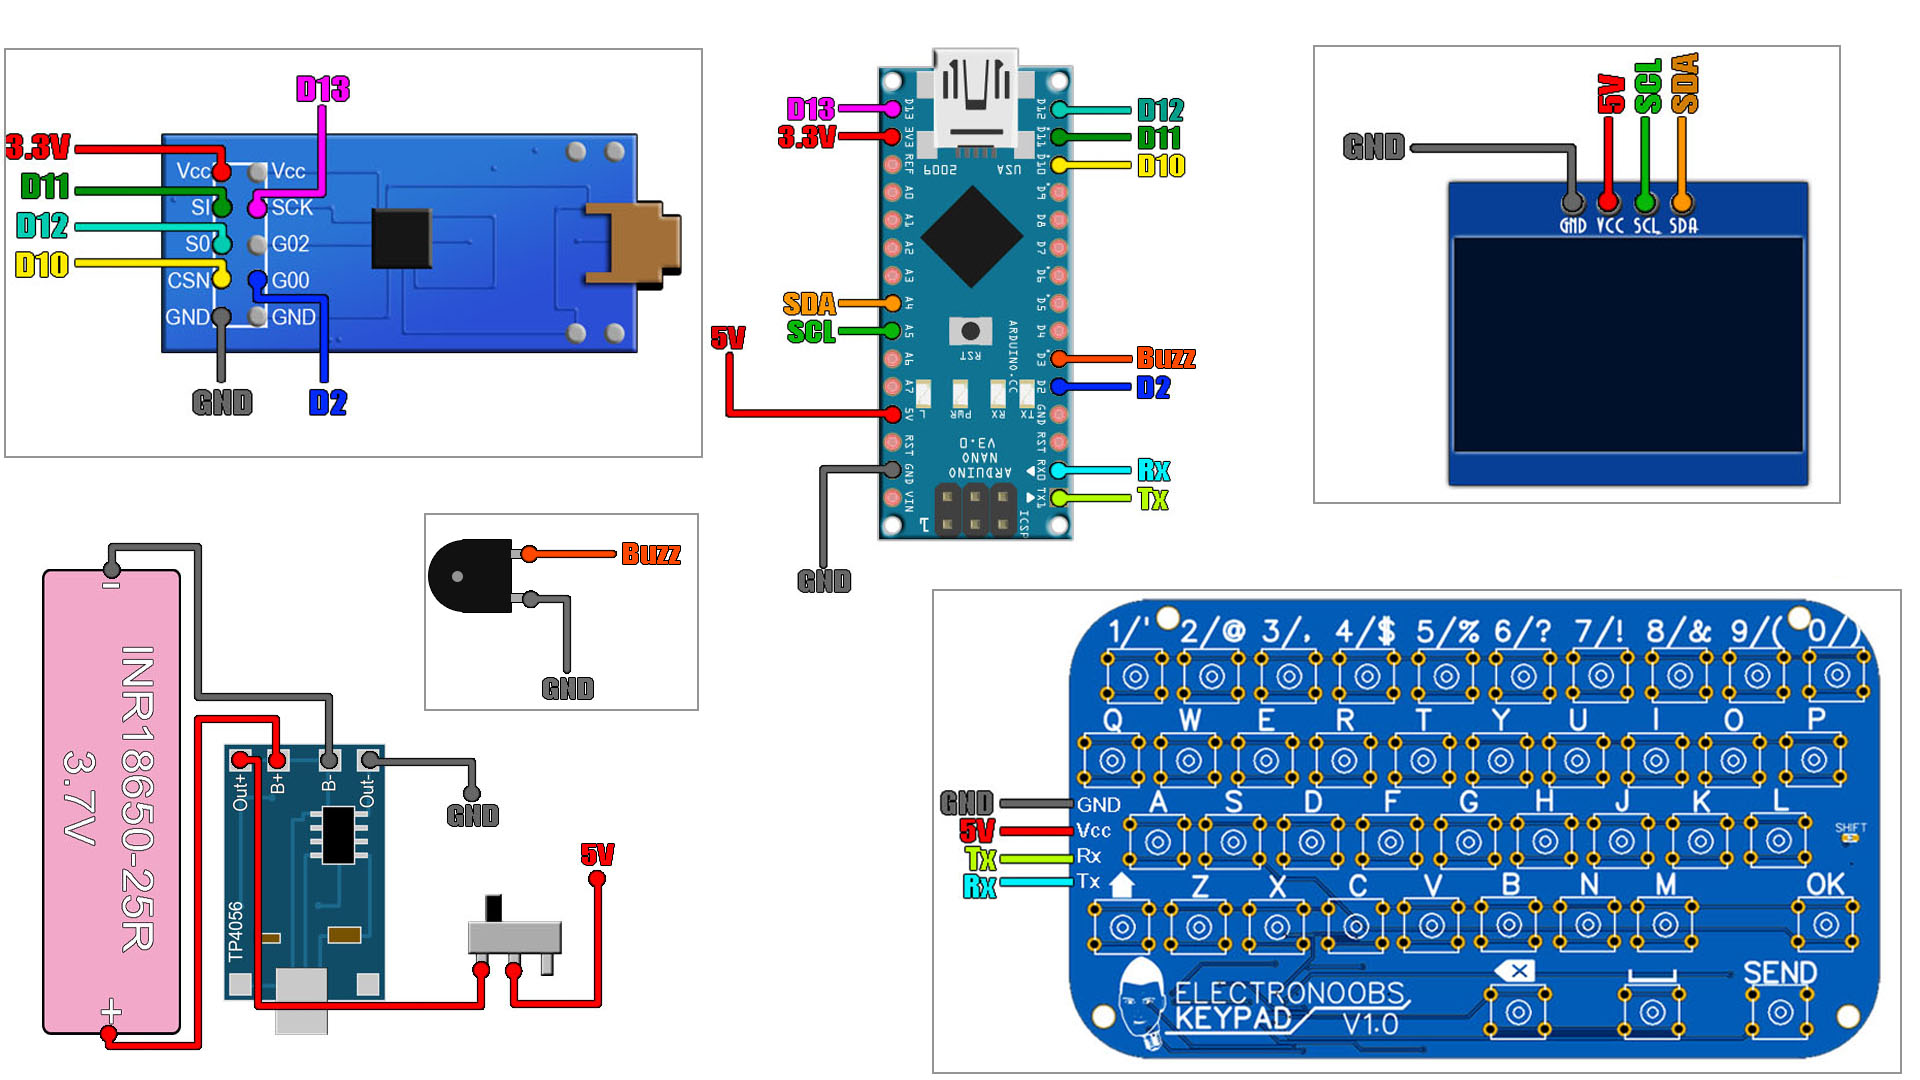
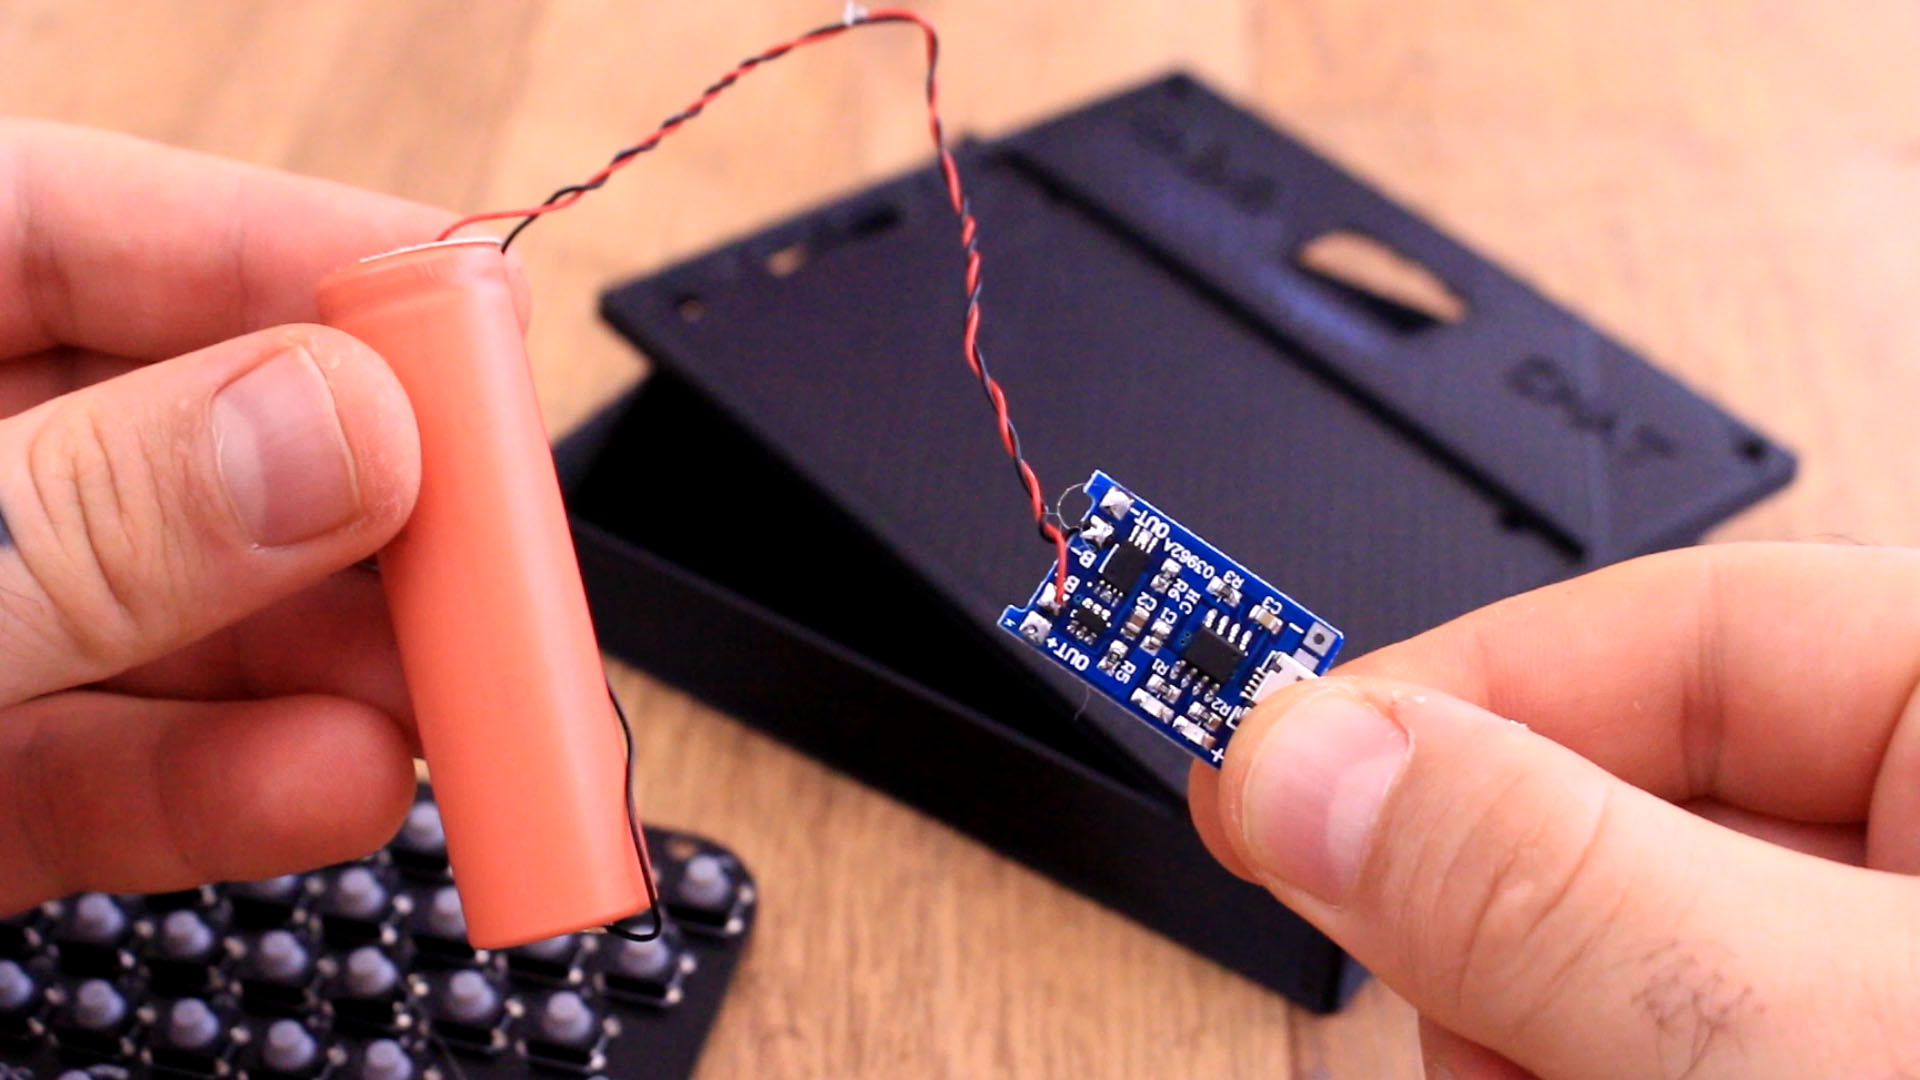
First we make the power part. We solder the battery to the small charging module with USB input. Then, we soler wires to the output of the module and the negative wire goes to Arduino ground and the positive to one pin of the sliding switch. Then from the switch, we connect a red wire to the 5V pin of the Arduino. Now the circuit has power.
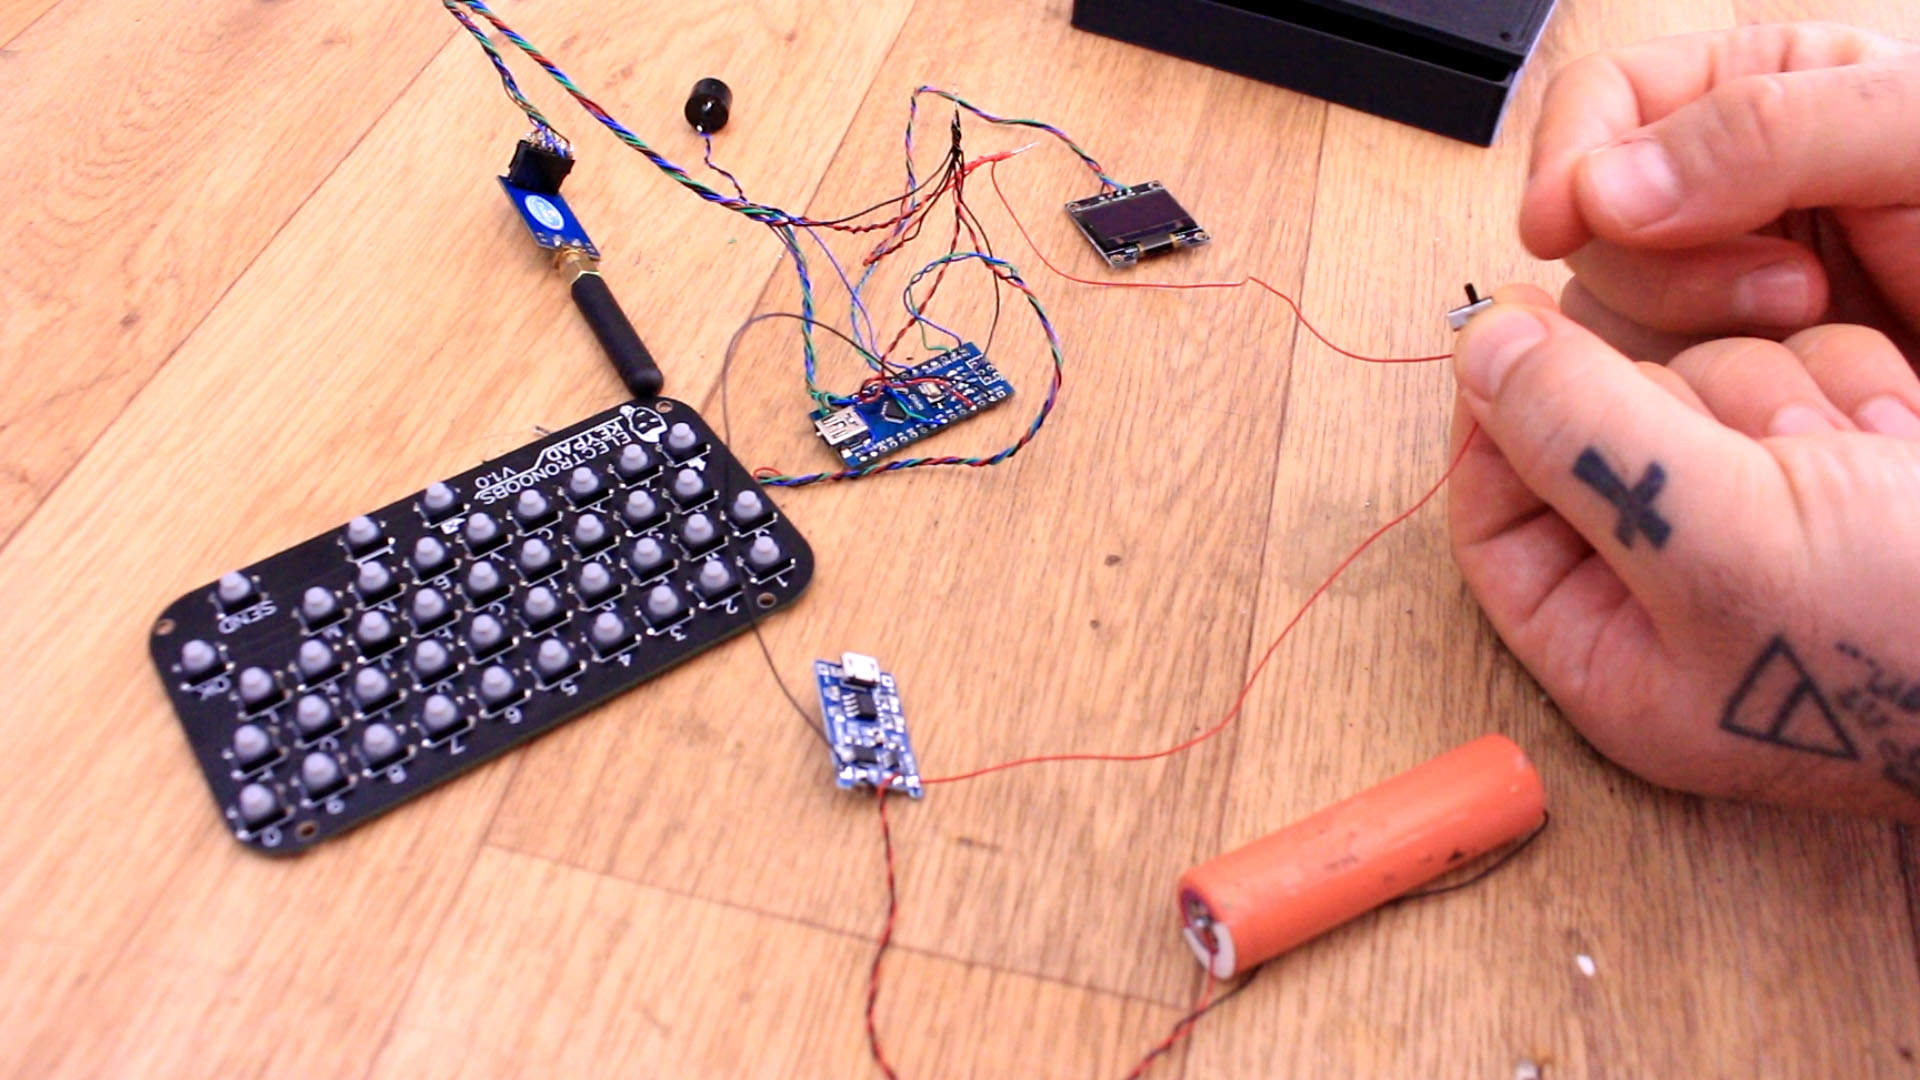
Ok, now we connect all the wires from all modules except the keyboard. Before we connect that, go below, and downlaod the code and uplad it to the Arduino and then you could connect the keyboard Rx and Tx pins. Now, slide the switch and test if it works. If yes, we could now place all the parts inside the 3D printed case.
Get the 3D printed case and some brass threads inserts. Heat the soldering ion and push the thread inside the holes. Now we could use screws. First thing I do is to glue in place the OLED dsiplay on the fron part of the case and also screw in place the keyboard with some 3mm plastic screws.
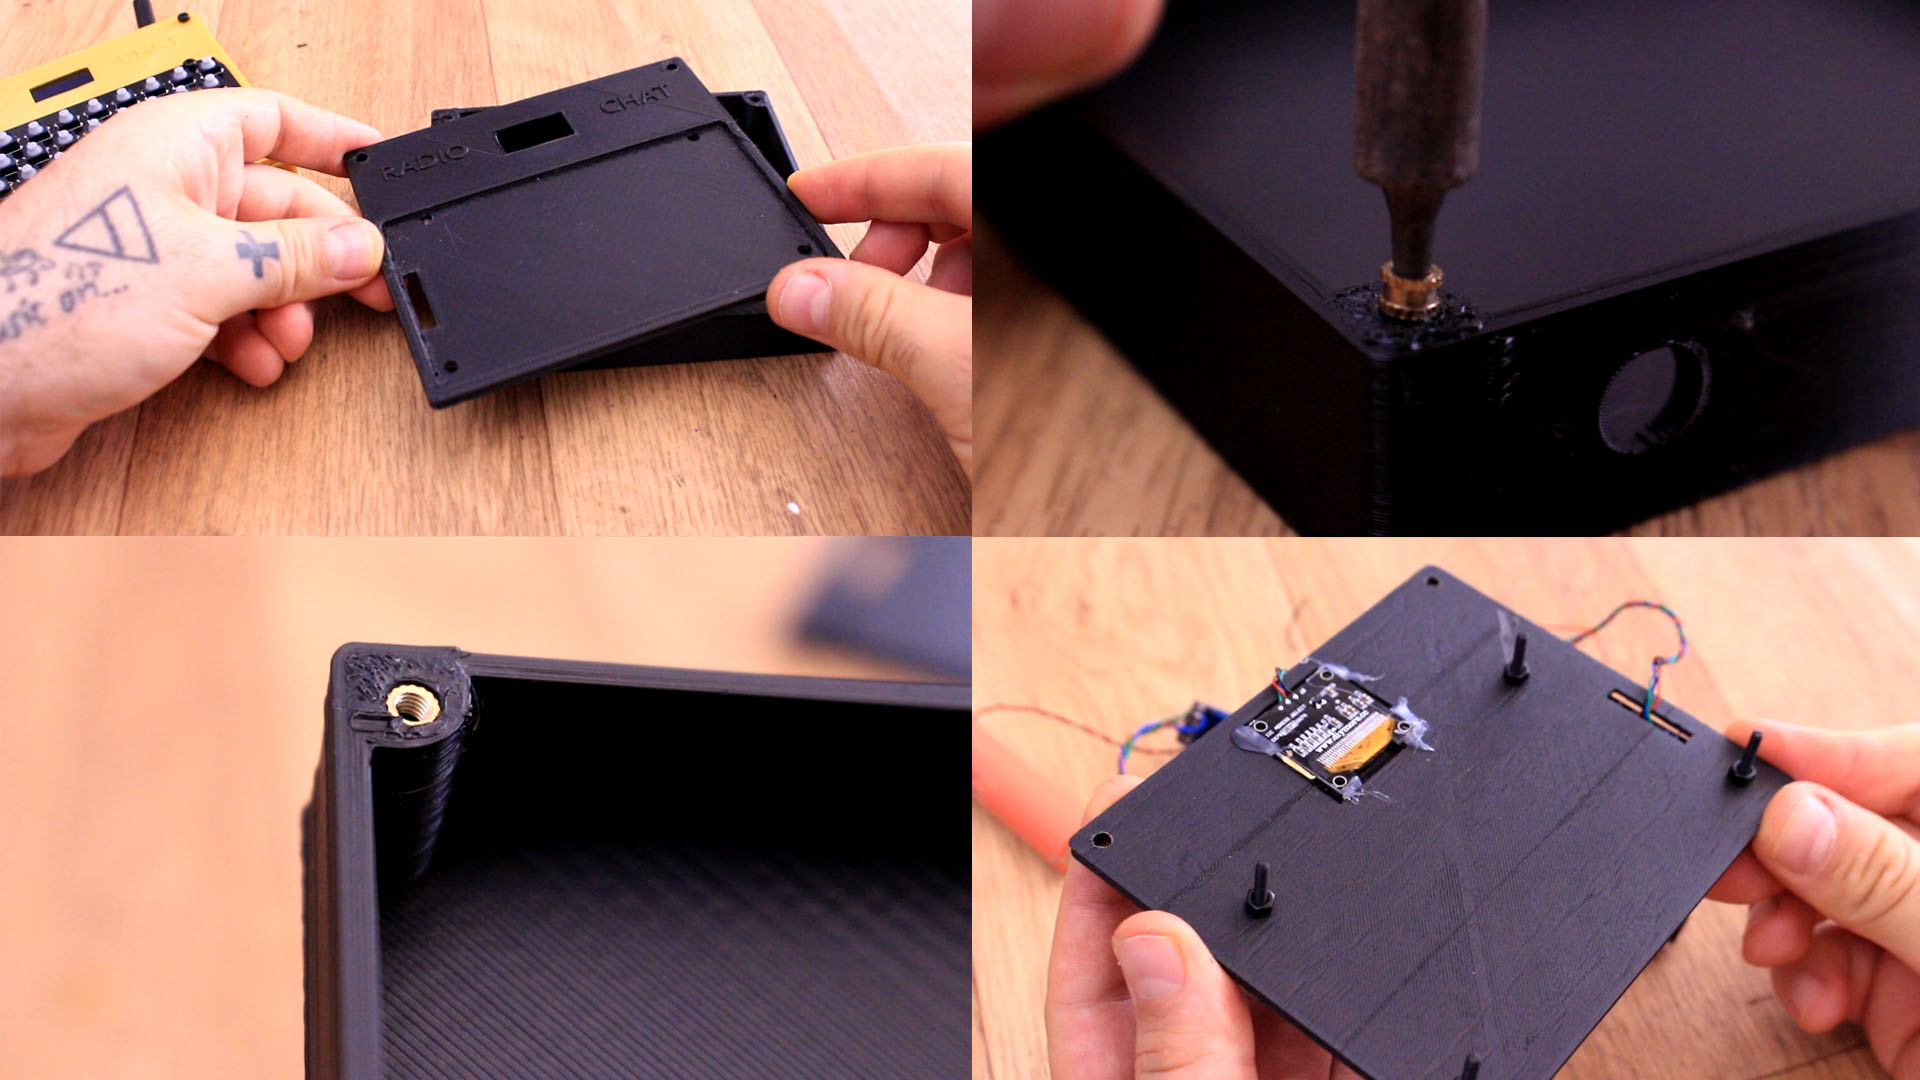
Glue everything inside the case. Pass the antenna through the hole and glue that in place as well. make sure the charging module is in front of the charging hole and that the USB can fit ok. Glue the sliding switch to the side and now we could close the case. Use some 3mm screws for that.


