
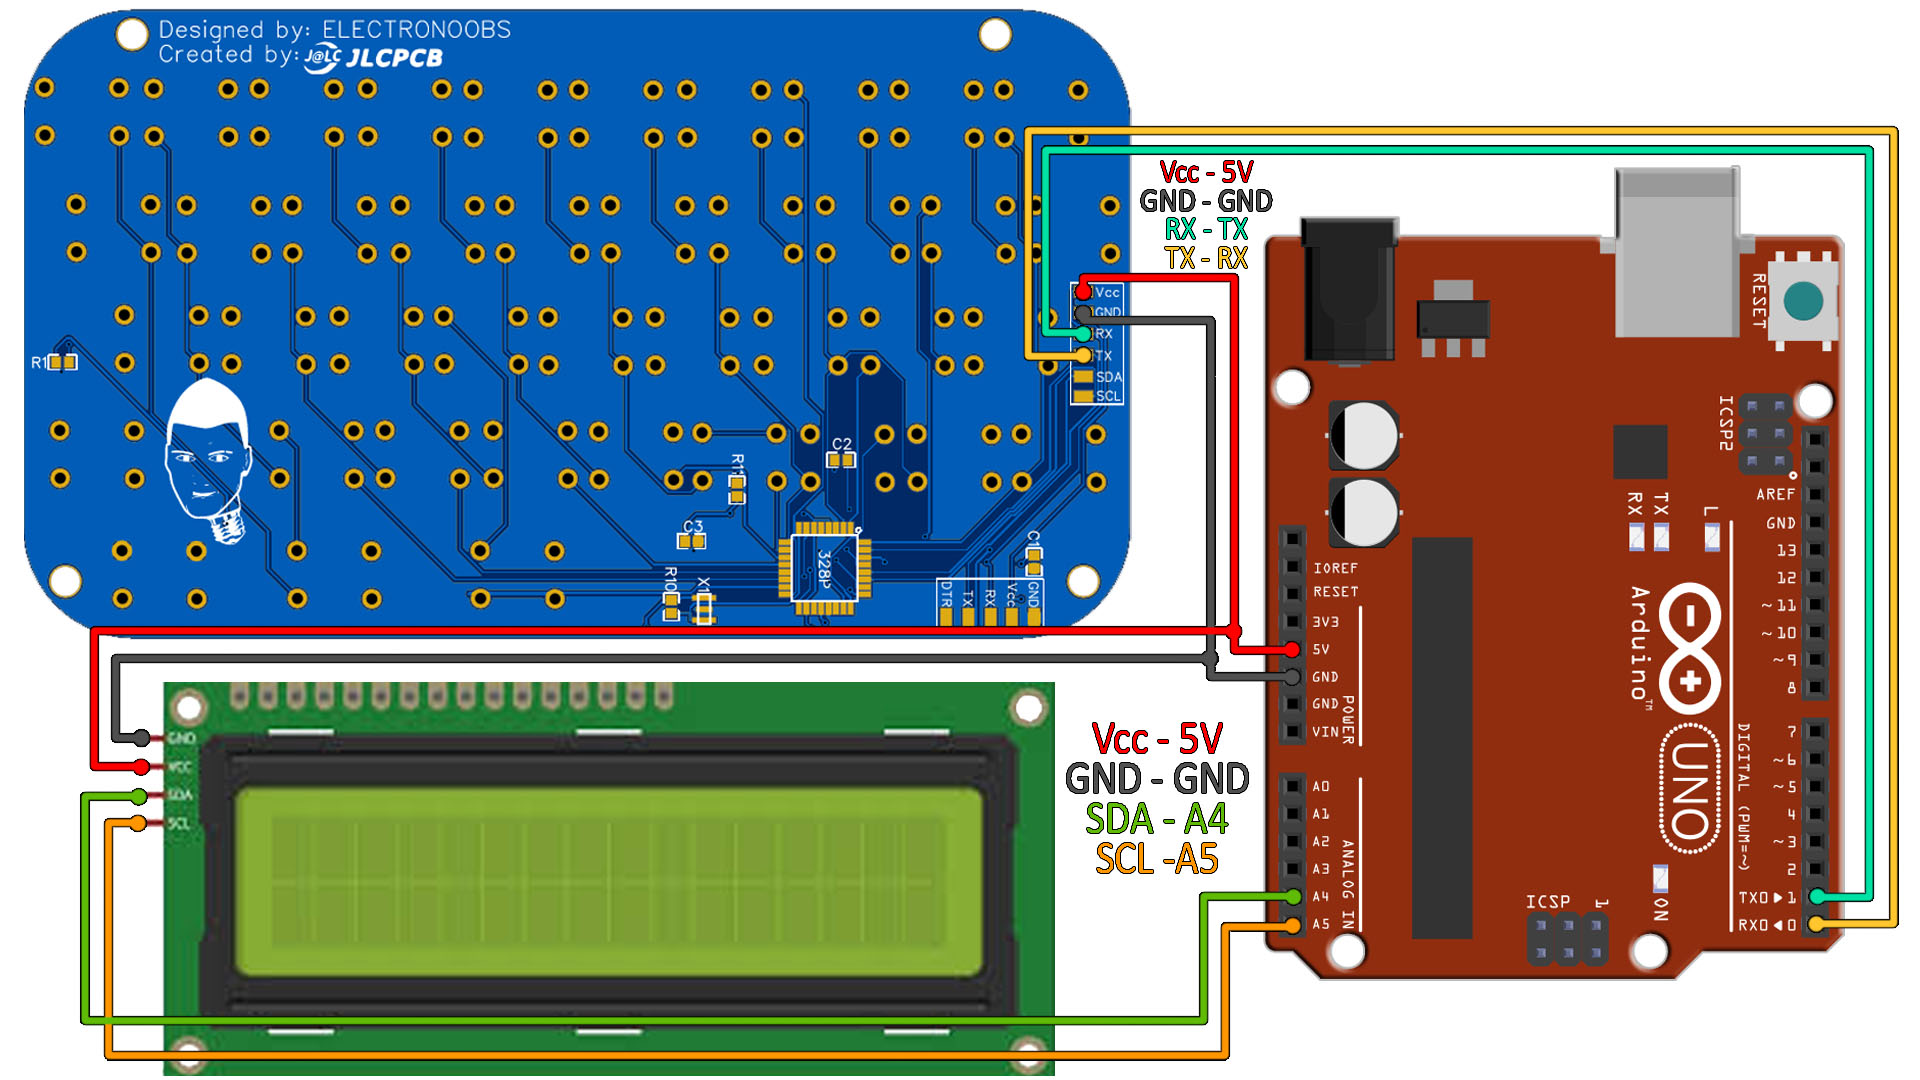
Once you have the keyboard wotking with the code uploaded, connect it to another Arduino as seen below. Download the test code from below and upload it to the second Arduino and connect an LCD or open the serial monitor. Then press buttons and see the received character.
/* This is the code for testing the Arduino keyboard, ELECTRONOOBS 21/08/2019
 *  Tutorial: https://electronoobs.com/eng_arduino_tut103.php
 *  Schematic: https://electronoobs.com/eng_arduino_tut103_sch2.php
 *  Code: https://electronoobs.com/eng_arduino_tut103_code2.php
 *  YouTube channel: https://www.youtube.com/channel/UCjiVhIvGmRZixSzupD0sS9Q
 *
 *  Connect Rx and Tx to any other microcontroller and use serial at 115200 bauds.*/

#include <Wire.h>
#include <LiquidCrystal_I2C.h>
LiquidCrystal_I2C lcd(0x3f,20,4);   //sometimes the LCD adress 0x3f and sometimes is 0x27. Try both.


void setup() {
  lcd.init();                 //Init the LCD
  lcd.backlight();            //Activate backlight
  Serial.begin(115200);       //Must be the same as the keyboard
  lcd.clear();
  lcd.setCursor(0,0);
  lcd.print("Push any key!");
}

void loop() {
  if(Serial.available() > 0)
  {
    char RECEIVED = Serial.read();
    //String text = String(RECEIVED);
    if(RECEIVED == '{')
    {
      lcd.clear();
      lcd.setCursor(0,0);
      lcd.print("SEND");
    }
    else if(RECEIVED == '}')
    {
      lcd.clear();
      lcd.setCursor(0,0);
      lcd.print("OK");
    }
    else if(RECEIVED == '^')
    {
      lcd.clear();
      lcd.setCursor(0,0);
      lcd.print("RETURN");
    }
    else
    {
    lcd.clear();
    lcd.setCursor(0,0);
    lcd.write(RECEIVED);
    //delay(10);
    }
  }
 }


