
 About me
  History
  Let's learn
  Contact us
  Arduino tutorials
 Circuits tutorials
  Robotics tutorials
 Q&A
Q&A Blog
Blog  Arduino
  Circuits
 Robotics
  Modules
  Gadgets
  Printers
  Materials
  3D objects
  3D edit
  Donate
  Reviews
  Advertising


Homemade bluetooth speaker, 3D printed case
3.0 Mount the speaker
Before that, I measure the voltage and current to obtain the power. At maximum volume and using two 4 ohms speakers I’ve measured a mean of 2.6 amperes of current at 3,79 volts that gives us an output power of around 10 watts. Each TDA2030 amplifier could deliver up to 18W. We could increase the power of our speaker by increasing the input voltage up to its maximum 24 volts but with this small speakers that is not necesary. If you use 2S or 3S batteries, you should also consider a different charging system with balance charging for 2s, 3s or even 4S batteries. But that would increase a lot the project price. Any way the maximum voltage for this amplifier is 24 volts so make sure you won’t supply more than that unless you want something like this to happen to it. This safety charging module could only charge 1S batteries of below 5 volts. If you want to put more batteries in series to obtain 7.4 or 11.1 volts you should also use a balance 2S or 3S charging and protection module. The rest of the circuit should be the same. Now that I know the circuit works I prepare the case. I’ve designed and 3D printed the case using my dear Anet E10 3d printer. The 3D design already has holes for the potentiometer and switch, the battery charging indicator LEDs, the paring push button and USB plug for the charging module.
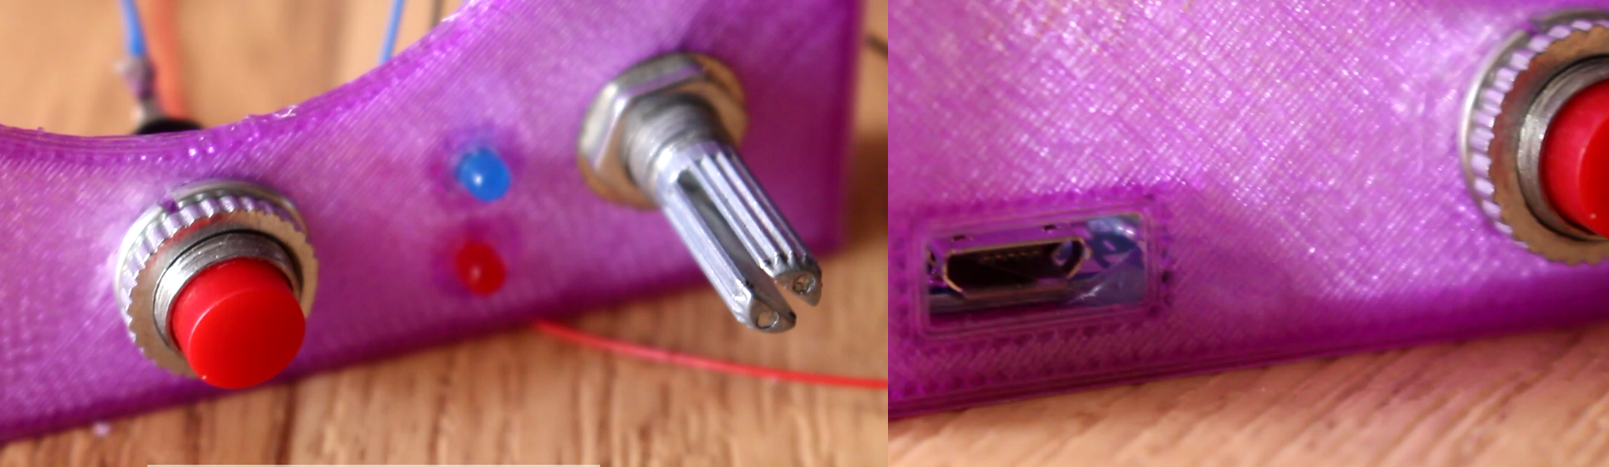
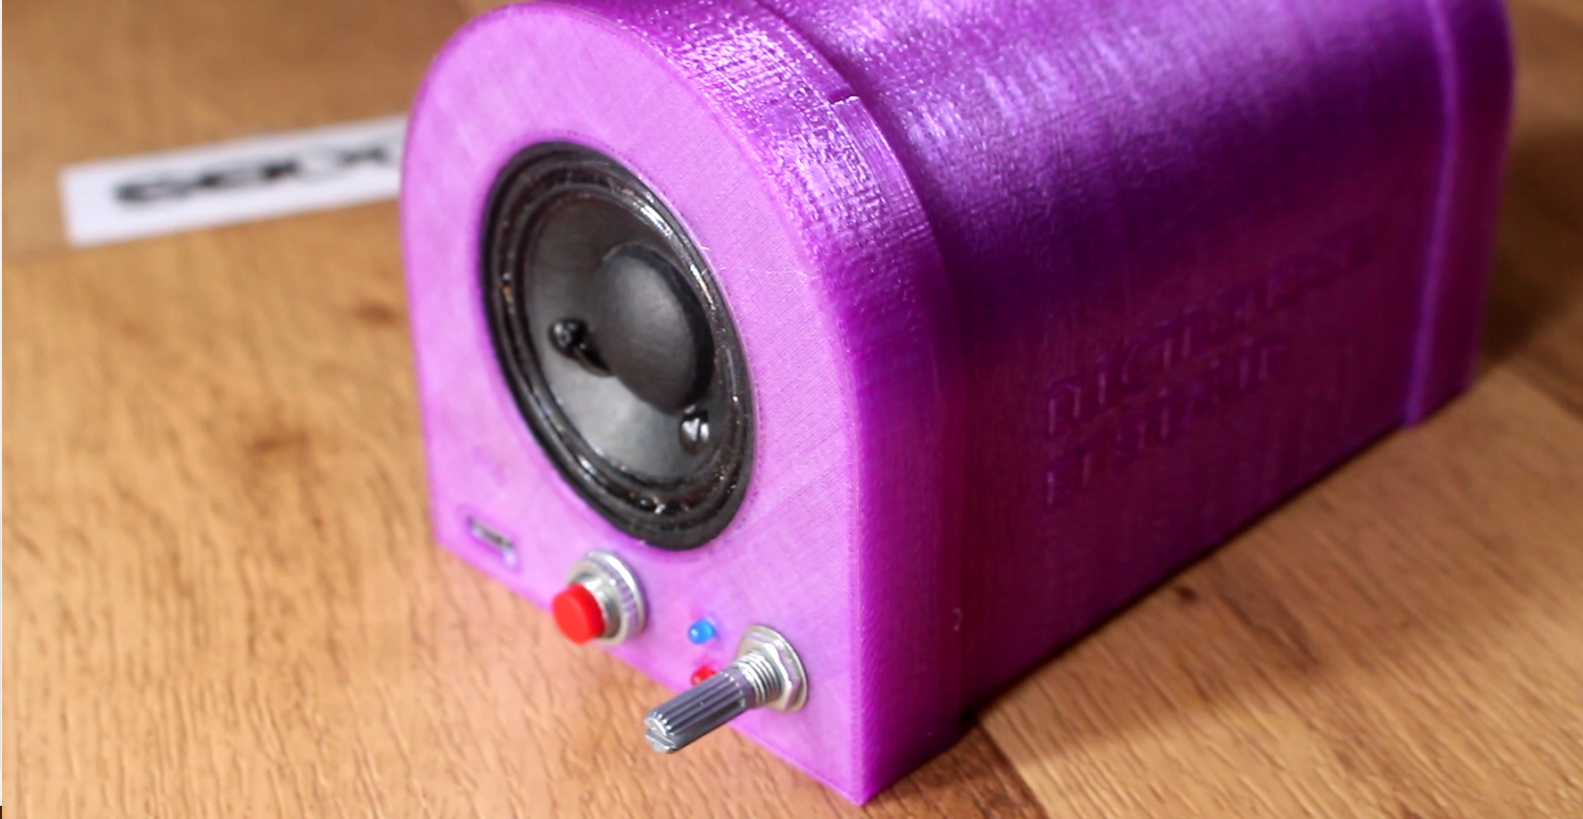
I screw in place the potentiometer and glue the LEDs on the 3D printed part. Next I screw in place the push button. I position the charging module to have the USB connector exactly in front of the hole. I glue it in place using hot glue. I take the 55 mm diameter speakers and fit them on the 3D printed parts. I make sure that all the components won’t move and that are well glued in place. I close the case and this project is done. Finally, for a final test I power it up turning the potentiometer switch. I long press the push button till I hear the Bluetooth mode sound. I connect to the Bluetooth module and play my favorite music. Now with the case the sound quality changed a lot. The 3D case already has holes in it in order to let the speaker membrane oscillate freely. I could add some extra LEDs to make it cooler but I want to have more battery life for the speakers.
To charge it just plug any USB to the USB charging module hole. The red LED will turn on and the blue one once fully charged. The module turns itself off when battery is low. I’ve use the speaker for 6 hours.
After some tests, I found that the fully charging time is between three and four hours and that at full volume it last around 6 hours and the maximum power was 10 watt. You could always add more batteries in parallel to have more life time. The project could always use any other amplifier chip than the TDA2030 or if you don’t like soldering your own circuits, there are already soldered modules for 99 cents or DIY kits ready to be soldered. You will find a bunch of examples in here.
The total price for this project without the batteries and speakers was around 6 dollars, with the Bluetooth module for 1.75 dollars, the two TDA amplifiers for only less than 50 cents, the potentiometer for one dollar, charging module also 75 cents, almost none for the 3D printed case and a few dollars for the extra components like capacitors, LEDs and resistors. The batteries in my case were free. Usually you could get a pack of 10 batteries for around 15 dollars. So that would add 3 more dollars to the project. You could also find 50mm speakers for around 1.5 dollars so let’s add 3 more dollars to the project. So, we could approximate the total price of this project to about 12 or 13 dollars using only 3 lithium ion batteries. But the best thing about this is that we made it. That worth more than any other speaker.
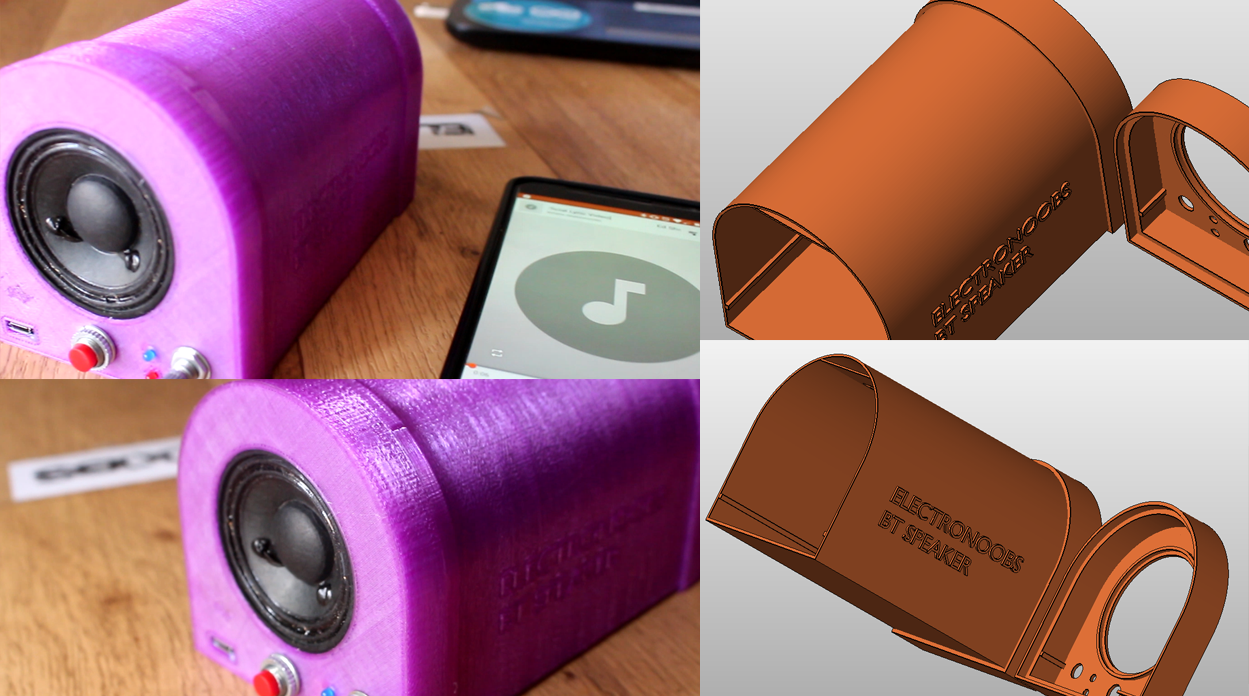
I’m pretty satisfied with the final results. It looks so nice, the color of the case is amazing, we have all the controls on the side and we could charge it with any USB charger. Since the filament I’ve used is translucent we could even see the paring LEDs of the Bluetooth module trough the walls. The sound quality is not the best but you could always improve that just by using any other amplifier. The rest of the project should be the same.
If you want to support me check my Patreon page as well, I would really appreciate that. I hope that you’ve enjoyed this tutorial. If you have any question about this project or any other, just leave it on my Q&A page.
Thanks again and see you later guys.