
In this video we are going to build our own digital pet using Arduino, a Tamagotchi clone.
With over 76million units sold worldwide Tamagotchi was one of the most popular toys of the 90s.
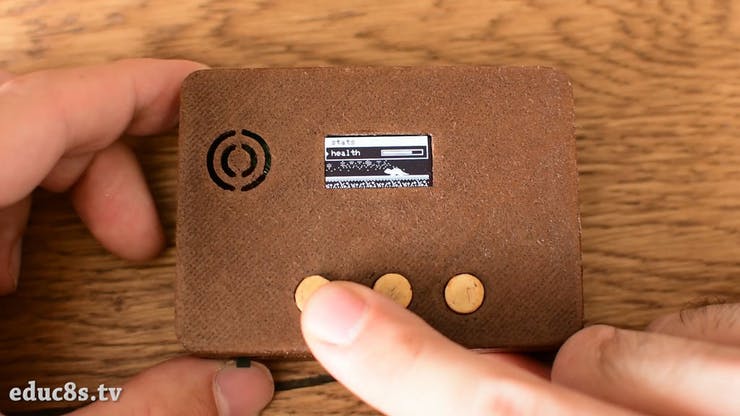
As you can see on the small OLED display we take care of a small dinosaur. Using the meters, like the hunger meter, the happy or the discipline meter we can determine how healthy and well behaved the dinosaur is. We can feed the dinosaur, play with it, visit the doctor when it gets sick and many more things. As you can see, the game offers great features and animations. It is a very addictive toy, I remember playing with a Tamagotchi for months when I was a kid. I still remember the day that my first Tamagotchi died. This project brings back so many memories from my childhood and that’s why I decided to build one.
This project is developed by Alojz, a friend from Serbia. He has done an amazing job. I discovered his work a few months ago. He has built a website where he shares everything about this project. The code, the schematic diagram, even a 3D printed enclosure for it. He has done a fantastic job in this project. Even if you are not interested in building the project, study the code. Alojz is a very skilled developer so you are going to learn a lot from his code.
Project Page: https://alojzjakob.github.io/Tamaguino/
The 0.96" OLED display is a very nice display to use with Arduino. It is an OLED display and that means that it has a low power consumption. The power consumption of this display is around 10-20 mA and it depends on how many pixels are lit.
The display has a resolution of 128×64 pixels and it is very small in size. Furturmore, it is very bright and it has a great library support. Adafruit has developed a very nice library about this display, you can find this library here. In addition to that, the display uses the I2C interface so the connection with Arduino is extremely easy. You only need to connect two wires except from Vcc and GND.
Main Circuit
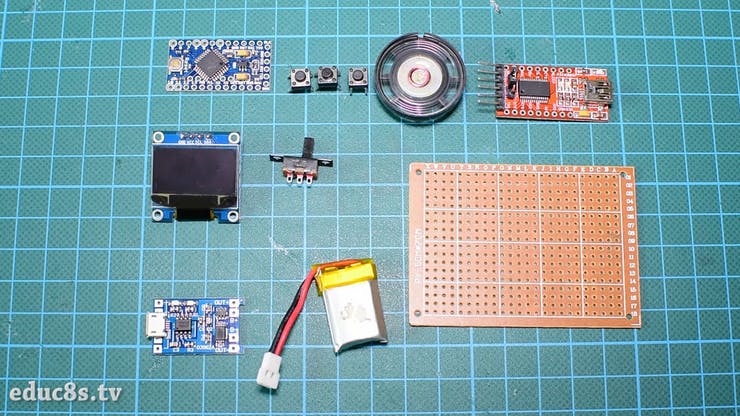
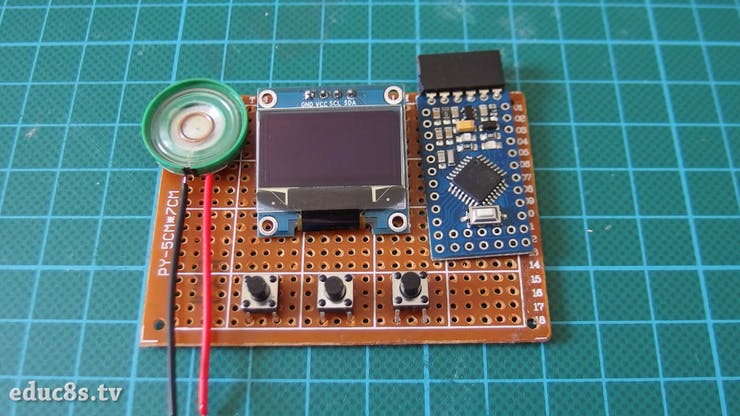
First of all let’s build the electronics. I used this small 7x5cm prototyping board to solder all the electronics together. It was the first time I was using a prototyping board in a project so I didn’t know how it was going to turn out. I first arranged all the parts on the prototyping board and then I started to solder the parts one after another according to the schematic diagram.
One hour later everything was soldered. It turnout out to be easier than I thought. It was then time to load the code to the Arduino Pro Mini. I used an FTDI programmer to load the code and everything was working fine!
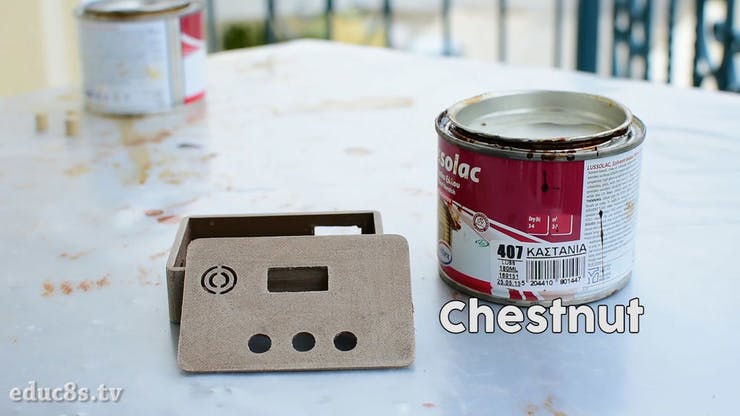
Building this project was a great learning experience for me. It was the first time I was using a prototyping board and the first time I was using a LiPo battery in a project. Also, I designed this enclosure from scratch which was more difficult than I expected. To be honest I am not satisfied with enclosure, it is way too big for such a small display. That’s why I am thinking to replace this small 1” OLED with a bigger 2.4” display I have discovered. I think it will make the project much better. I would like this project to evolve into an Arduino game console. This project is good start. I would love to hear your opinion about this project. Do you have any improvement suggestions? Please post your comments in the comments section below! Thanks!


