This is called ferrofluid, basically, tiny nanometer sized particles coated with magnetite and suspended in a transparent liquid. And since they are magnetic, we can attract the liquid with a magnet and look how cool is that. So for today’s project I want to combine ferrofluid movement with music. I’ve seen such a speaker online and I want to make one as well so we will have a Bluetooth 3D printed speaker with ferrofluid effects and futuristic look. I will design and print the enclosure for the speaker, we select some good speakers and we add a Bluetooth music receiver, we add some sort of supply and we also create a simple circuit that will use the music to create magnetic movement and make the ferrofluid dance and that should look awesome. So guys, let’s get started.
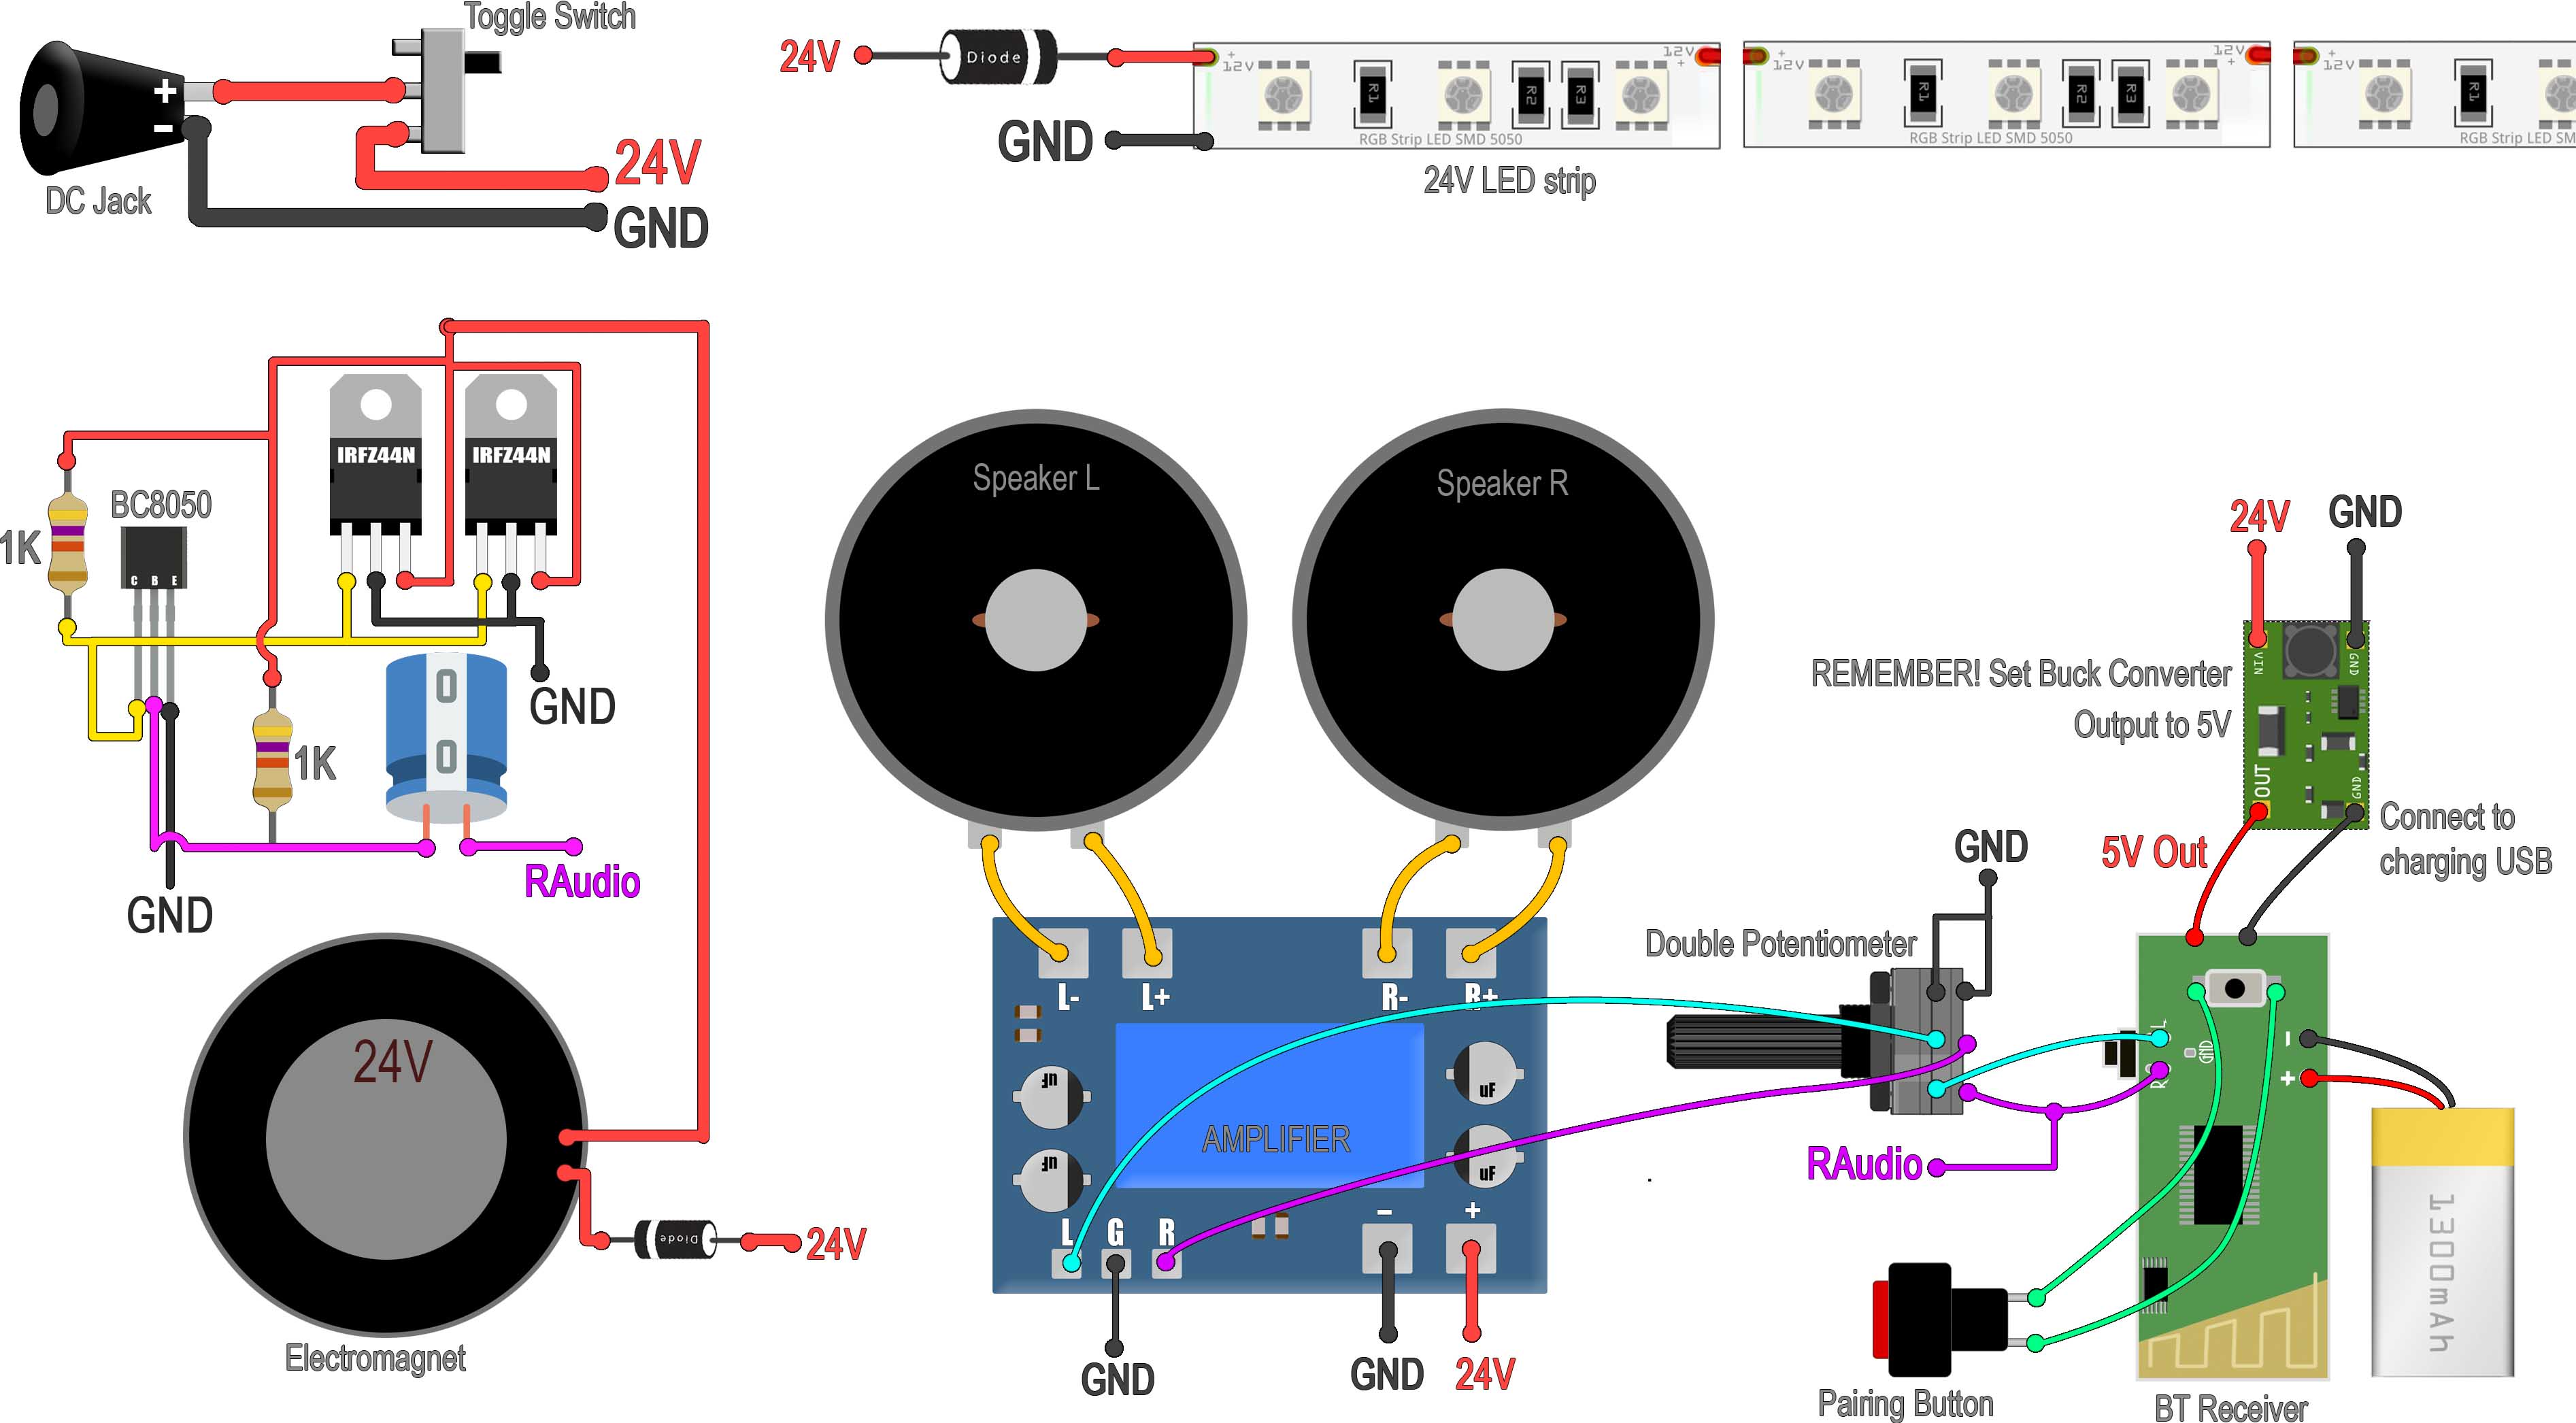
Now get this schematic from below and follow it for the audio connections. To receive audio I will use as before, one of those Bluetooth Audio receivers that only cost 2 dollars on AliExpress. I only need this small PCB with wires connected to the outputs, battery, push buttons and charging input. I connect the left and right audio outputs to the Audio amplifier left and right input pads. I also solder two wires to the on and off push button so we could place that button on the exterior of the speaker enclosure. Then I add a bigger battery to the receiver so it would last longer. To charge the battery I add this small buck converter for 5V from those 24V and that’s it, check the full schematic for all the connections.
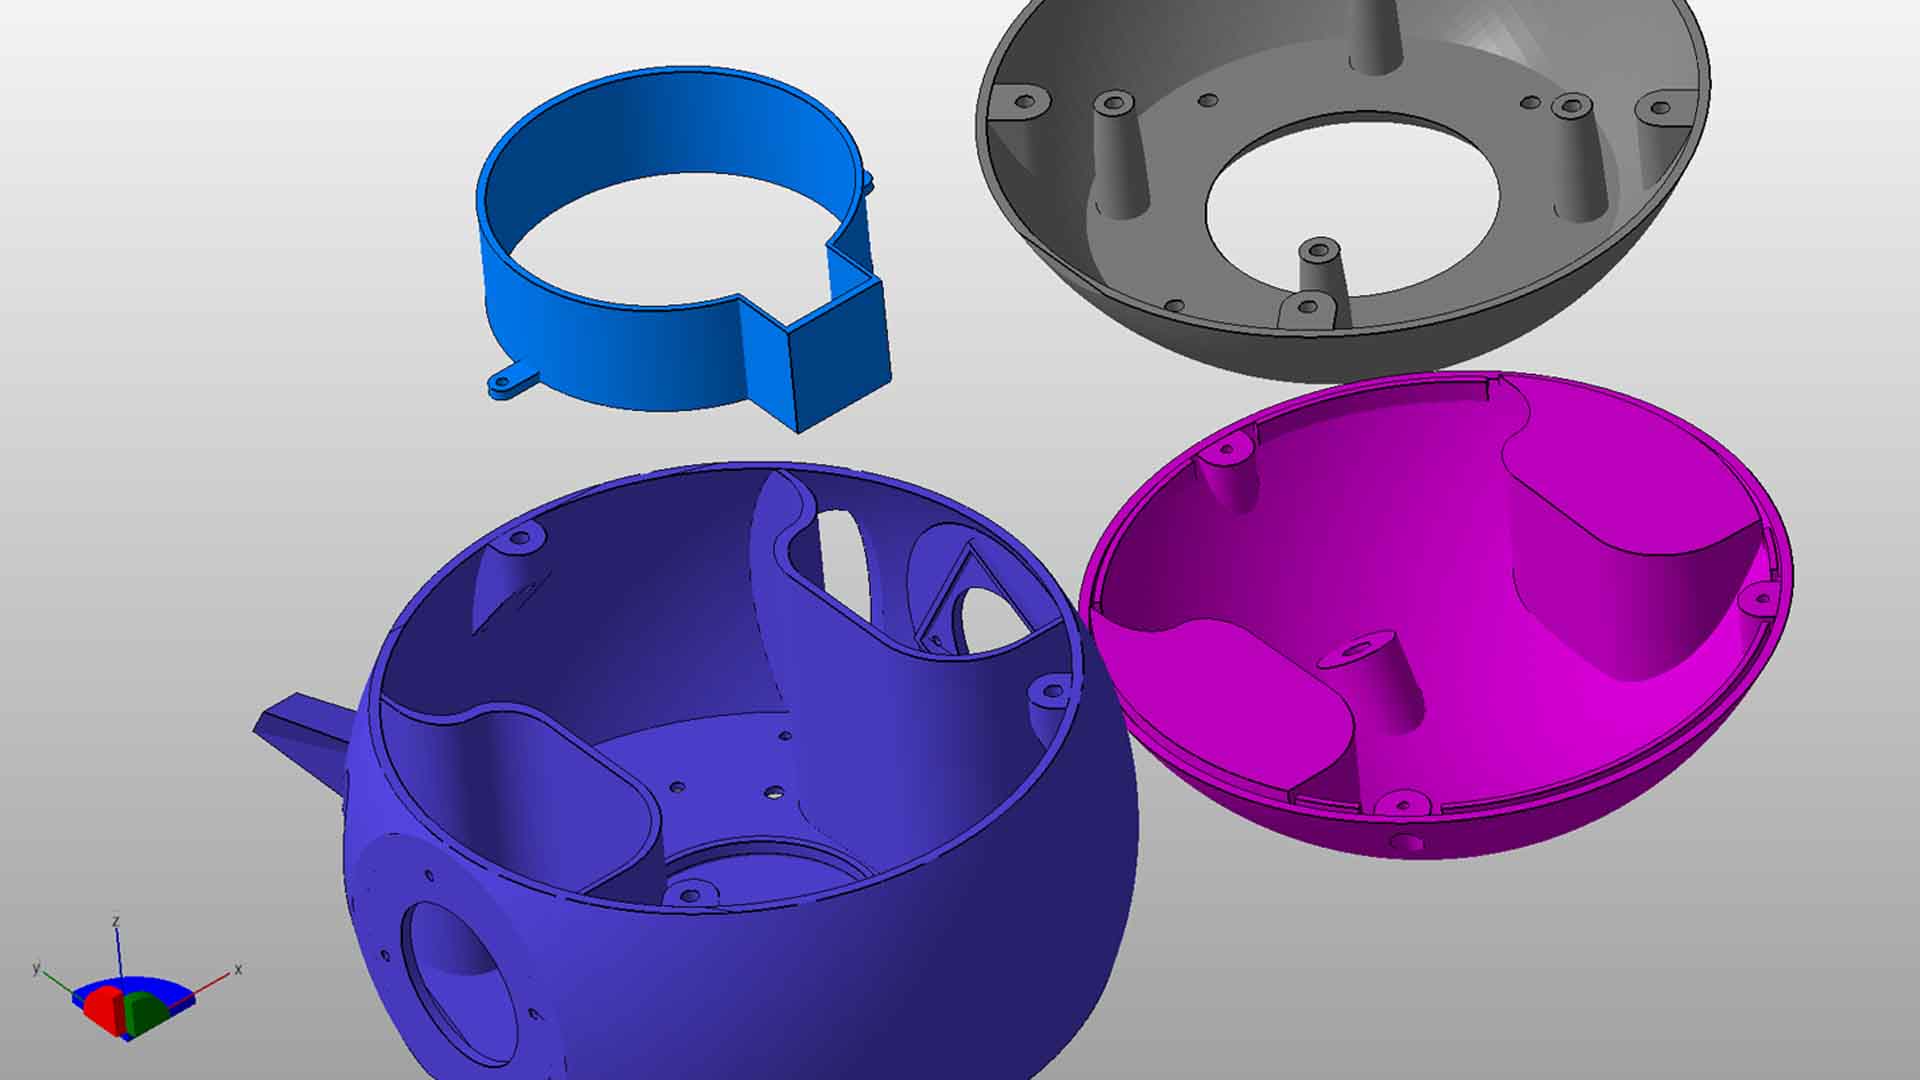
For this project we have 3 parts. Design and print the enclosure, select and make the music circuit with the amplifier and all, and the third part is the magnetic control circuit of the ferrofluid. Downlaod the STL files from below. Around the ferrofluid bottle I’ve printed a different part, It is made out of translucent PLA. That’s because I also want to add some LEDs inside so the light will also dance with the rhythm of the music as well. Then I’ve designed the middle part. That will keep in place the electromagnet which is made to work with 24V and is quite powerful.
This is the PCB I’ve made for this project. It is quite big but don’t worry, the circuit is not that complicated. The size is of 210mm by 90mm but depending on your designing skills and the time you invert for such a project, you could make it even more compact. So you can download the GERBERs from below and go to PCBWAY and order your own board. Click the quote now button. Select the size, amount of PCBs and the color, in my case I want it to be black. Save to cart and click the upload GERBERs button. Upload the GERBER and make the order. In a few days you receive the PCBs and they look awesome. I think the black solder mask is my favorite. As you can see, the PCB has exposed copper tracks. That’s because I want those tracks to withstand more current so later we could add solder on top so they would get thicker.
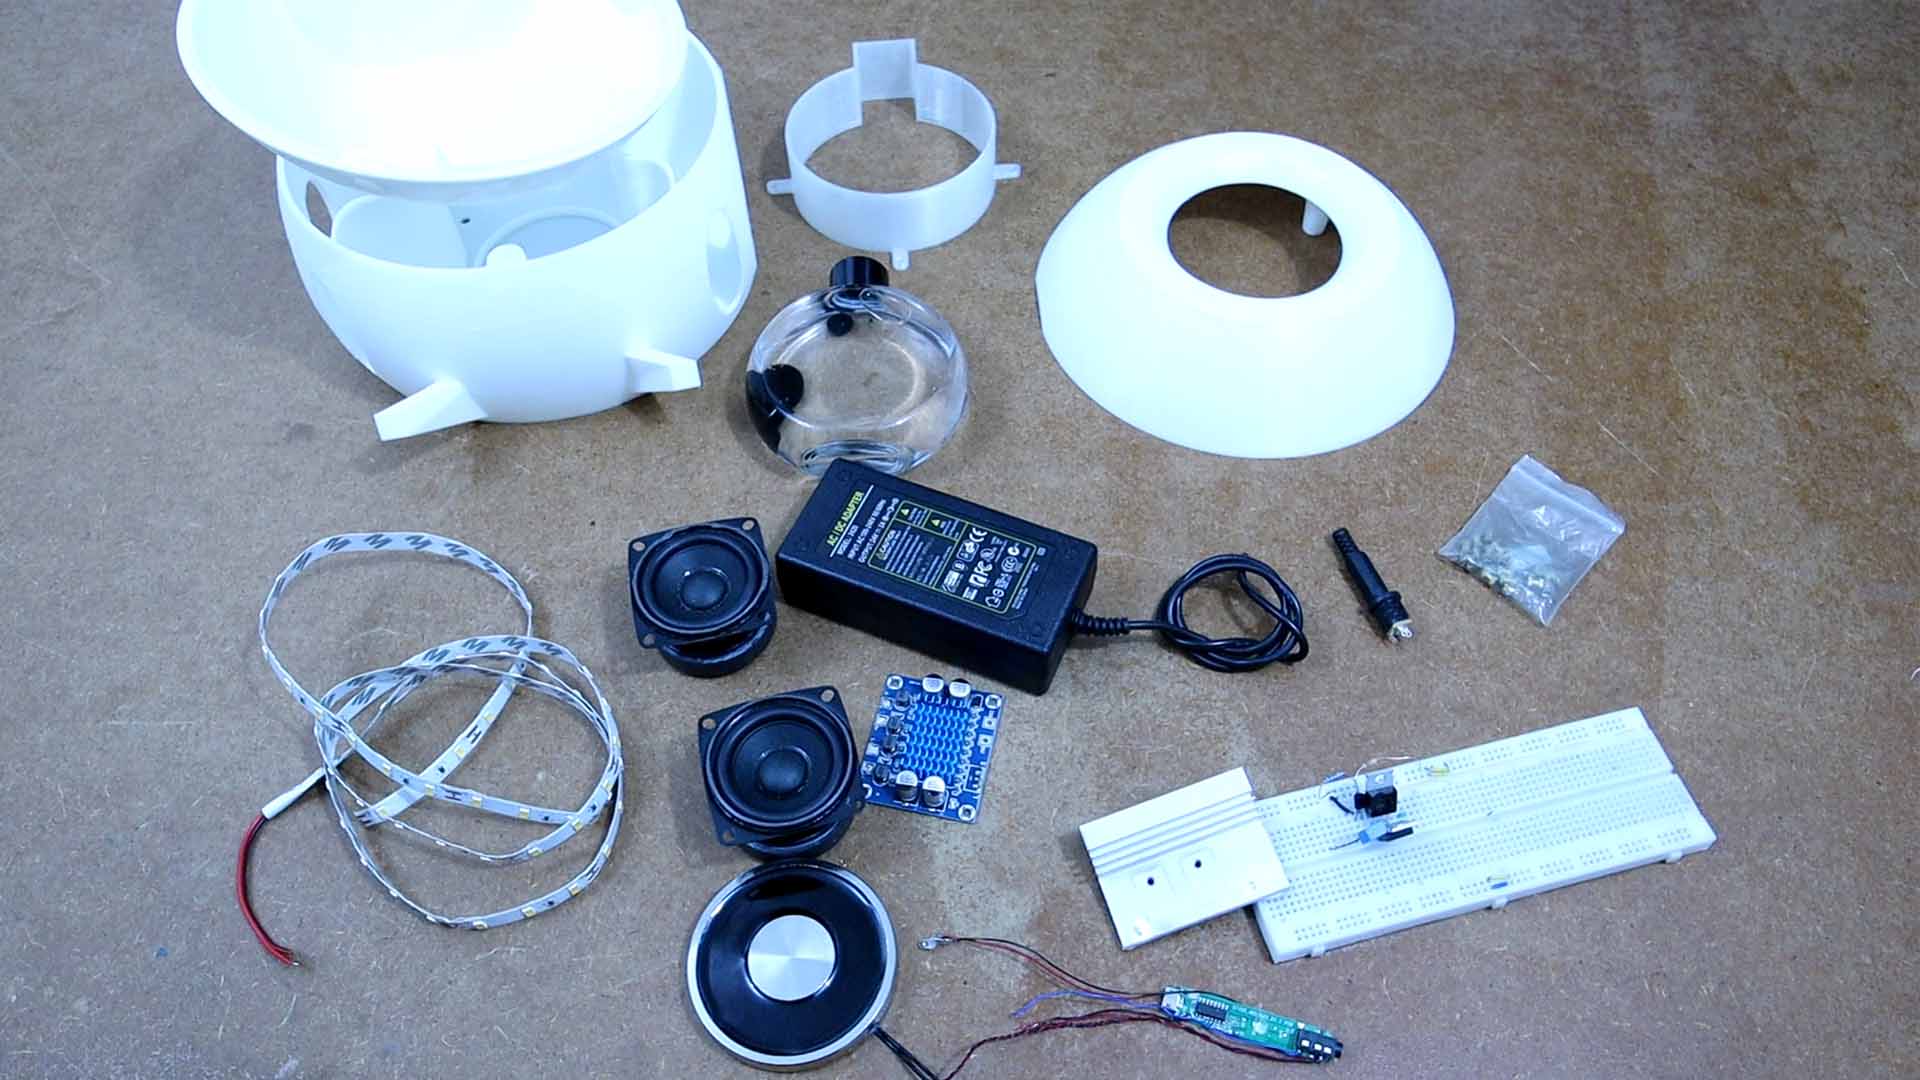
So guys you have the full part list, the design for the 3D printed enclosure, the circuit that I’ve made and everything you need above so check the links for everything. If my videos help you, consider supporting my work on my PATREON or a donation on my PayPal. Thanks again and see you later guys.