


Ok, now we haev the gerbers in .zip file. I select order at JLCPCB. A new page will open and here I can see my board. Click view gerber and inspect it one more time. Select your settings. I’ve selected red color, 10 boards and 2 layers. For red color the price is of 9 euros, but for green you will pay the amazing price of only 1.62 euros.
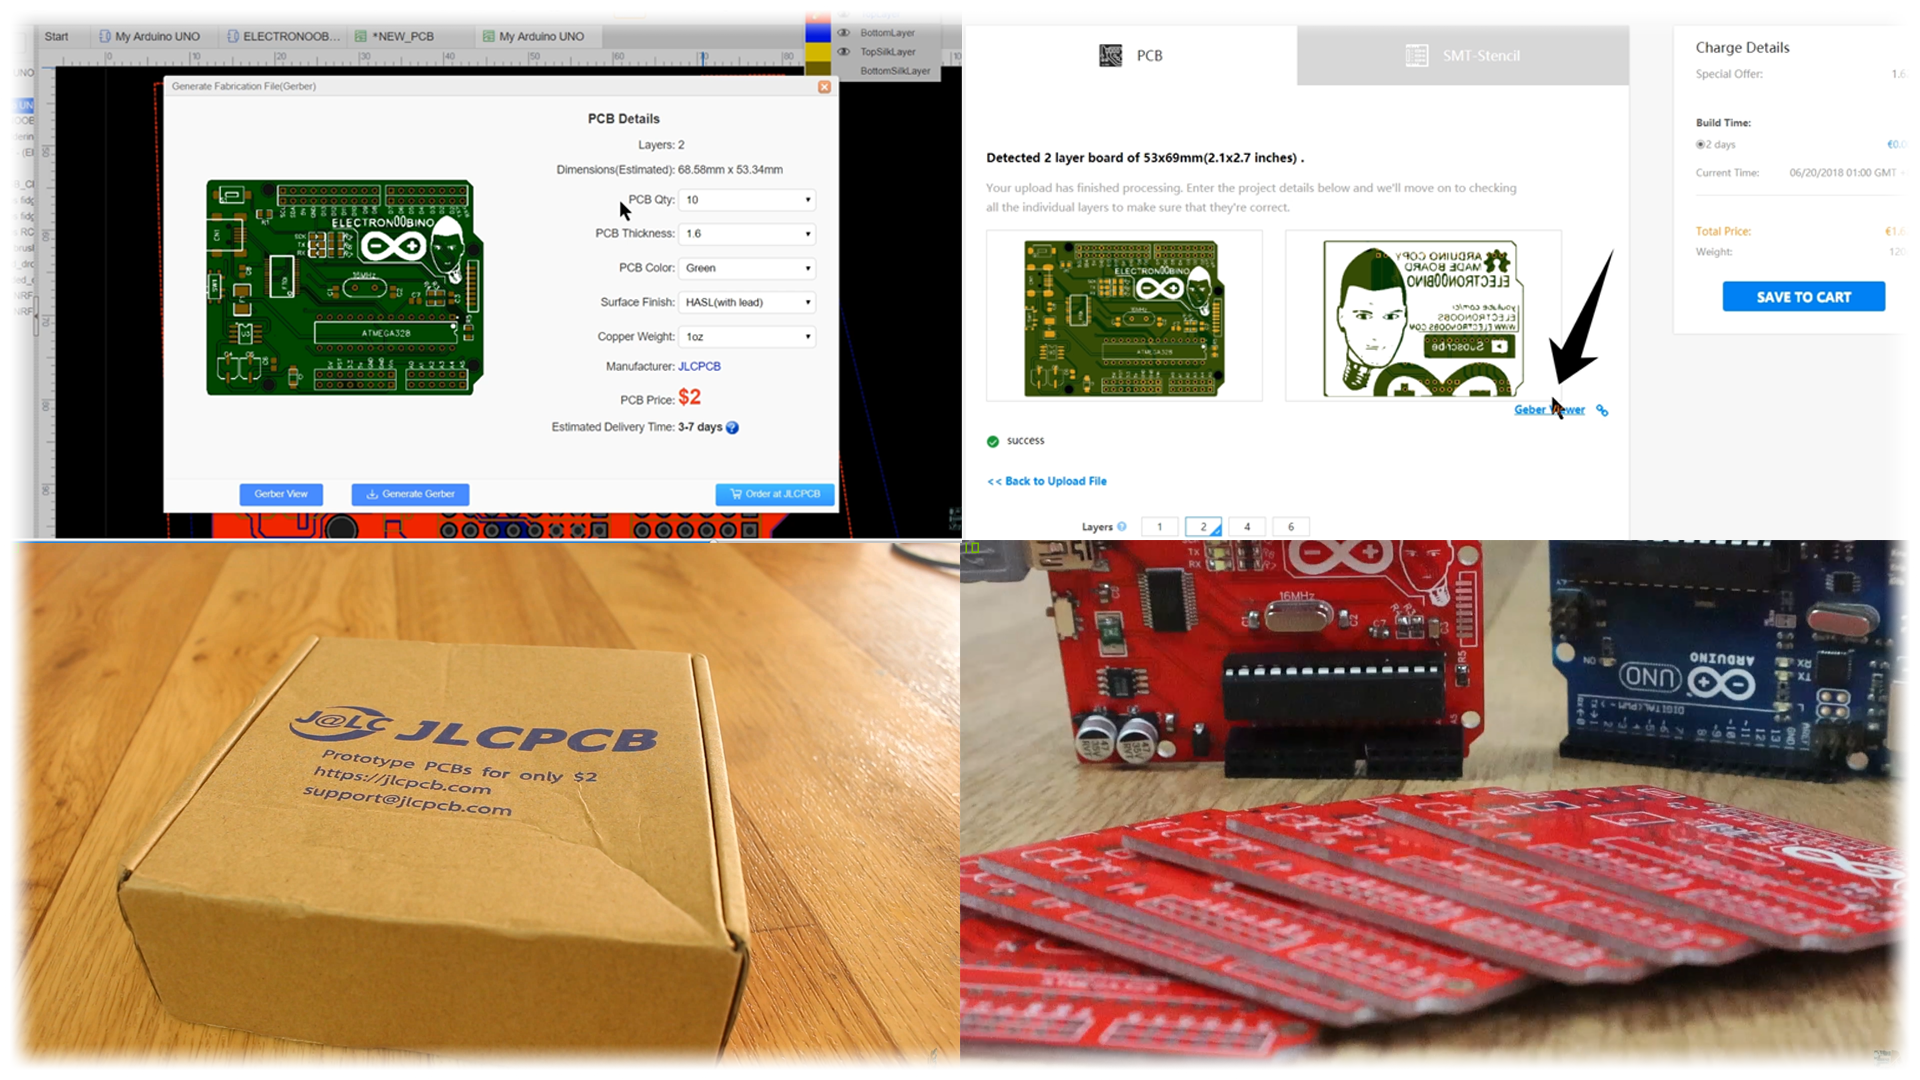
Ok, save to cart. For Spain, as you can see I’ve paid only 6 more dollars for shipping. Time is not a problem for me so I never use DHL because it is very expensive. Pay the boards and wait for the order to arrive. With DHL you would receive the boards to Spain in around 5 days which is amazing, but, with normal shipping in 2 weeks which is not that bad. For new customers JLCPCB has free shipping during this time of year. SO, ordering the green color, 10 PCB of 10 by 10 cm and 2 layers, you will only pay 2 dollars.
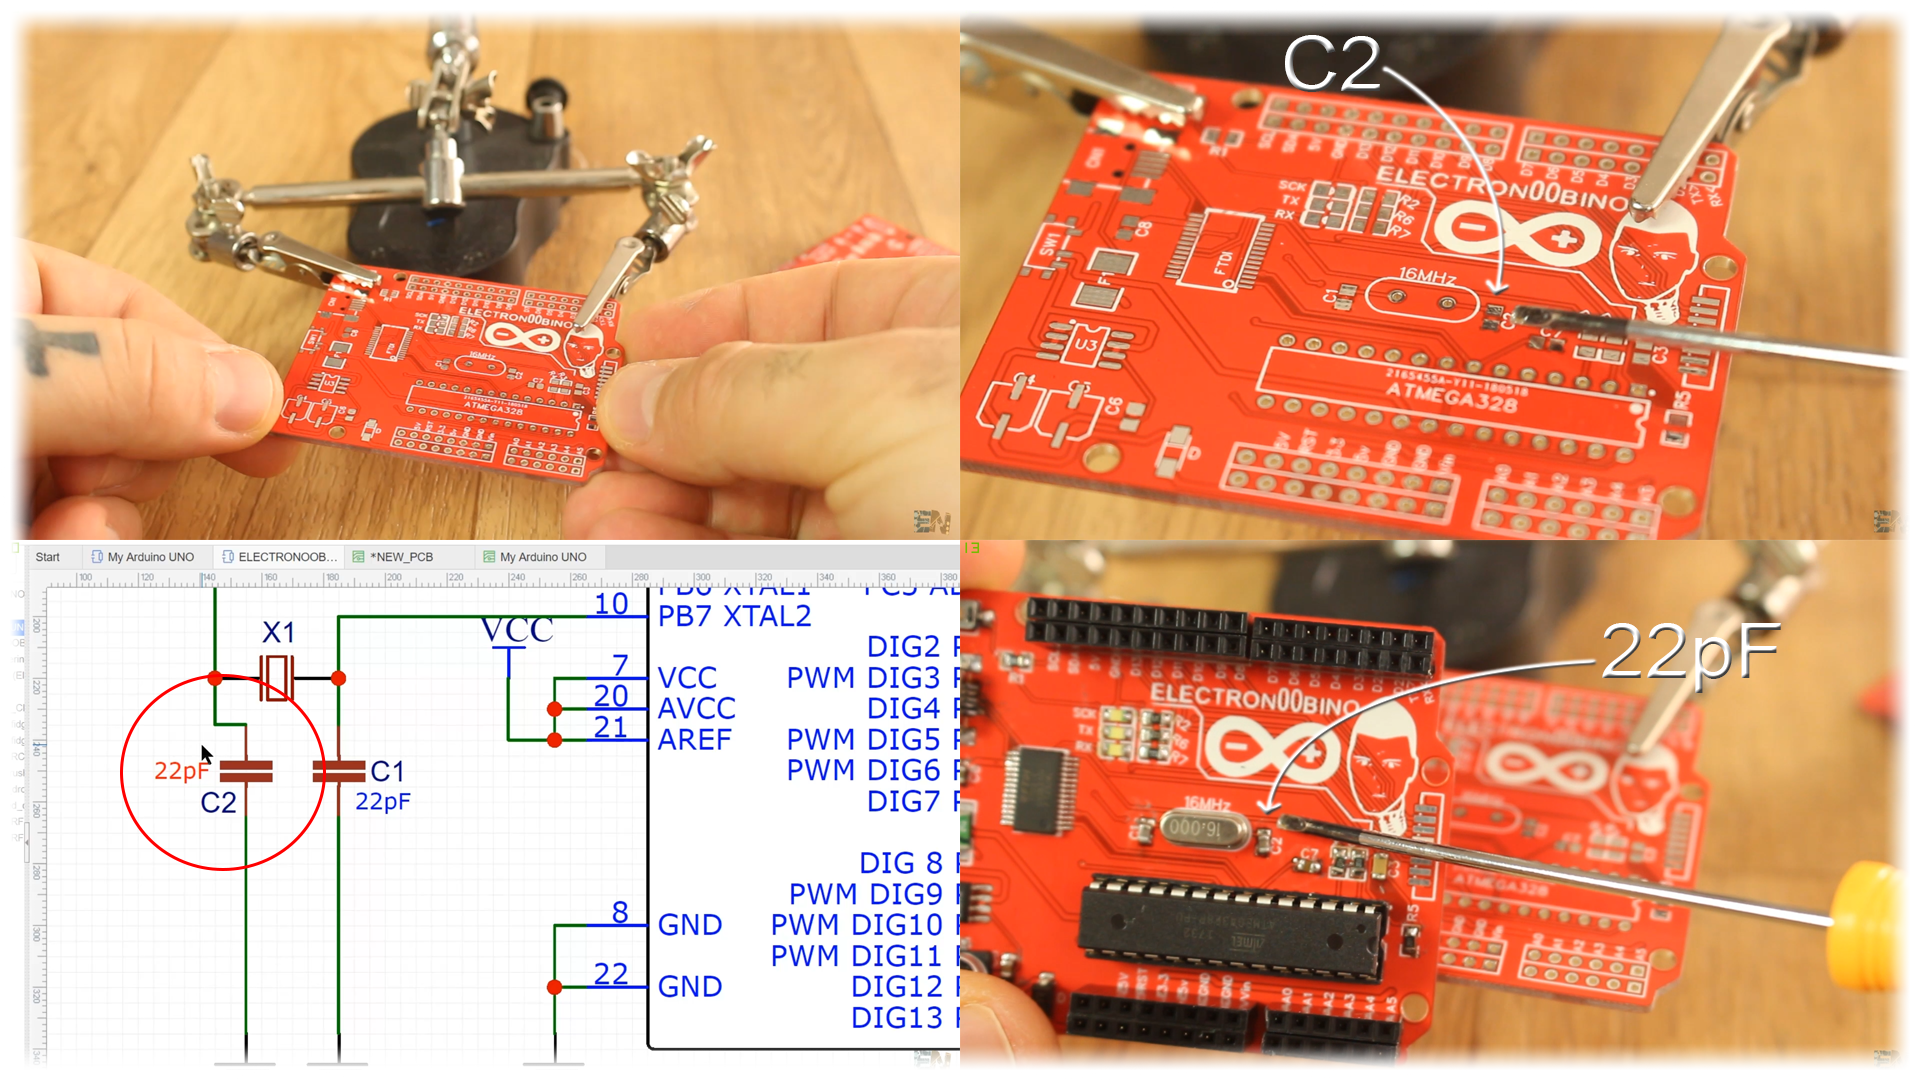
Ok, I’ve received my boards. Now, with the schematic on the side I start soldering the components. The board has silk layer so I can see the name of each components.
Now, with the schematic on the side I start soldering the components. The board has silk layer so I can see the name of each components. . For example, inj the photo below we have C2 capacitor. I go to the schematic and see its value. I get that value and solder it to my PCB. Do that for each component.
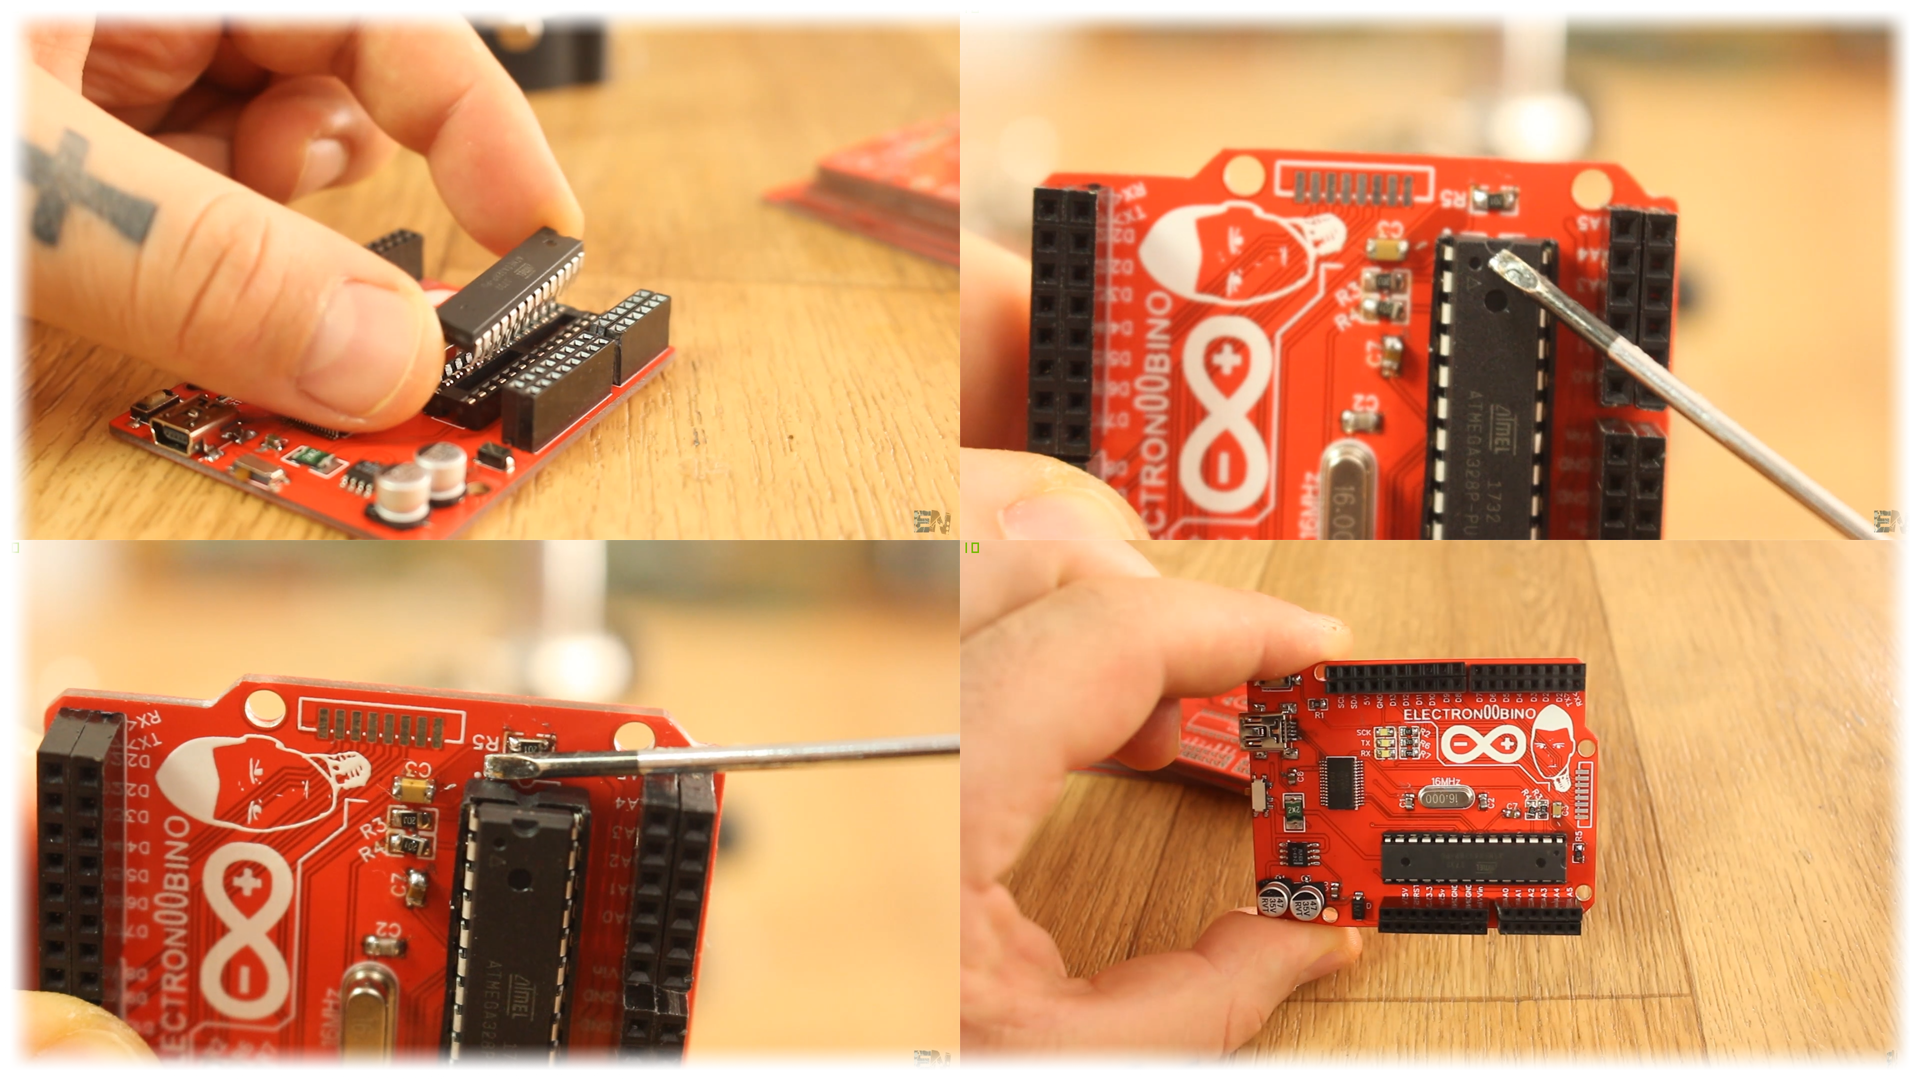
Now everything is soldered in place. Is time to add the ATMEGA chip. Be careful and not put it backwards. Check pin one marked with this dot here on the corner. We have the same dot on the silk layer of the bopard. Now, if the chip doesn’t have a bootloader burned to it you should burn it first.
Now, if the chip doesn’t have a bootloader burned to it you should burn it first. Here is what you need to burn a bootloader to a new ATMEGA chip:
- Another Arduino UNO
- Some jump cables and
- USB cable
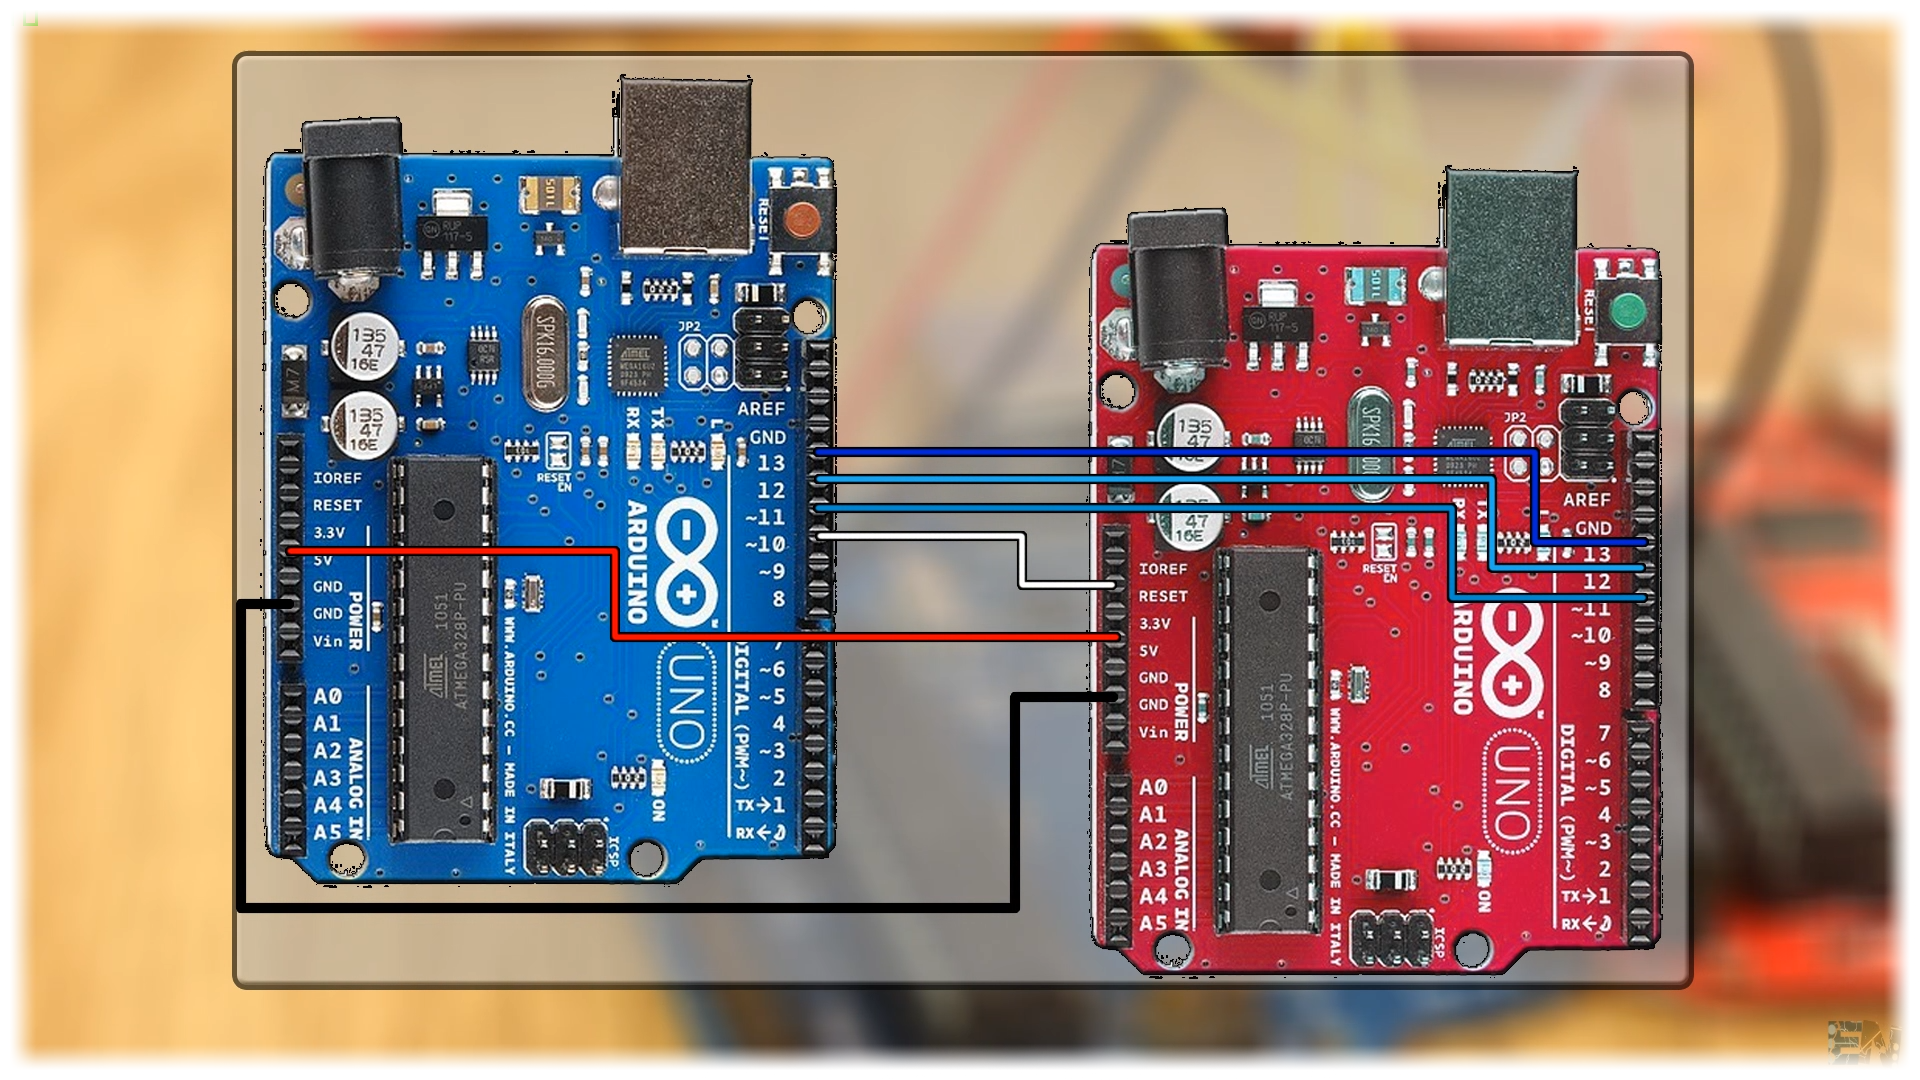
Connect the Arduino UNO to your PC and open ARDUINO IDE. Select Arduino board and go to examples → Arduino ISP → and open this example. Now upload this file to the Arduino UNO (original one). Now go to tools and change the programmer to Arduino as ISP.
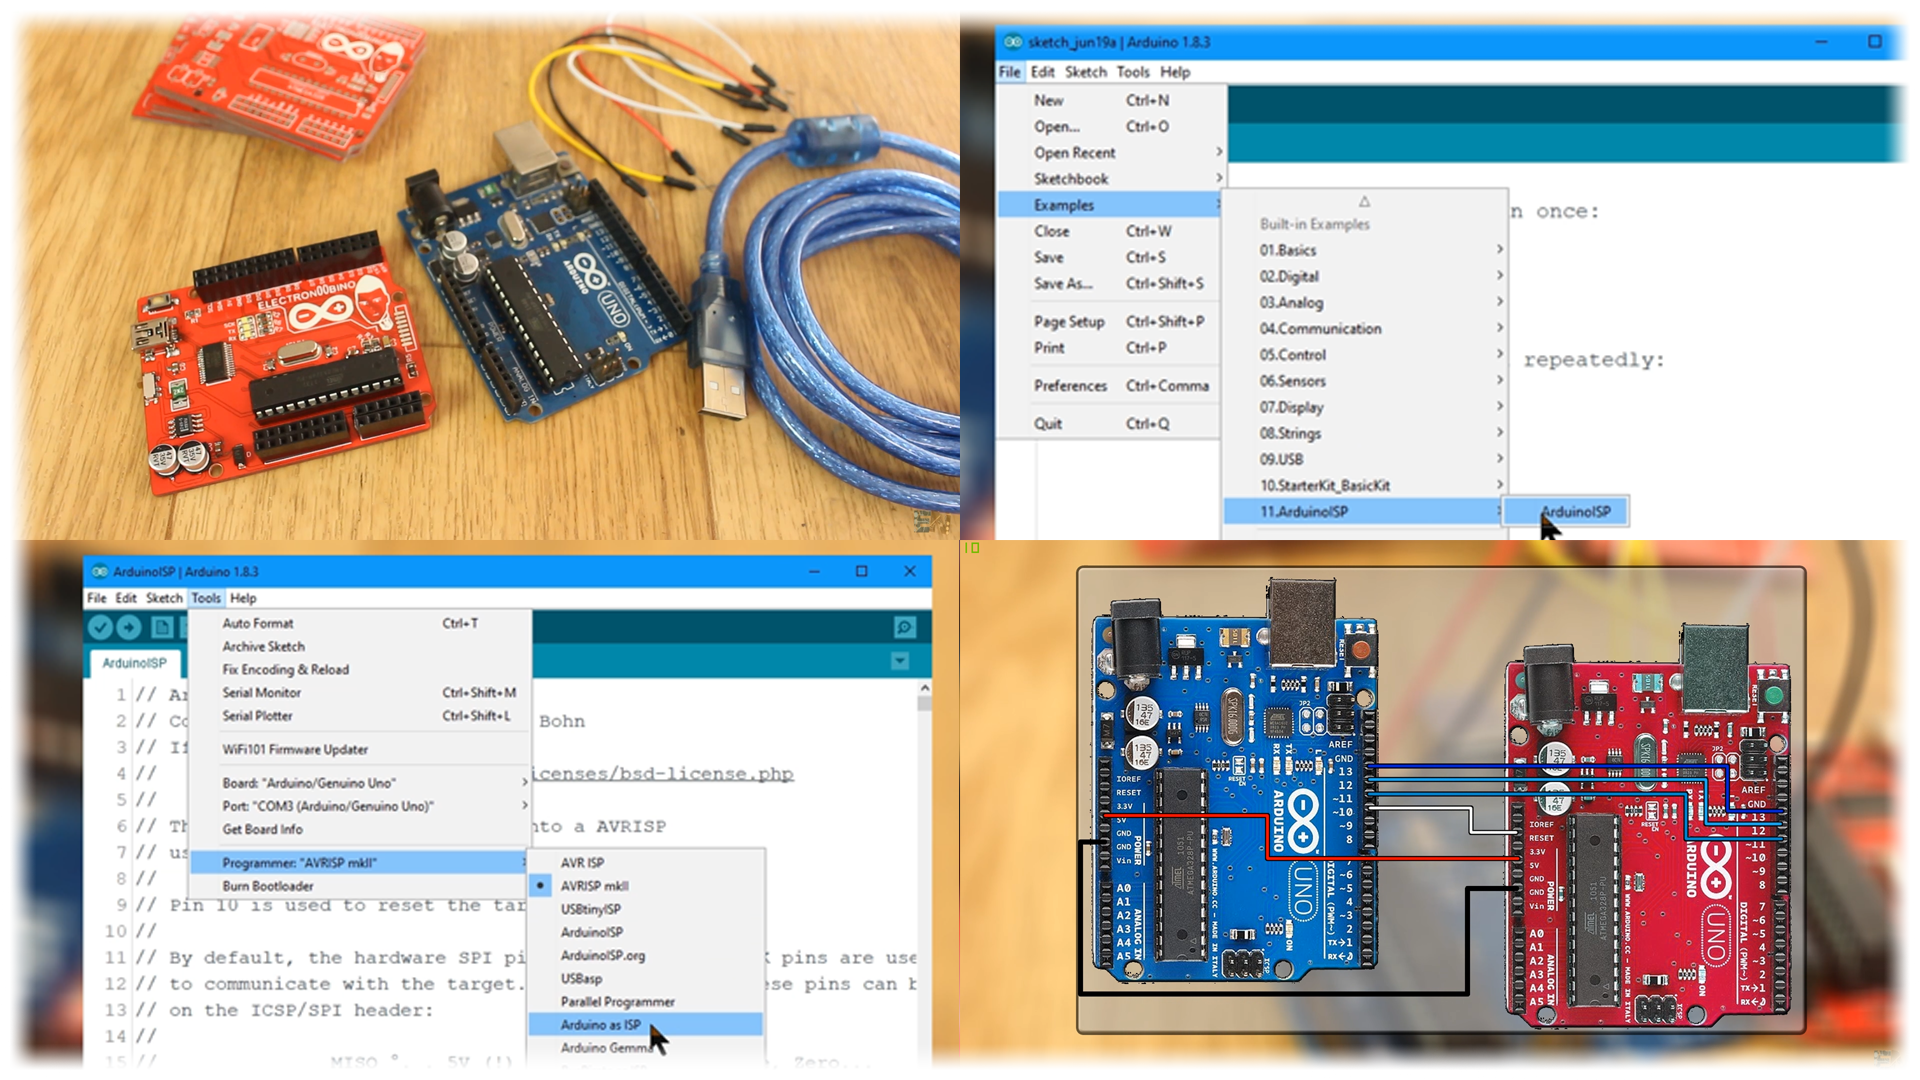
Now make these SPI connections between the stock Arduino and your board. Once the connections are made, go to tools and select burn bootloader. The LEDs will start blinking very fast. Once you get the message bootloader successfully burned you are good to go.
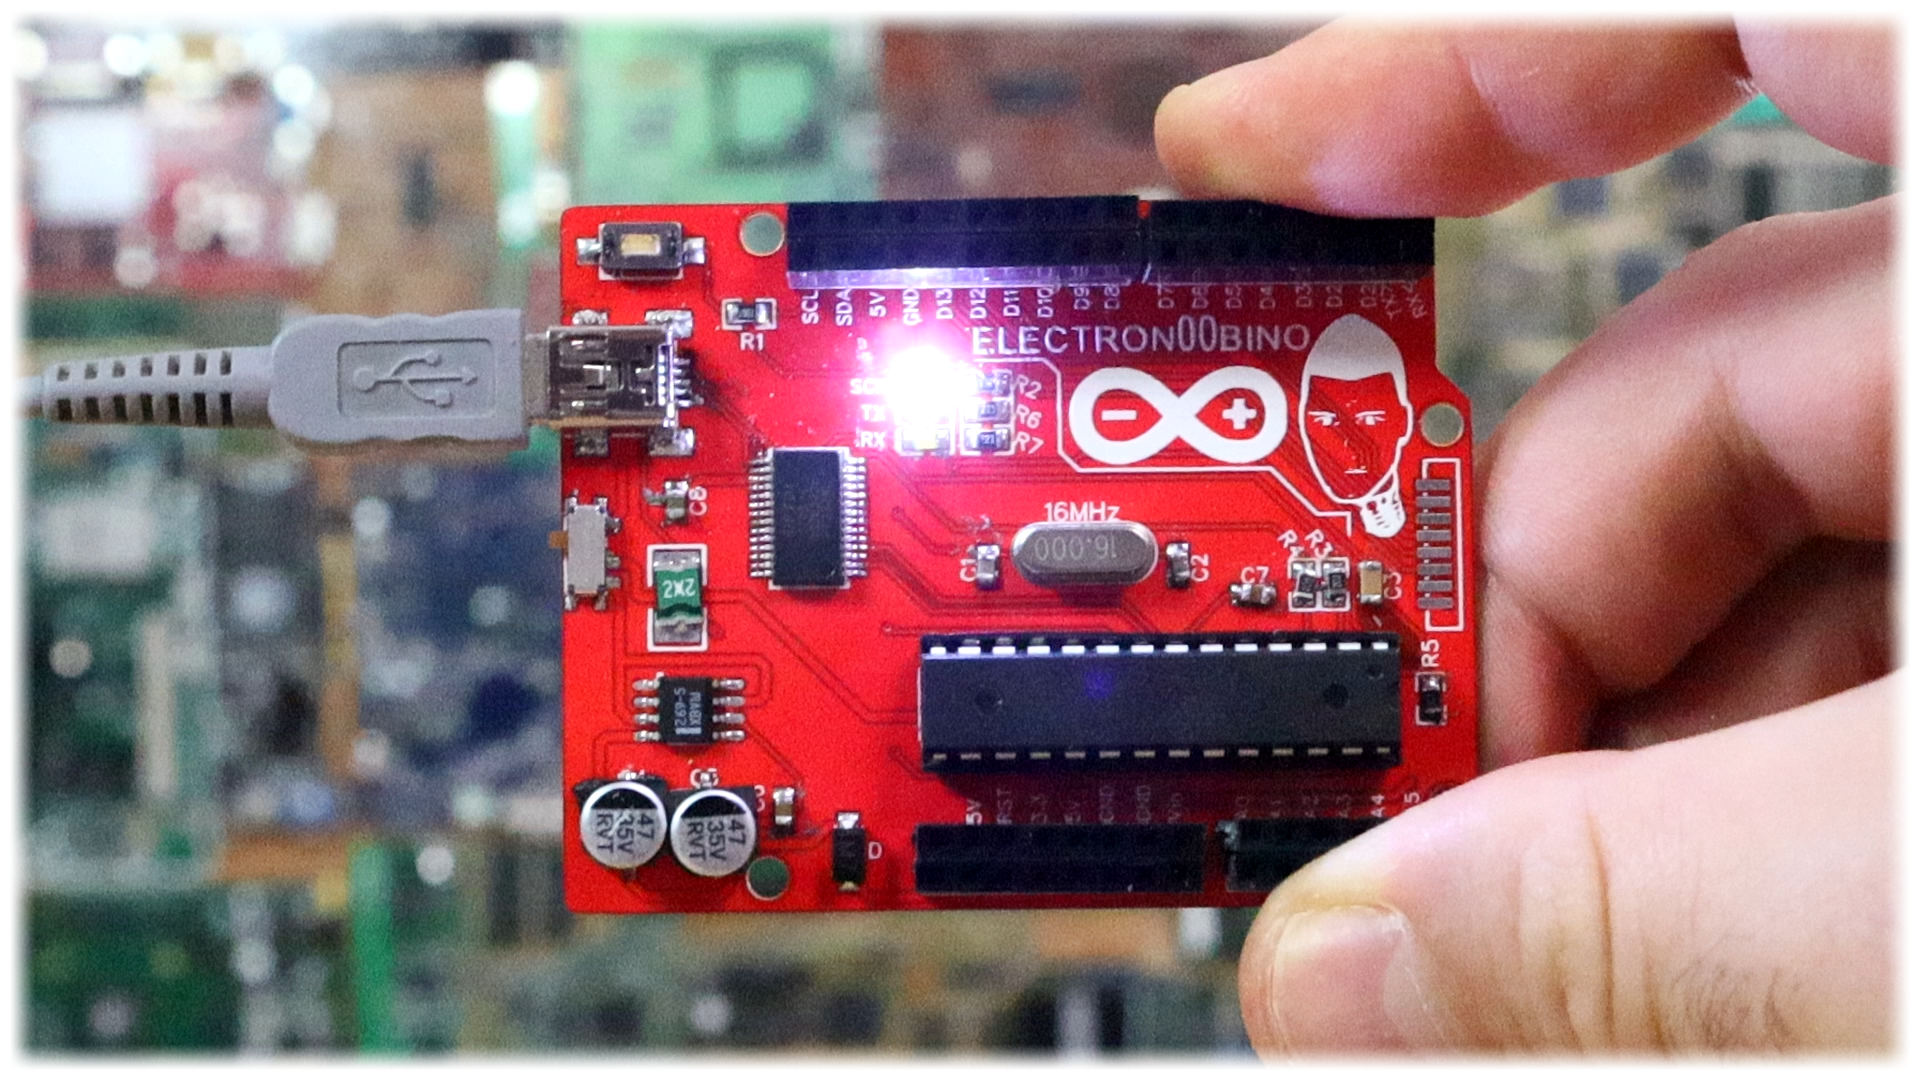
Connect the USB to your board, change back the programmer mode and upload a test sketch. There you go, I’ve made the LED blink with my ELECTRONOOBINO board. Pretty cool right?
This board works exactly like the Arduino UNO, but it is made just how I wanted. More female pins, SPI pads here and great color. You can find all the extra information, schematics, gerbers and photos in this tutorial. So there you have it guys. This is my ELECTRONOOBINB board. Tell me what do you think about it, if you will build one yourself or if you like my design.
I hope that you’ve enjoyed this tutorial/project. If so don’t forget to check my Youtube channel. If you have any question about this project or any other, just leave it in the comment section below or on my Q&A page. Also, don’t forget to subscribe and watch all of my other great tutorials. Remember, if you consider helping my projects check my Patreon page as well.
Thanks again and till next project.


