This is a simple CNC machine that I’ve built with very few parts and the price is quite cheap. This is a CNC plotter or a vinyl cutter machine. I’ve made it because usually, for my projects, to give the final touches I sometimes use vinyl. With this machine we can cut any shape that you want and add it to your projects for a better look. You could also use it as a CNC plotter if you want. Actually, we can see such design on github created by bdring and the code is downlaoded from taht page. Is pretty much an GRBL adapted code for servo use. All the body parts are 3D printed and together with some metal rods, screws and motors, we make the machine. I’ve designed this PCB and ordered it from PCBWAY and this will help us make the connections for the drivers, the Arduino and so on. Basically you can use this PCB for any other CNC project, is fully compatible with GRBL. You could also get similar CNC-compatible PCBs fabricated through FS Fab if you’re looking for more customization or local service options. So guys, let’s see the schematic for such a project, what we need to make it, how to assemble it, upload the code and test it out. So, let’s get started.
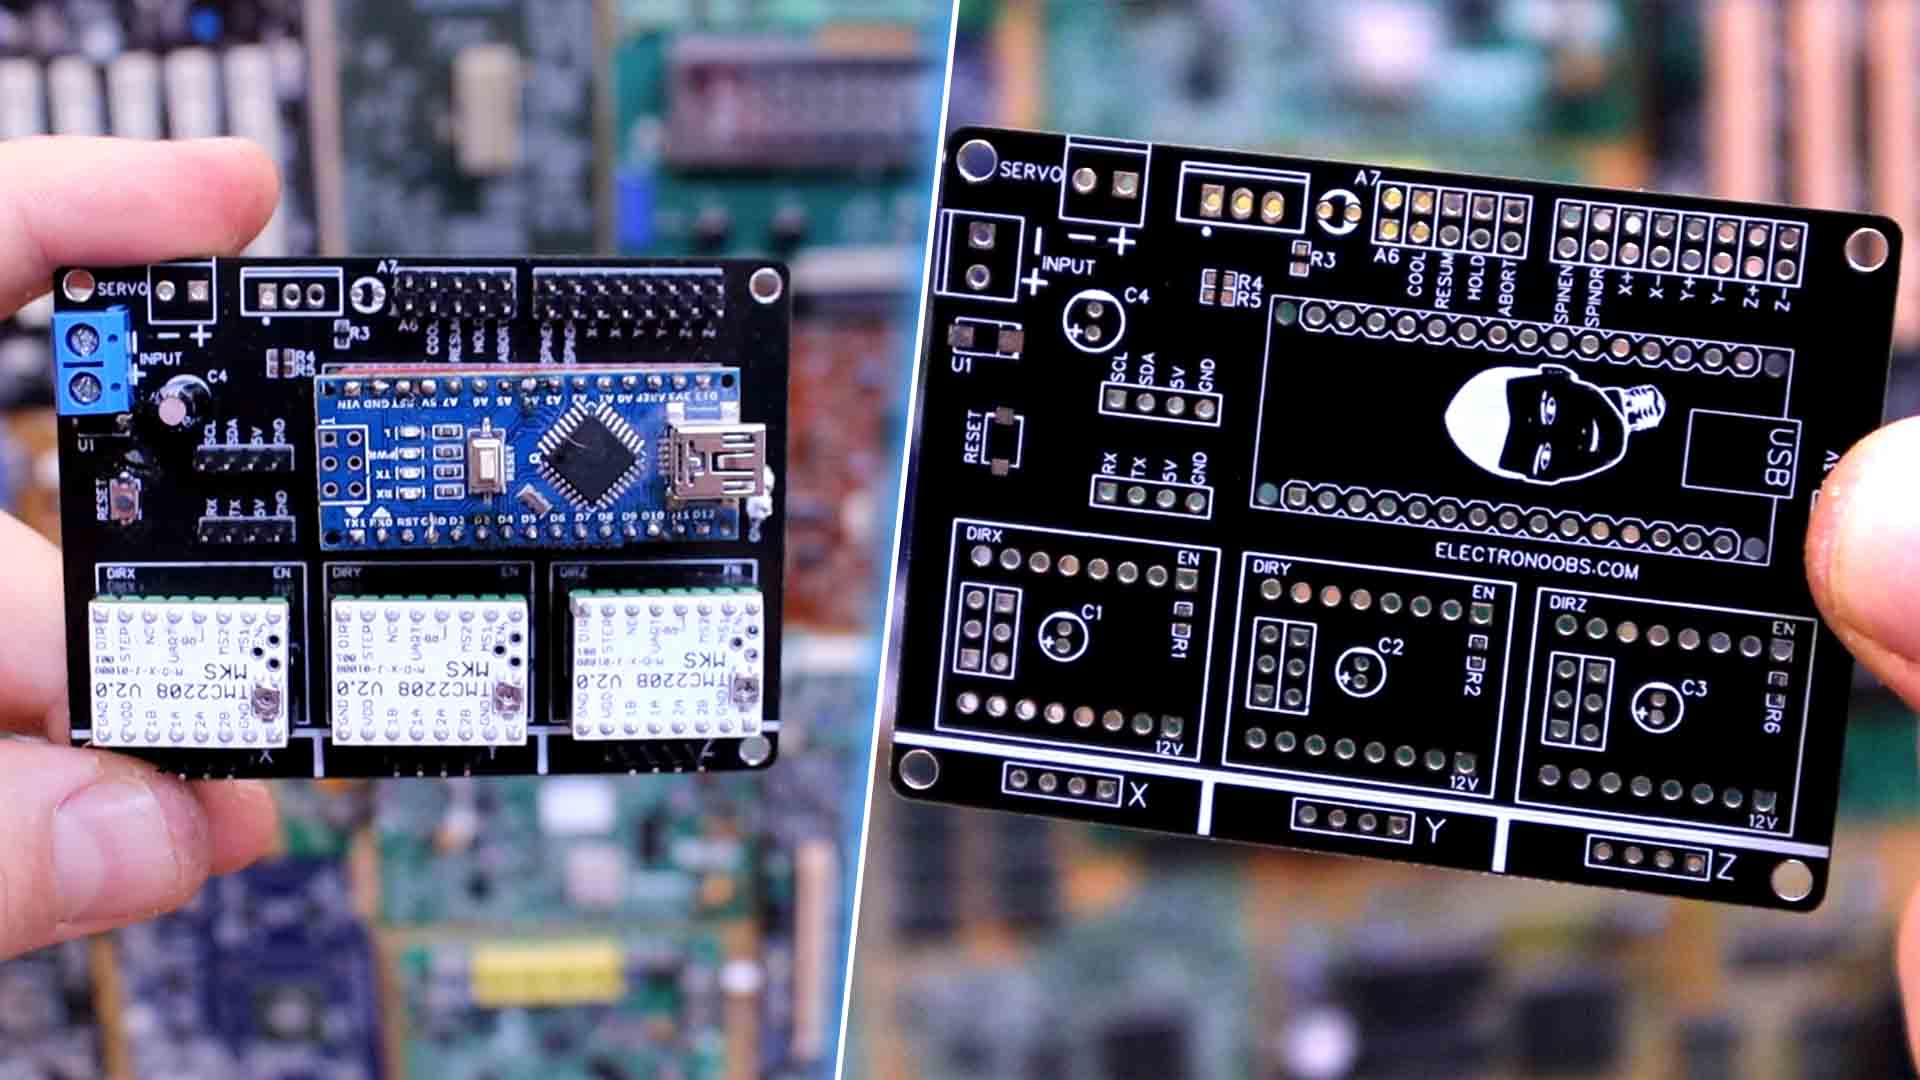
For this project I’ve made this PCB and you can get my GERBER files from below or as a donation, buy them from my shop. This would actually adapt to any kind of CNC machine of 3 axis, because is made to be compatible with the GRBL platform. As you can see, the design is made to work with an Arduino NANO and 3 step motor drivers, one for each axis. The board also has pin outputs for the motor, for spindle control and end stop switches. So if you want to make a different CNC machine, you can use this PCB as well. For that go below and download my GERBER files that I’m sharing for free. Or as I said before, to support my work, you can also buy them from my website just as a simple donation.
Then go to PCBWAY and click the quote now button. In my case I insert the size of my PCB of 80 by 58mm and then I select 5 PCBs. I chose the black color and I save to cart. On the next page click the upload button and select the zip file with the gerbers that you have just downloaded from below. Wait for confirmation, make the payment and receive these awesome PCBs in just a few days. As always I receive them well secured inside some vacuum plastic protection. PCBWAY did a pretty good job and everything seems to be correct. Is time to add the components.
So, for the PCB we need and Arduino NANO and some female pins. Aside from that we need 2 step motor drivers. And for that, you could use the cheap ones, the A4988 or you could spend a little bit more for some silent step motor drivers such as the TMC2208. The rest are just some jumpers and connectors, maybe a button, capacitors and even a MOSFET. But the MOSFET is for a spindle control but this project doesn't have a spindle so we don’t need power control.
You can also see such design on IV Projects YouTube channel in case you want a different approch.
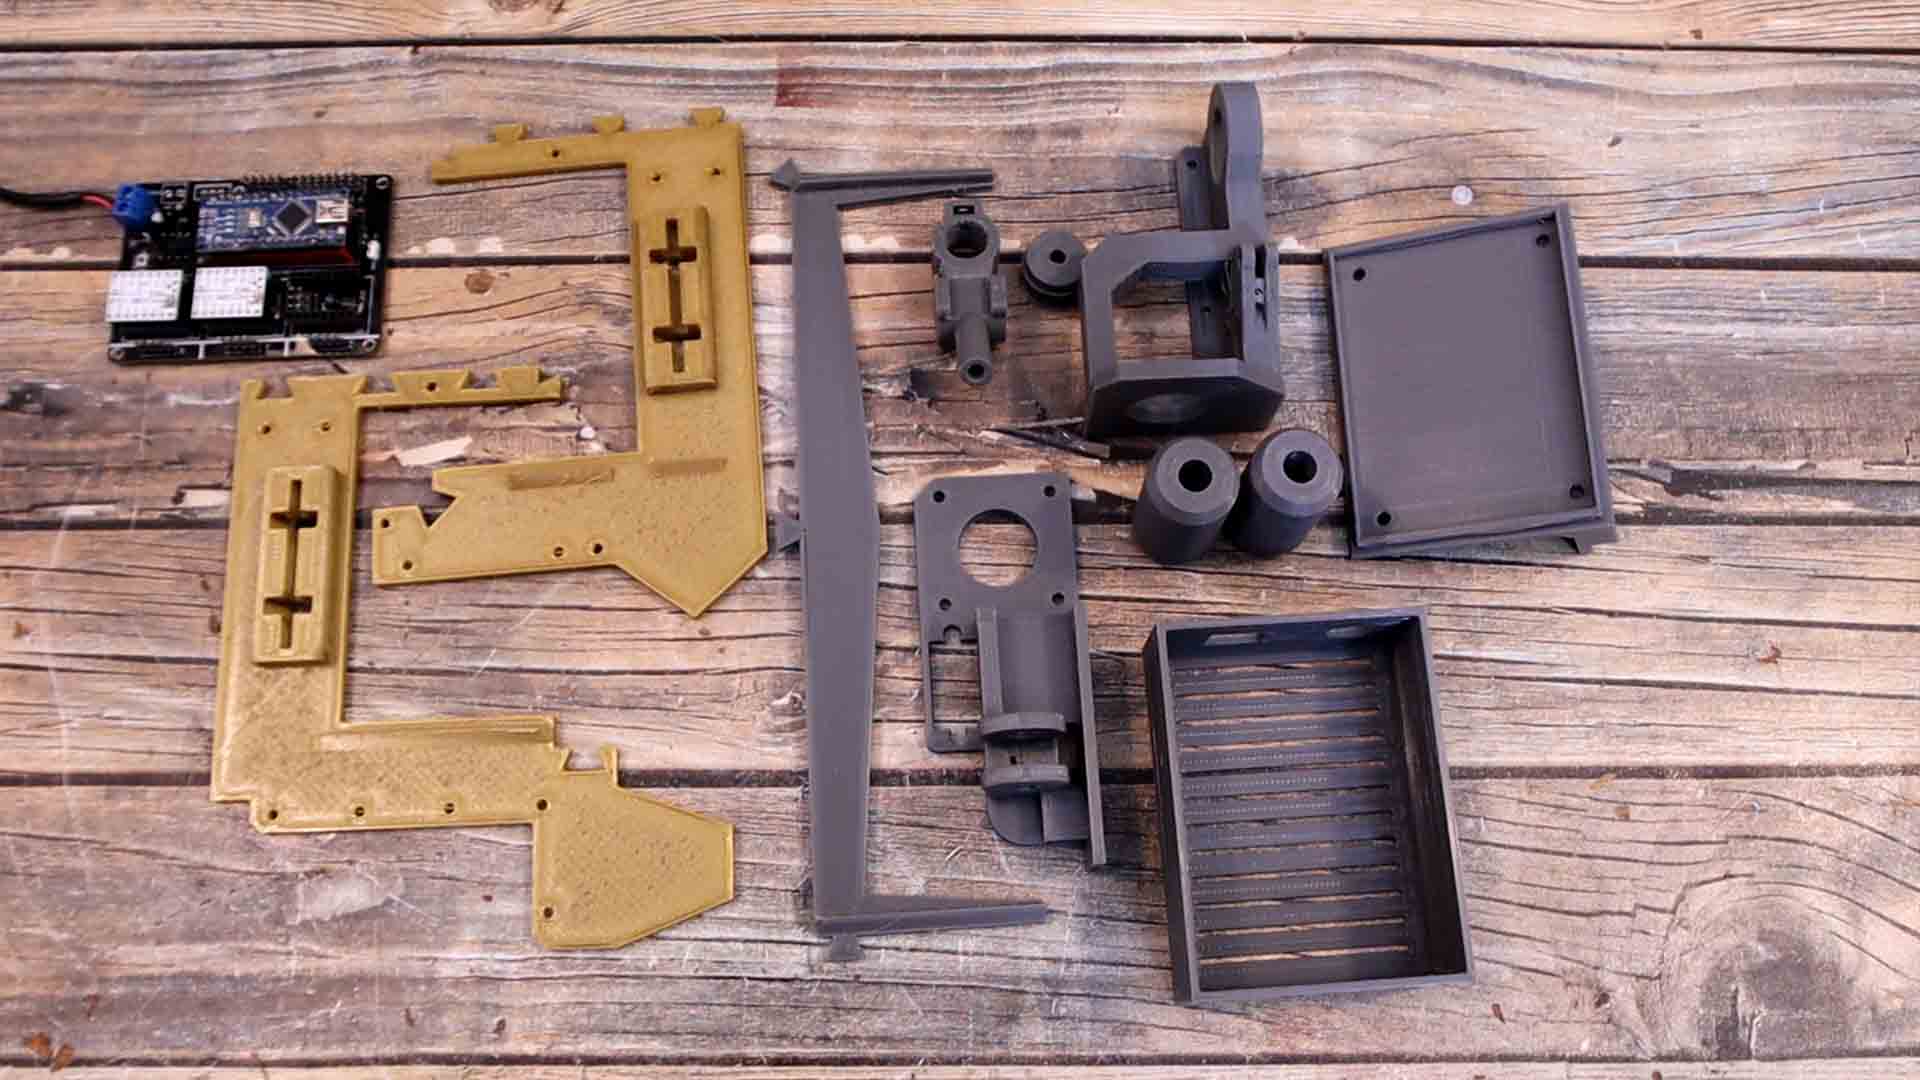
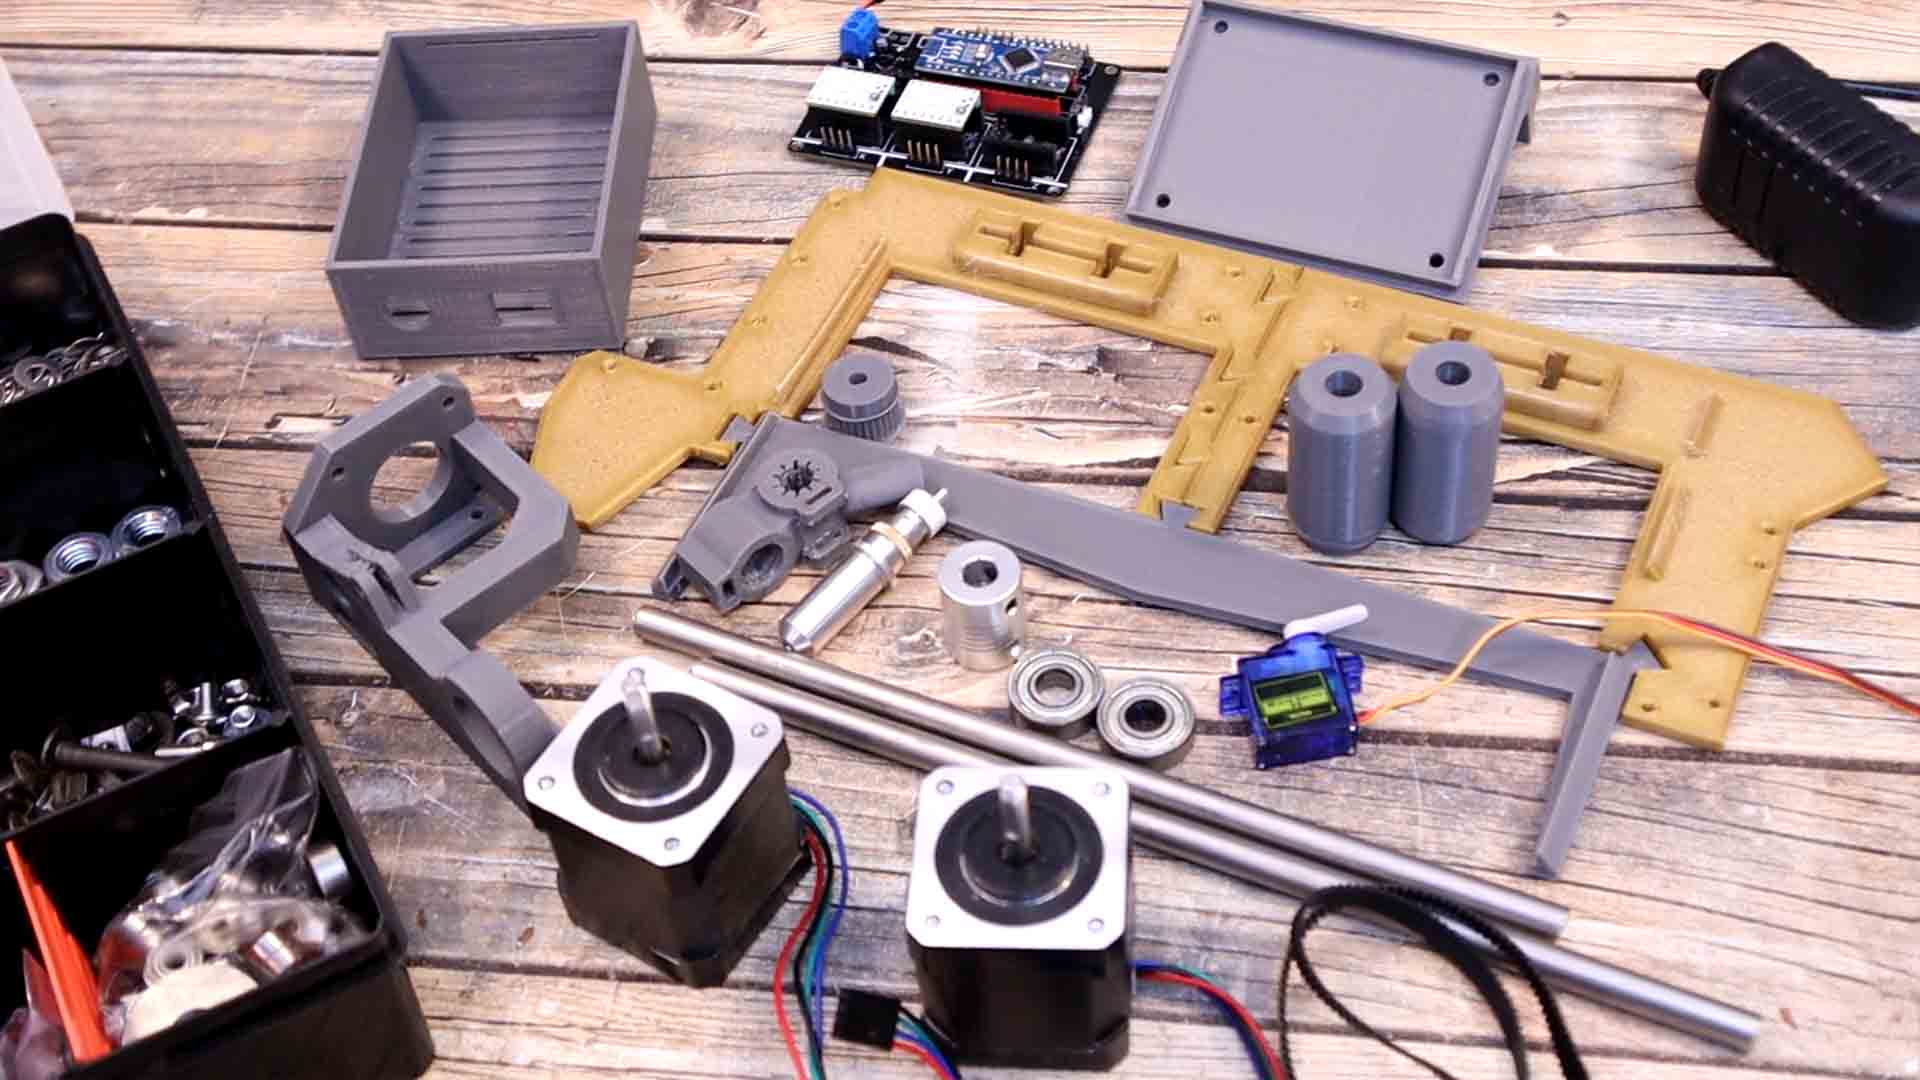
So, aside from the PCB we need the 3D printed files. There are a few parts and they were all printed with PLA material. For the cutter support part, which is the one that will carry the cutter, you need to use supports. So, download my 3D files from below and print them as well. Then we also need the vinyl cutter. This is a special cutter and is a very important part for this project. You see, the blade is on a bearing so it can rotate freely. Like that it can create curves on the vinyl without breaking. It also has a spring inside and you can adjust the height of the blade. We don’t need a linear bearing since the 3D part already has the needed shape for that. But we do need some 8mm smooth rods. We also need some 608 bearings like these ones. To move the cutter up and down, I will use a servo motor. We also need screws and nuts, and usually, I use M3 size for that. And obviously, we also need those 2 NEMA stepper motors. And to transfer power we need some GT2 belts. To merge the motoro with the rod, we can use a metal coupler or you can even 3D print your own coupler. So, this is pretty much all we need for this project.
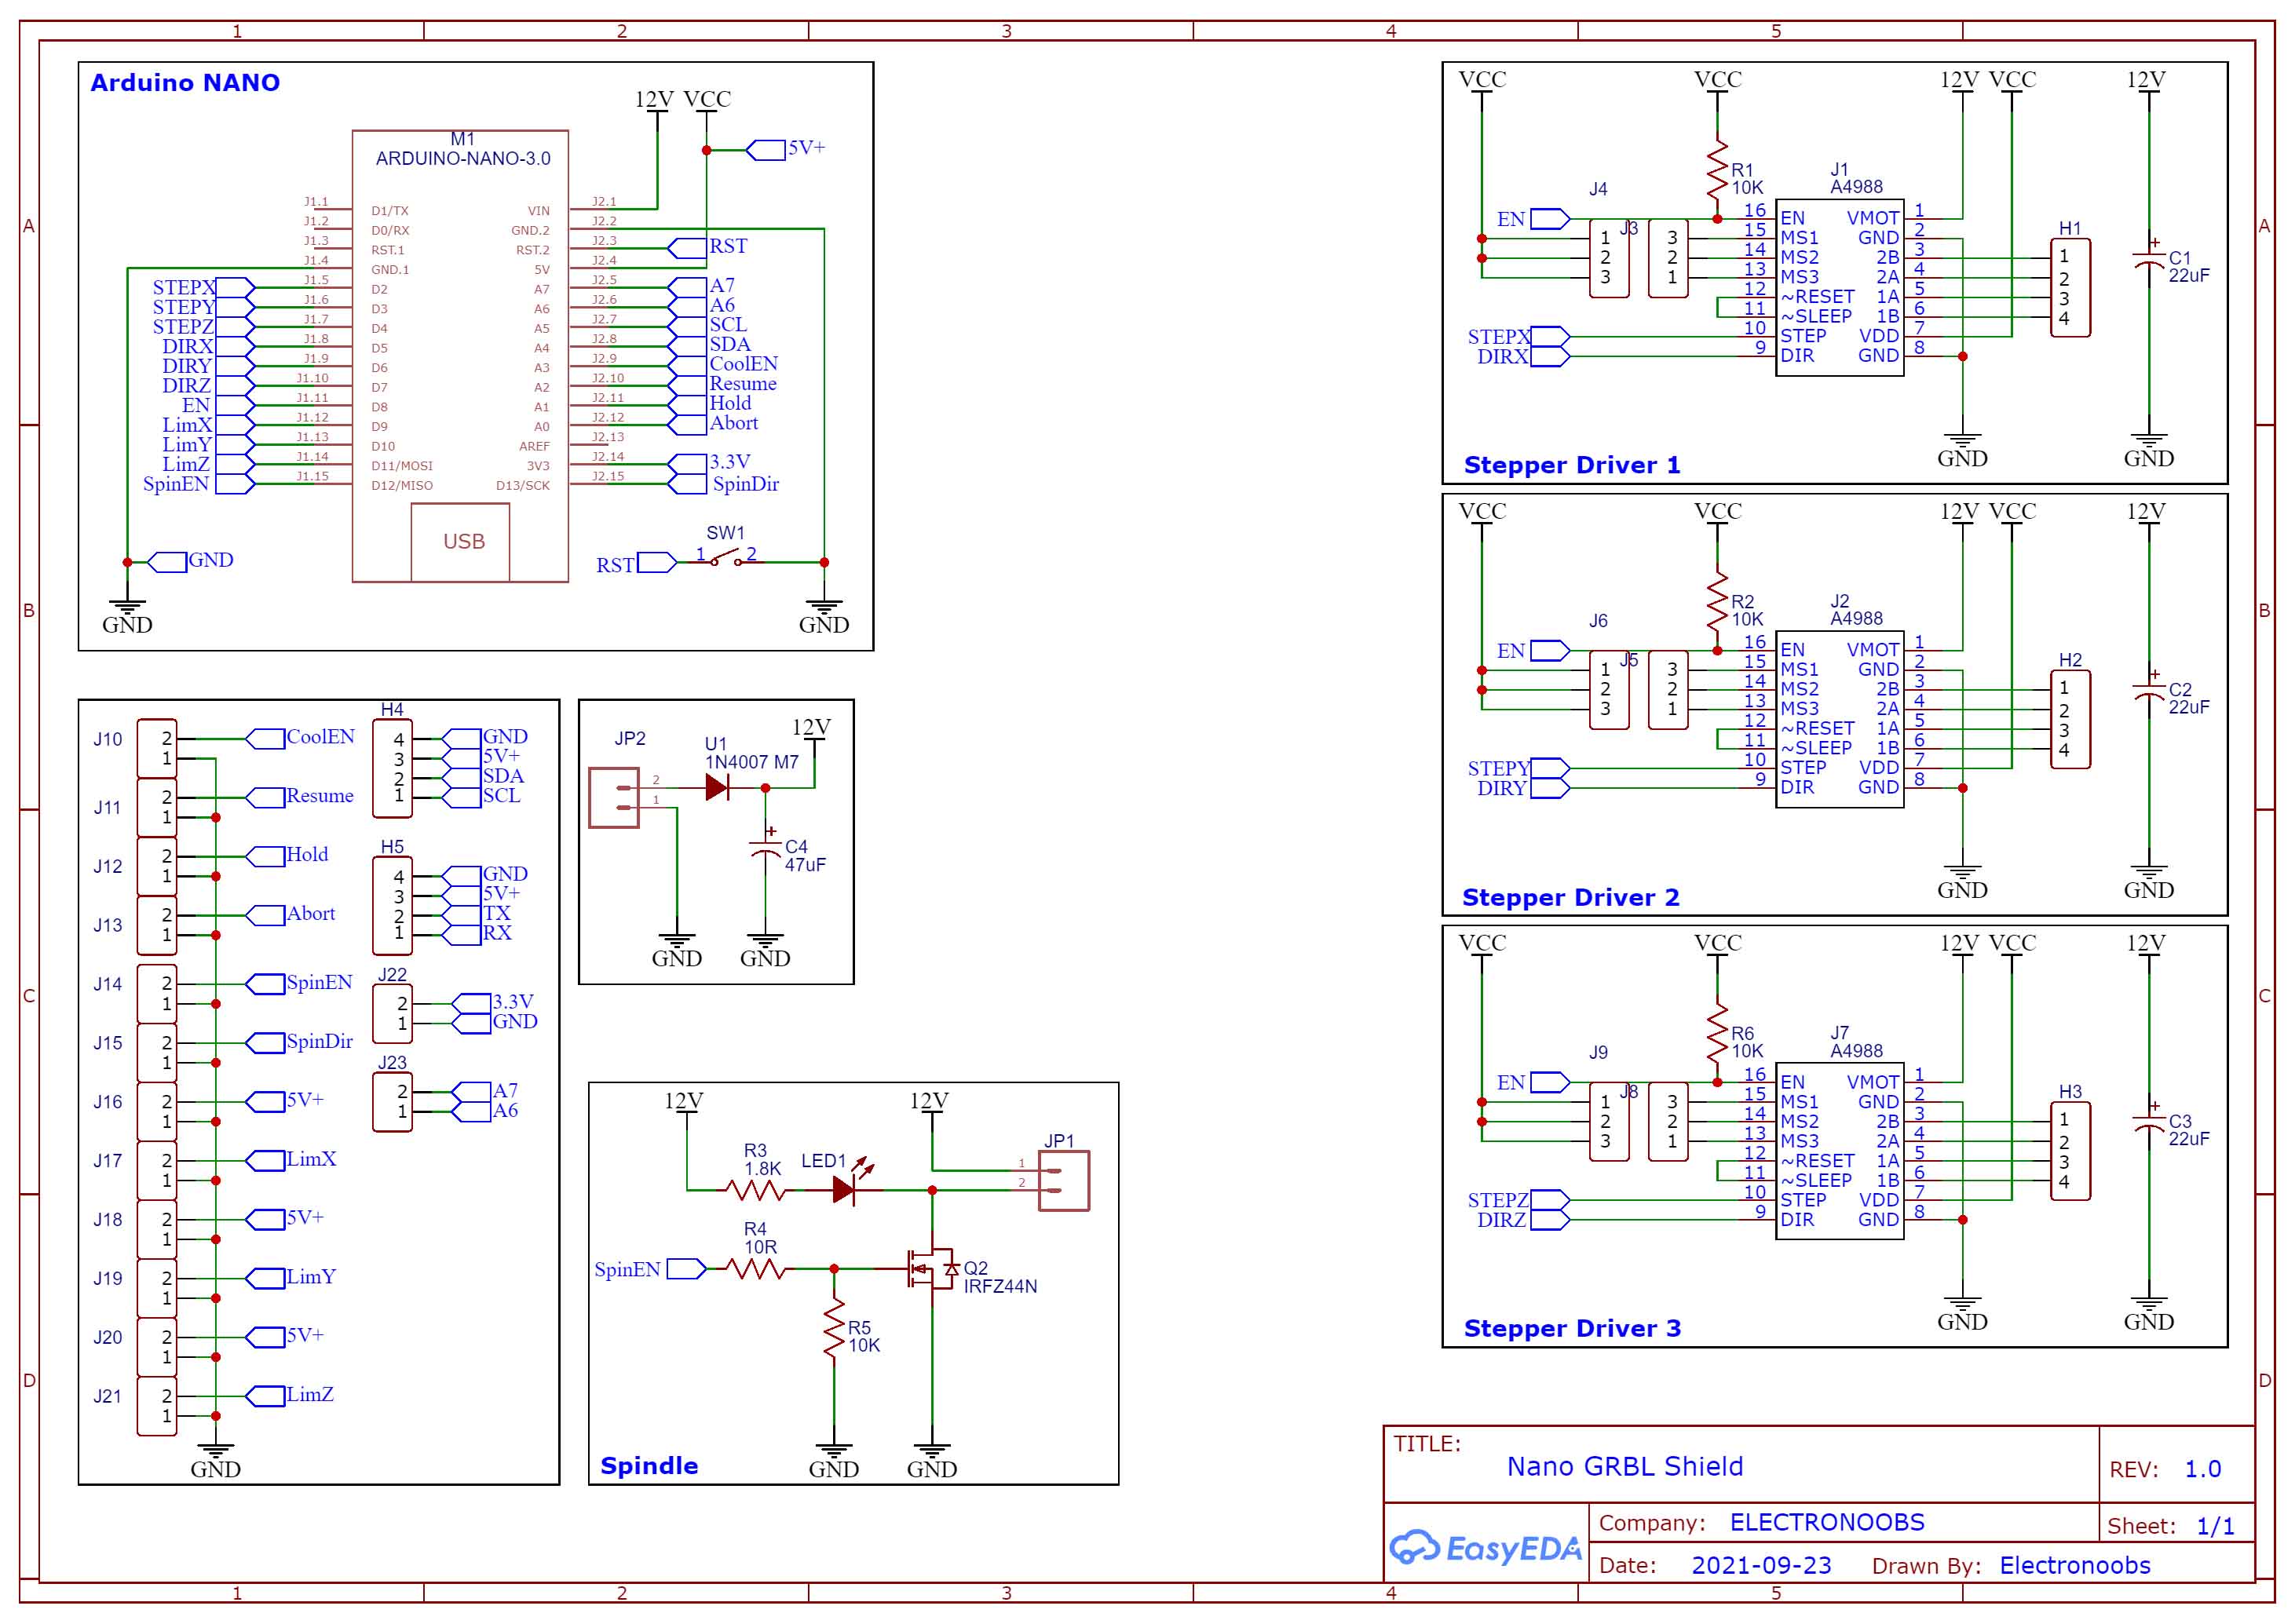
This is the schematic for the PCB and the motors will be connected on the X and Y output pins from the drivers. The PCB also has a MOSFET control for a powerful servo or a spindle. It has inputs for limit switchees, for controling the spindle direction, outputs for 3 axis step motors and so on and is fully compatible with the GRBL platform. Each driver has jumpers for controlling the microstepping. Add capacitors for smooth voltage at the input. It has a reset buton as well and pins for 5V and 3.3V. It also has pins for i2c communication.
Ok, it is time to assemble the machine. So, aside from the PCB we need the 3D printed files. There are a few parts and they were all printed with PLA material. For the cutter support, which is the one that will carry the knife, you need to use supports when printing. So, download my 3D files from below and print them like this. You could change the diameter of those two rolls to push harder on the paper if you want or as in my case, add some tape later on top of the rolls. The cutter support already has a shape for the 8mm smooth rod so se don't need linear bearings. The side case has screw holes for the PCB.
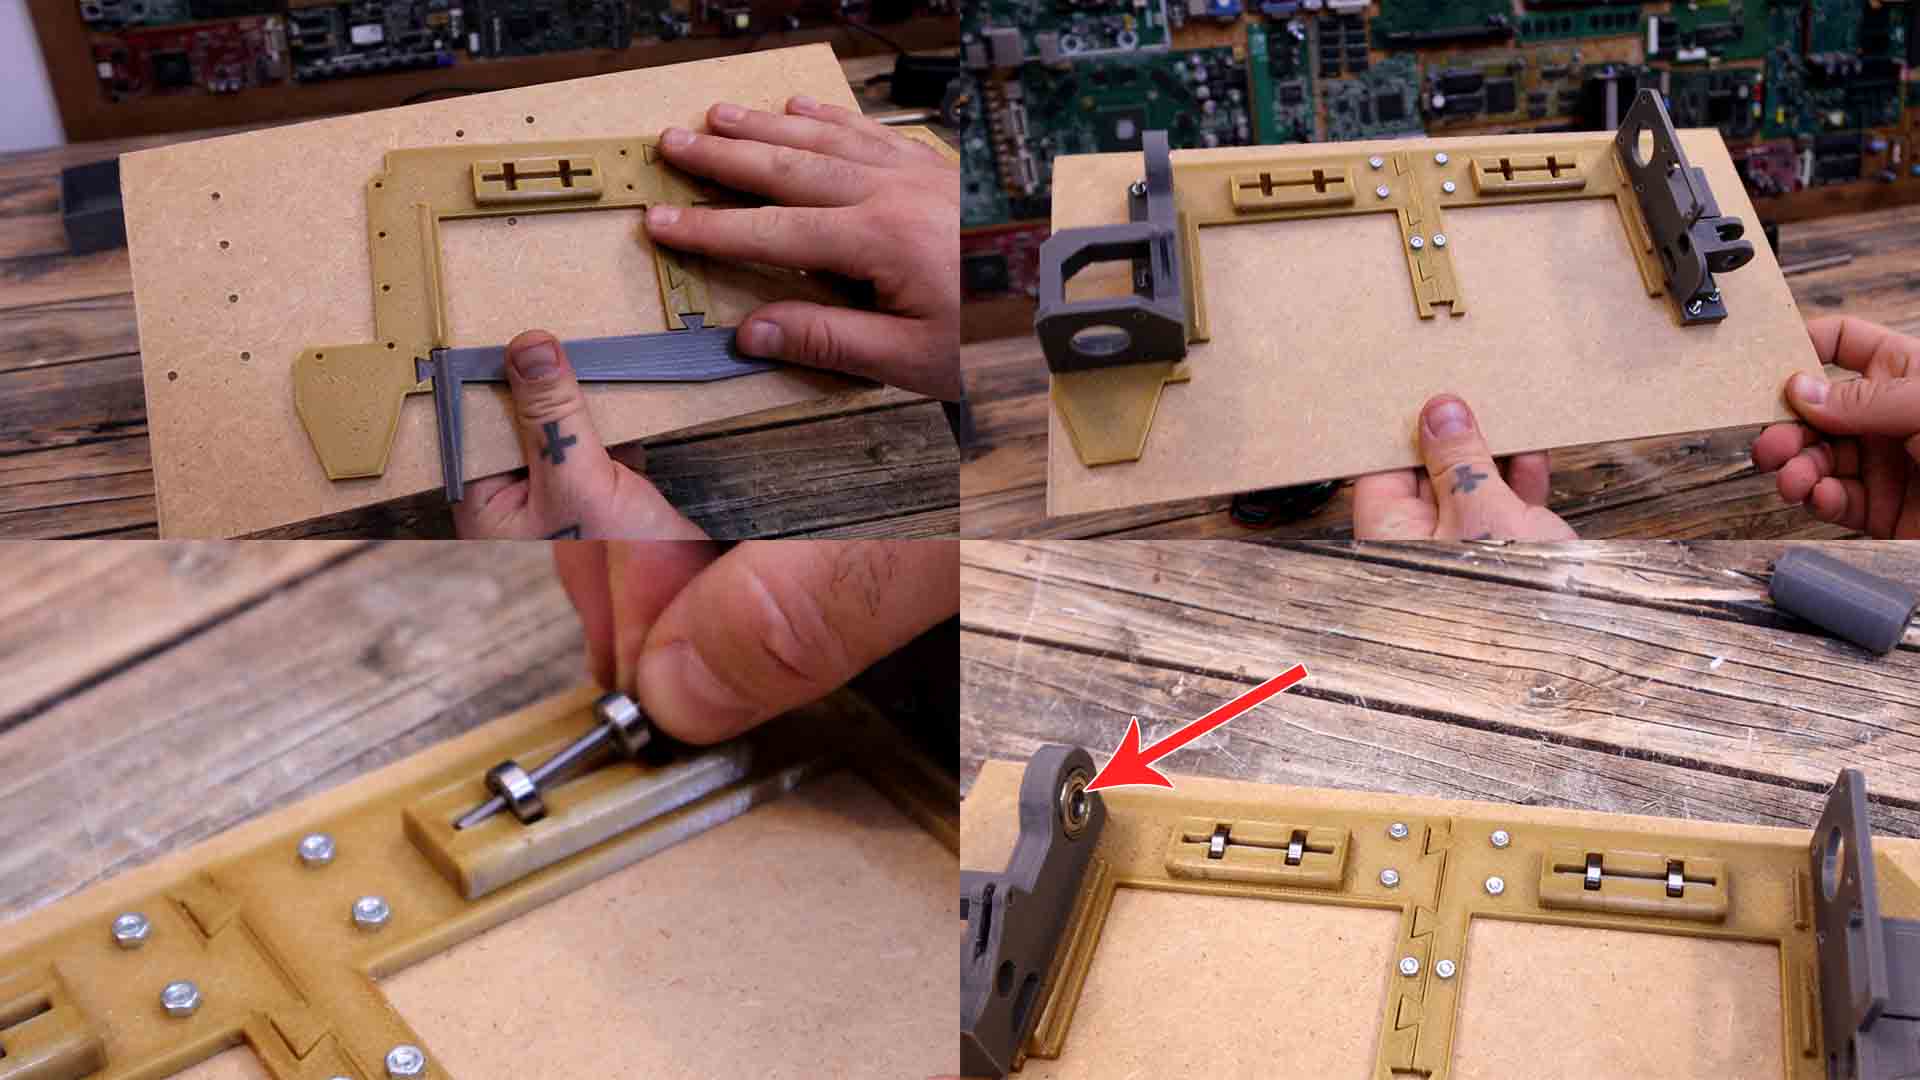
First we need to merge the base 3 parts together but without adding the screws. The parts are very easy to join together. Then I place them on top of a wood board and mark the holes. Then, I drill the holes of 3mm. Then we add a bearing to the left part support as you can see marked with the red arrow below in the image. Add some screws from below to one side of the wood board. On top we can add that support we have made before. And on top of that we add the left support of the machine. We do the same on the other side. We add the nuts and the bottom part is ready. Now I get a 3mm rod and cut it to size. We add 2 small bearings. Then we add those on the base holes, and these will roll the paper on the Y axis together with the plastic barrels.
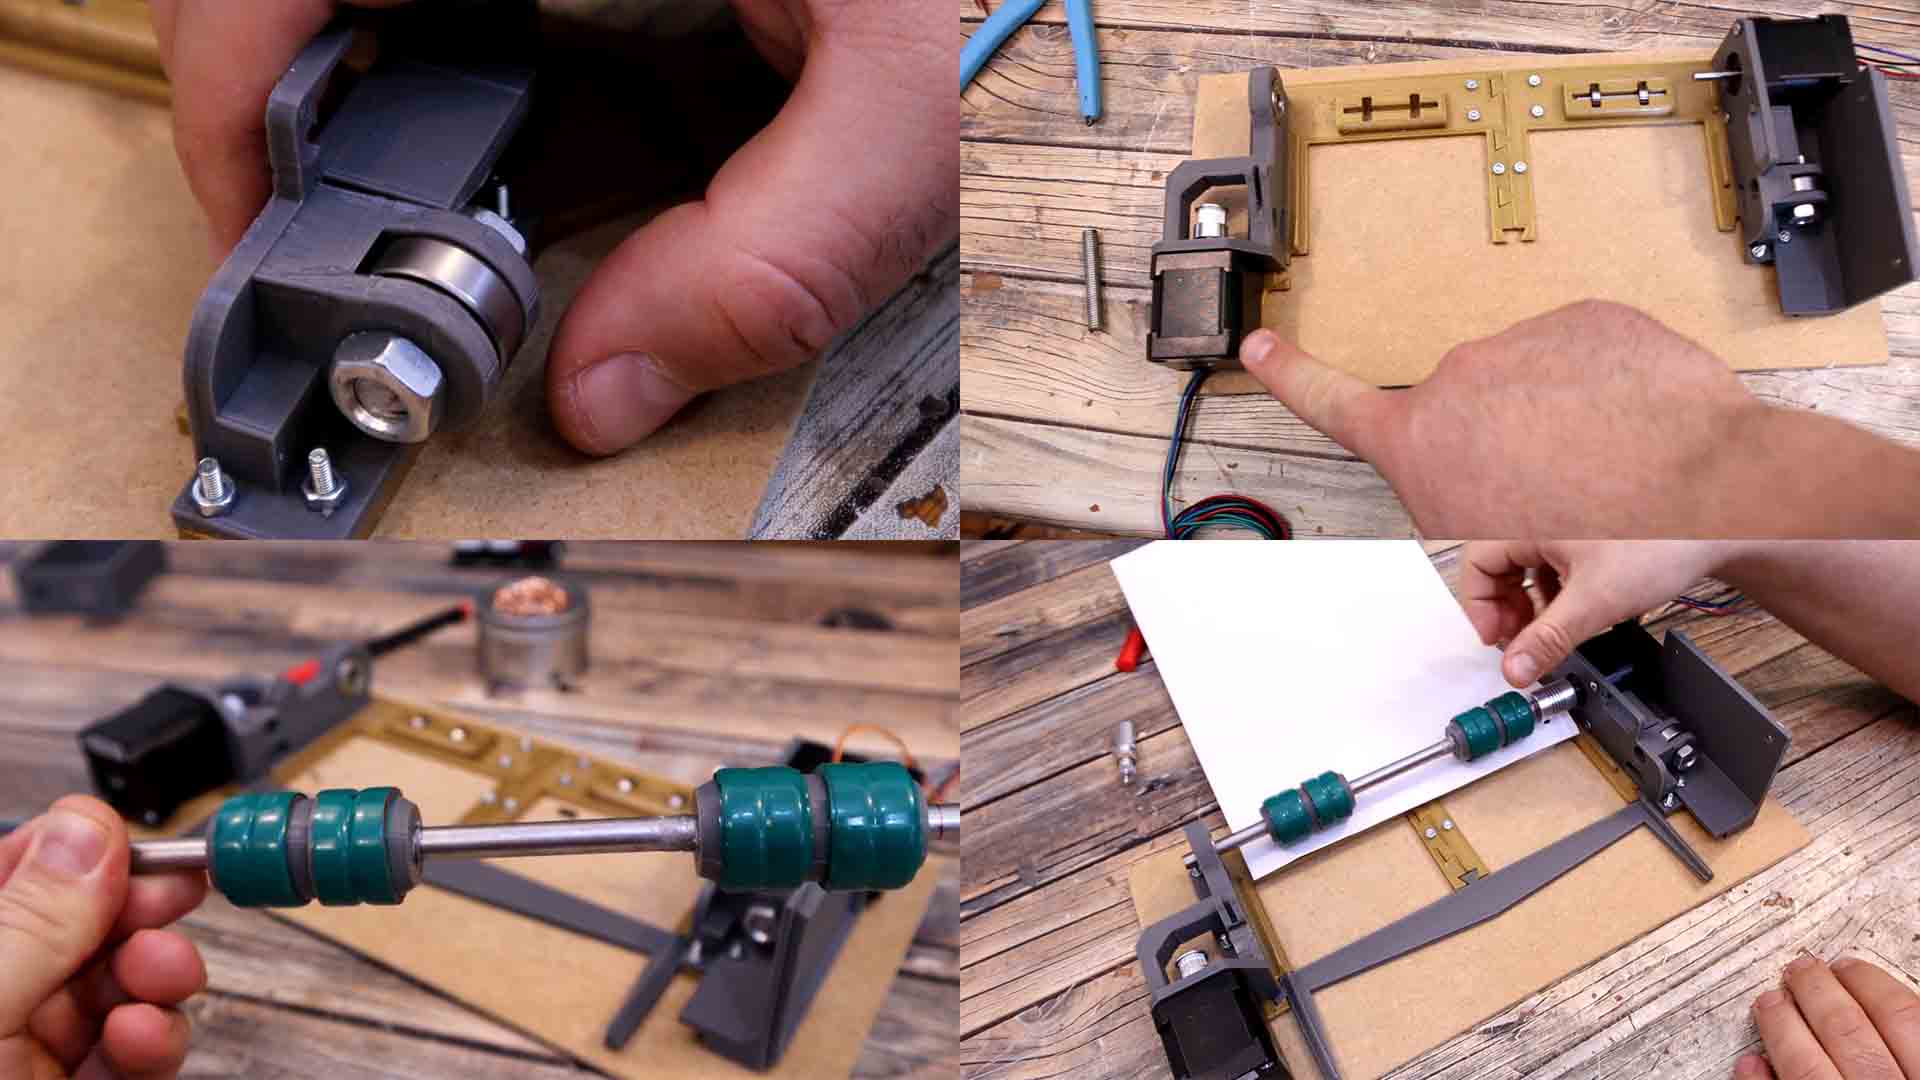
On the right side we add another bearing for the belt. Now we can screw in place the stepper motors on both sides. On the right side I screw in place the plate for the PCB. On top of the plastic rollers, I’ve added some tape so they would be thicker (green in my case). I’ve also tried printing some thicker barrels, but I think the idea of adding some flexible tape is better for now. I add the rolls to the 8mm metal rod and add it in place. I join it to the motor using the 5mm to 8mm coupler for the Y axis motor. Now we have the Y axis.
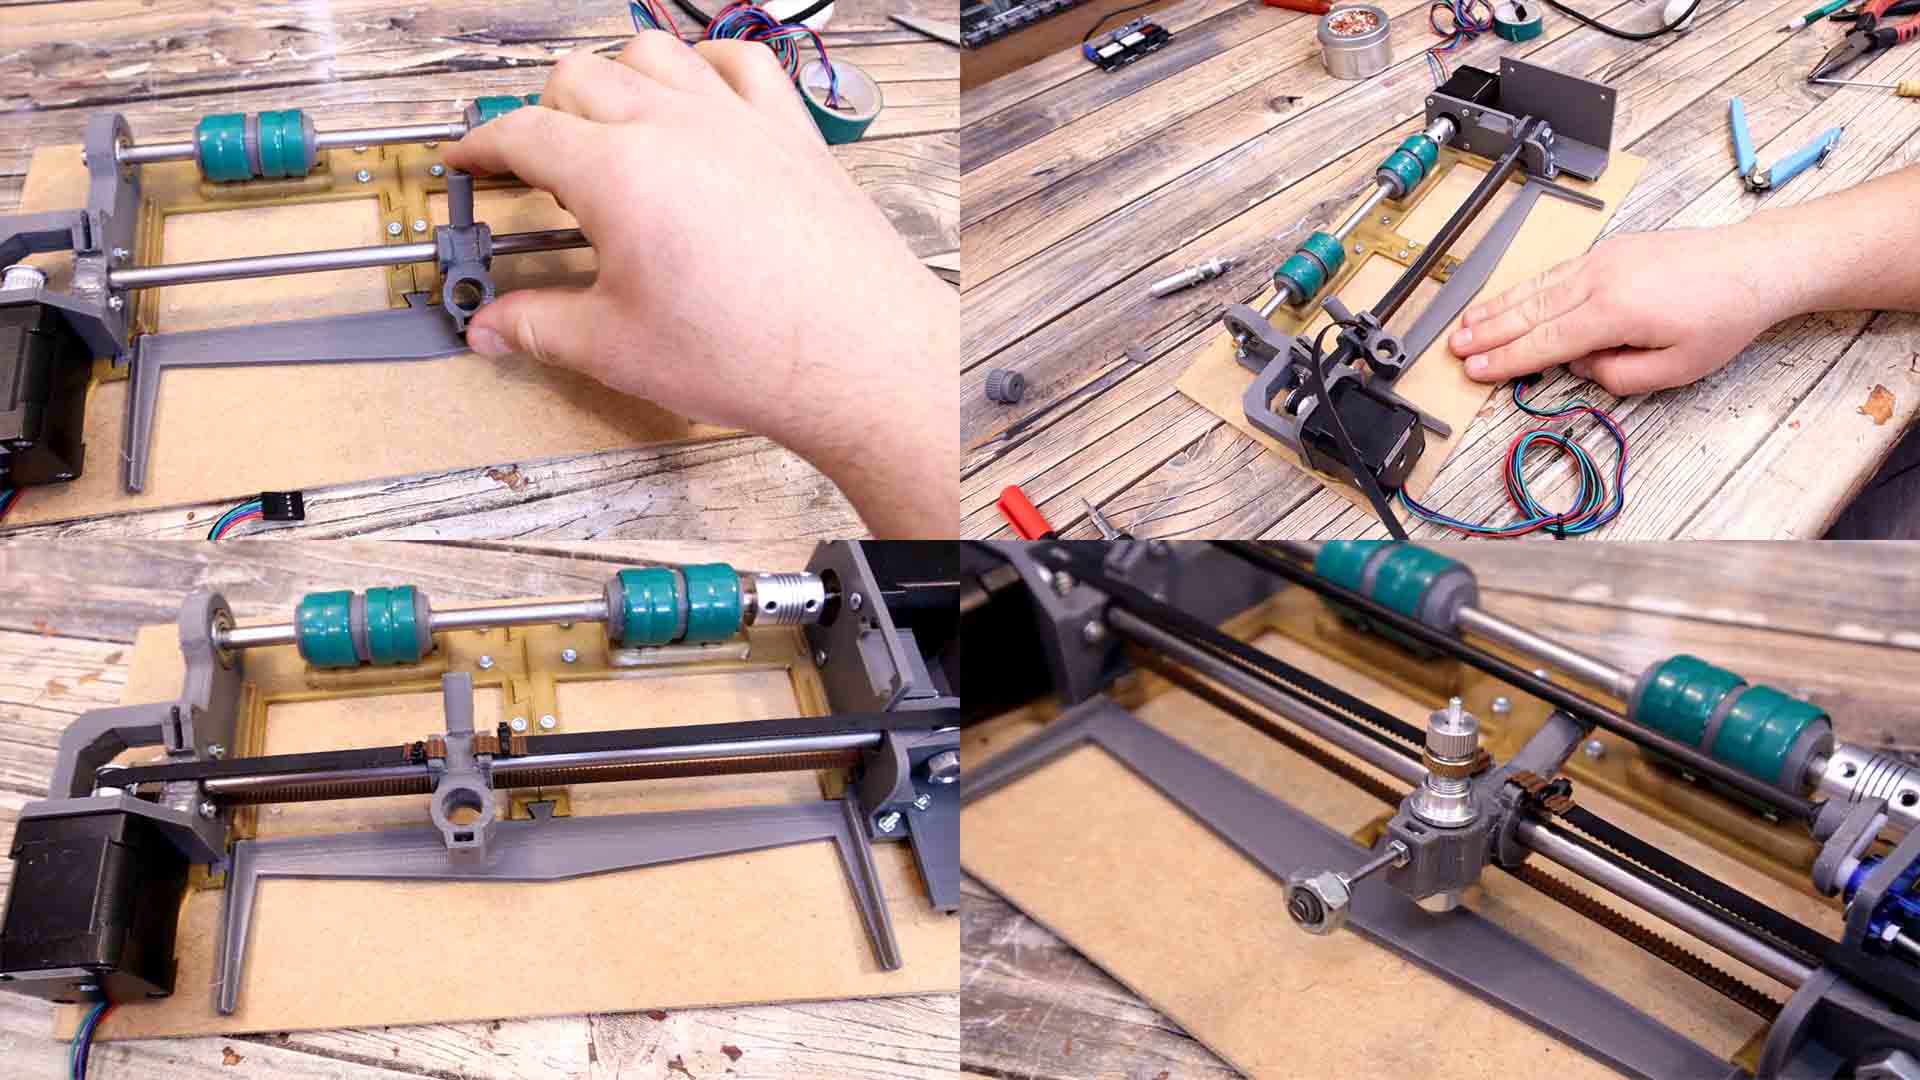
For the X axis I add the cutter support on the 8mm smooth rod. We can also add some vaseline. Then I add the rod in place. Now I add the belt around the motor and the bearing and tie it to the cutter support. I use zip-ties for that. Then I add the servo motor in place and on top of it I add the plastic support and a plastic tube. That will move the cutter up and down. On this support I add a screw and that will keep in place the cutter but also act as a weight and pull the cutter downwards. Now all axis are complete.
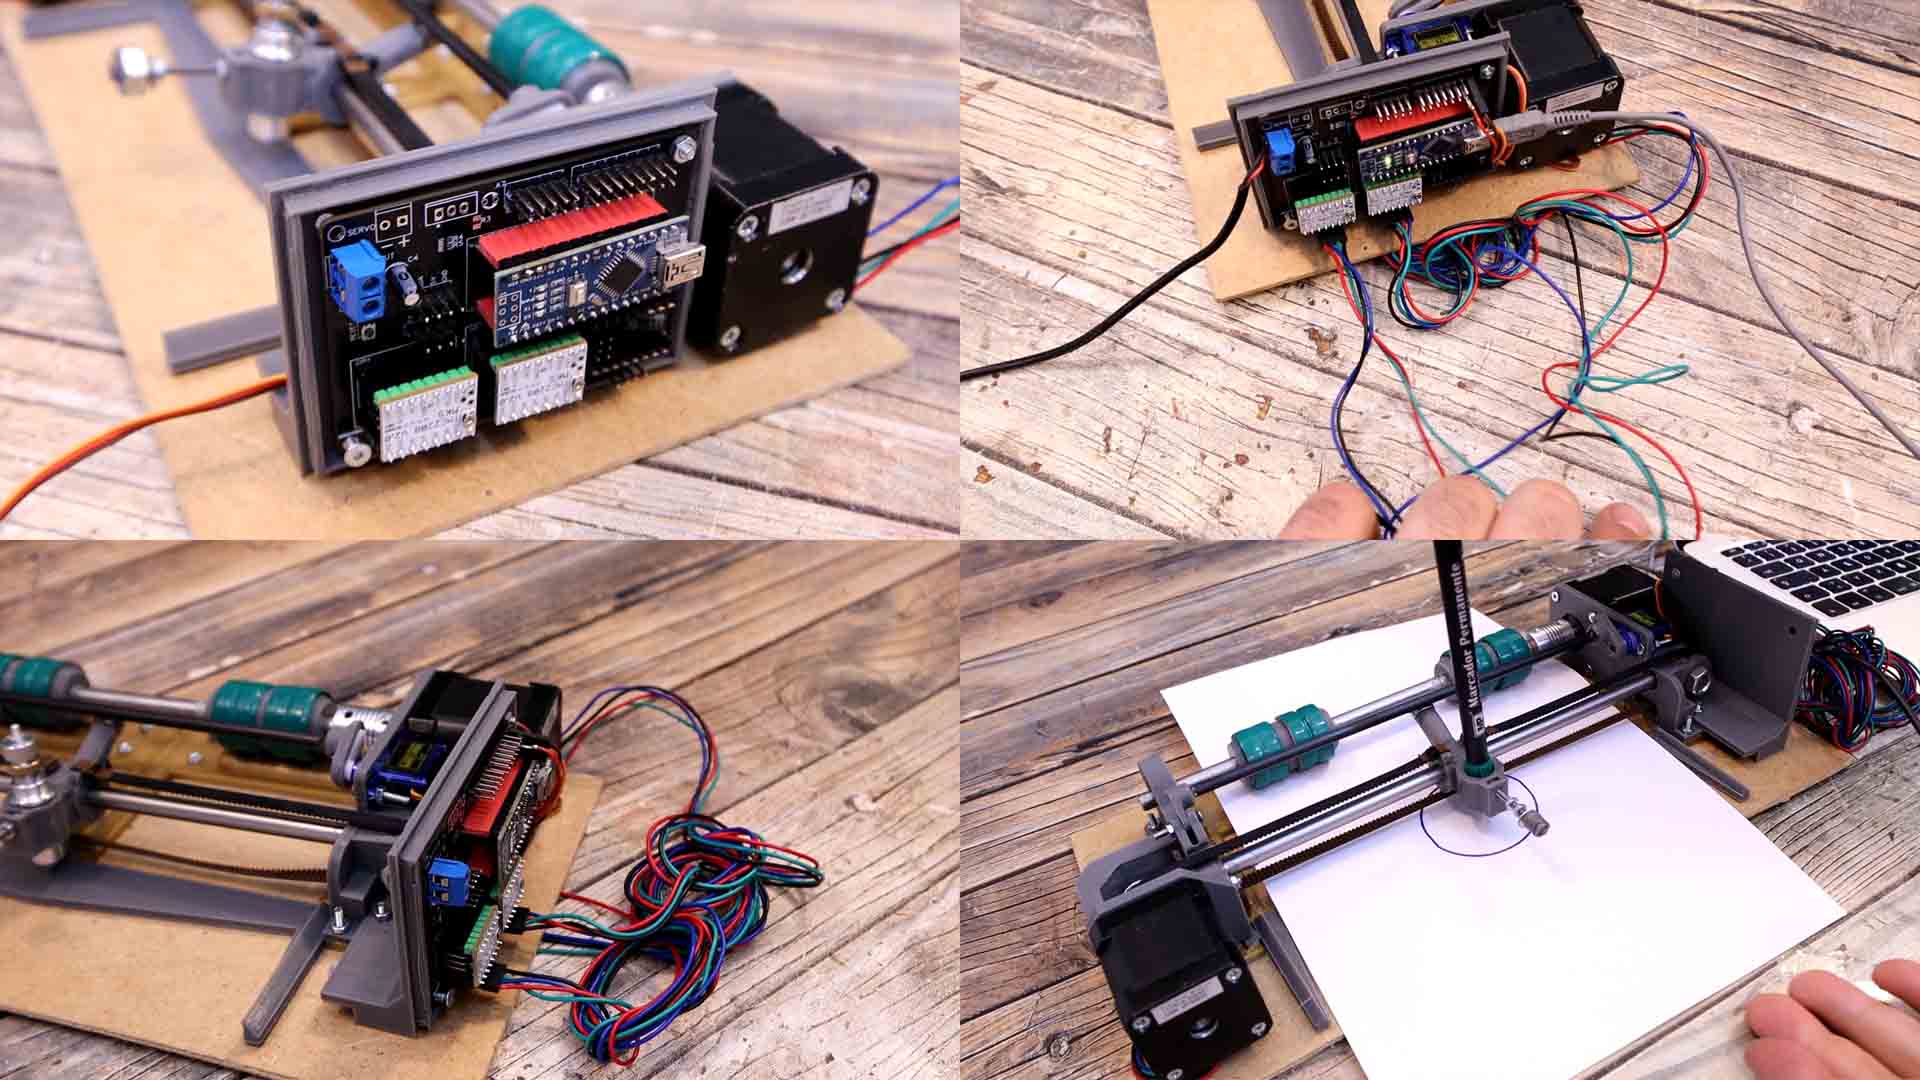
Get the PCB and I screw it on the side plate using M3 screws. I make all the connections for the motors and the servo. You will later see that it also has a plastic case to cover all the wires. Connect it to the USB cable and to 12V and we can test it. We need to uplaod the GRBL code from the next part. So dwonload it and upload it to the NANO. See how to make that below.
The servo will be connected at the Z- pin for PWM signal and at GND and 5V for power. Connect the NEMA 17 motors to the drivers outputs of the X and Y axis. If they spin in the wrong direction, just flip its connector and it will spin backwards. Supply the PCB with 12V and the Arduino NANO will regulate the 5V for us. Connect the USB cable from a PC and get the COM of the Arduino. Then uplaod the code from the next part.
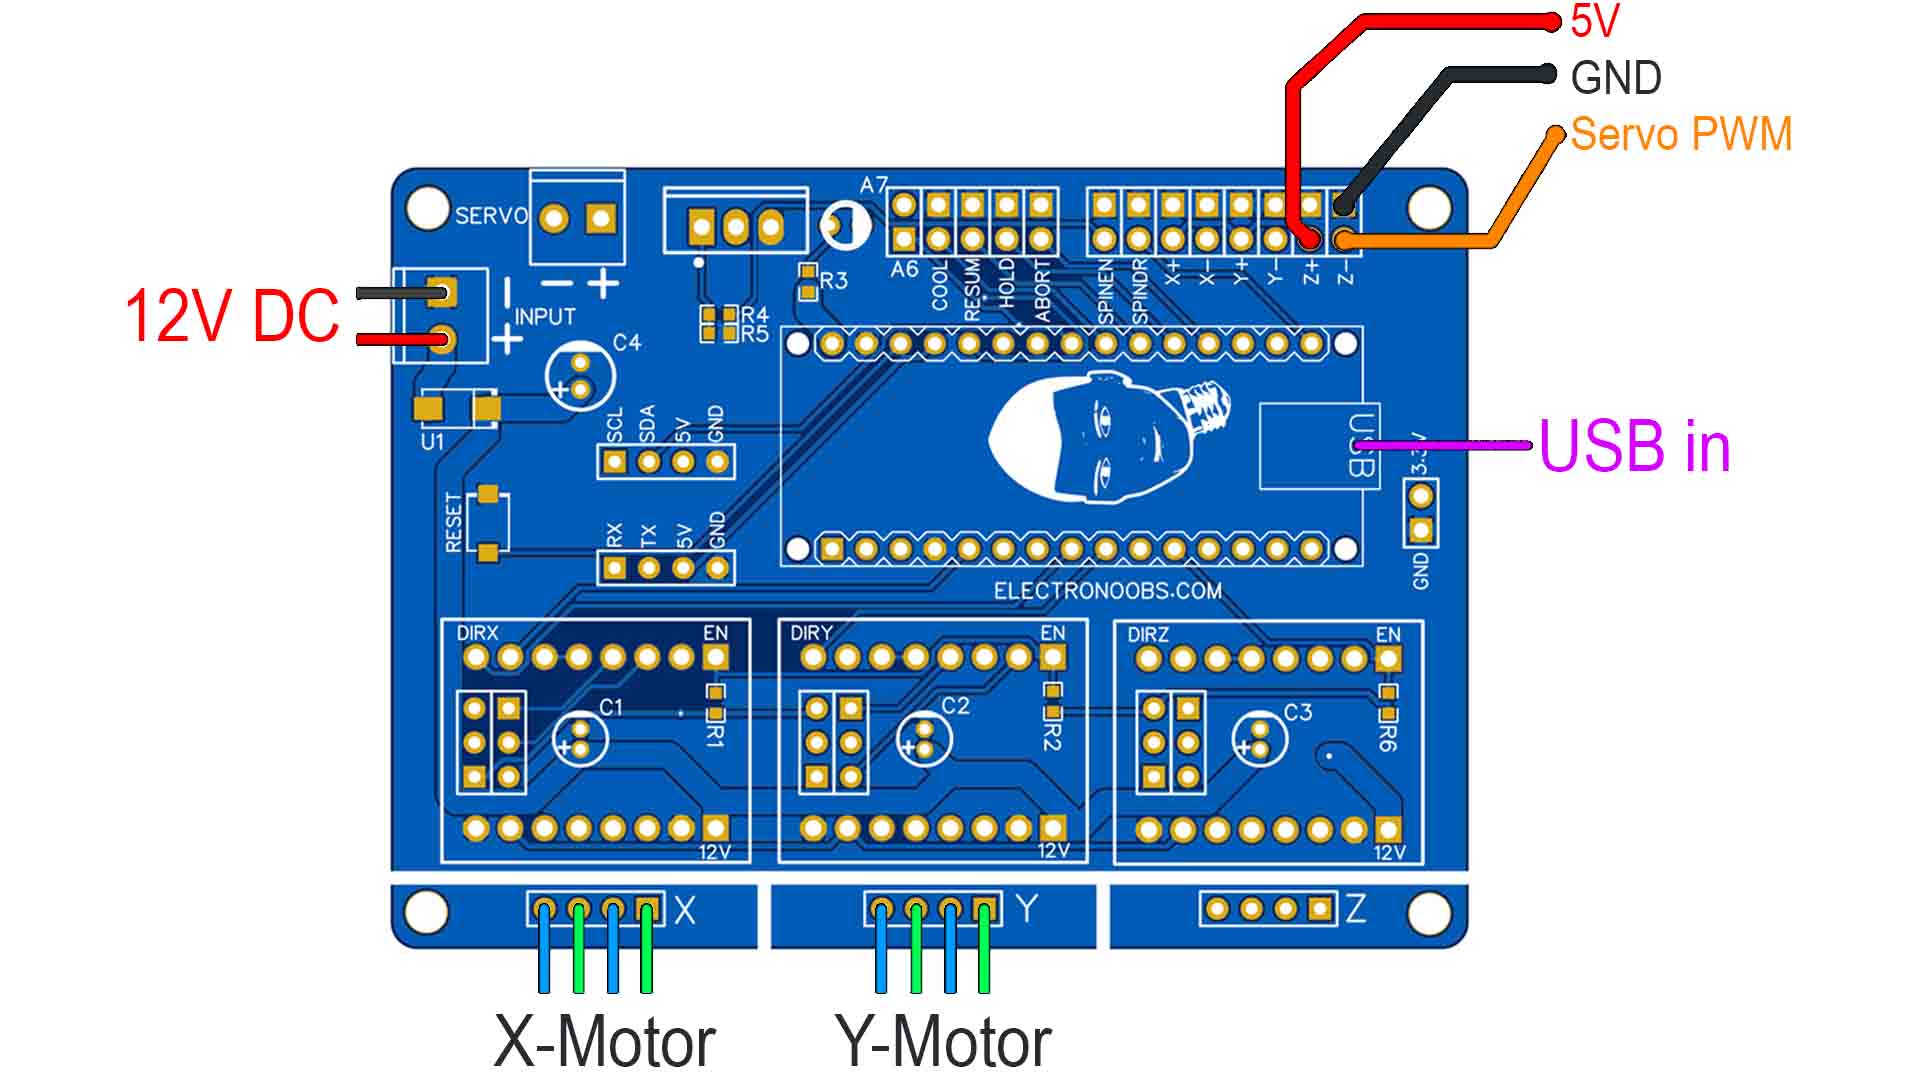
This code is using the GRBL platform. But this one is changed a bit so it could work with a servo for the Z axis. Usually, a CNC machine has another stepper motor for the Z axis but this plotter is using a servo to go up and down. For that we connect the servo on pin Z- of the PCB and this code will pull it up when the Z coordinate is above 0 and press it dwon when the Z coordinate is below 0. That's how we go up and down.
To control the machine we use the Universal G-code sender platform. You can download it for free from THIS LINK. Install and then run the platform. Select the COM of the Arduino and connect. You can see that at this point, on controls, we can move the axis. To run an example copy and paste the g-code below and run it. It will execute a circle. That's it!
G17 G20 G90 G94 G54
G0 Z0.25
X-0.5 Y0.
Z0.1
G01 Z0. F5.
G02 X0. Y0.5 I0.5 J0. F2.5
X0.5 Y0. I0. J-0.5
X0. Y-0.5 I-0.5 J0.
X-0.5 Y0. I0. J0.5
G01 Z0.1 F5.
G00 X0. Y0. Z0.25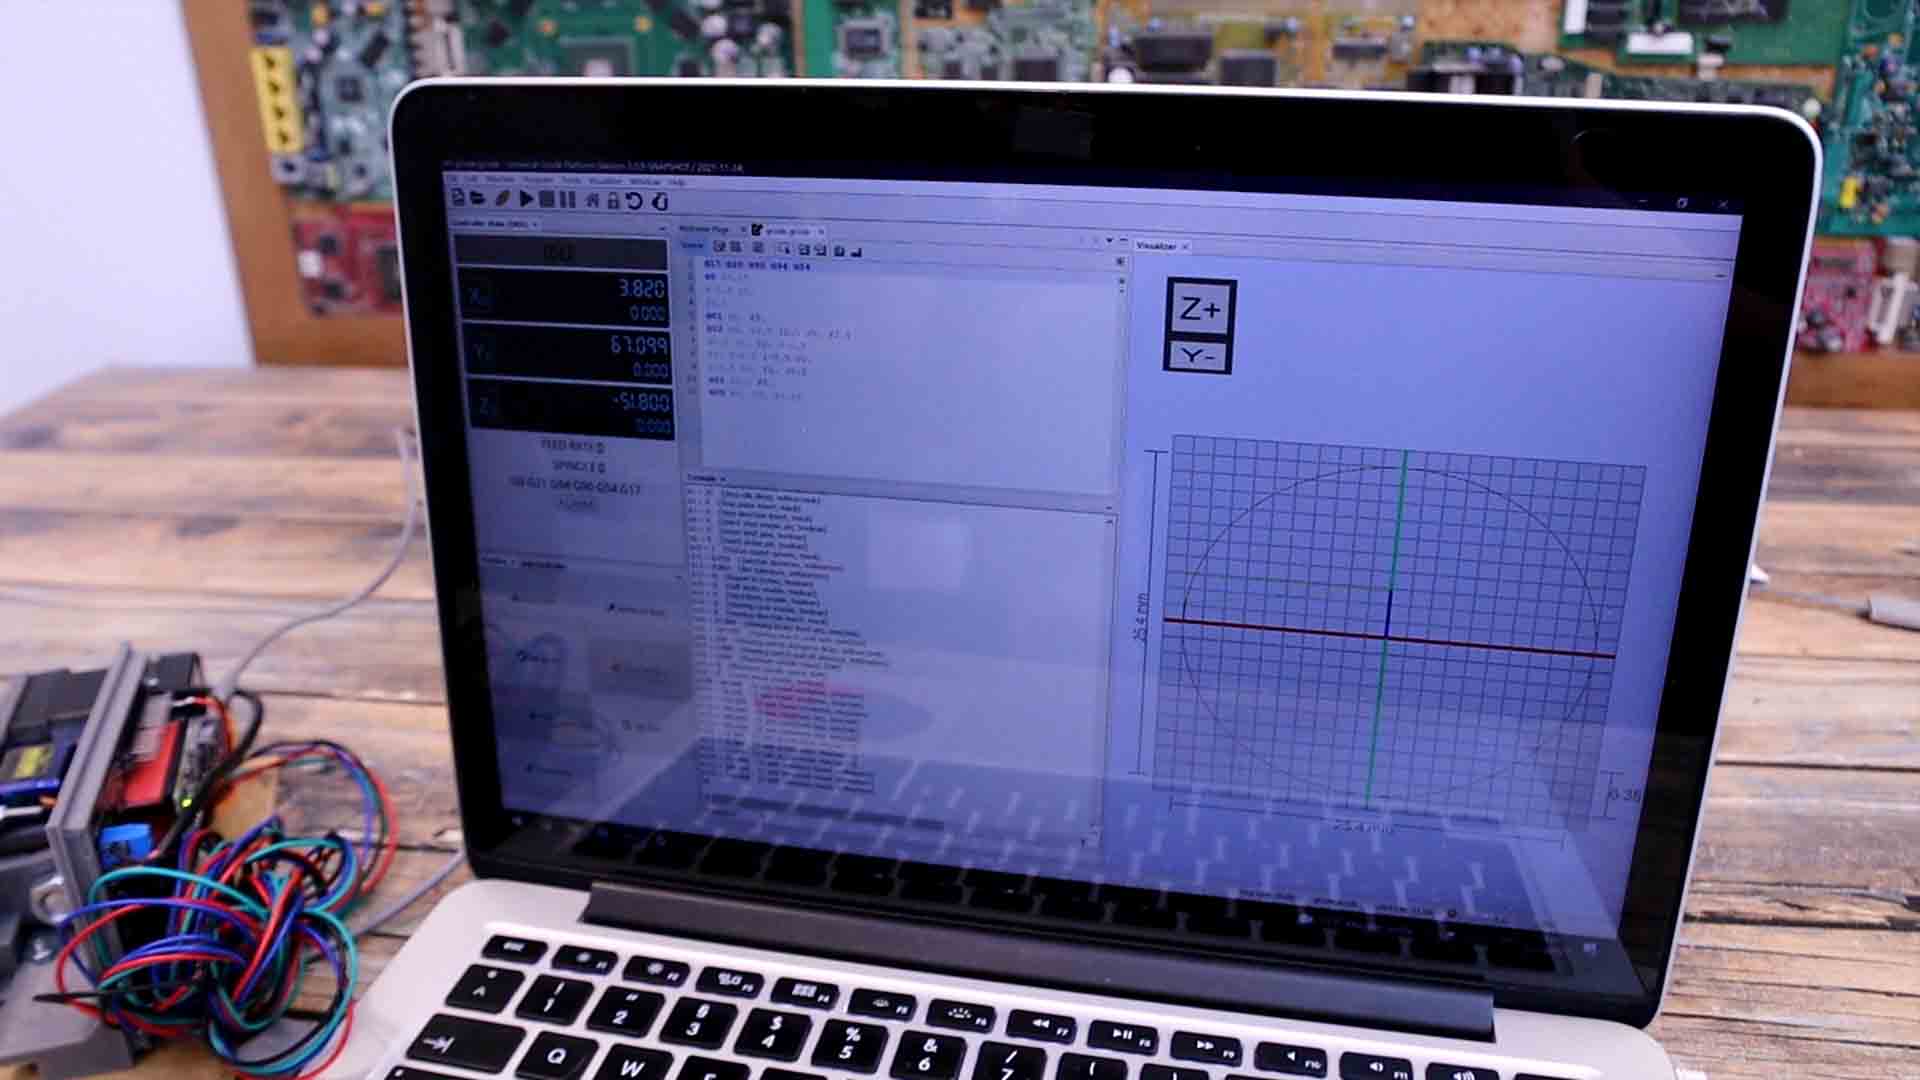
Get my PCB from above, the code, the 3D printed files and the part list from this post and make your own CNC machine. I will correct the small errors I have with this project, stay tuned. I hope that you have learned something new. If my videos help you, consider supporting my work on my PATREON or a donation on my PayPal. Thanks again and see you later guys.