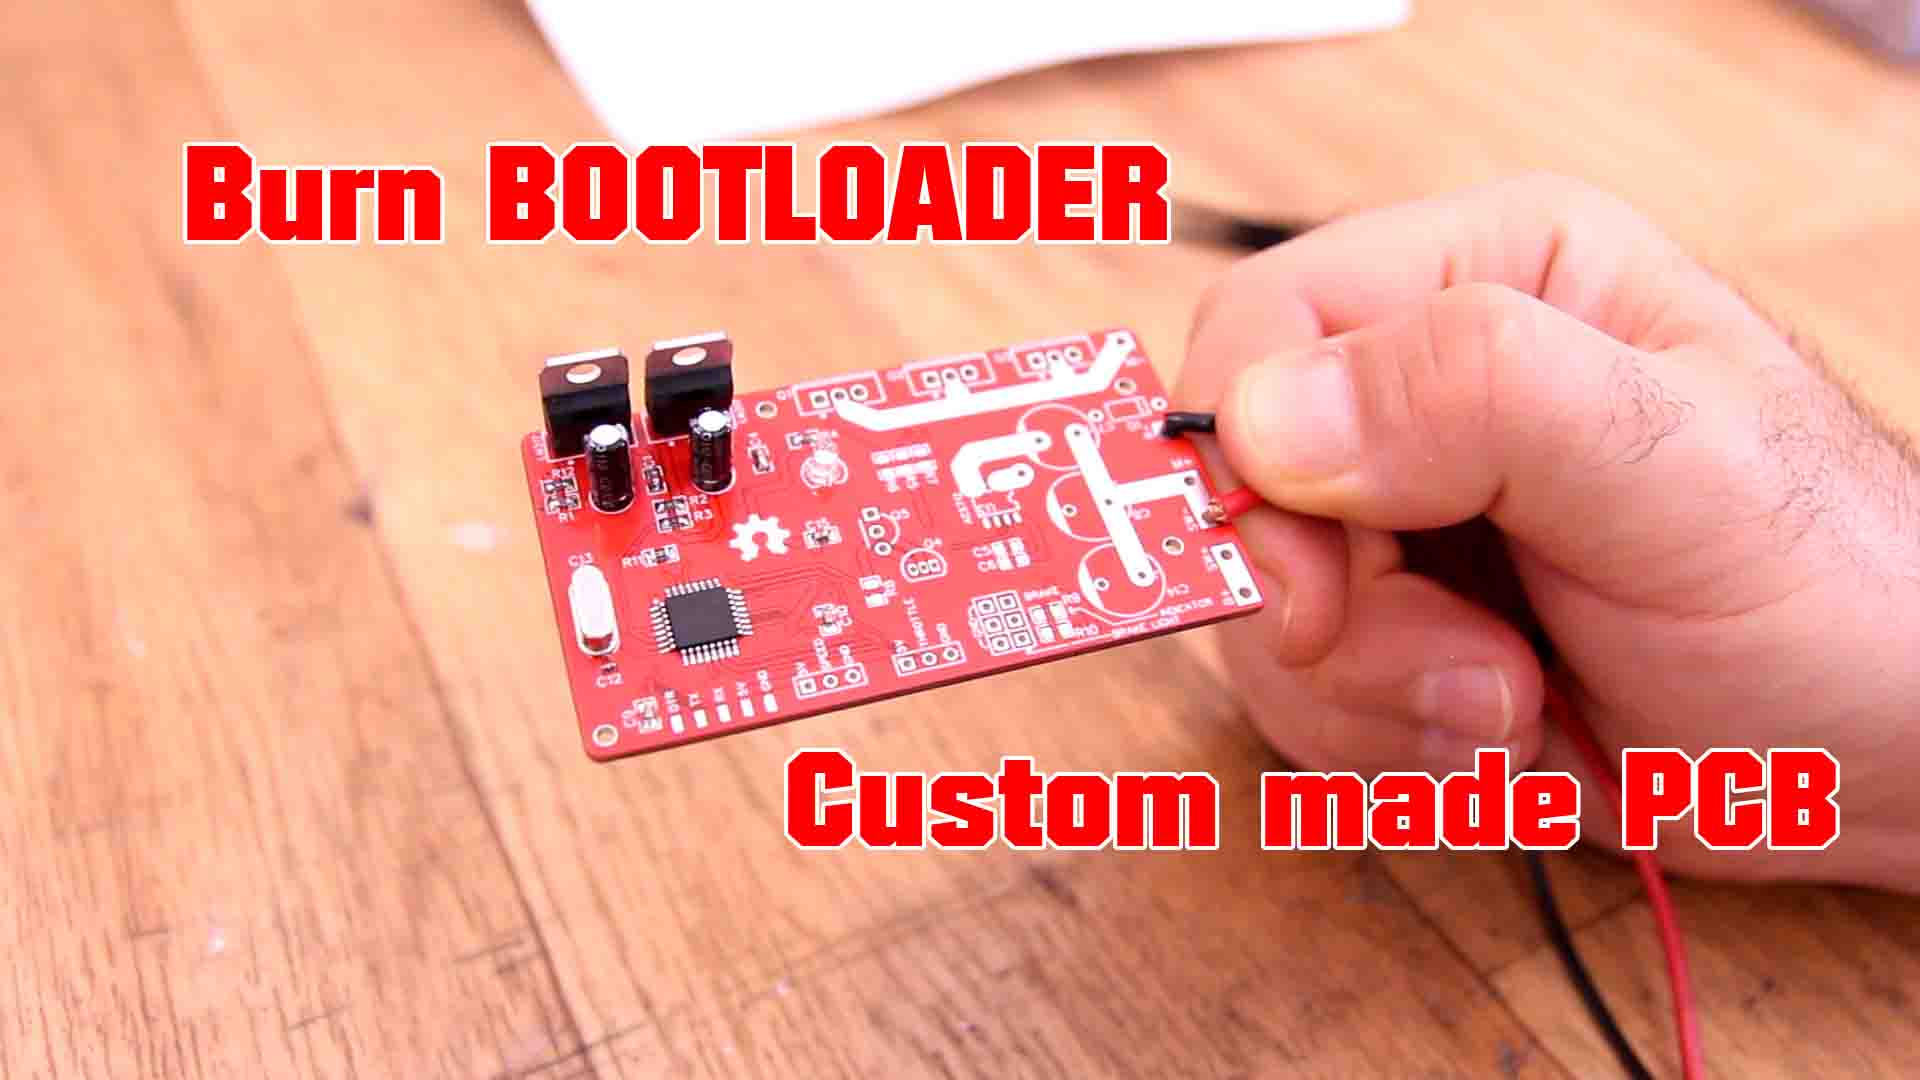
I've made this PCB with the ATmega328p-AU. In case the chip is brand new and doesn't have bootloader, learn here how to burn it with Arduino IDE and an Arduino NANO with ISP code.
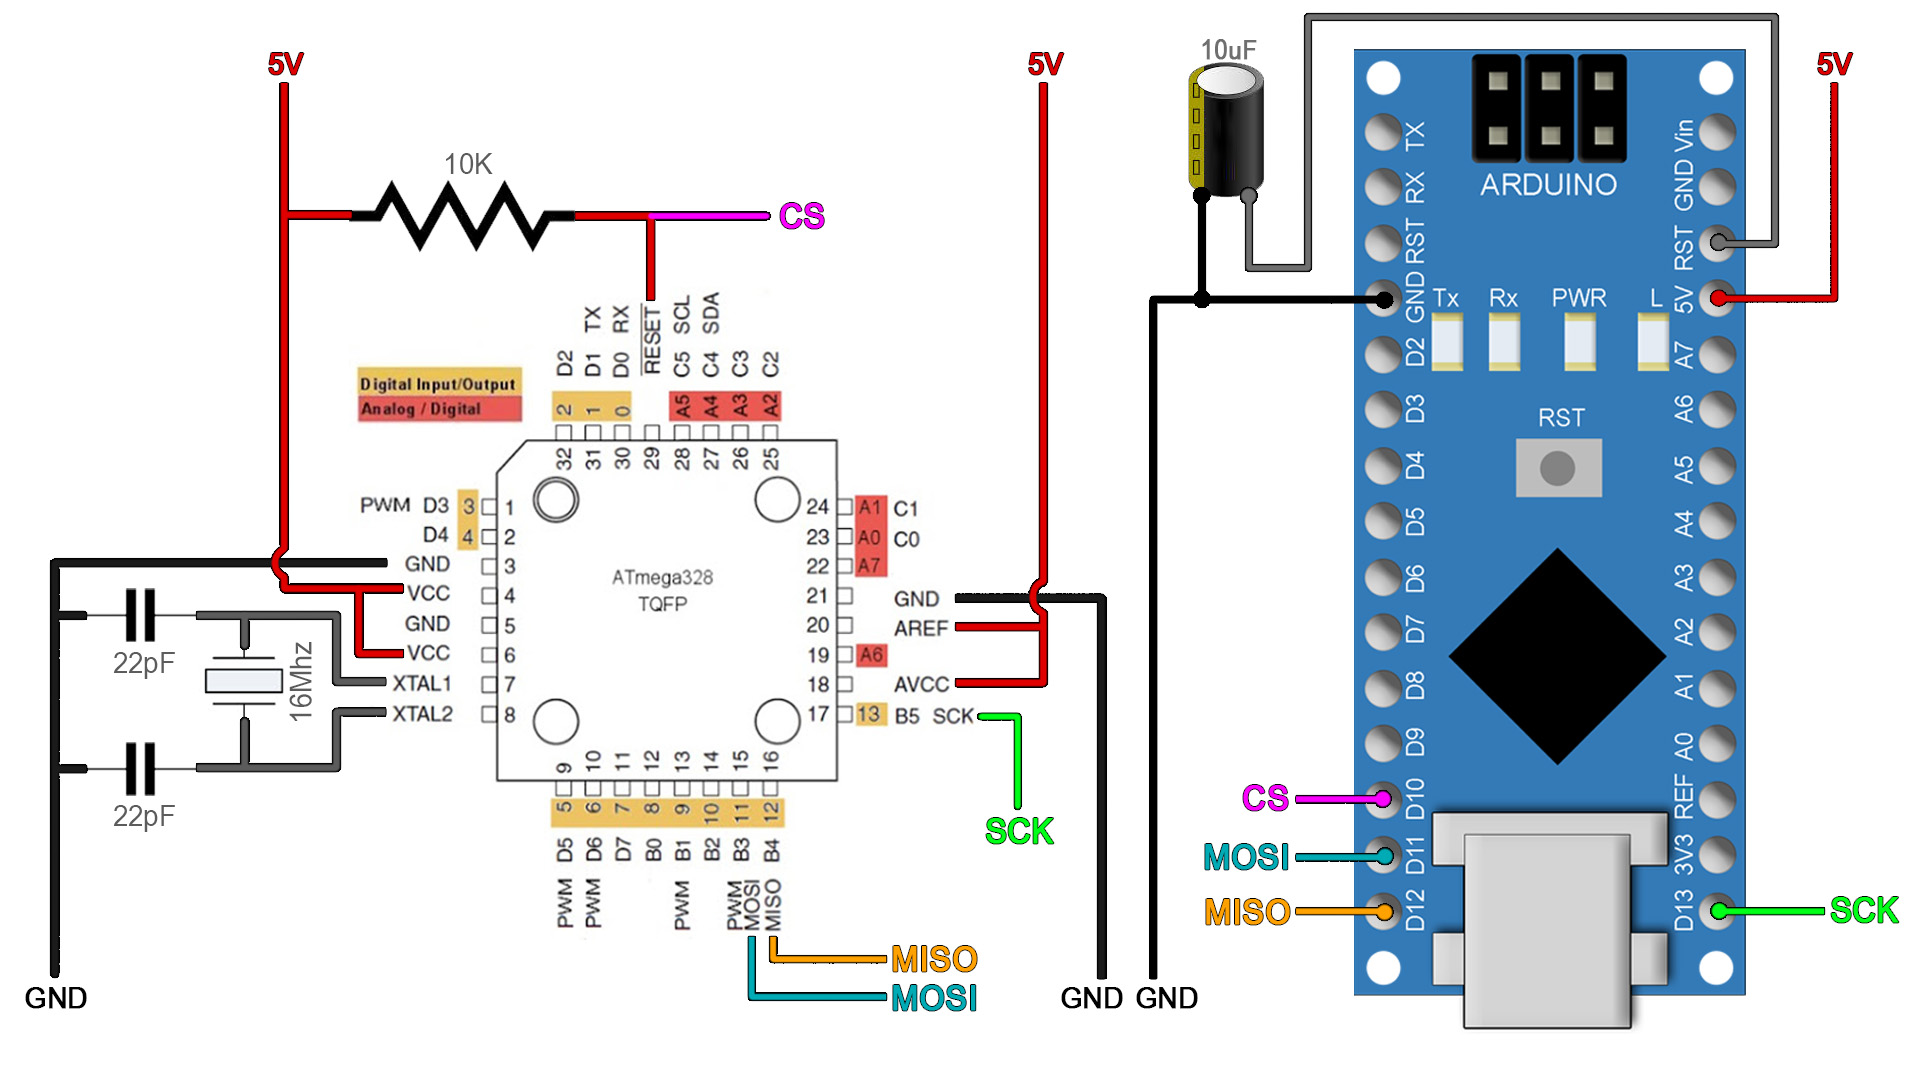
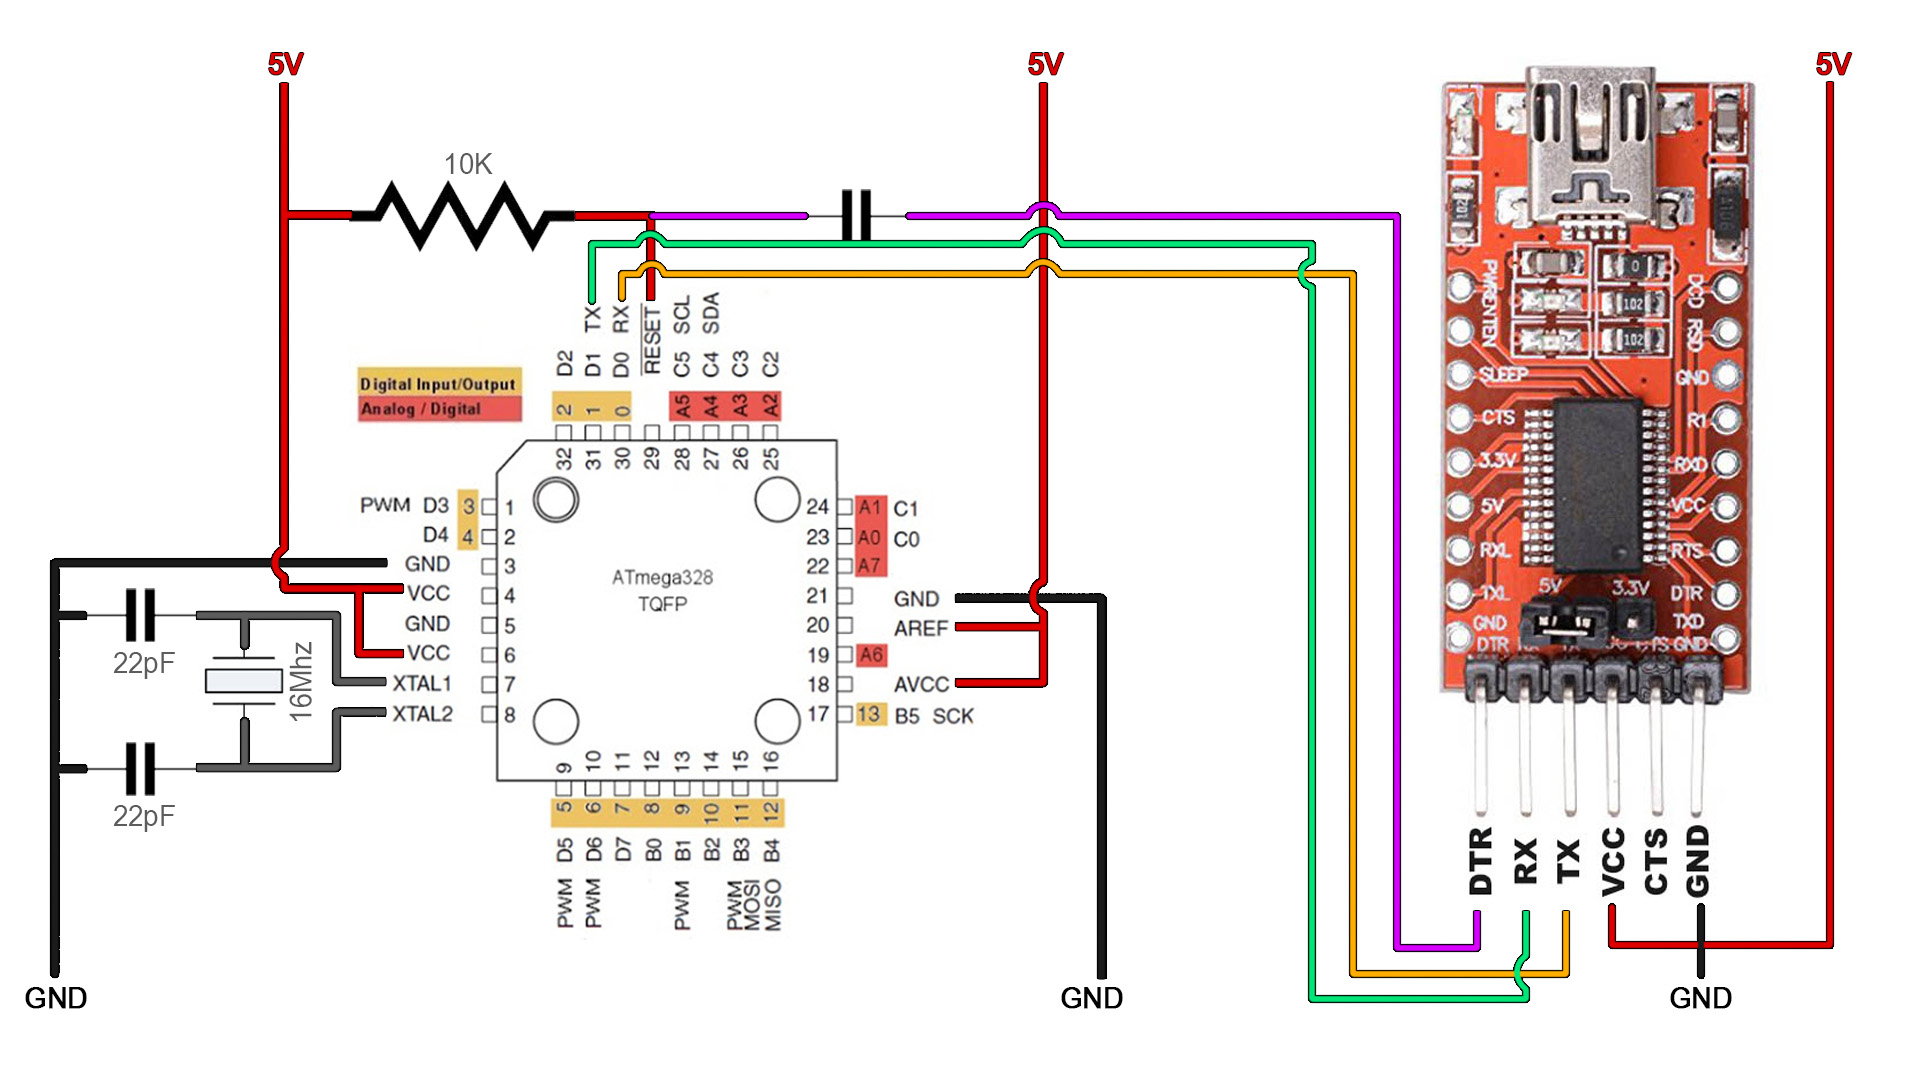
First, below you have the general connections for the ATmega328p-AU with the basic configuration. Then, later you will have connections to the PCB. But jsut in case, if yu have a different PCB, make sure you have the connections below before you try burning the bootloader.
And here are the connections to our PCB. The connections are the same but the PCB has special pads for that. So, connect it like below and then let's go to next part.
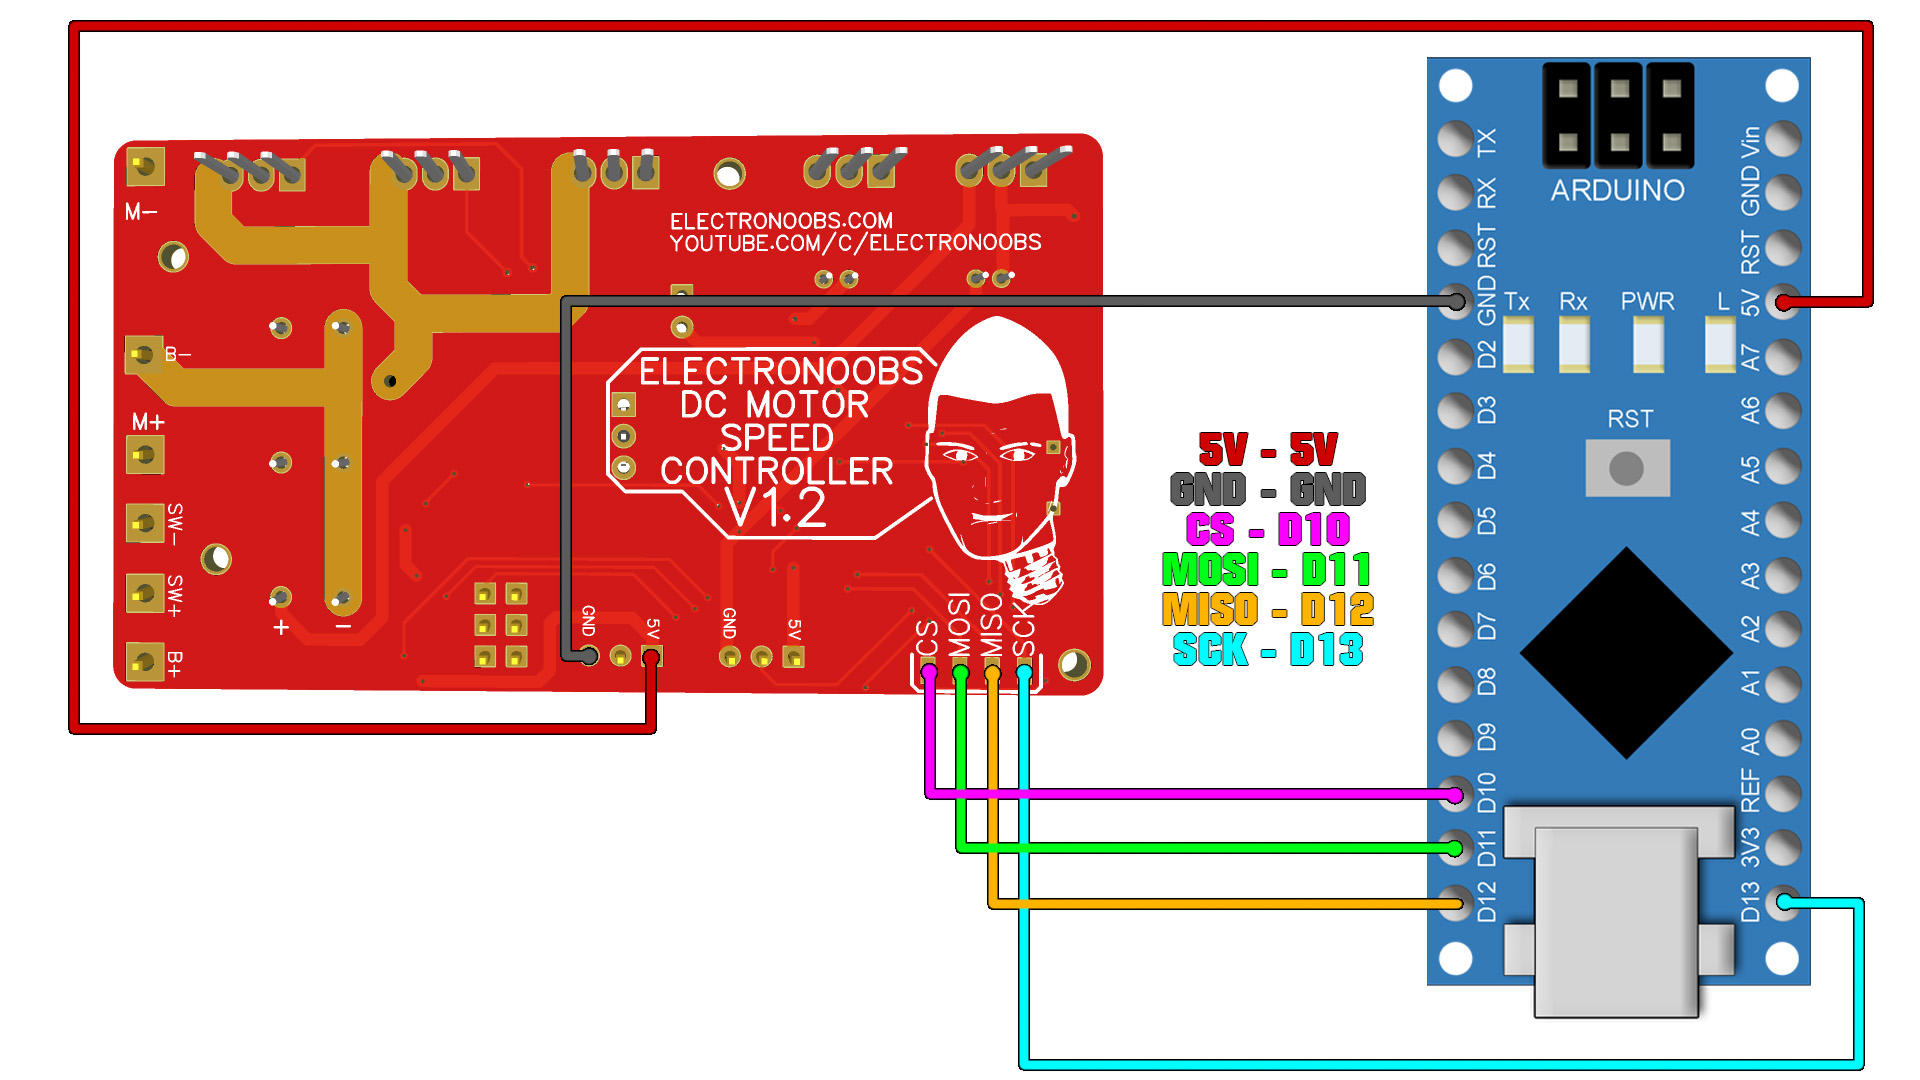
Ok, we have to burn a bootloader to the chip and then uplaod our codes. For these steps we need the connections above to an Arduino. In my case I will use Arduino NANO because I hev the AU version of the chip. So, make the connections as above between the Arduino SPI port and the PCB. We will use the Arduino as ISP to uplaod codes.
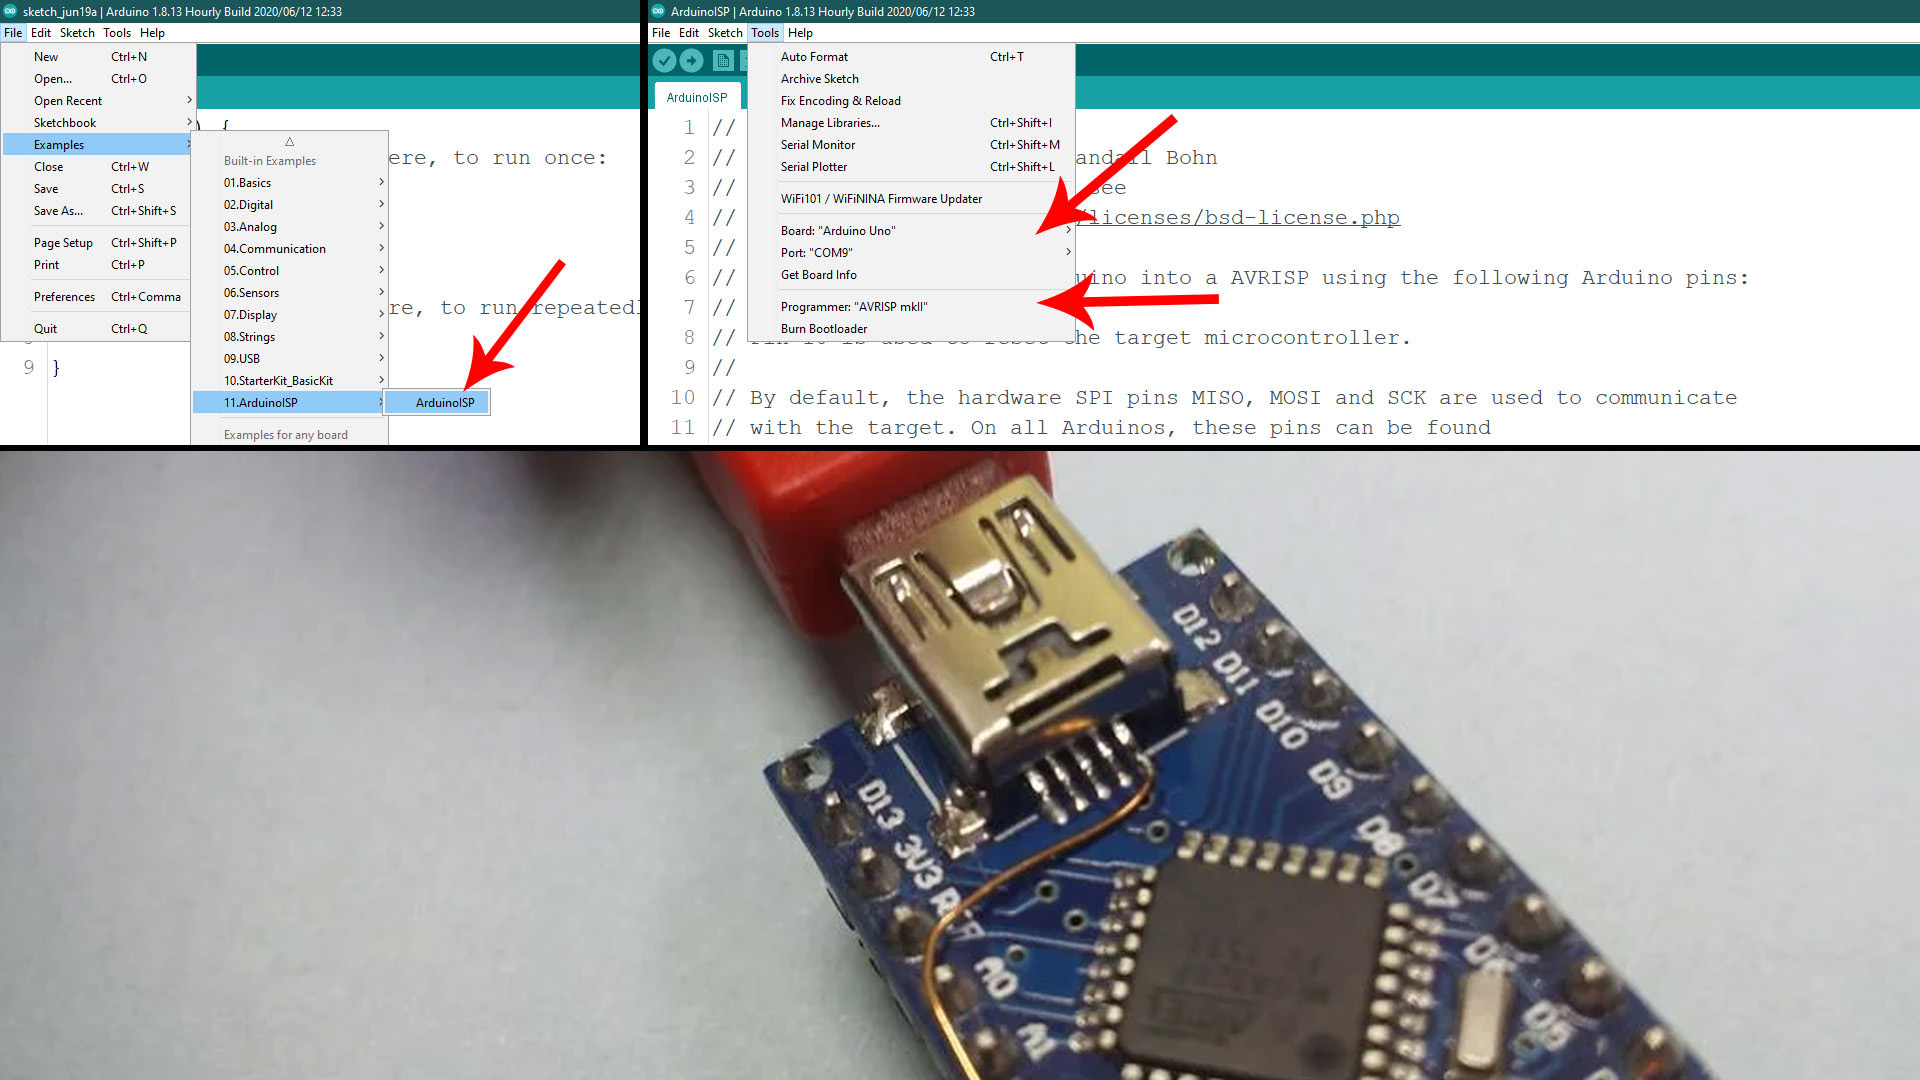
In order to use the Arduino as an ISP programmer, we need to uplaod a code to it so for that, go to Examples -> ArduinoISP -> ArduinoISP and open that example code. Then make sure yous elect the type of board for your Arduino, in my case, Arduino NANO. Select the com and leave the default programmer as "AVRISP mkII". Connect the USB, select the COM and uplaod the code to the Arduino UNO.
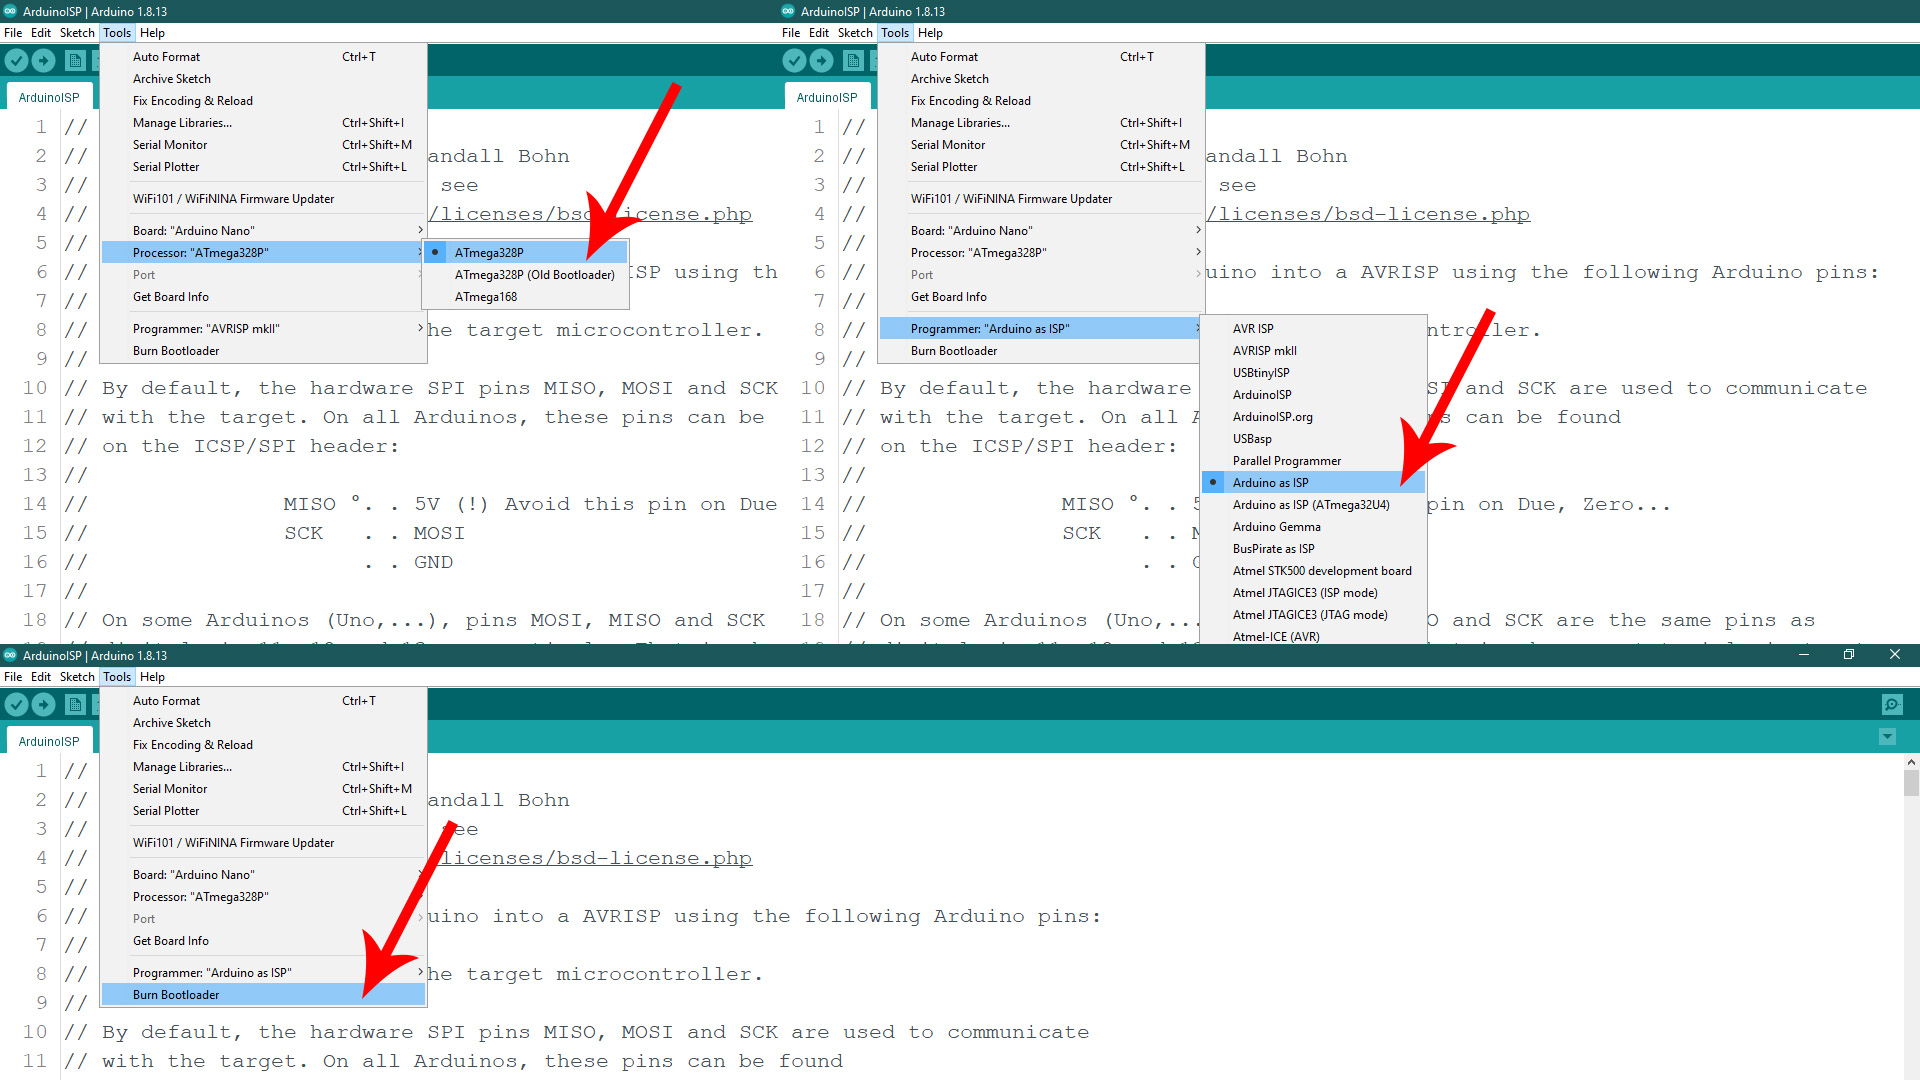
Ok, now the Arduino has the ISP code so it will act as a ISP programmer. Now, let's burn the bootloader. Go to Tools -> Board and select the NANO type of board. Go to Tools -> Programmer and make sure you now change the normal programmer from "AVRISP mkII" to "Arduino as ISP". Finally, make sure the Arduino NANO is connected to the PCB to the ISP port and go to Tools -> Burn Bootloader. The Arduino Rx/Tx LEDs will blink and after a while you will get the bootloader burn complete on the screen.
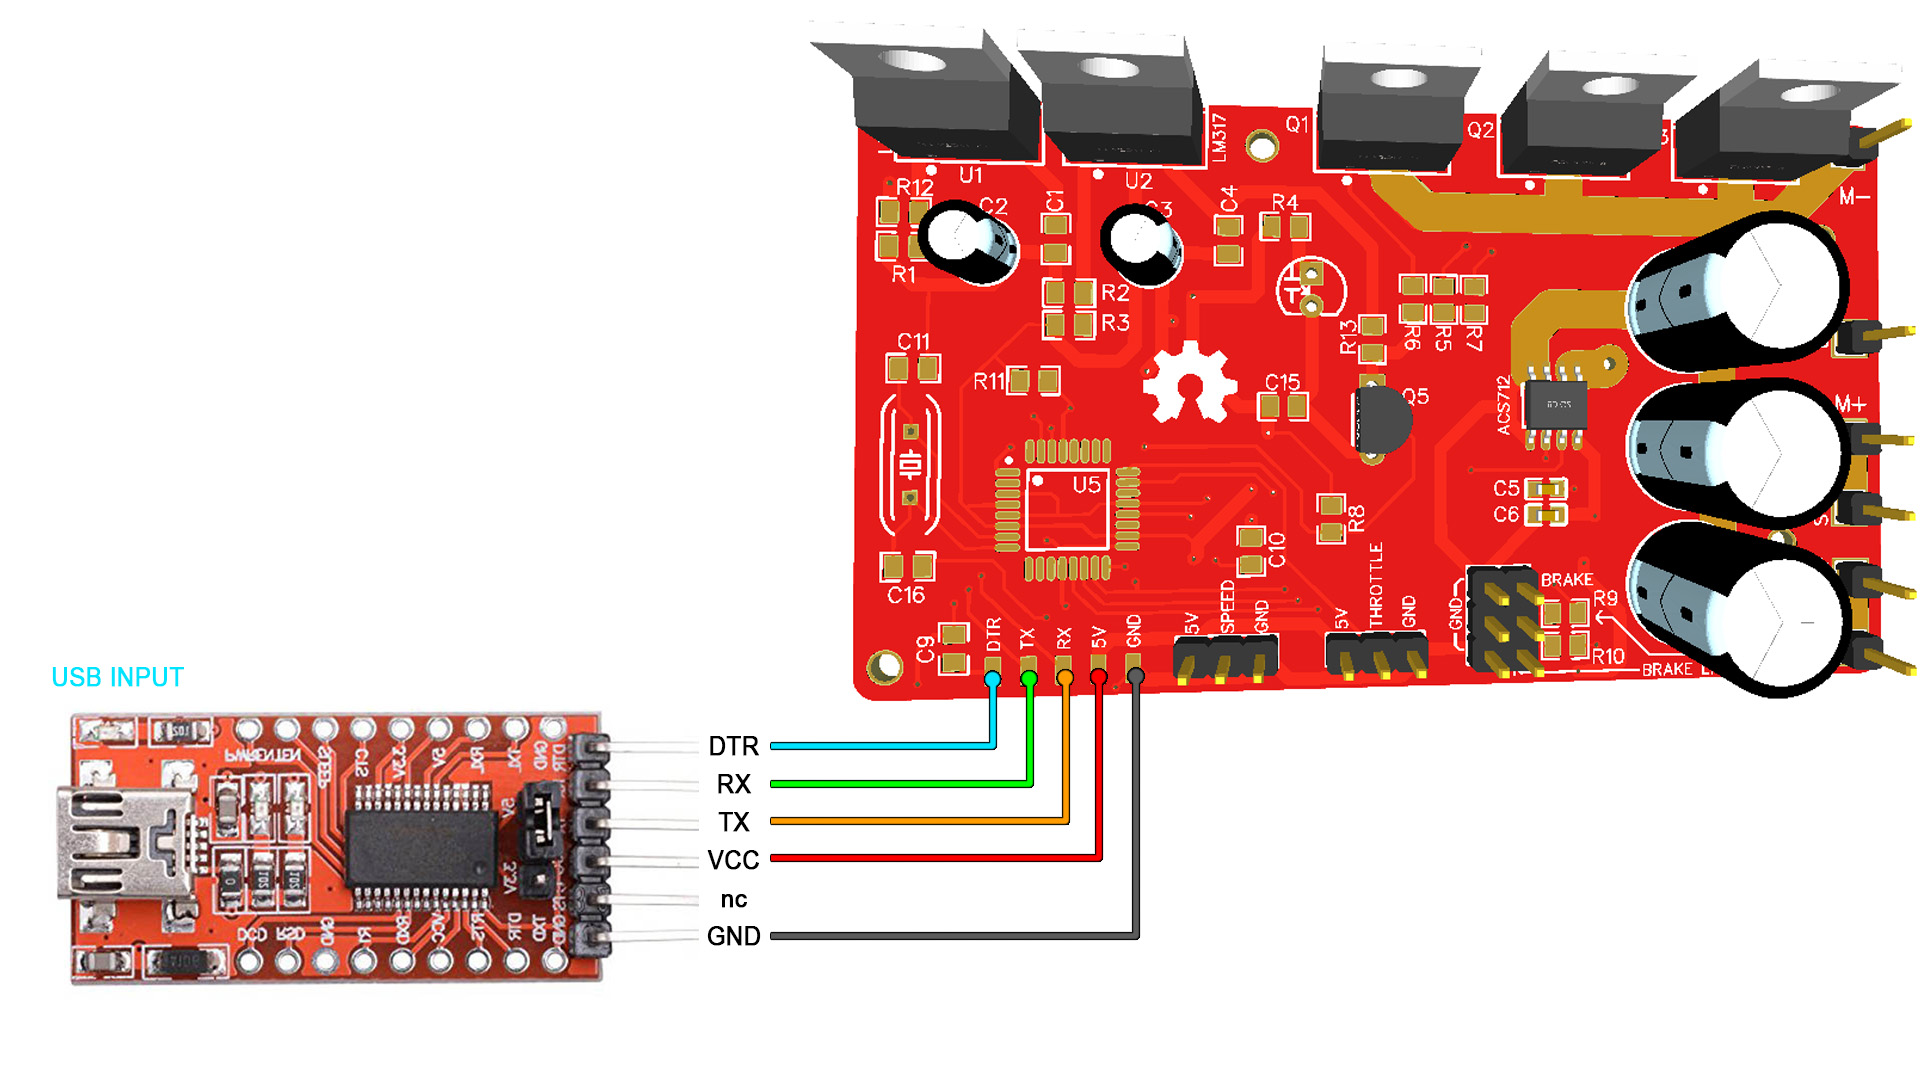
Make sure that you change back the programmer from "Arduino as ISP" to "AVRISP mkII". Then connect the FTDI progrmmer to the UART port as below to pins RX, TX and DTR. Add a 100nF cap between DTR and reset pin of the chip. Make sure you have selected Arduino NANO as board and the COM of the FTDI programmer. Then, get your code, compile and uplaod.
Make sure that you change back the programmer from "Arduino as ISP" to "AVRISP mkII". Then connect the FTDI progrmmer to the UART port of the PCB as below to pins RX, TX and DTR. The PCB already has the 100nF capacitor so don't worry. Make sure you have selected Arduino NANO as board and the COM of the FTDI programmer. Then, get your code, compile and uplaod.