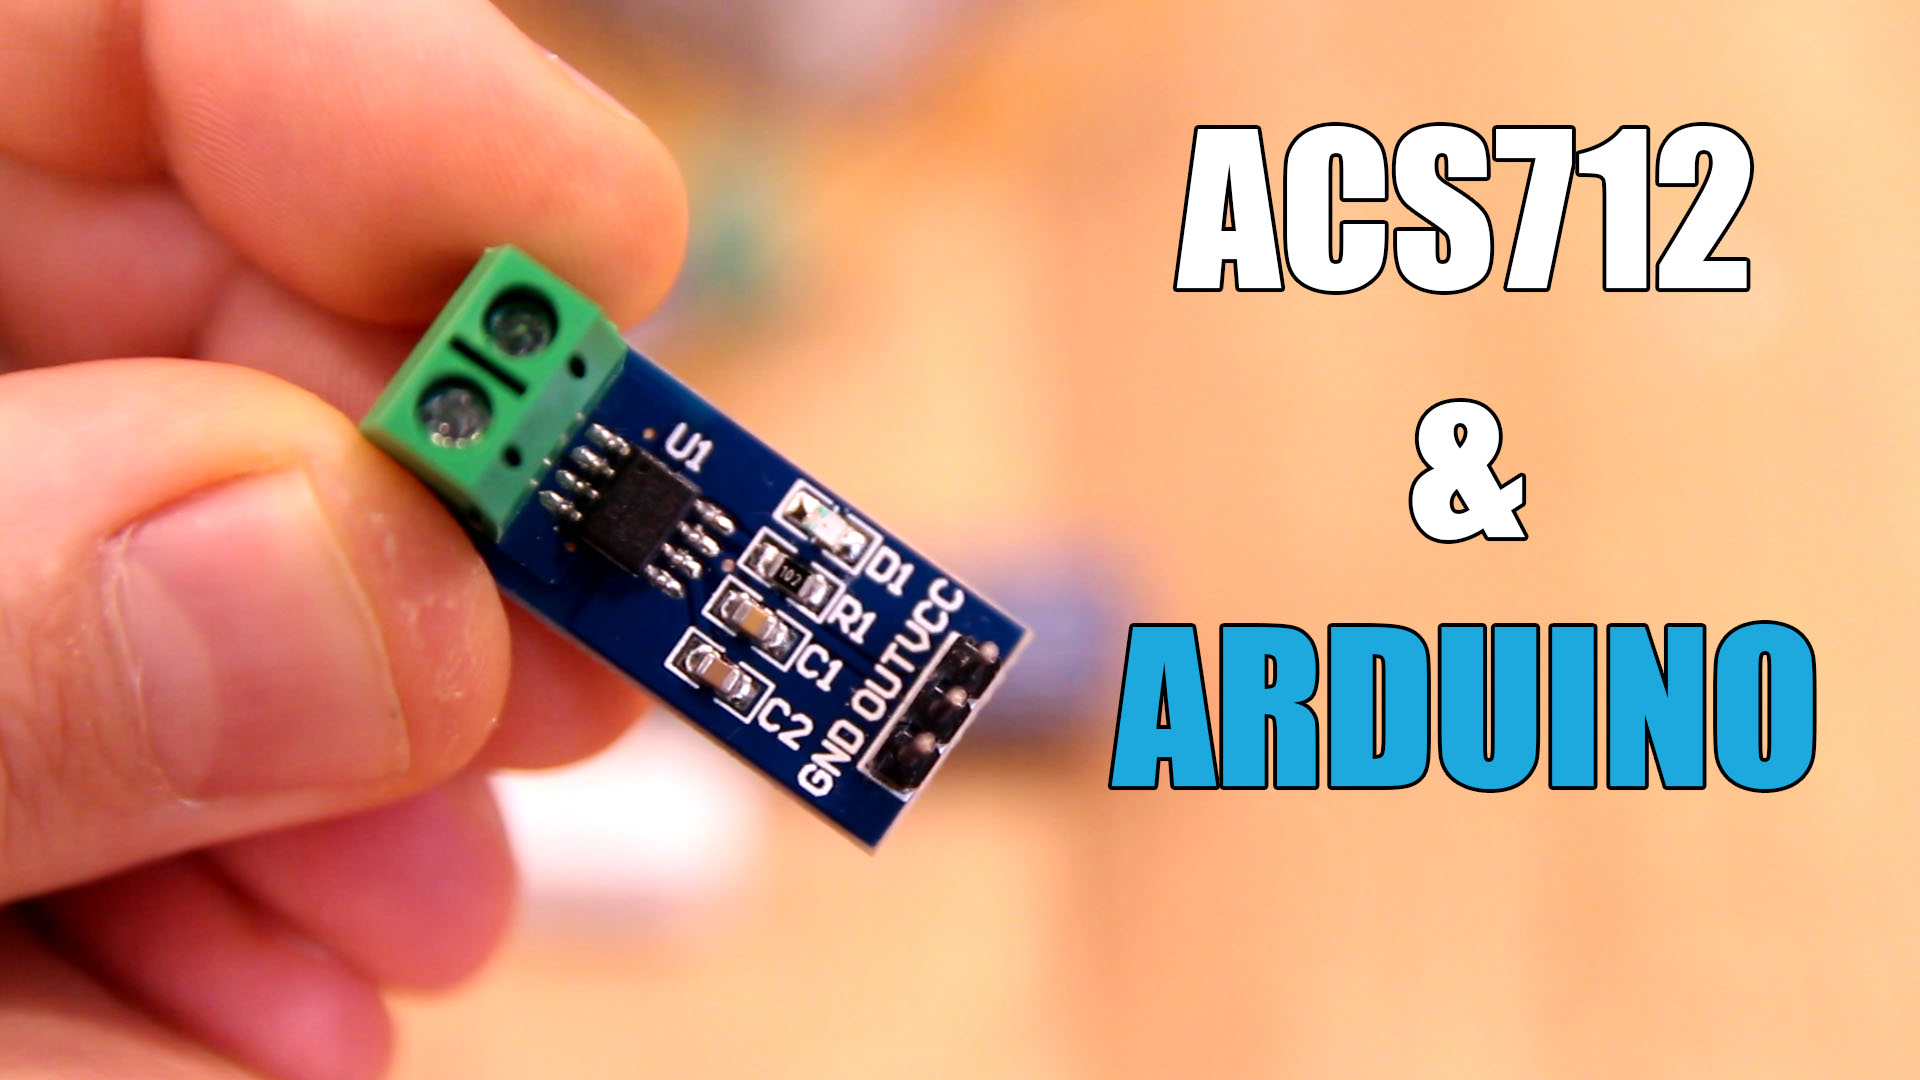
The ACS712 Current Sensor is a cool little device for making current measurements. Better, its really easy to use with an Arduino. In this sample project, I’ll show you just how easy it is to connect up, program and put to immediate use.
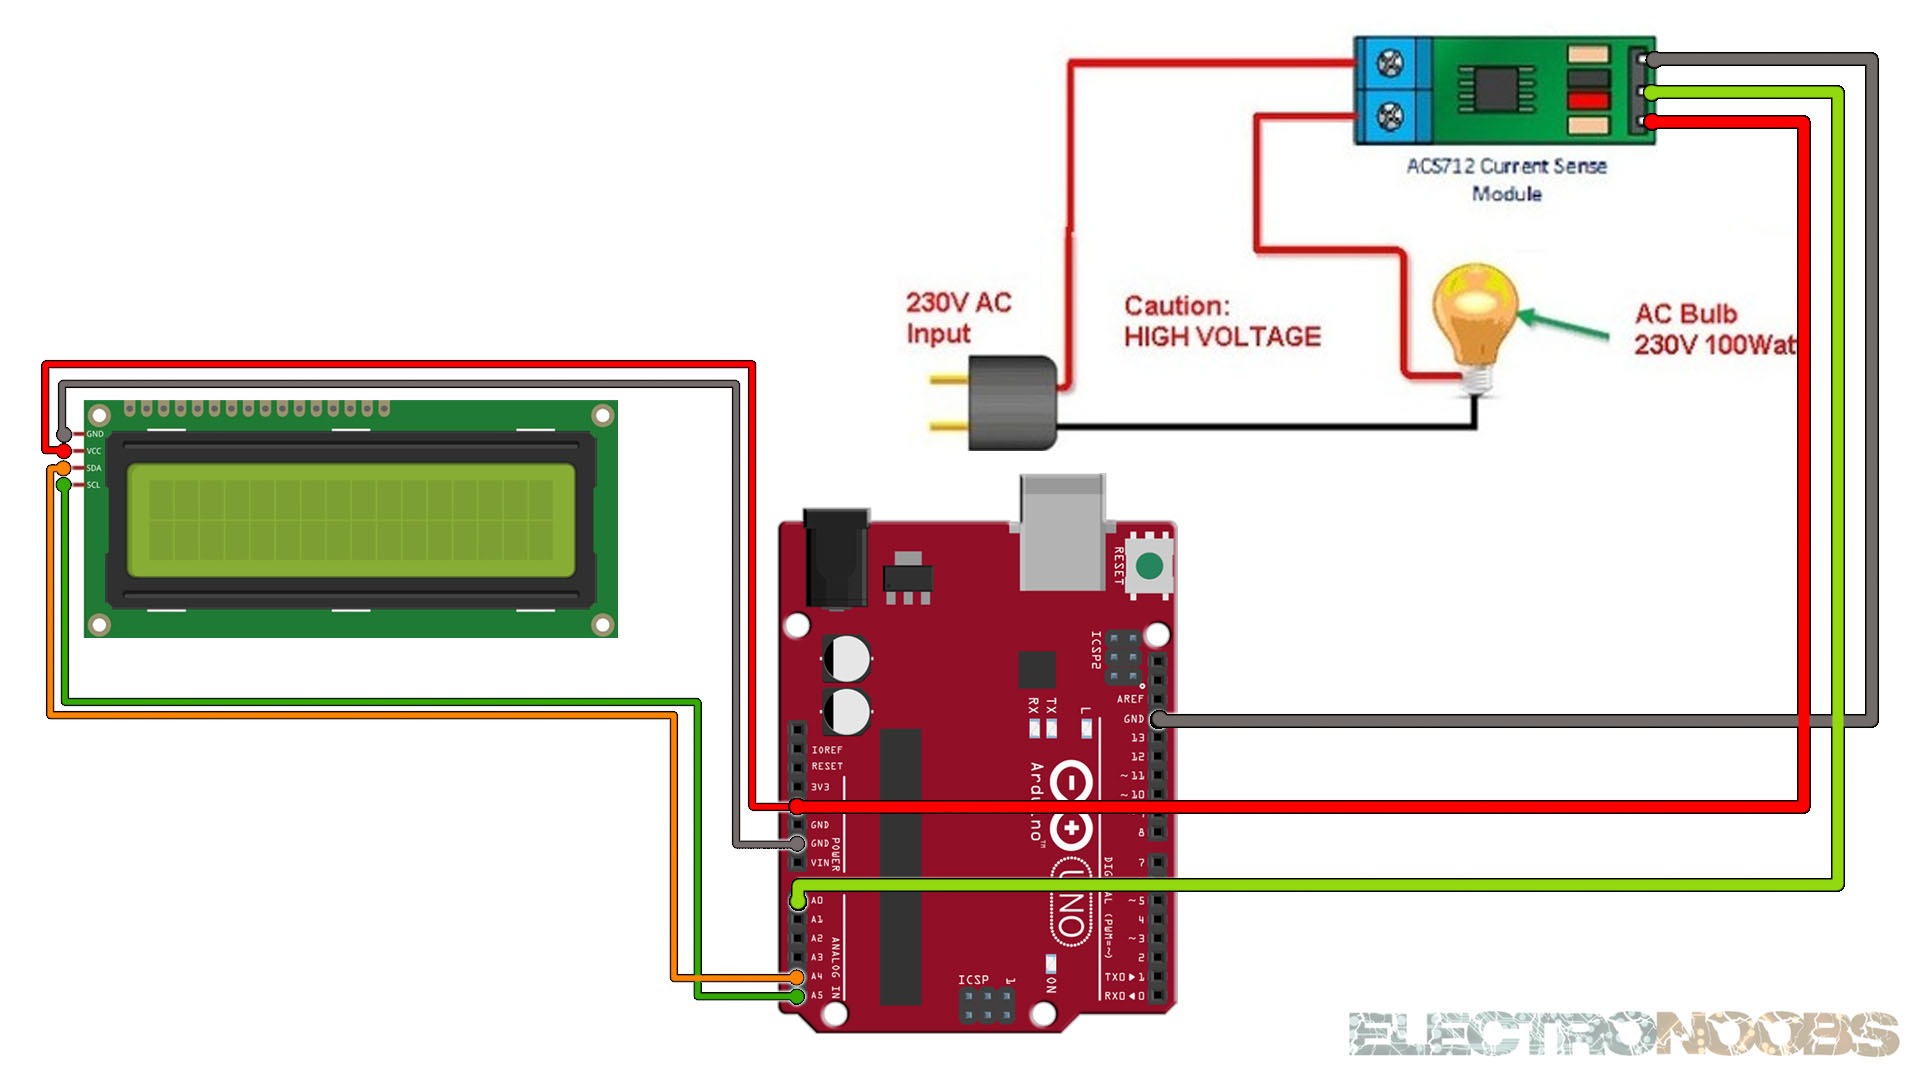
The drawing below shows I hooked things up. The ACS712 has supply of Vcc and GND and it will give out an analog output. Depending on the model, the resolution is different. The ACS712 current sensor is an economical solution to measure current, internally it works with a Hall effect sensor that detects the magnetic field that is produced by induction of the current flowing through the line being measured. The sensor gives us a voltage output proportional to the current, depending on the application we can use the ACS712-05A, ACS712-20A or ACS712-30A, for ranges of 5, 20 or 30 amps respectively
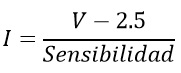
To perform the current reading, you simply need to read the analog input and obtain the current with the formula below. Below is the code for a current reading. In our case we are working with a 5A sensor so we use the sensitivity value of 0.185V / A which is the 185mV / A equivalent that the manufacturer gives us, if they are working with the 20A sensor, replace the sensitivity value by 0.100 V / A.
#include <Wire.h>
#include <LiquidCrystal_I2C.h>
// Set the LCD address to 0x27 or 0x3f for a 16 chars and 2 line display
LiquidCrystal_I2C lcd(0x27, 16, 2);

float multiplier =0.185; //Sensibility in Voltios/Ampers for the 5A model

void setup() {
  lcd.init();
  lcd.backlight();
  Serial.begin(9600);
}

void loop() {

  float SensorRead = analogRead(A0)*(5.0 / 1023.0);     //We read the sensor output
  float Current = (SensorRead-2.5)/multiplier;                  //Calculate the current value
  Serial.print("Current: ");
  Serial.println(Current,3);

  lcd.clear();
  lcd.setCursor(0,0);
  lcd.print("    Current:    ");
  lcd.setCursor(6,1);
  lcd.print(Current);
  delay(200);
}