Halloween is close and I wanted to make a related cool project. Of course, it will involve a pumpkin. But to make it last longer, I’ve made a 3D printed one. After I’ve made a simple design and divided in a few parts, 3D printed it and give it a pain job, I had a cool looking plastic pumpkin. But I wanted to add some electronics, of course. For that, inside we have an Arduino connected to a few other parts. For light effects, I’m using an addressable controlled LED strip. For sound we have a mp3 module and to detect movement a PIR sensor. The scary pumpkin will stay powered off till it detects movement. Once it detects that somebody is close, it will run a few random loops such and play scary sounds. Also changing lights colors and blinking. We will also see how a mist maker with a piezoelectric component works, even I had a lot of problems with the 1.7MHz circuit, but I’ll try to give you a few solutions.
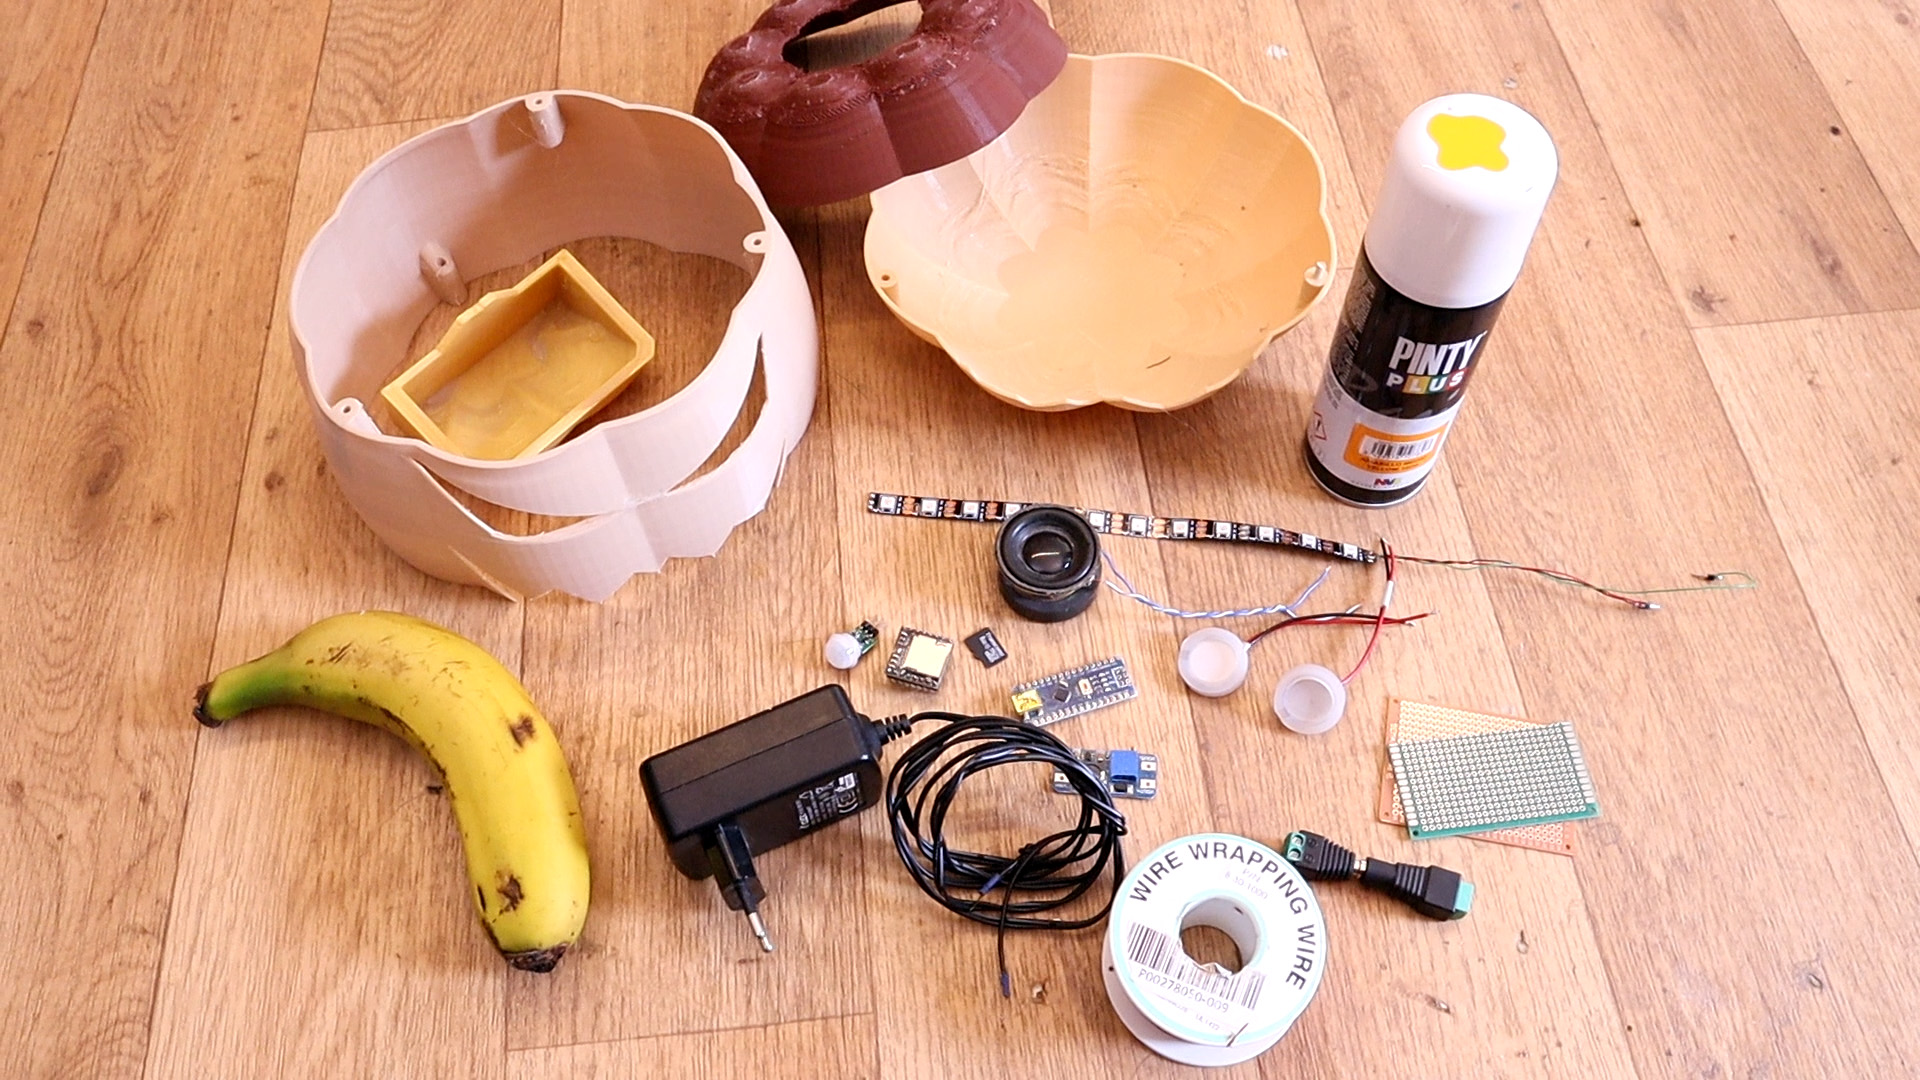
First of all download the 3D files and print them usin PLA material. then see the list below and buy the LEDs, speaker, sound module and everything we need. Make sure you buy the 113KHz mist module, not the 1.7MHz one. We will need a 12V transformer for power, soem DC jacks and a buck converter to get 5V.
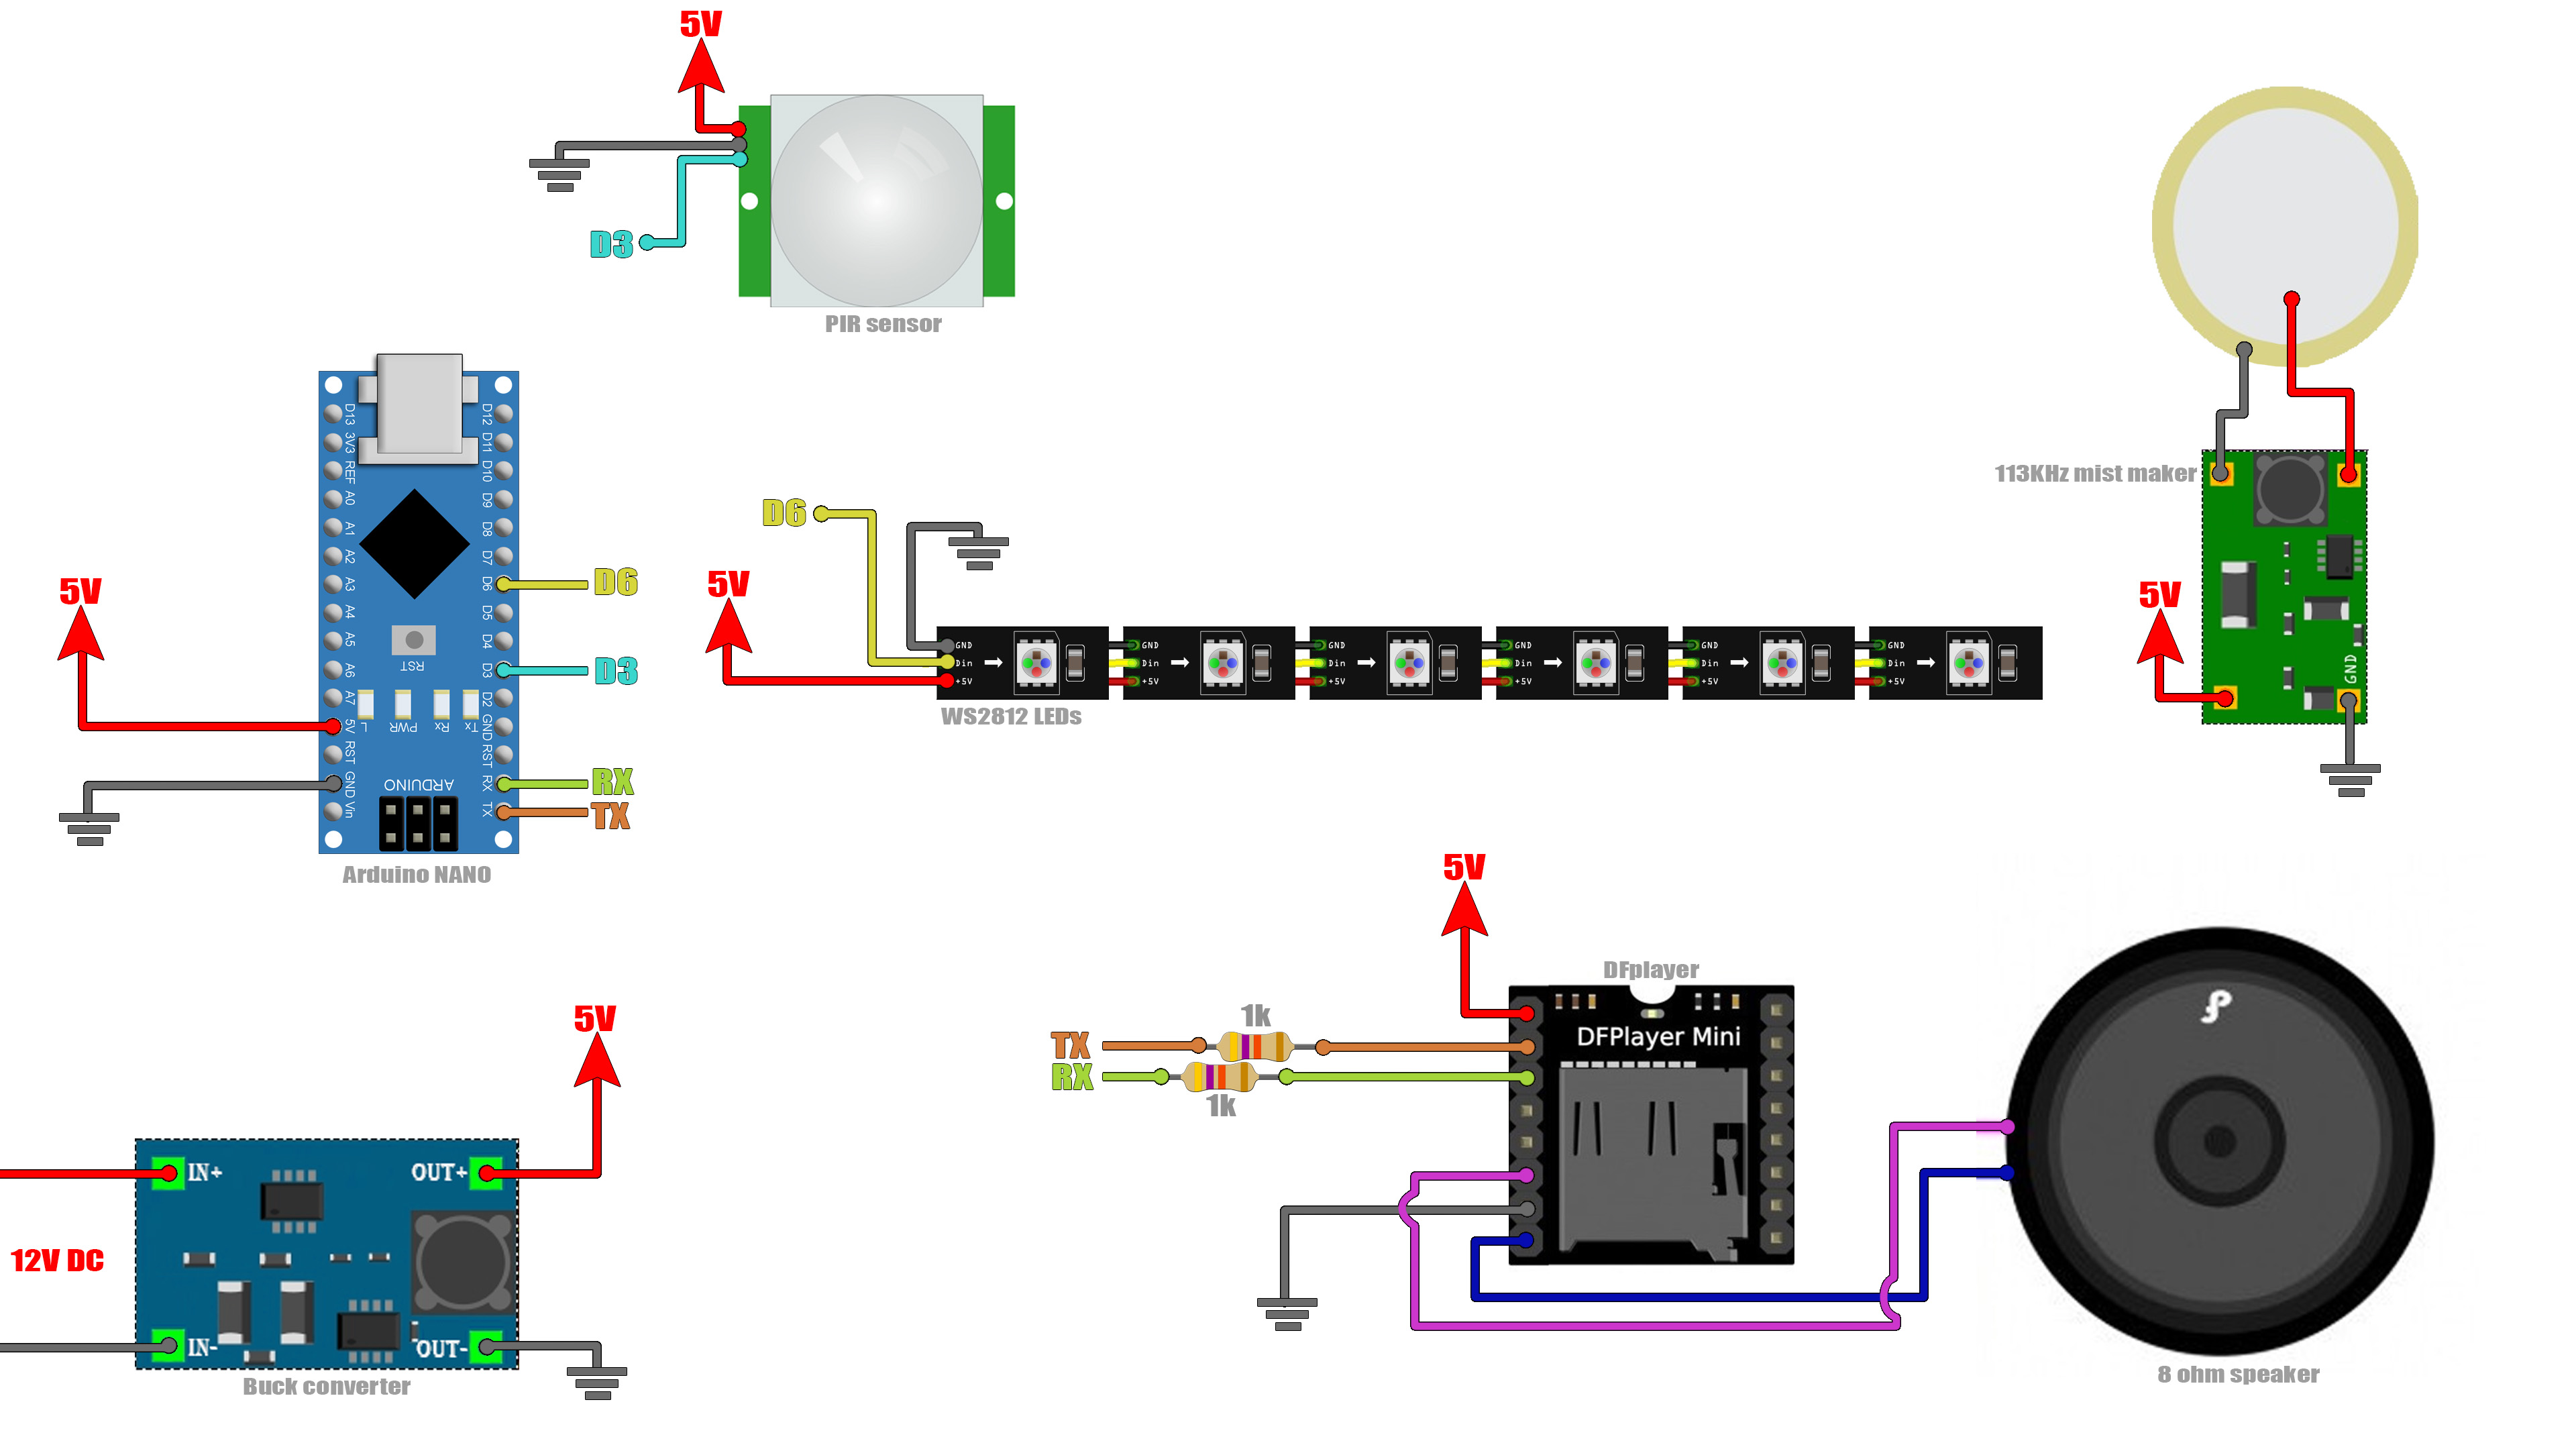
These are the connections below for our project. The 113KHz mist maker is connected separatelly and it will be always on. You could add a switch for that in order to turn it on and off. Then the rest are all connected to 5V from the buck converter. Make sure you set the converter to 5V. Then connect the data to the LEDs and the input from the PIR module to the Arduino. Connect two 1K resistors to the RX and TX pins of the DFplayer and add the speaker. That's it. Then go below and upload the code.
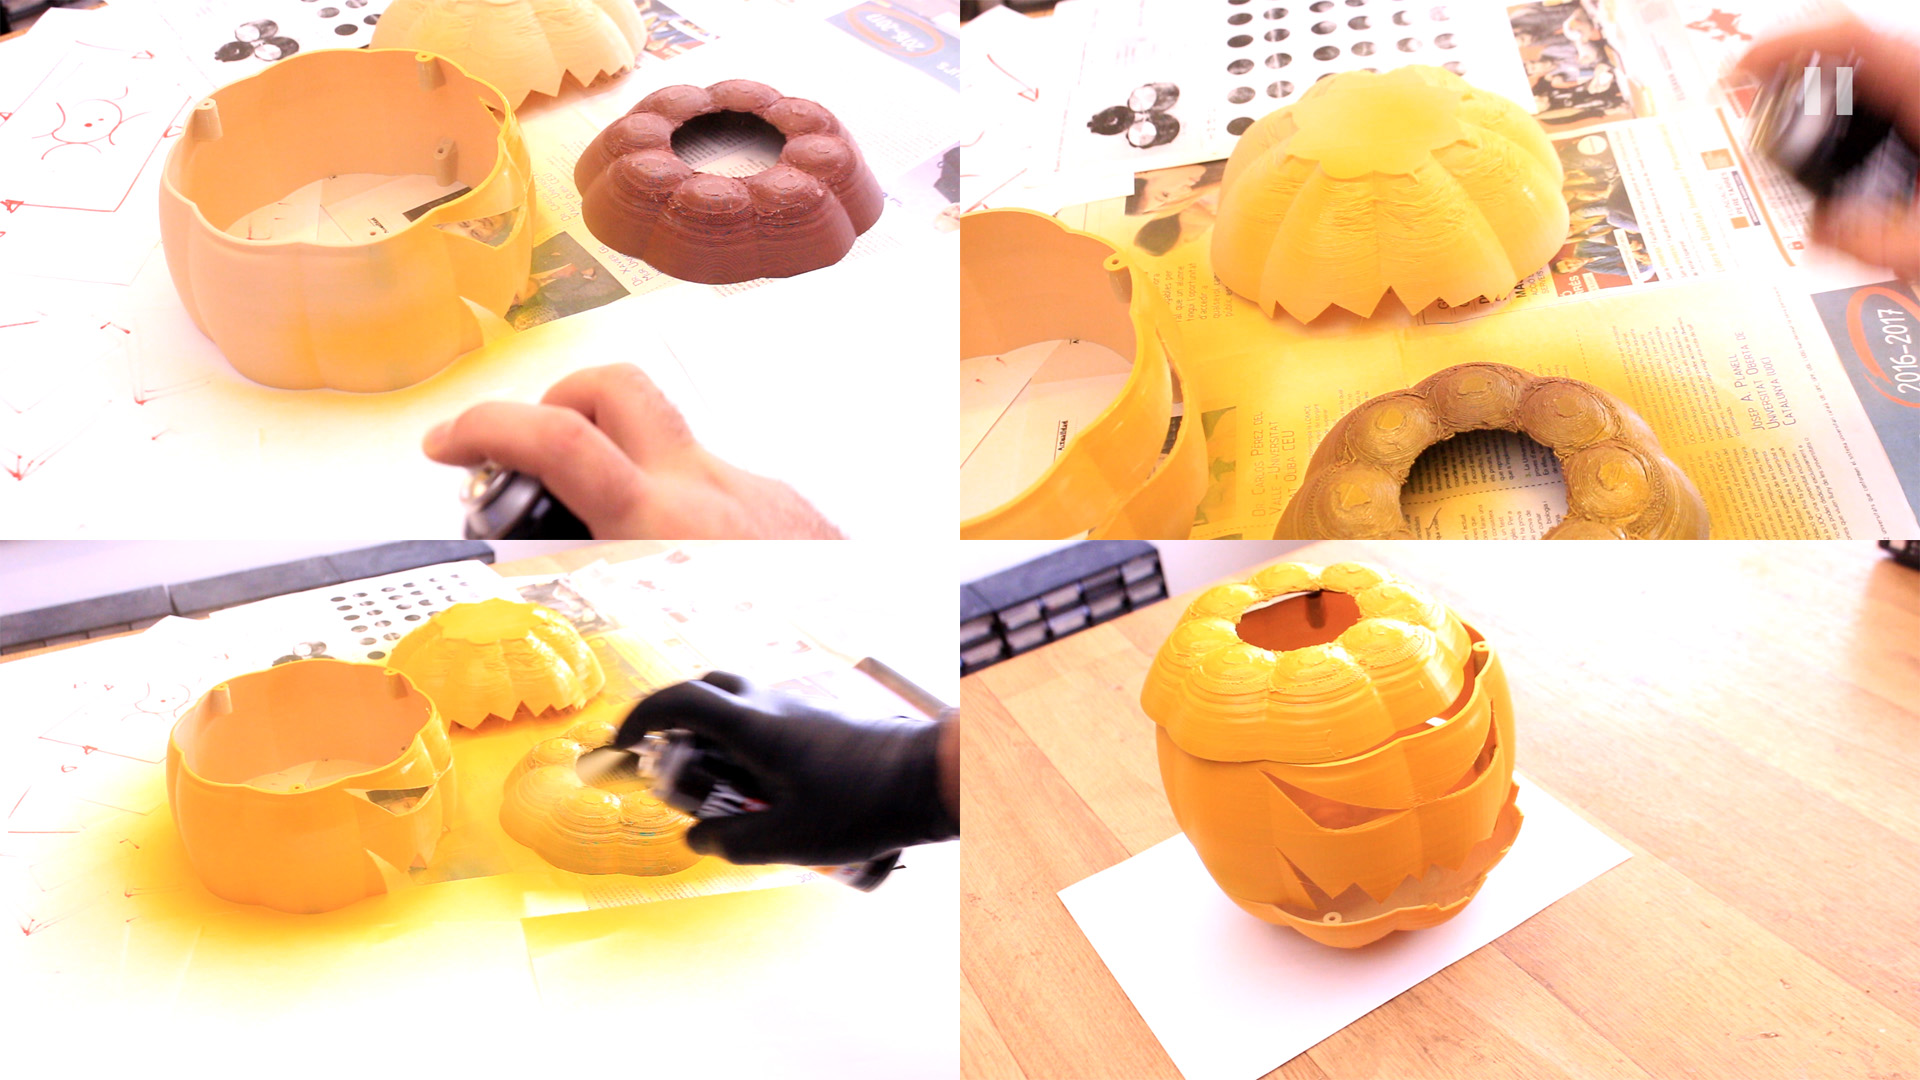
First get the 3D printed parts and spray paint them. We have 3 main parts and a small water container. For the water container add some layers of glue before in order to make sure that it will be water sealed. I've used orange spray paint and applied 2 layers. Let the paint dry a few hours.
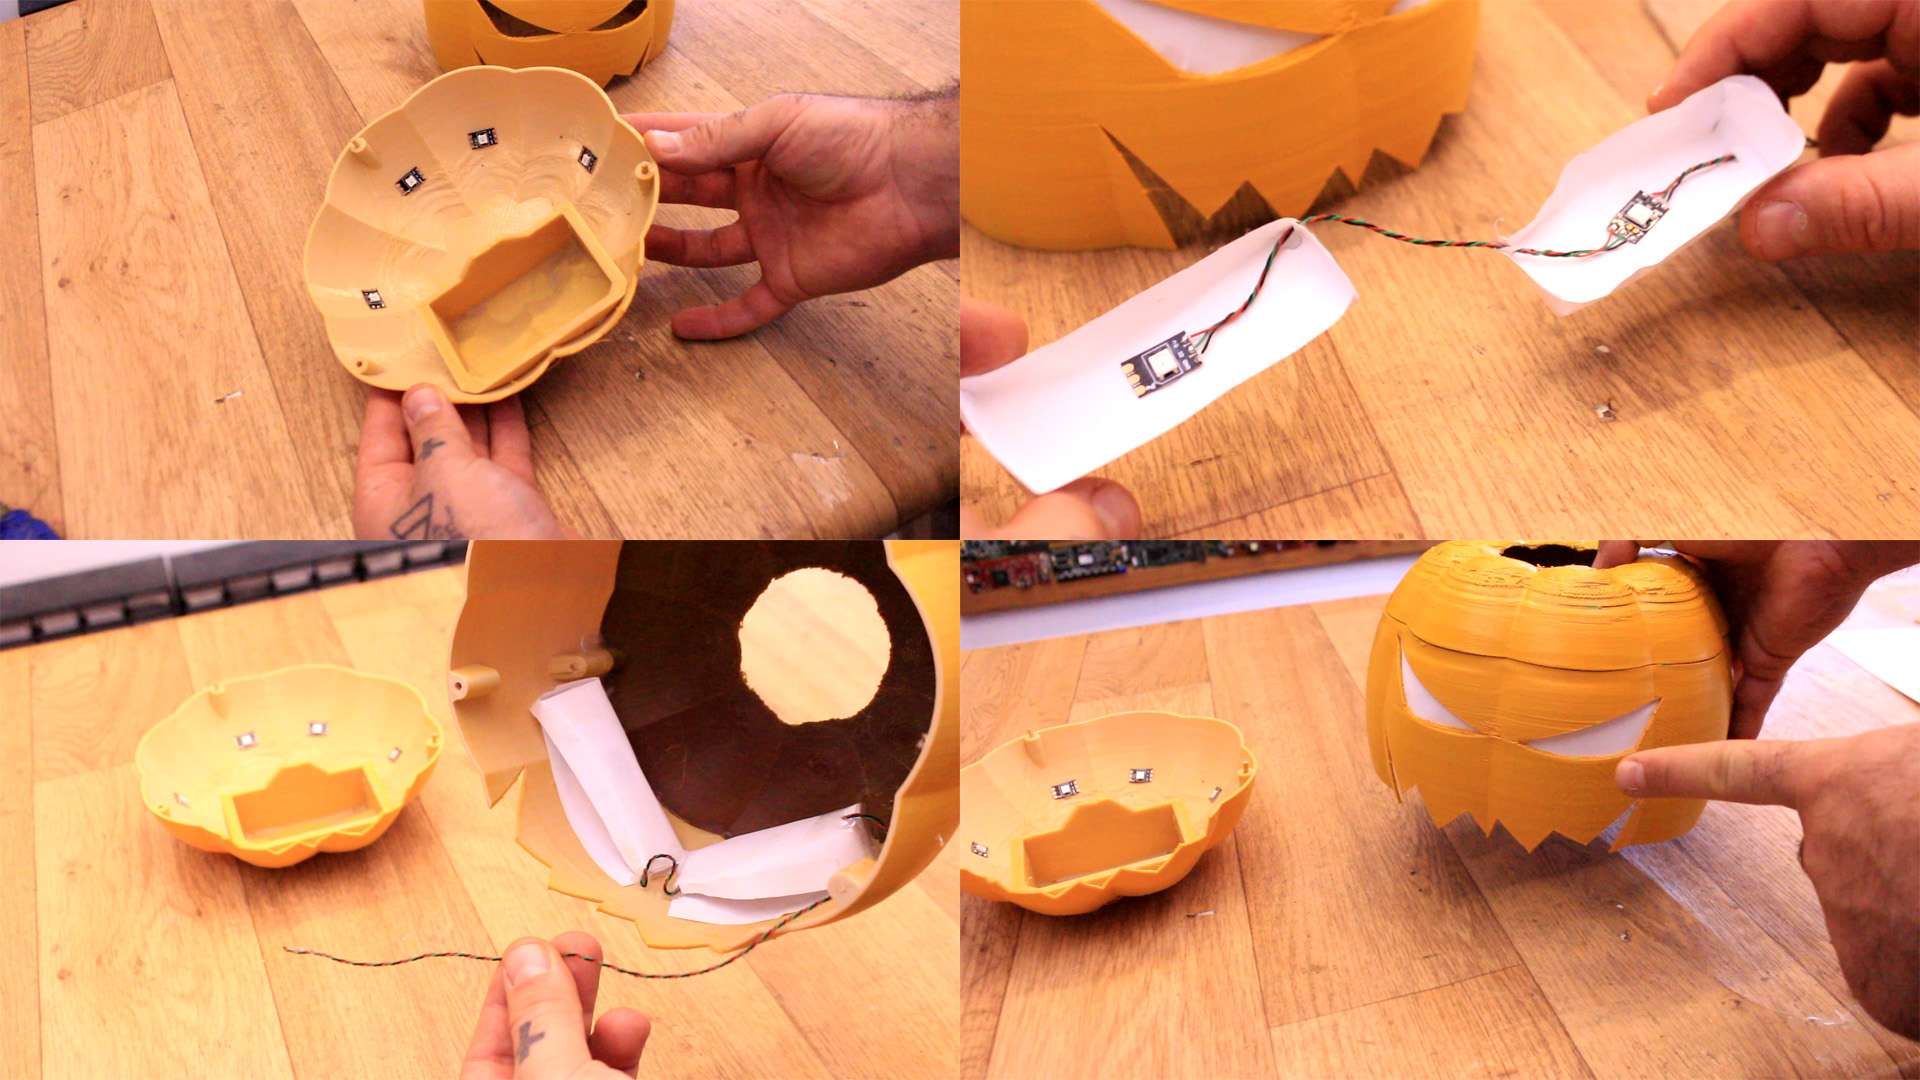
Now, we add the LEDs inside. I've palced 4 on the bottom side and 2 more for each eye. But, for the eyes first glue some white paper on the back of each eye. Then we make some sort of paper cup and glue one LED inside. Connect cables in between for 5V, GND and data for the LEDs. Glue everything inside. The eyes LEDs will be the last in the serial data for the LED control.
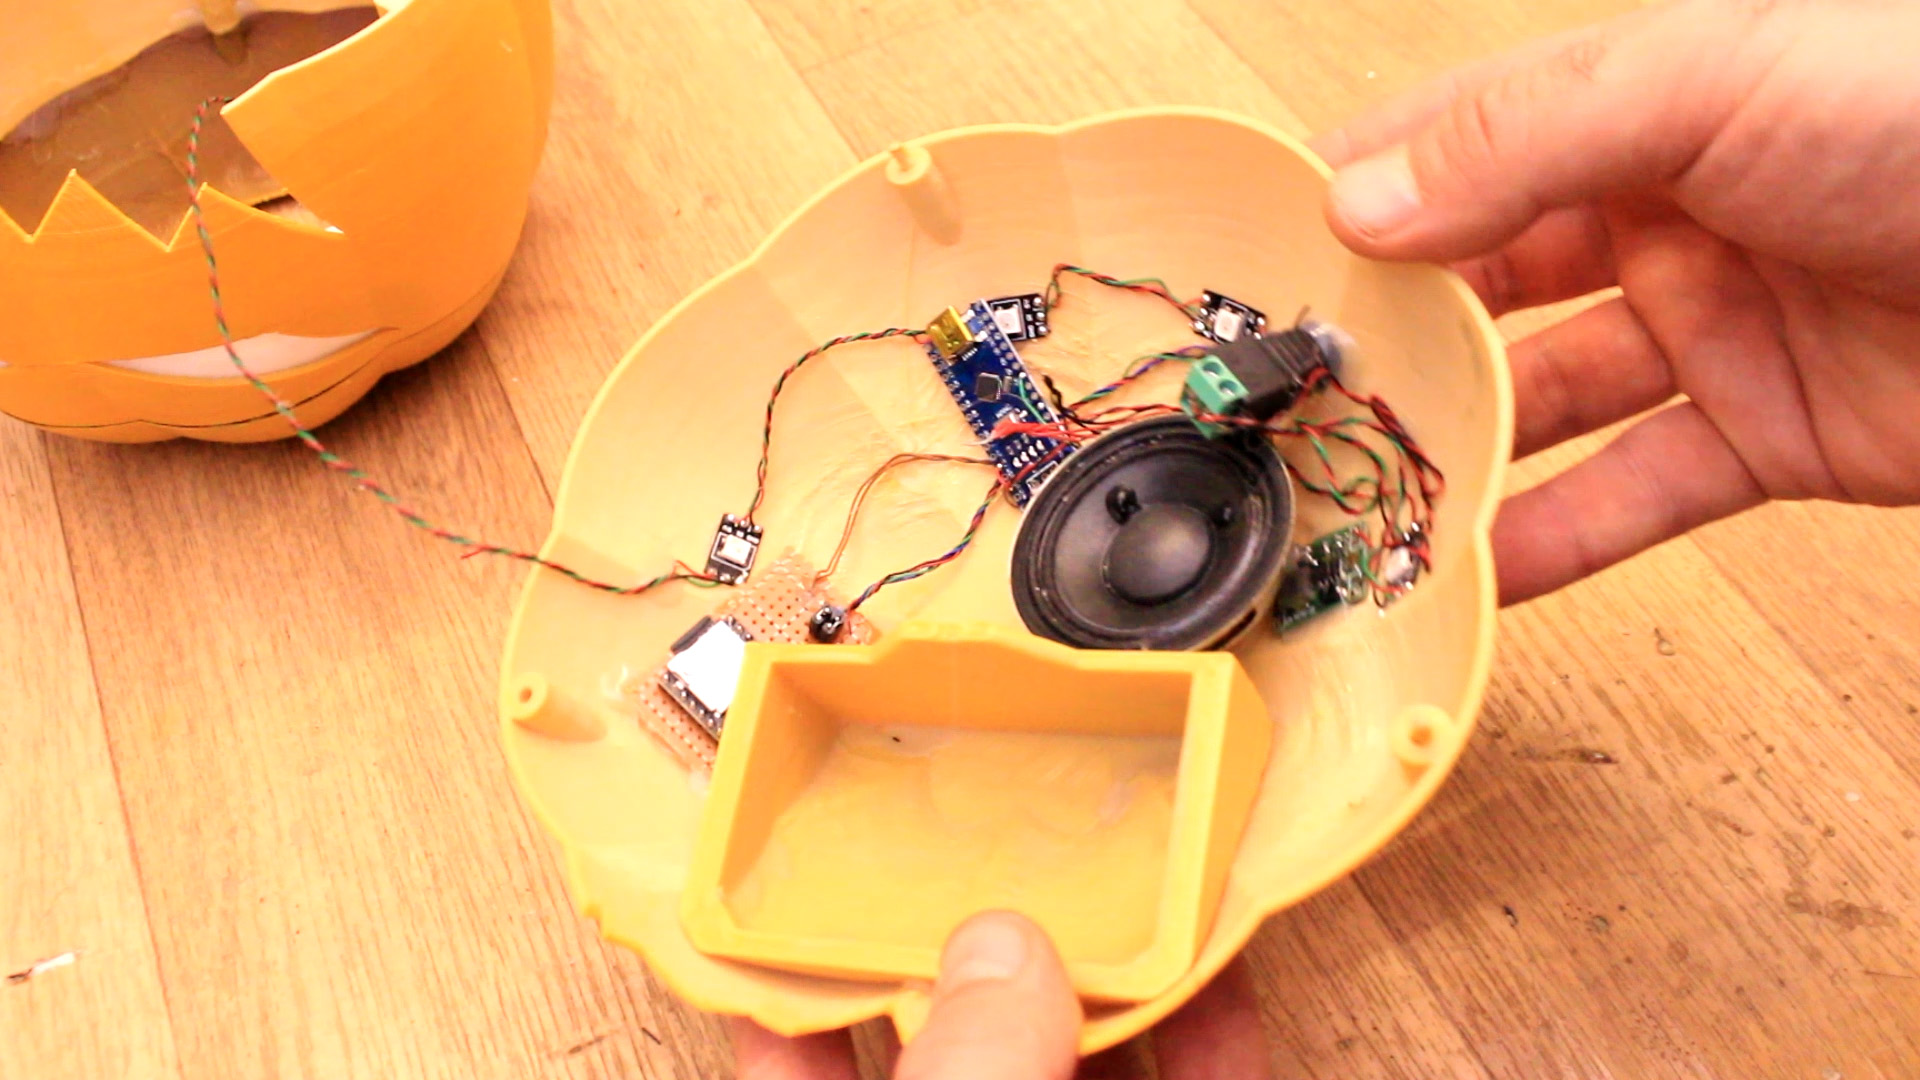
Now I glue everything in place. Follow the schematic. The DC jack will be out 12V. Then connect taht to the buck converter and then supply 5V to all the module. Go below and download the mp3 folder, extract the zip file, format the SD card and copy that folder to the SD card. The entire folder not just the files. Then insert the SD card to the DF player. Glue everything in place and then go to next part and uplaod the code.
The code is long but simple. You need to isntall the libraries for the DF player and the WS2812 LED strip. On the next link you have the code and libraries. So download those and install them to the Arduino IDE. Then compile and upload the code to the Arduino and that's it.
#include <Adafruit_NeoPixel.h>
#include <SoftwareSerial.h>
#include <DFMiniMp3.h>

int PIR_in = 3;
#define PIN            6

//Variables
bool detected = false;
int mode = 0;
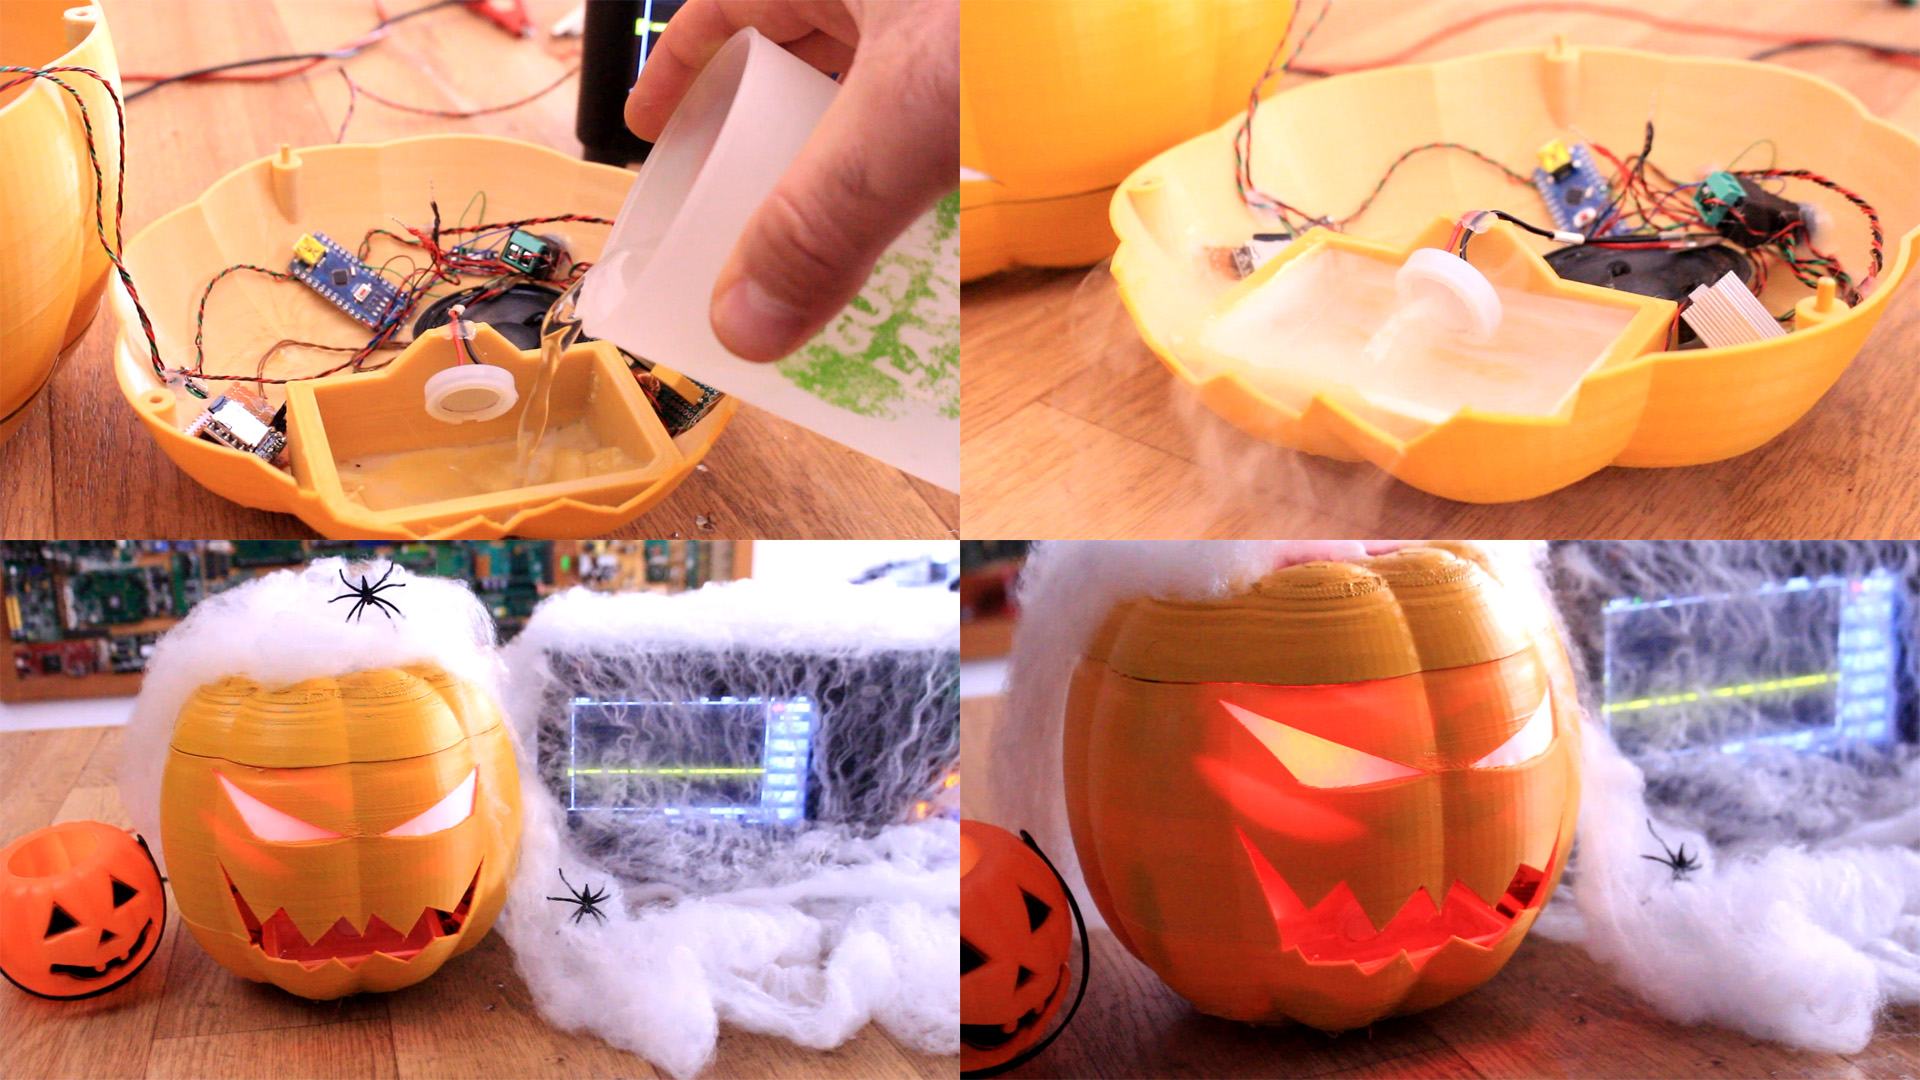
Add water to the container. Place the mist maker inside. Then close the pumpkin and connect 12V. Now move in front of it and scary people. LOL. I hope you like this project....