
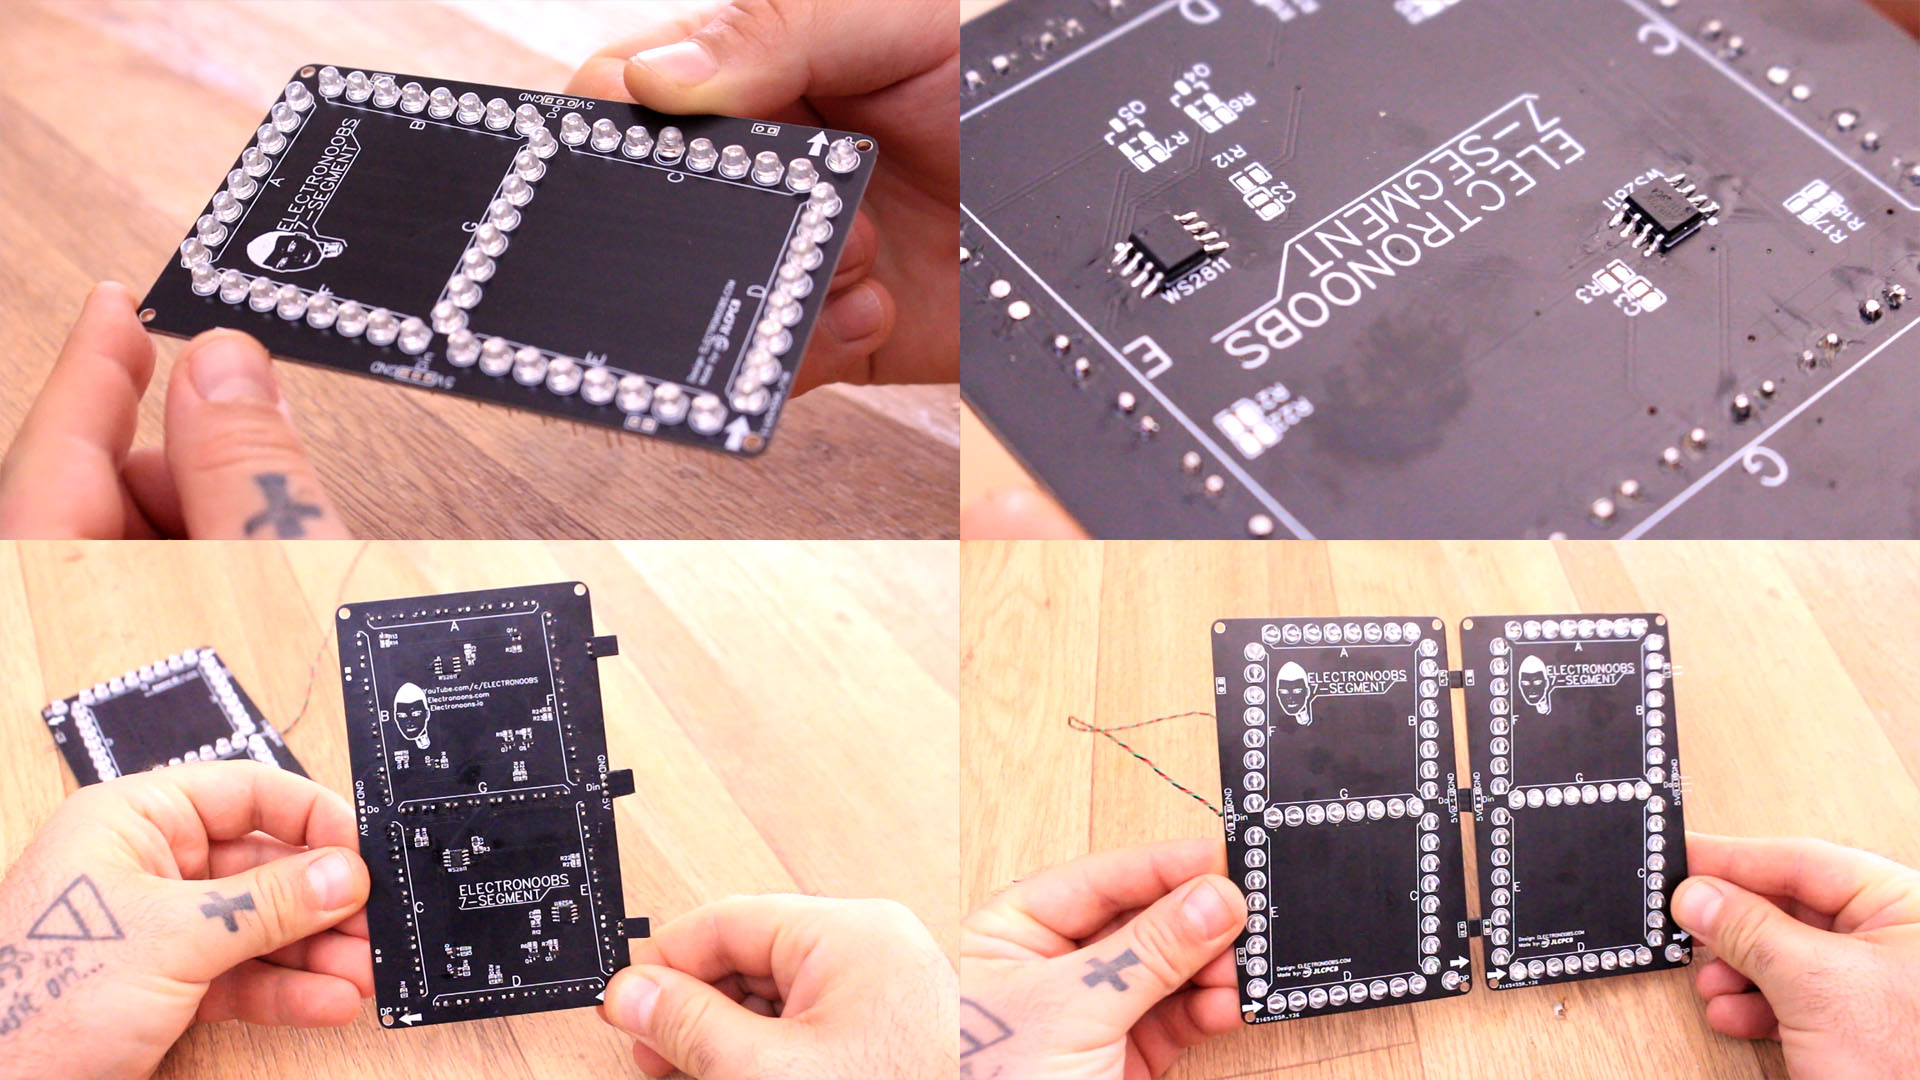
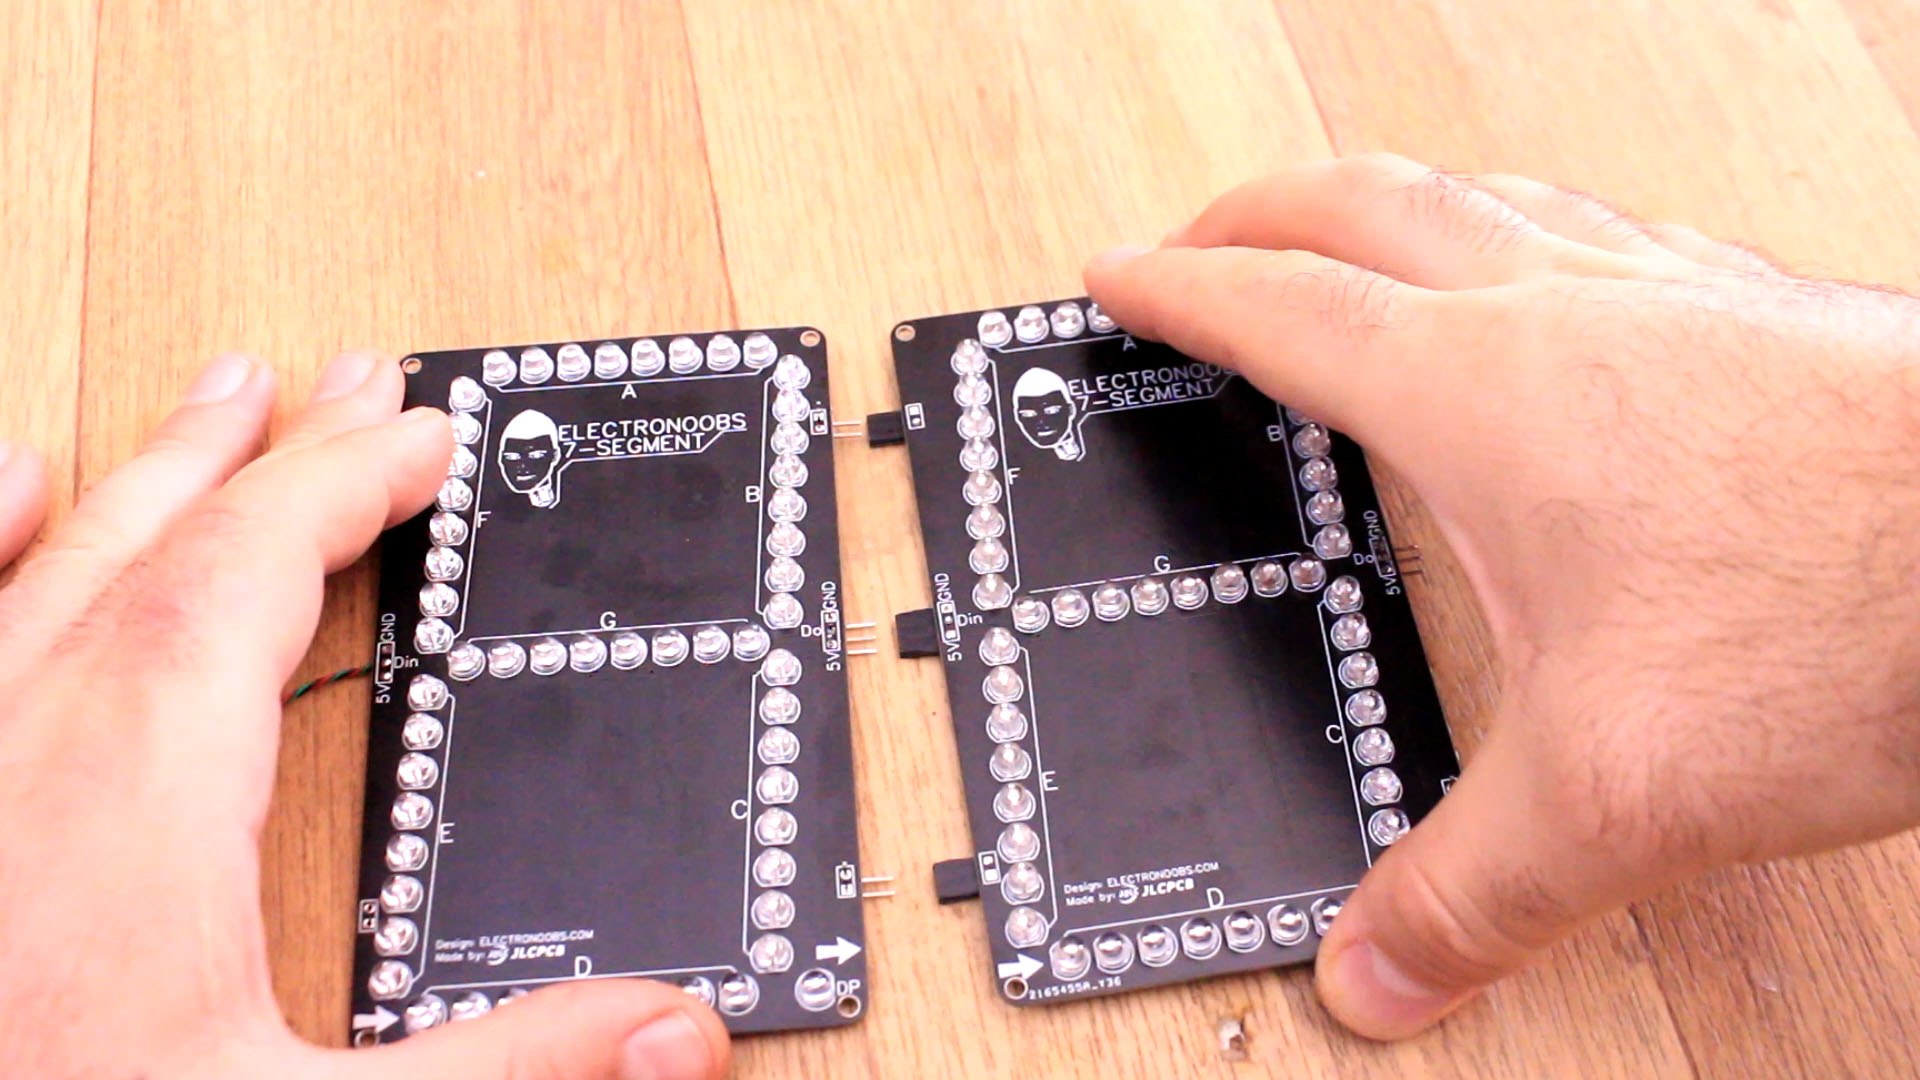
This is a huge 7 segment display. I mean is not huge, but compared with a common 7 segment display module, this one is quite big. The board is 130 by 80 mm. But that’s not the best part of this project. This PCB is controlled in series using just one data pin. If you ever used this WS 28 11 addressable LED strips, you will know how this 7-segment display PCB works as well. Because this one is controlled by the same chip. Actually, 3 chips because each IC could control 3 segments and the PCB has a total of 8 segments including the decimal point. Not just that, but you could place multiple modules in series and control all of them just with one data cable, because the data out from one module is the data in of the next one and so on, so you could place 10 modules in series if you want, all controlled by one data signal from the microcontroller.
For this project we need the PCB so download from below the GERBER files and send it to JLCPCB. Once we haev the PCB we get the other parts. We need 3 drivers and a lot of LEDs. Also a few resistors and 7 transistors. The WS2811 drivers can't deliver too much current for 8 LEDs in parallel, so I'm using the transistors to do that. See the list below.
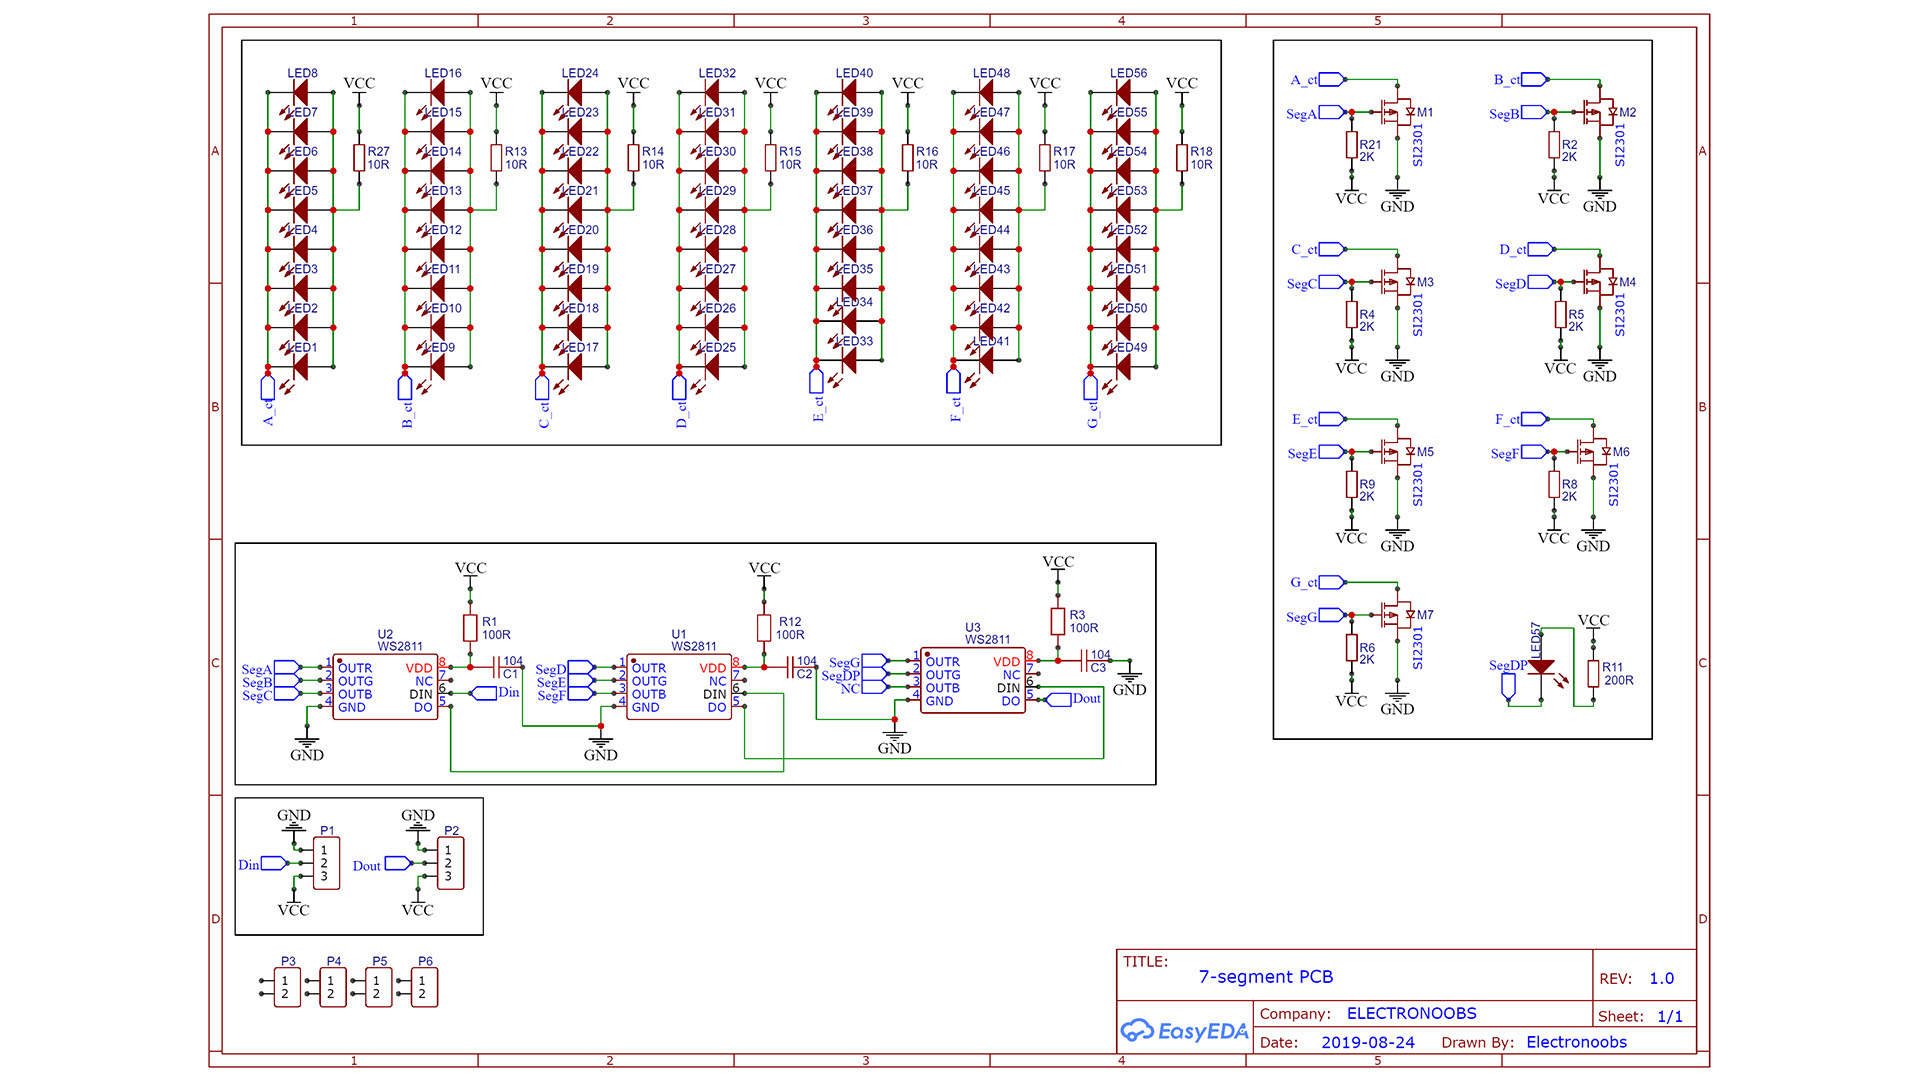
See the schematic below. We can see 8 LEDs in parallel for each segment and one separated LED for the decimal point. Sicne the WS2811 can't control 8 LEDs at the same time because not enough current, I'll use some PNP transistors to do that. Each transistor has a 2K pulldown and will be controlled with a PWM signal form the WS2811 driver. We will also need the drivers and a few more female and male pins to palce around the PCB. We use some resistors to limit the current.
Ok, making the PCB is very easy. Get the PCB, see the schematic and the components we need and mount the PCB. That’s very easy. I first solder all the LEDs and we need a total of 57 LEDs. Make sure which one is the cathode and which the anode and don’t solder them backwards. Then you can trim the pins of the LEDs to length. Now I have all LEDs in place.
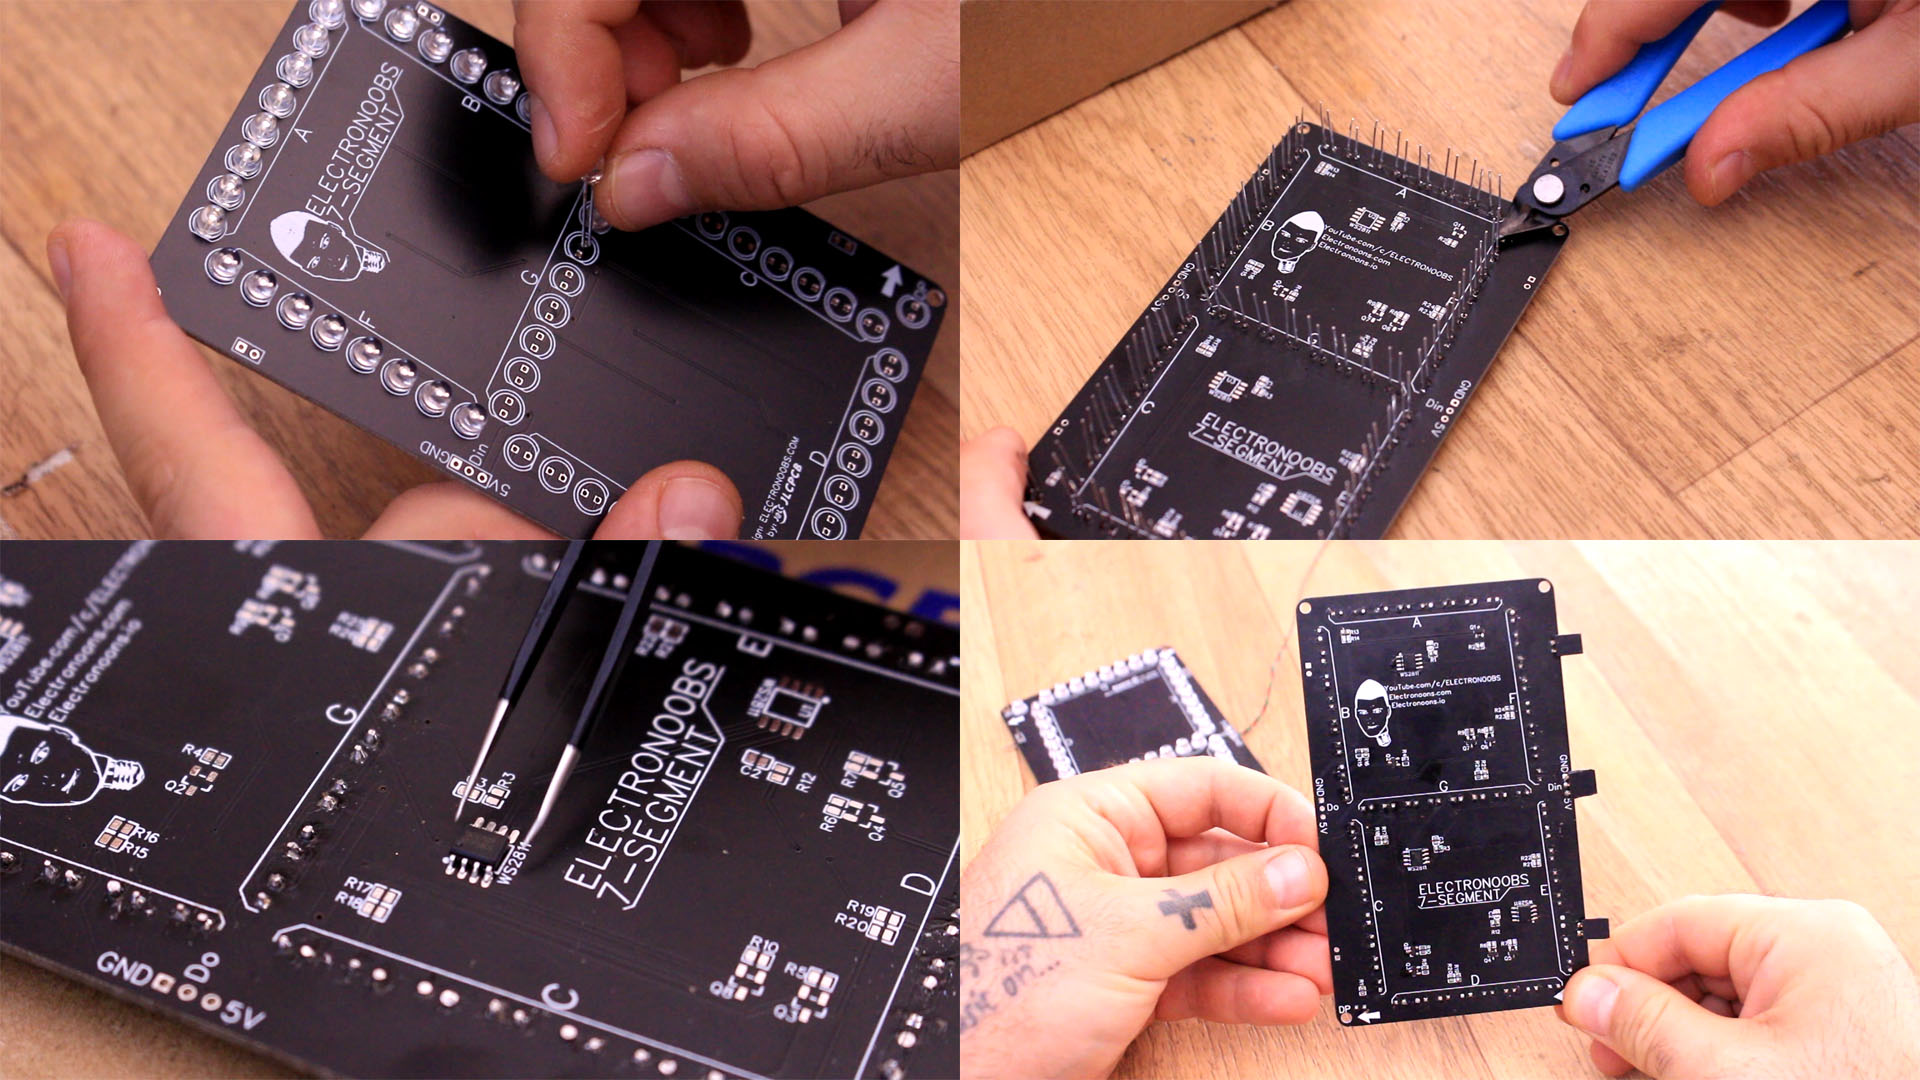
Then I solder the 3 ICs on the back of the PCB. Then the small msofets and and the rest of the resistors. I the connect 3 thin wires for 5V, GND and data in for the first module. The PCB has some more pins in order to connect one PCB to the other. So on the left side we have female pins and on the right we have male pins and we can put PCBs together.
As for the Arduino code, you will need the Adafruit neo pixel library for this so download that from below. In the code I’ve created a few functions so we define the Arduino pin that we will use for data and the amount of modules, in case 2 because I have only 2 PCBs. See code in next part.
Below you have the code for the 7 segments display test. The code will hAve a few examples to show characters, numbers and also control each segment separatelly. We have two voids for that. One is to show an entire character or number and the other is to control each segment separatelly. Downlaod the code from below and also the Adafruit library from the next link.
//Example 1
//Could show 0, 1, 2, 3, 4, 5, 6, 7, 8, 9 and a  b  c  d  e  f  h  l  o  p  s  u  x(DP)
show_char(0,0);       //module 0 show a 0
show_char(1,'a');     //module 1 show the A
delay(delay_time);
show_char(0,1);       //module 0 show a 1
show_char(1,'b');     //so on...
delay(delay_time);
show_char(0,2);
show_char(1,'c');
delay(delay_time);
show_char(0,3);
show_char(1,'d');
.
.
.
Connect 5V and GND to the Arduino from the 7 segments display. Connect the data pin to pin D6 of the Arduino. Uplaod the code and see the results. That's it. I hope you like it. Consider supporting my work on PATREON.


