
The screen will go on the front part of the plywood base as you can see below. The HDMI driver, I’ll glue that below the base so we have access to the connecters. First, I fix in place the LCD with just a little bit of hot glue around the frame. Make sure it will have the data connection pins on the outer side of the prompter so we could connect the driver below. Now, connect the LCD to the driver. It has the data strip connector and also a 12V connector for light. When the driver is connected, glue that below the plywood. But, make sure it will have enough space between the driver and the tripod. You don’t want the tripod to touch the driver, so measure that before you fix the driver in place. I also glue the power DC connnector on the back side of the prompter, so I can later connect 12V here. Ok, now we can give the setup a test.

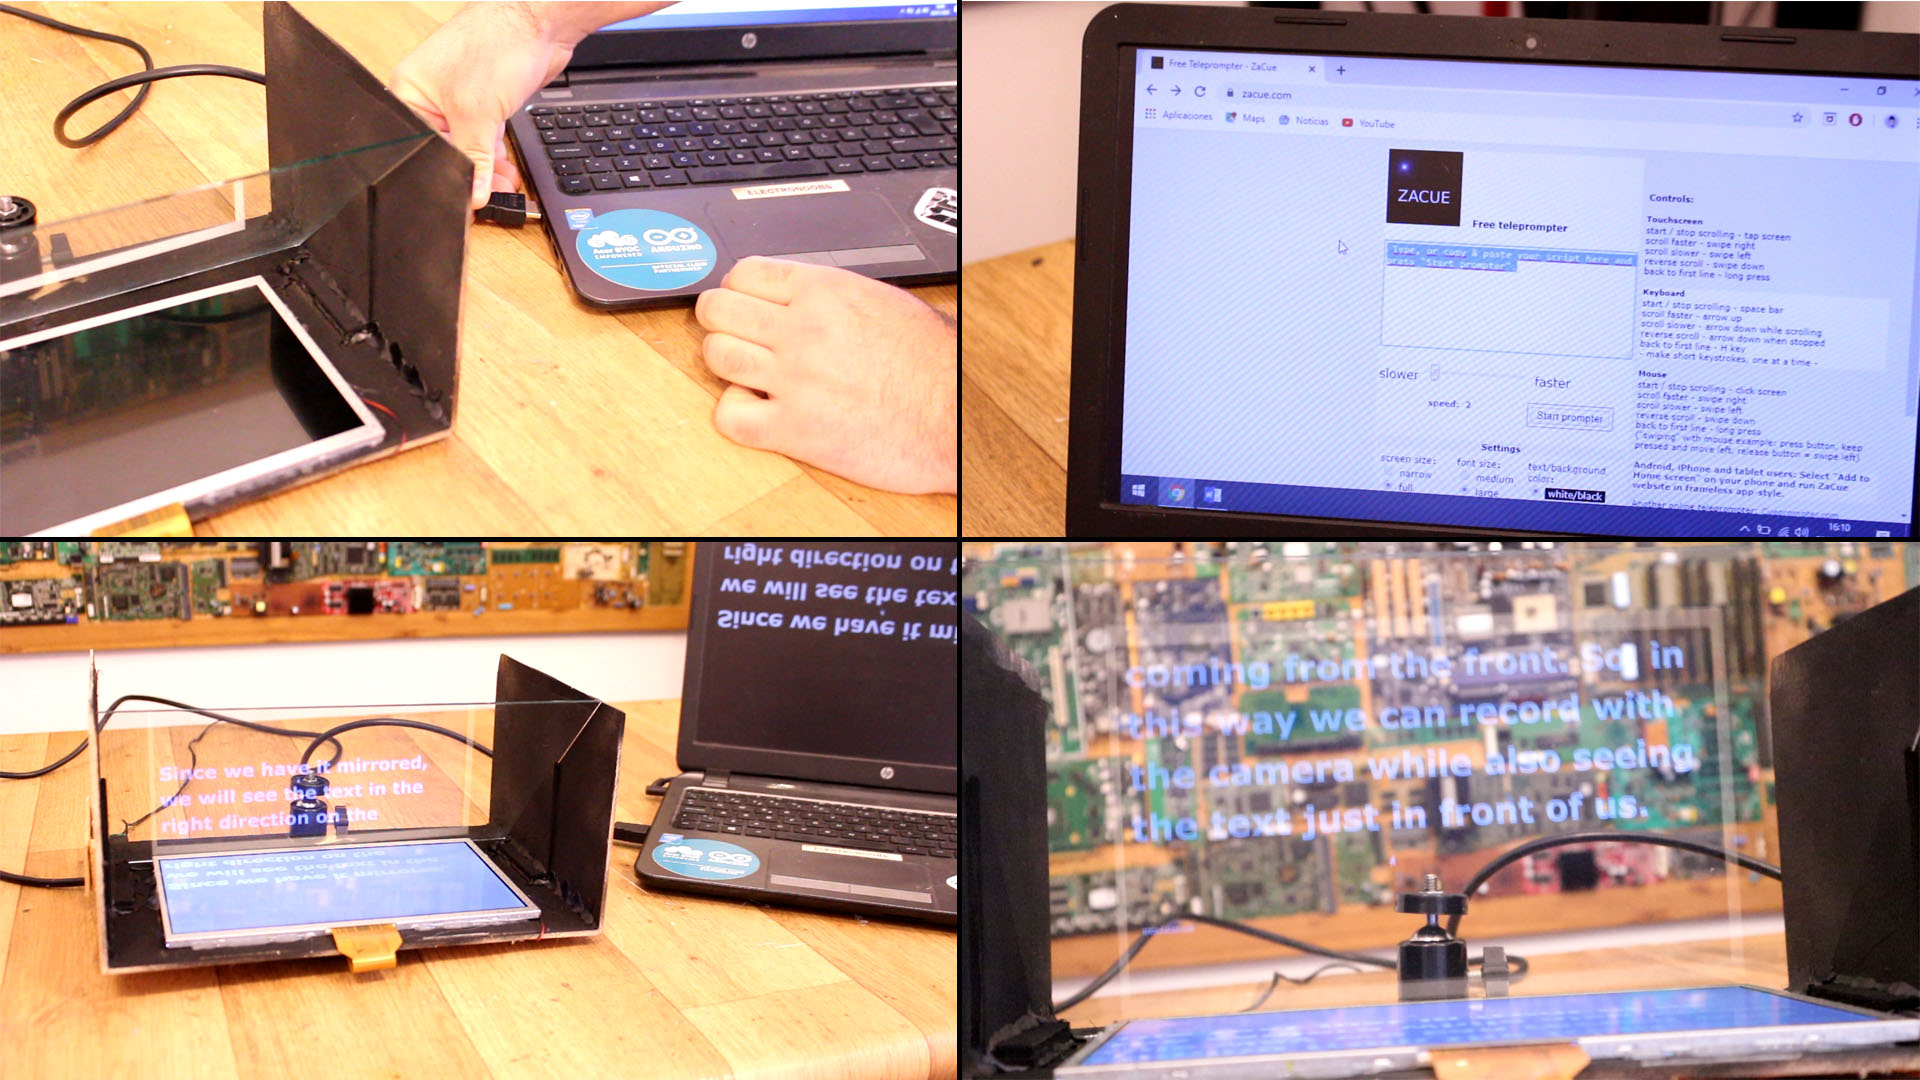
Connect the HDMI cable to the driver. Power up the board with the 12V DC transformer. Then connect the HDMI cable to the your PC. Then open your internet explorer and go to zacue.com or any other free prompter website. Paste your text here, select the font size, the speed, background color to black and the mirror settings. Then press prompt and the text will start scrolling. Since we have it mirrored, we will see the text in the right direction on the reflection glass. So, the system works, but we need a black background so we better see the text, but also to protect the camera against unwanted light or reflections. Otherwise, we will see reflections in the camera, and we don’t want that.
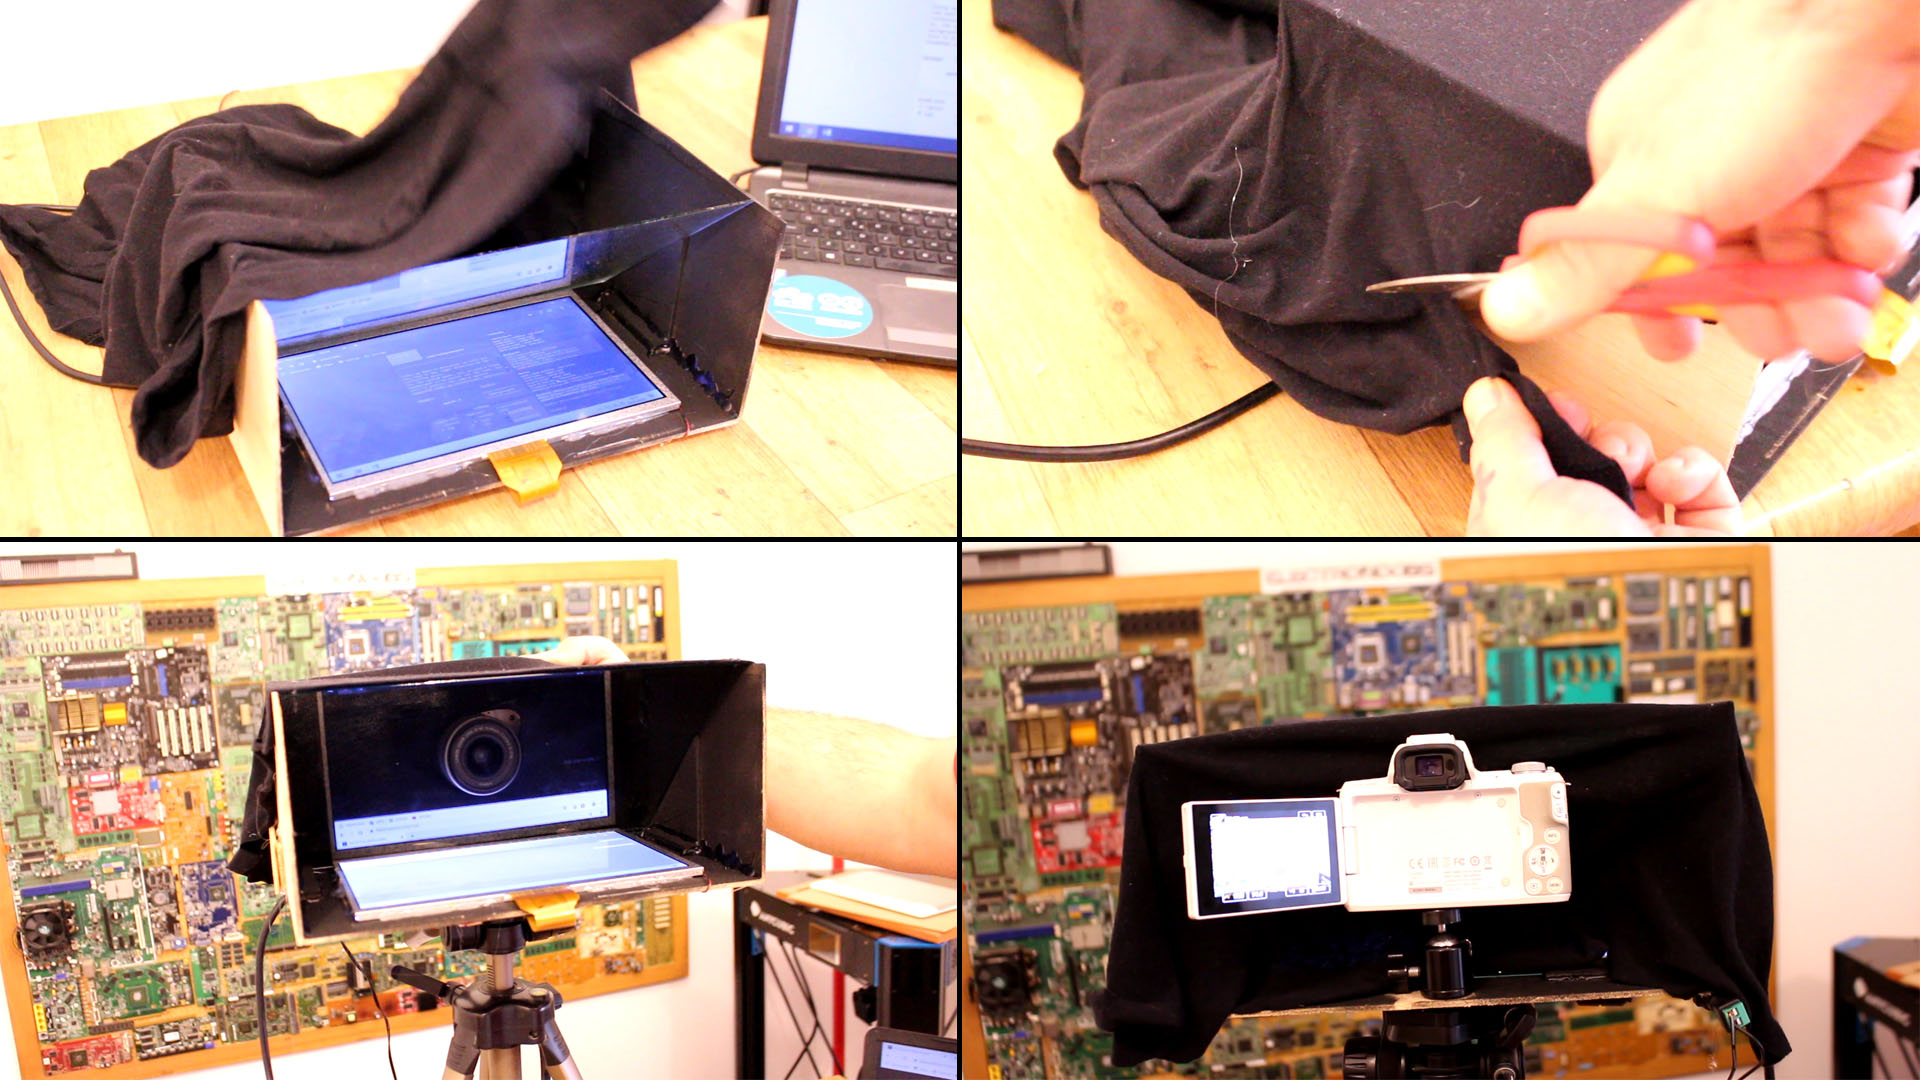
Final step is to add the black material. Place that over the glass, and also cut it to s smaller size. I glue it all around and leave a hole in the middle so only the camera lens will pass. In this way we wont see the white color of the camera. Now we can place this on a tripod, connect the HDMI cable and start reading the text while recording at the same time. Of course, you could make yours bigger and a lot more better looking. In my case, I just wanted to work. The looks are not important for me if it dose the job.
So guys, I hope that you like this project. You have the part lsit, the website, the sizes for the wood and all the steps here on my website. If you think my work is helping you, consider supporting me on my PATREON page. Thank you very much. Sahre and like!


