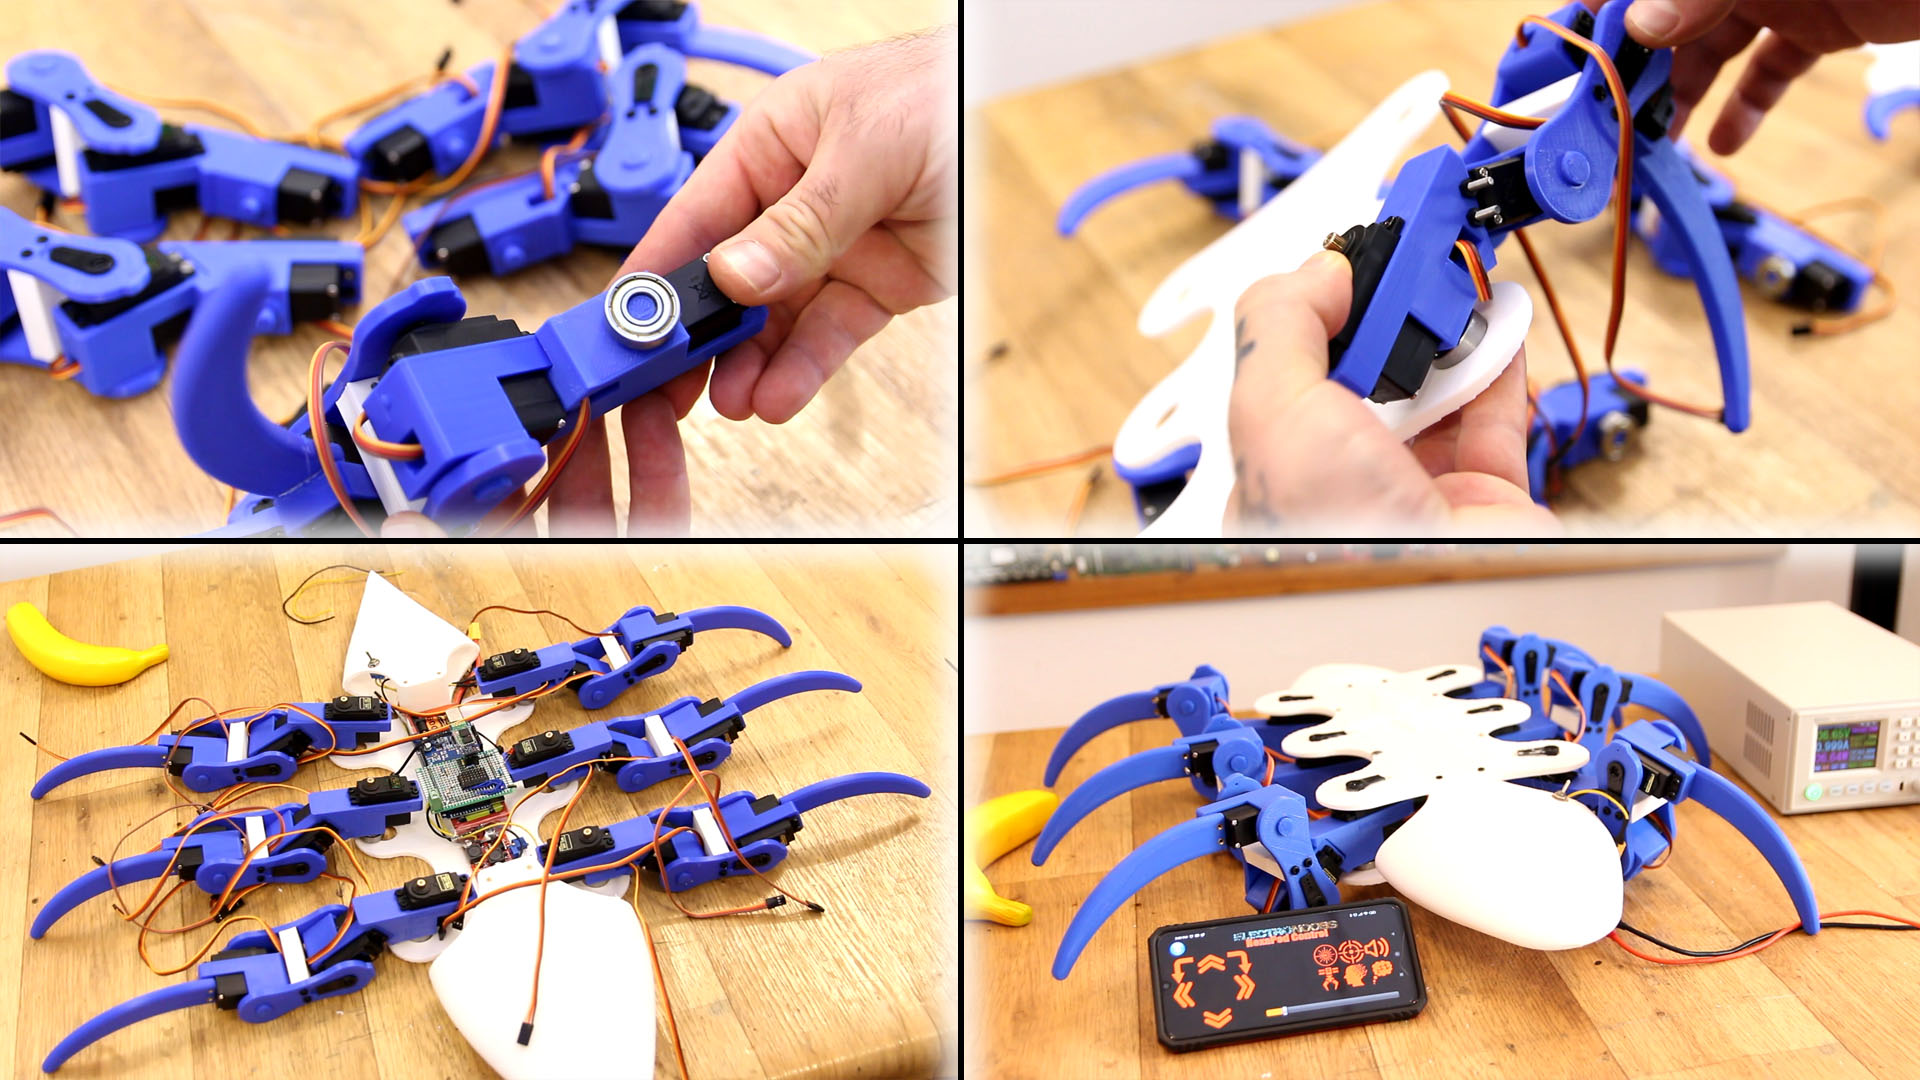
I wanted to make this project for a long time. Inspired by a projet of HowToMechatronics from a few years ago. This robot is fully 3D printed and is just the first version and is sensorless. In the future I want to add a lot more controls and sensors. This robot has 18 high torque servo motors, runs with an Arduino MEGA and is controlled by Bluetooth with commands from a smartphone. I've made a simple App to control it. See the part list, the 3D printed files, the code and all you need in this tutoprial step by step.
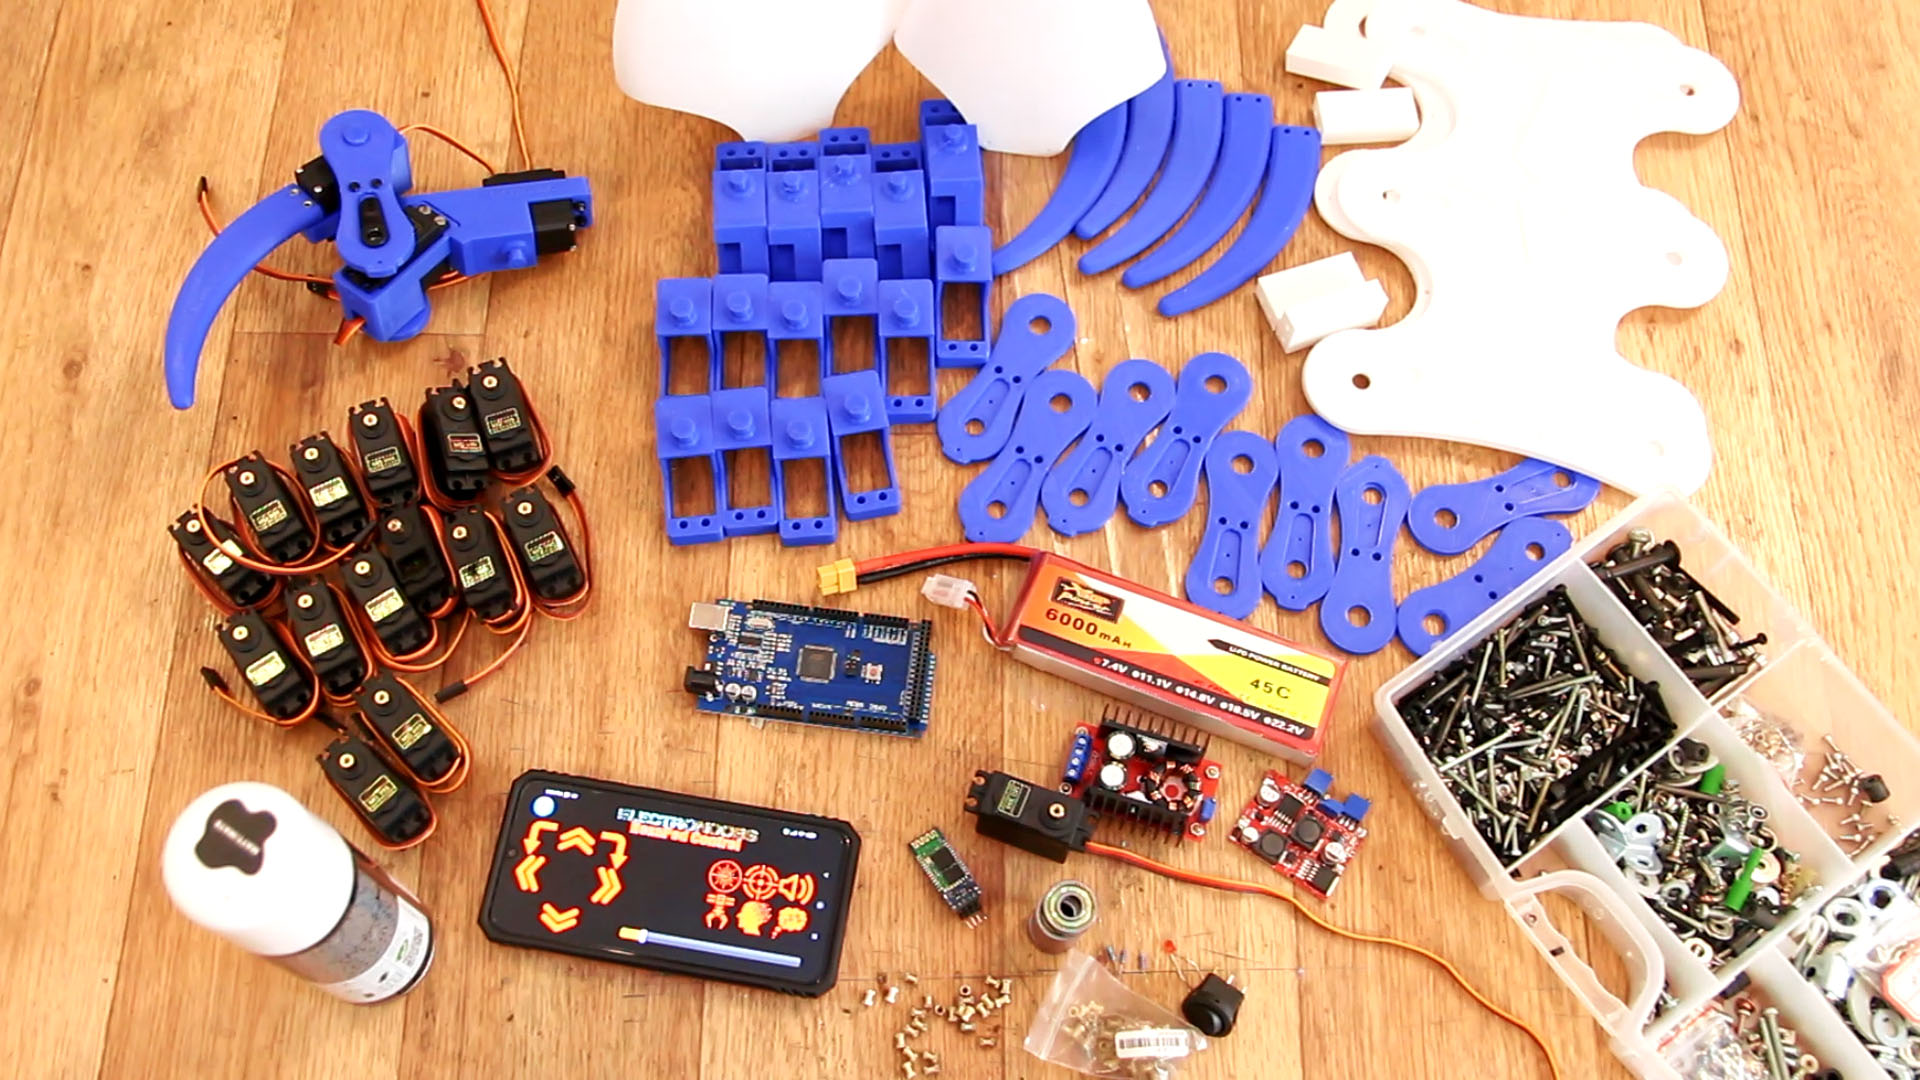
To make this project we need a lot of 3D printed parts and a few more components but a lot of manual work. The electronics list is very small, the rest are just plastic parts, screws, glue, ect. See the full part list below with what I've used. The battery I'ver used was 7.4V but is better a 11.1V one. We must use an Arduino MEGA becuse it ahs more pins and memory. The STL files are ready to be printed and need no support.
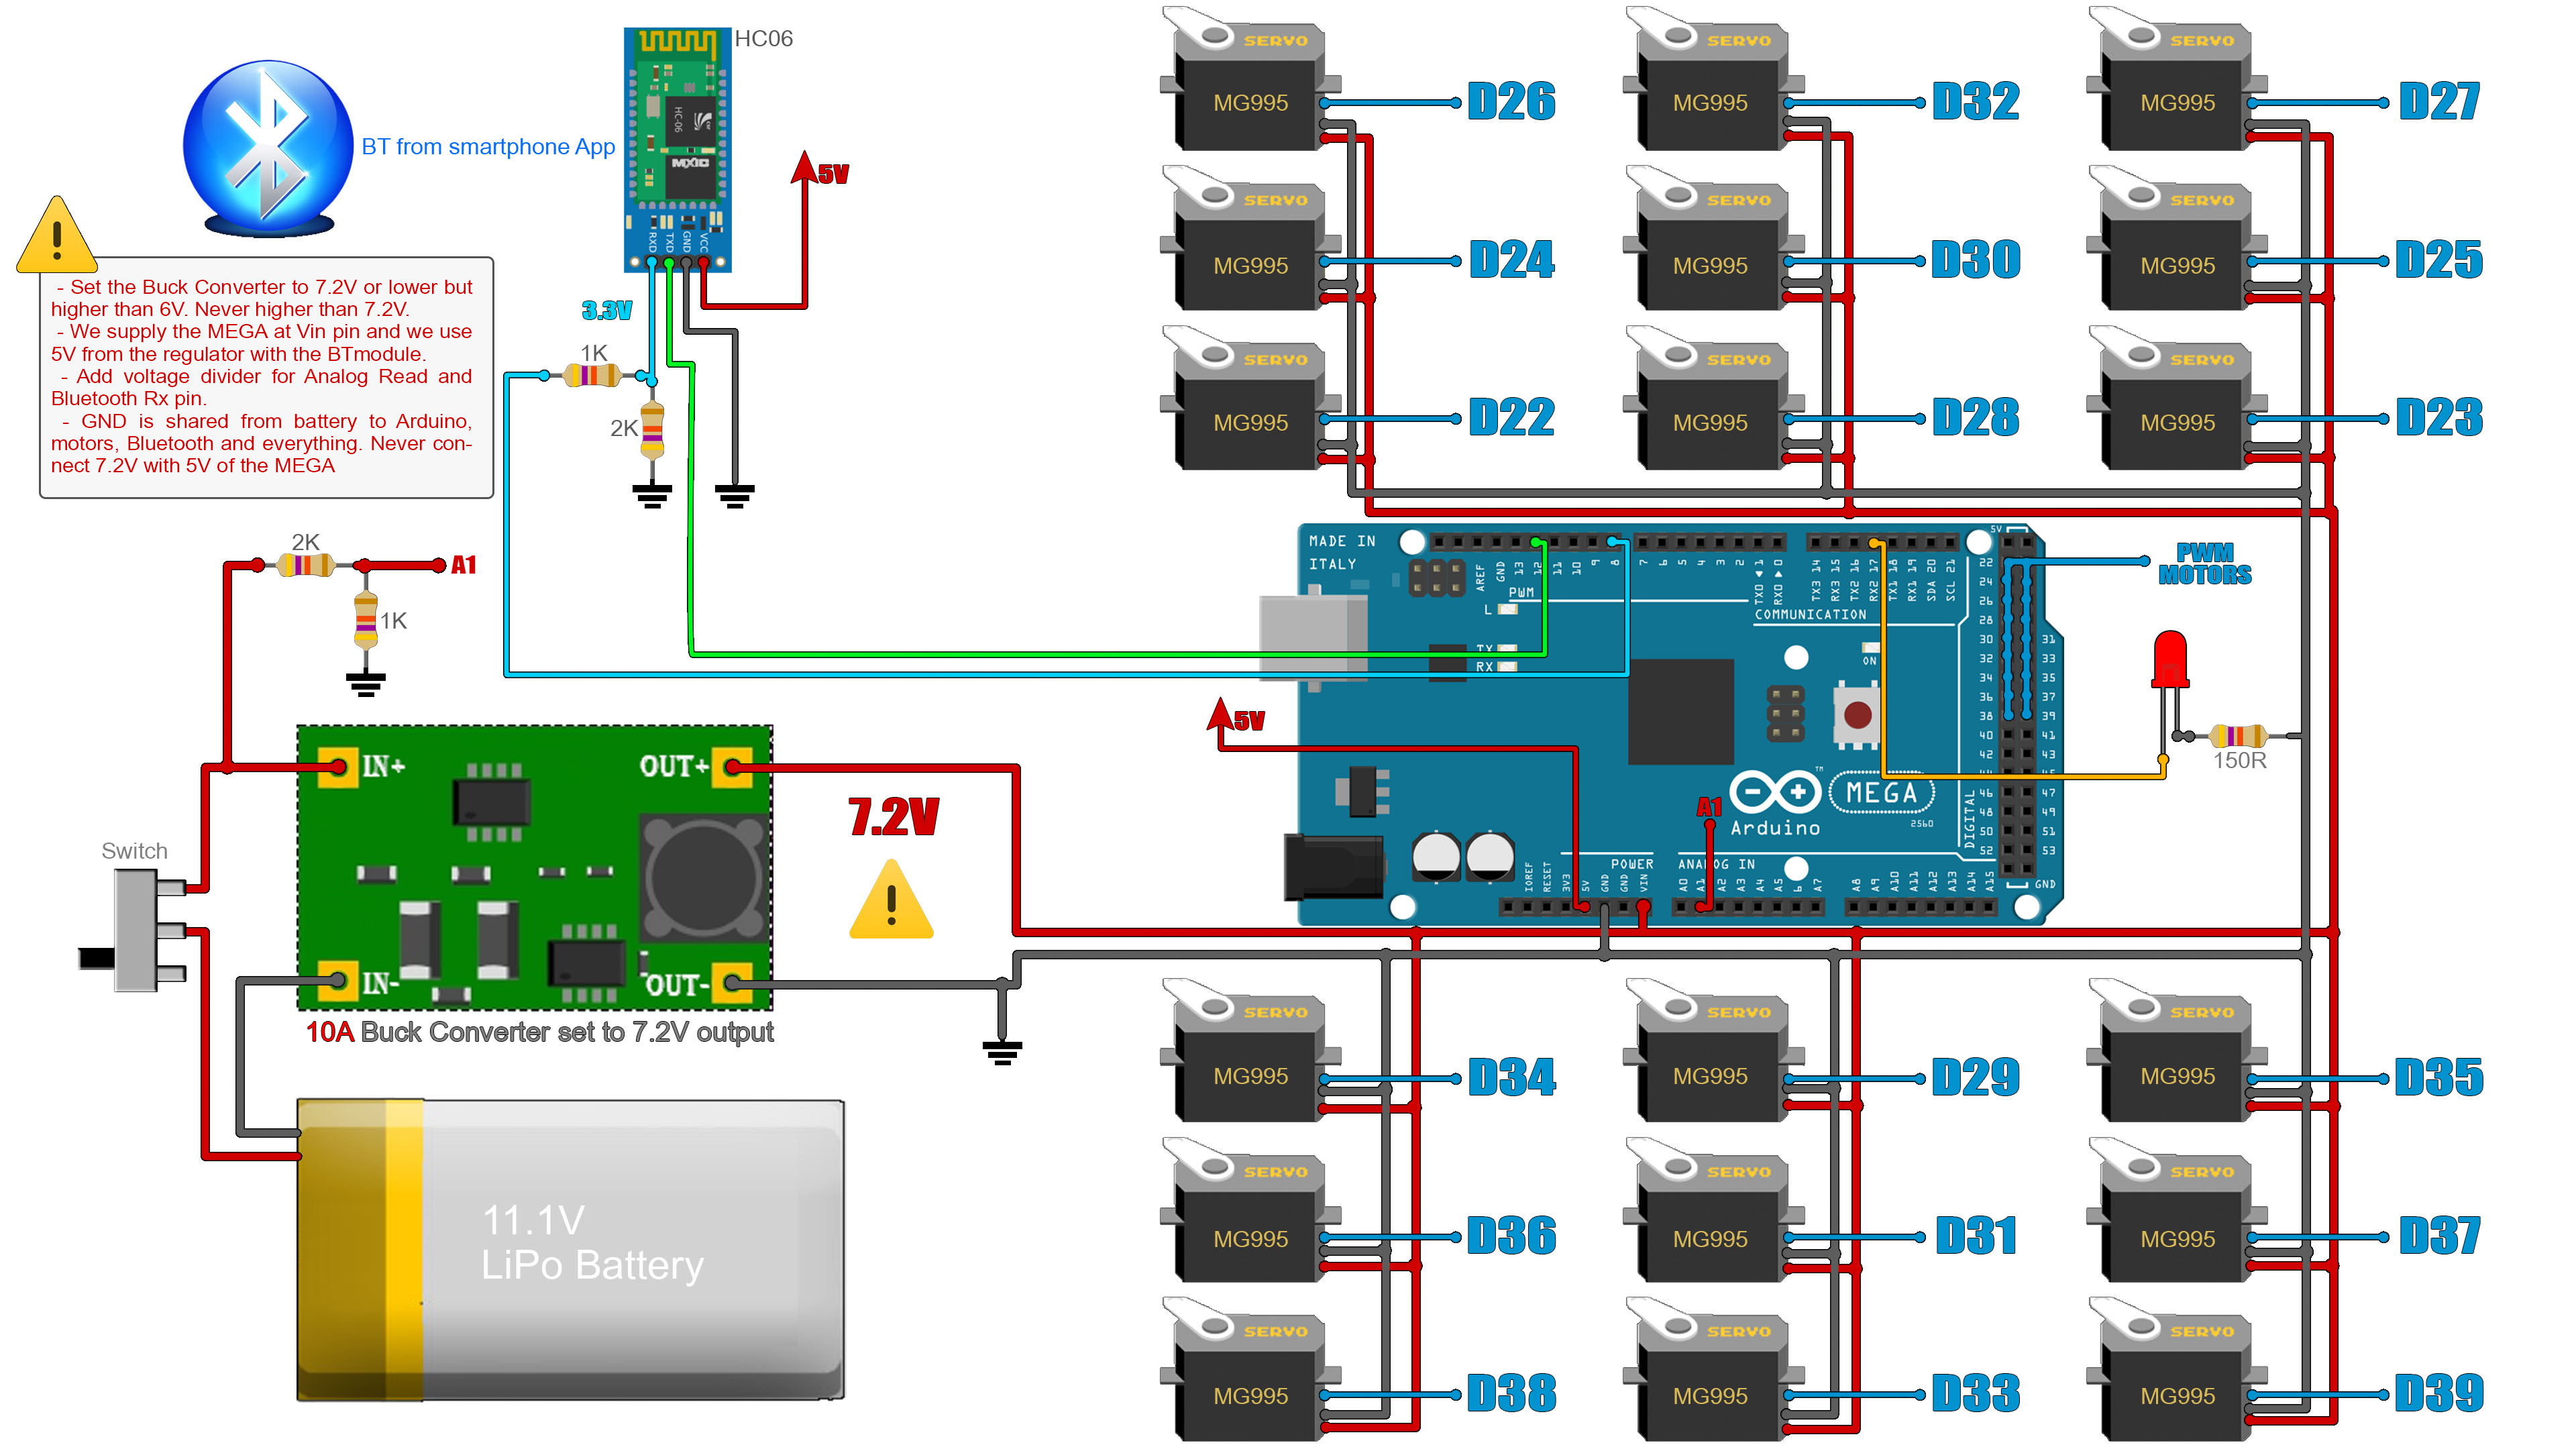
The connections are very simple but we have a lot. First connect positive pin of the battery to the swithc. From the swithc and battery we connect to the buck converter input. Set the converter to 7.2V. This 7.2V will then be connected to all servo motors and to the Vin pin of the Arduino MEGA. Share GND. Connect the Bluetooth module and remember to add a voltage divider to the RX pin to lower the voltage to 3.3V. Connect the PWM pins from the MEGA to each servo motor as below. Also add the battery indicator LED and the battery read voltage divider and connec it to analog input A1.
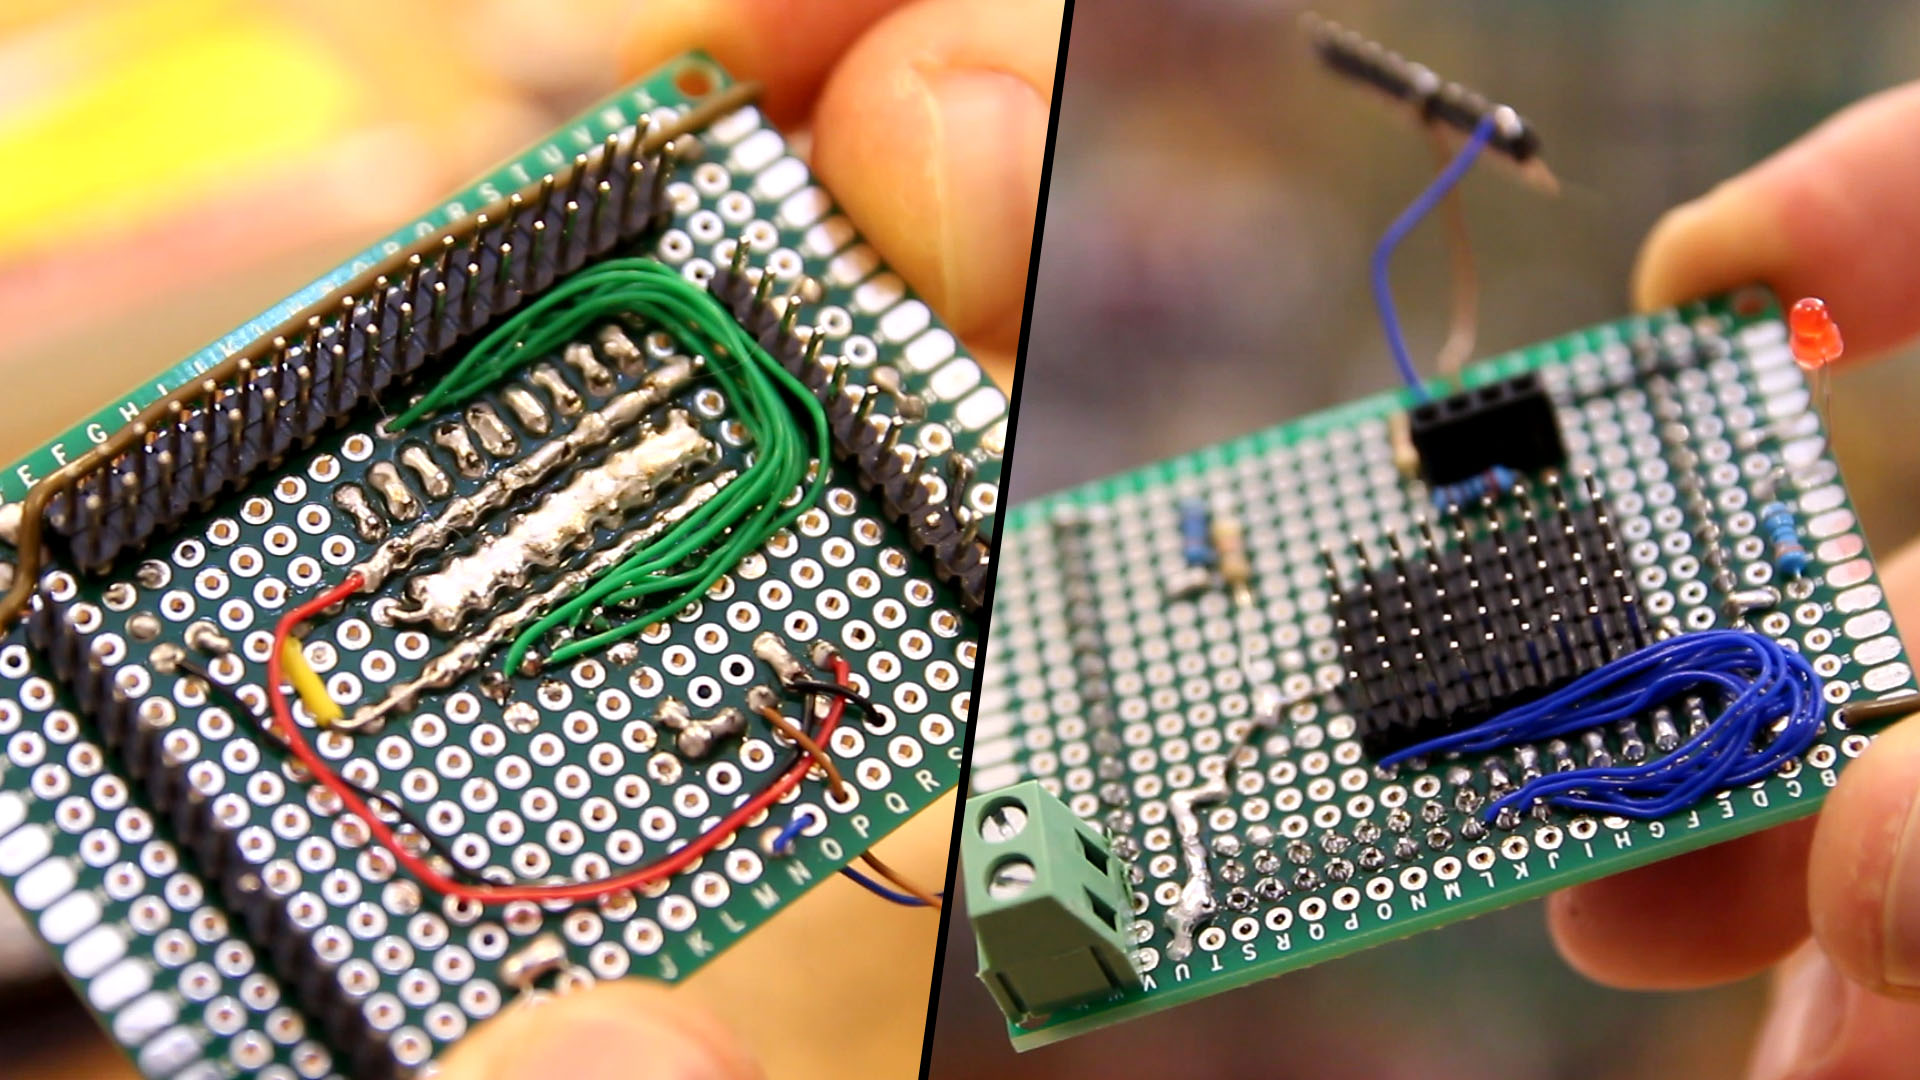
You can start with the PCB if you want. Make all connections as in the scheamtic above to the prototyping PCB. I've used those thin wires for all PWM connections but I've used thicker wires and add a lot of solder to the PCB for the power tracks of 7.2V and GND from the buck converter. All 18 motors will use a lod of current so we need thick wires. Add the PCB conenctor as well for the 7.2V input. Solder the LED and male and female pins. The male pins must fit on the Arduino MEGA female pins so test that before you solder the pins. Add male pins for all servo motors and have in mind each motor needs GND, 5V and PWM signal. GND and 5V can be soldered with one common wire each, but for PWMs you will need a separated conenction so we have a lot of wires.
We start making the robot by making the legs. We need 6 legs (hexapod daaah). Each leg needs 7 3D printed parts as you can see below. Get all STL files from this link and print the parts using PLA material. I've used a 0.4mm nozzle, 0.3mm layer height and 20% infill. We need no support and all parts are already oriented and ready for print. So, get the 7 parts for one leg.
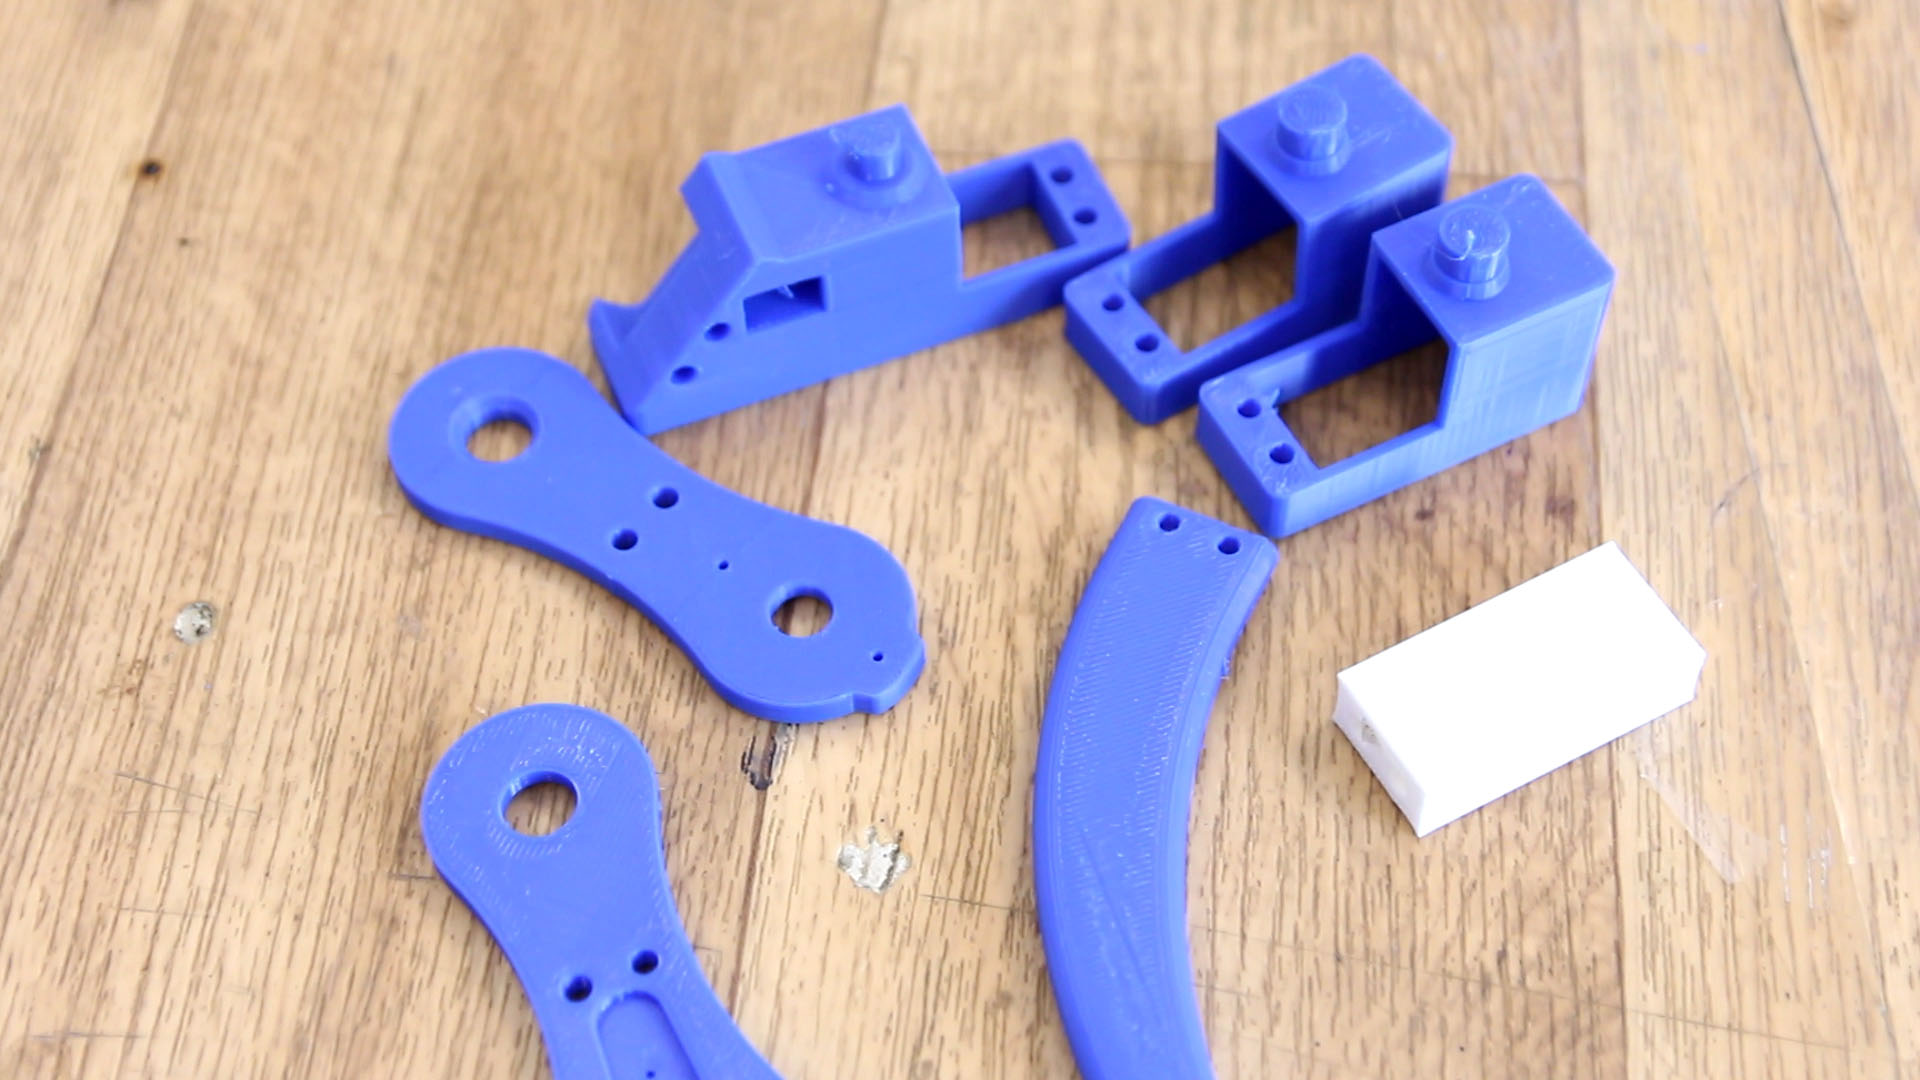
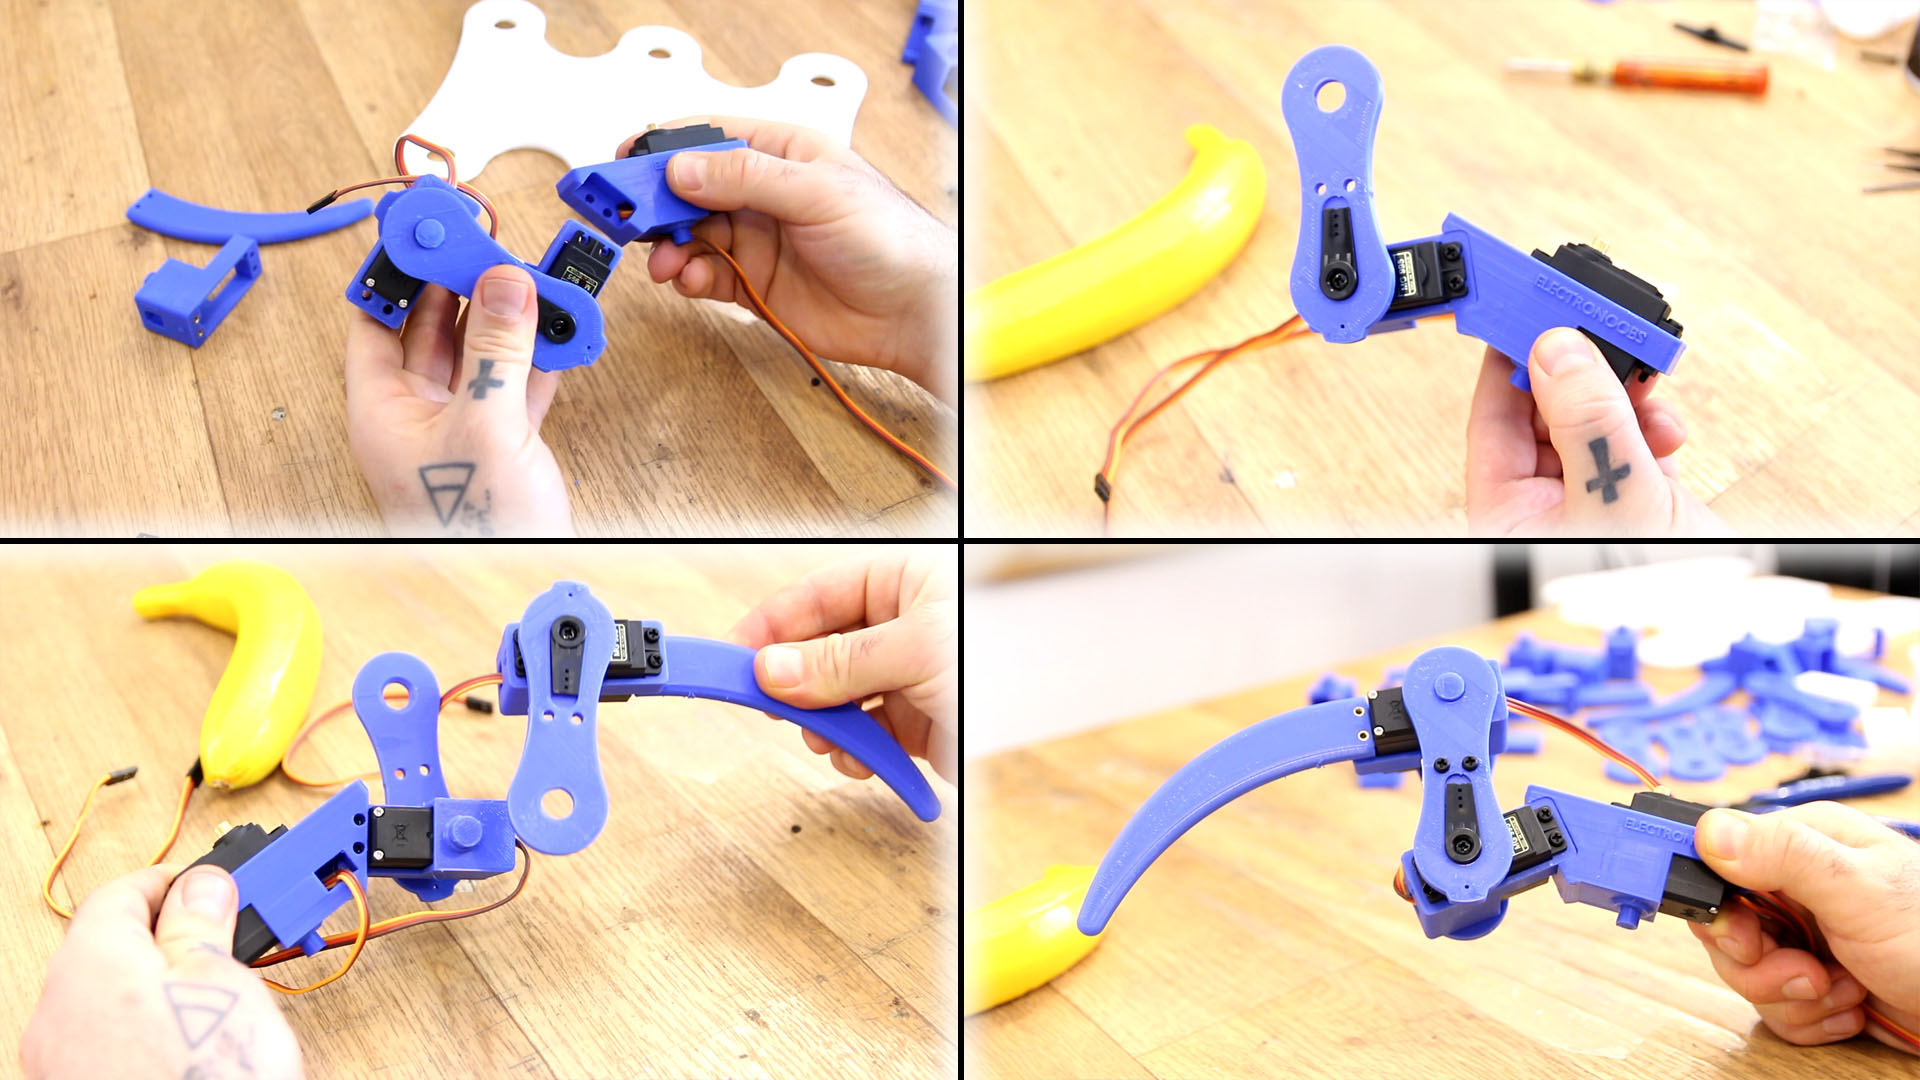
You should end with a leg like below. use the brass insertions as nuts for the screws. Add the servos on each 3D printed part. Better see video for all details. Make sure the servos are in their middle position more or less. Screw everythign in place and then do the same for 6 legs.
Add a bearing on each leg. Then place the legs on the bottom part of the robot. Add the head and tail with M3 screws adn those brass insertions. Place the Arduino with the PCB in the middle and on side of the Arduino palce the buck converter. The Lipo battery will go below the bottom part of the robot (on the belly) because we don't have enough space. Add the swithc button from the battery to the regulator. make all conenctions. Connect the servos to the PCB we have made before and close the robot with the top part. Use the palstic hooks and screws from the servos to close the robot. Ad extra screws if needed. That's it. Is time to upload the code.