BenBox software
Download the .zip file with all the files below
Inside of the file you will find the BenBox software, the driver for the CH340 chip of the microcontroller, the hexadecimal code to be uploaded to the microcontroller and an example file to print (logo).


Installing the software
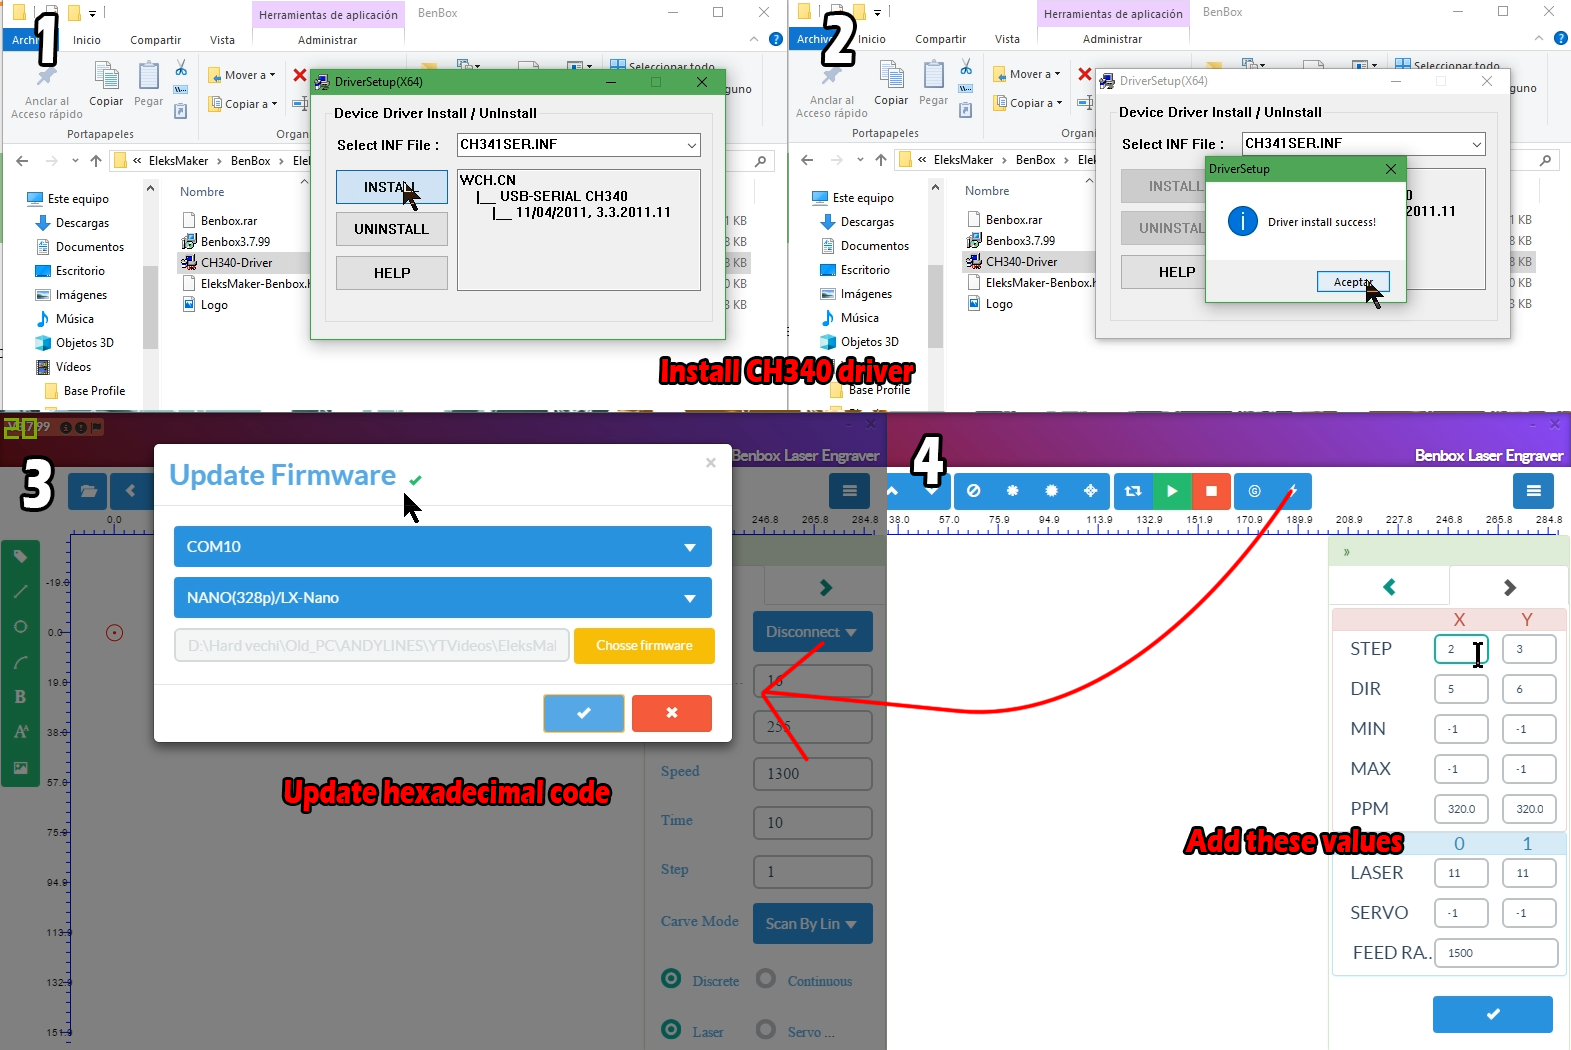
Download the zip file below and extract it. Inside you have the software but also the firmware for the main board in a hexadecimal format. First make sure you install the CH 340 driver. Once that is done, install the benbox software and open it. Here click the update firmware in order to upload it to the board. Select the Com of the machine board and open the hexadecimal file that you have in the downloaded folder. Upload and wait till you get a green check mark.

Now go to serial ports. If it says success than you are ready to go. In the parameters you must place this same values as you can see in the photo above for X and Y movement as for the laser as well. Save and now let’s make a test.
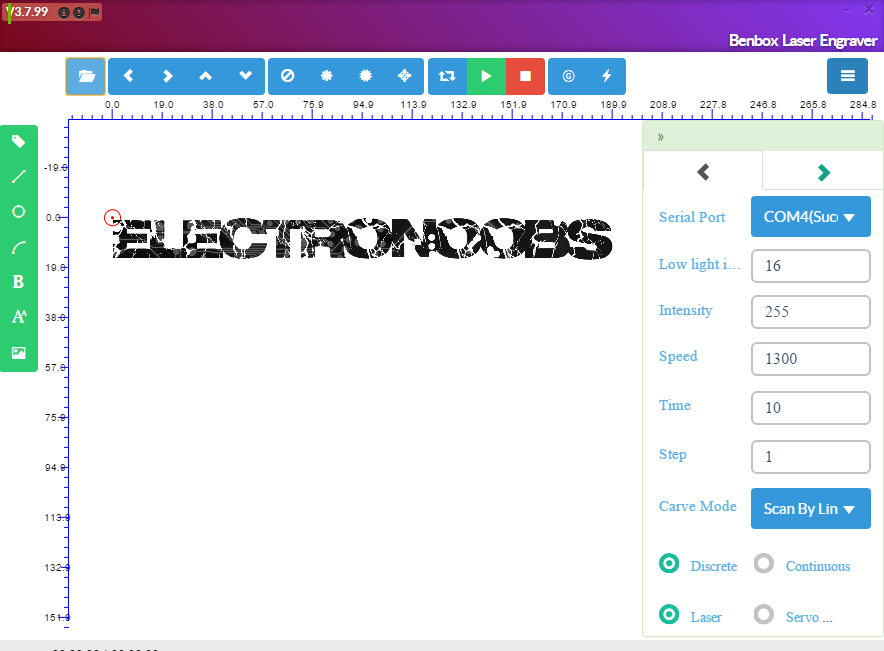
I’ve designed the file in Photoshop and save it in a BMP format. Click open and select that file (logo).
Now make sure you have the safety glasses on, and that you’ve focused the laser. Press the laser push button to put it into weak mode and rotate the laser tip till you get a very small and well focused beam. Remember to disactivate the weak mode and we are now ready to print.
Change your settings in the print config if you want and click play and the machine will start engraving. Make sure you open a window or have fume extractor since this will create a lot of smoke especially when you are engraving wood.
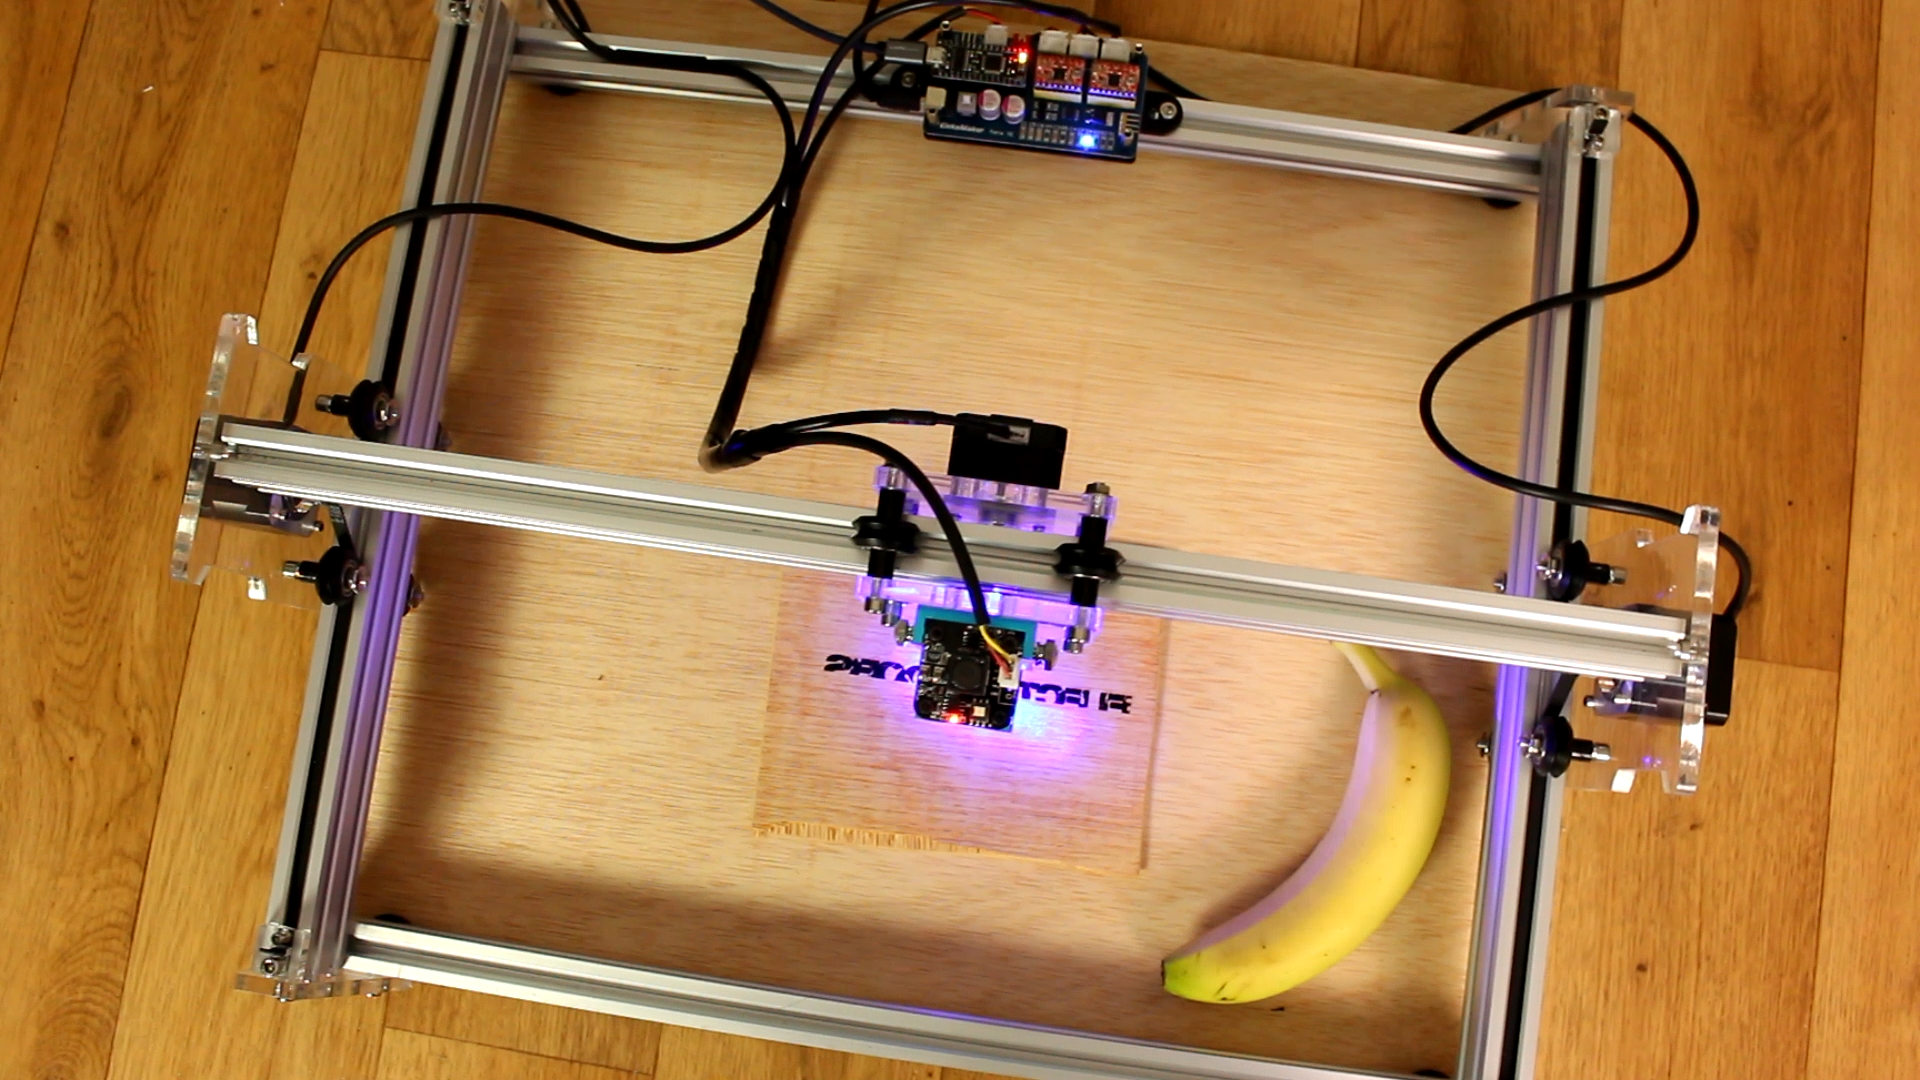
There you go, I’ve burned my first logo on a piece of wood. You could play with the machine settings and try other materials.

Results
Now my final opinion on this machine, well, it dose everything I expect it to do before buying it. The printing size is quite big of around 46 by 38 centimeters. It has decent precision that could even get better with more calibrations. It is very fast and easy to mount in just a couple of hours and also very easy to use. It has a great design, it looks nice and it’s quite powerfull. And that’s the problem. This machine has very few safety features. First of all it doesn’t have a case so you won’t be protected from laser exposure. The glasses they give you aren’t that good and for a direct beam exposure they might not protect you. Another issue I’ve seen is that when the machine is powered and you connect the USB the laser will be at of full power and if you’re not careful, that might hurt you. There is clearly an error where the boar enables the laser when the USB is connected and that second is enough to hurt you. So make sure you have the weak mode selected before starting the machine.
A good thing about this machine is that in any moment you could remove the laser module and add a drill and use it as a soft milling machine. Maybe I’ll try that in the future. As for the components quality, well, the frame is made out of metal and that’s a good thing. The kit was missing some metal corners for the main frame, but any way the frame seams quite strong only with the acrylic joints. It ahs V shaped rollers, powerful enough step motor and the main board, well, is one of the cheapest there is. It’s based on Arduino and with two step motors drivers and that’s it. The drivers have no heat sink on top of them so I’ll probably add those myself. Also, the USB cable is quite short, a longer one would definitely be better.

Anyway, I like it, I’ll have to use it for a longer period of time in order to see more good or bad things about it but for now I can say that this machine is ok as for quality and price. You have the link for this machine below from banggood for around 180 euros which I guess is a fair price since only the laser module is like 100 euros. You have the 2.5W model or the more expensive one of 5W laser module. You decide which one you’ll buy. With one like mine of 2.5W you would be able to burn wood, plastic, leather and much more. I hope that you’ve enjoyed this small intro on this EleksMaker CNC laser engraver.
If you would like to help my projects, I have a Patreon campaign. I would really appreciate that guys.
I hope that you’ve enjoyed this review. If so don’t forget share the project with your friends. If you have any question about this review or any other, just leave it on my Q&A page. Also, don’t forget to subscribe and watch all of my other great tutorials. Remember, if you consider helping my projects check my Patreon page as well.
Thanks again and see you later guys.

 About me
  History
  Let's learn
  Contact us
  Arduino tutorials
 Circuits tutorials
  Robotics tutorials
 Q&A
Q&A Blog
Blog  Arduino
  Circuits
 Robotics
  Modules
  Gadgets
  Printers
  Materials
  3D objects
  3D edit
  Donate
  Reviews
  Advertising

