
 About me
  History
  Let's learn
  Contact us
  Arduino tutorials
 Circuits tutorials
  Robotics tutorials
 Q&A
Q&A Blog
Blog  Arduino
  Circuits
 Robotics
  Modules
  Gadgets
  Printers
  Materials
  3D objects
  3D edit
  Donate
  Reviews
  Advertising


Android app + Bluetooth + Arduino control
Main design blocks

1.
2.
3.
4.
5.
6.
Into!
In this small tutorial we will see how to create a small android App using an online tool called App Inventor from Google. After we create the visual design of the app we will create the code blocks. There we will choos the data we whant to send via bluetooth connection. We will create a new bluetooth client and 4 buttons in order to control 4 outputs of an Arduino UNO. Then we'll make the arduino connections and connect one android smartphone to the Arduino bluetooth module. By pressing the App buttons we will control the Arduino's outputs.
OK, so first we will create the Android App. We google App Inventor 2. We open the page. If you don't have an acount you should create a new one.
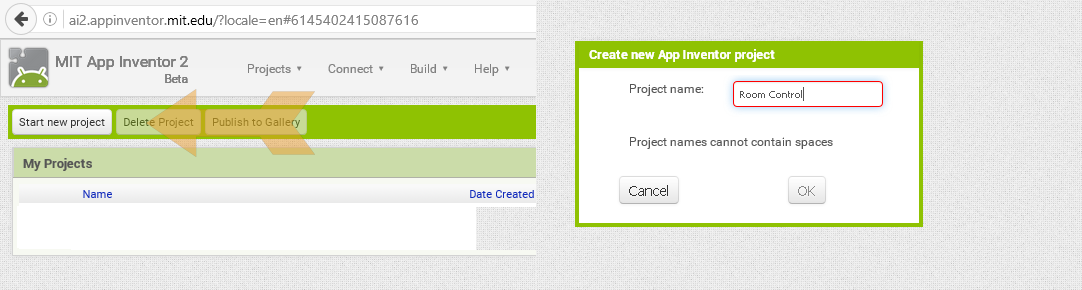 When we first open the too we will see our projects. If it is a new account you will have no created projects. So click new project and give a name to your new project. I've called mine Room control since I whant to create a new app in order to control stuff around my room using my phone.
A new viewer is created. In the center we can see our screen. On the left we have our palette with all the components that we could add. On the right we have the settings of each block taht we add.
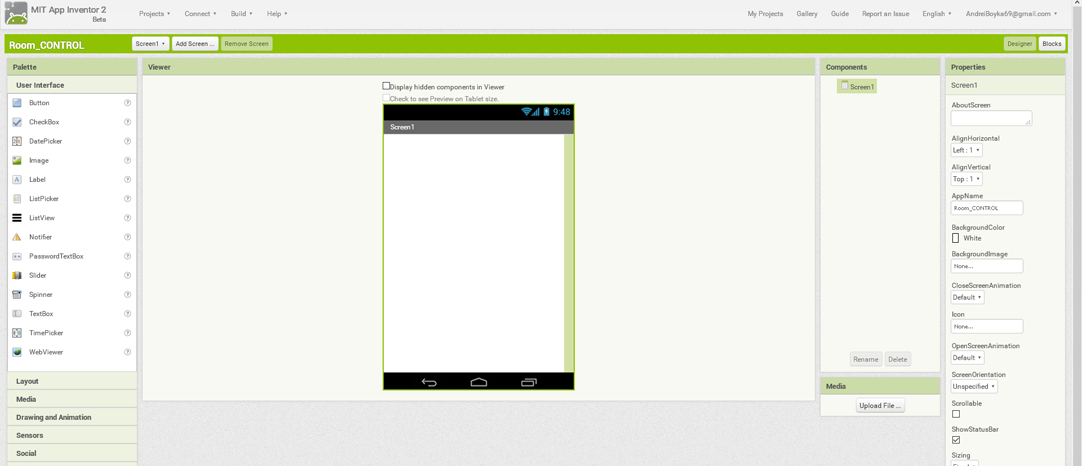
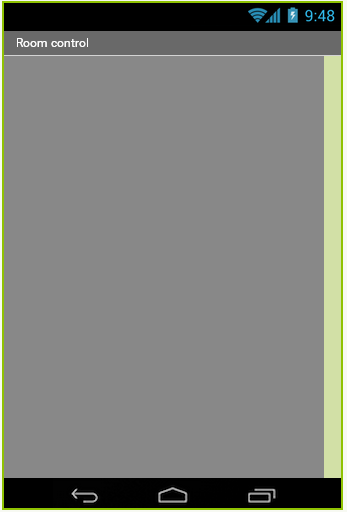
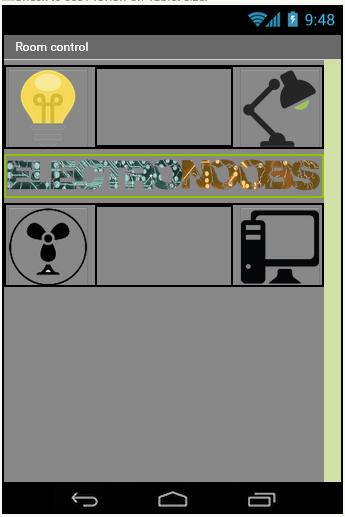
OK, so we can see the palette, components and propierties. In the components tab we can see that the only thing that we have is our screen. We select that screen and go into properties and start changing settings. We can give a title to our screen, change the background color or even add a image background. We can also switch between the lanscape or portrait modes of screen. I've choosed a portrait mode, grey background and Room control title.
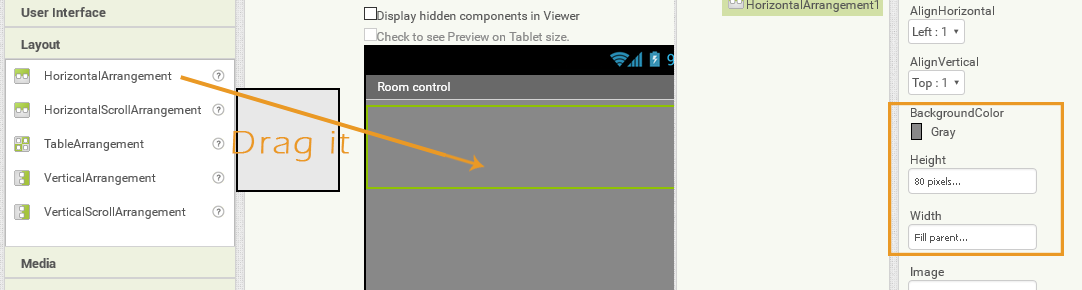
Once we finish with the screen settings we can start adding more blocks. We go to our palette. We first have to add some new layouts where we will add the 4 buttons that we want to create. We go to Layout and drag a new horizontal layout to our screen. In the settings of the new layout we give the a fill parent width and a 80 pixels height and olso a grey background color as the screen.
Now we go back to the palette in to the user interface and drag a new button in to the new added layout. In the settings we delete the button name. We give a 80 by 80 pixel size for our button. In the image settings we upload a new image for this button. I will first add a "light bulb" icon since this button will turn on and off the main light of my room. I recommend you to use ".png" files for the images if you whant transparent buttons.

If you want you can give your own settings to fill your requierments. Now we add two more layouts in the same way as before. Now we add 3 more buttons each one with his own icon. We have to upload a image for each one. I whant to control a vent, a lamp, my pc and the main light. I make the middle layout 40 pixels height and add as a background my logo. That will give a better look to my app. Between each two buttons I've added one more layout and make the width to fill parent in order to separate the buttons. This is the final result.
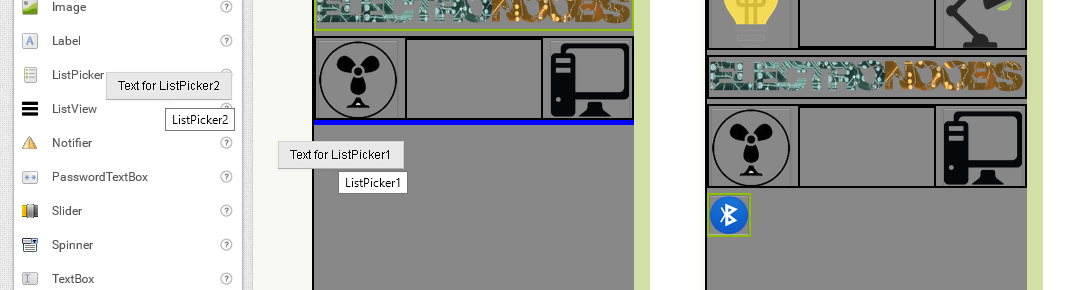
Now we have to add our bluetooth client and the bluetooth list button. We go to conectivity in the palette. We drag the bluetooth client on oue screen. You can see it is a non visible object. Now we go back to user interface and drag a list picker to the bottom of our screen, below the 3 created layouts. As the buttons I will amke this block 40 by 40 pixels and add a bluetooth icon image as background.
Our design part of the App is done. We now go to the code blocks edit.
Next page: