


This is a very simple project that uses the Adafruid library to control a RGB adressable LED strip that will eb inside of a Daft punk Helmet. In this tutorial you will find the STL files to 3D print the plastic helmet, the schematic for the LED control with Bluetooth and the Android App that I've made to control it. All the information is below. Let's start.
The design of the helmet is not mine. I've downlaoded the original files from this page here. So, thanks to Ruiz Brothers for their work, the helmet is awesome and very easy to print and glue togehter. Go to the link below and downlaod the files. The helmet is made out of 4 parts, 3 for the helmet and one more for the shades. You will need a big printer, more than 25x25cm of printing area.
So, we need to print 3 parts for the helmet body and one for the shades (visor). I've used black PLA for the helmet case with 2 perimeters, 15% infill, 0.4mm nozzle and 0.2mm layer height. For the visor I've used translucent clear PLA and I've printed 2 visors. One to put the LEDs on and the other one to cover the LEDs and by that give a better look. If you ahve translucent dark PLA, it's better to use that.
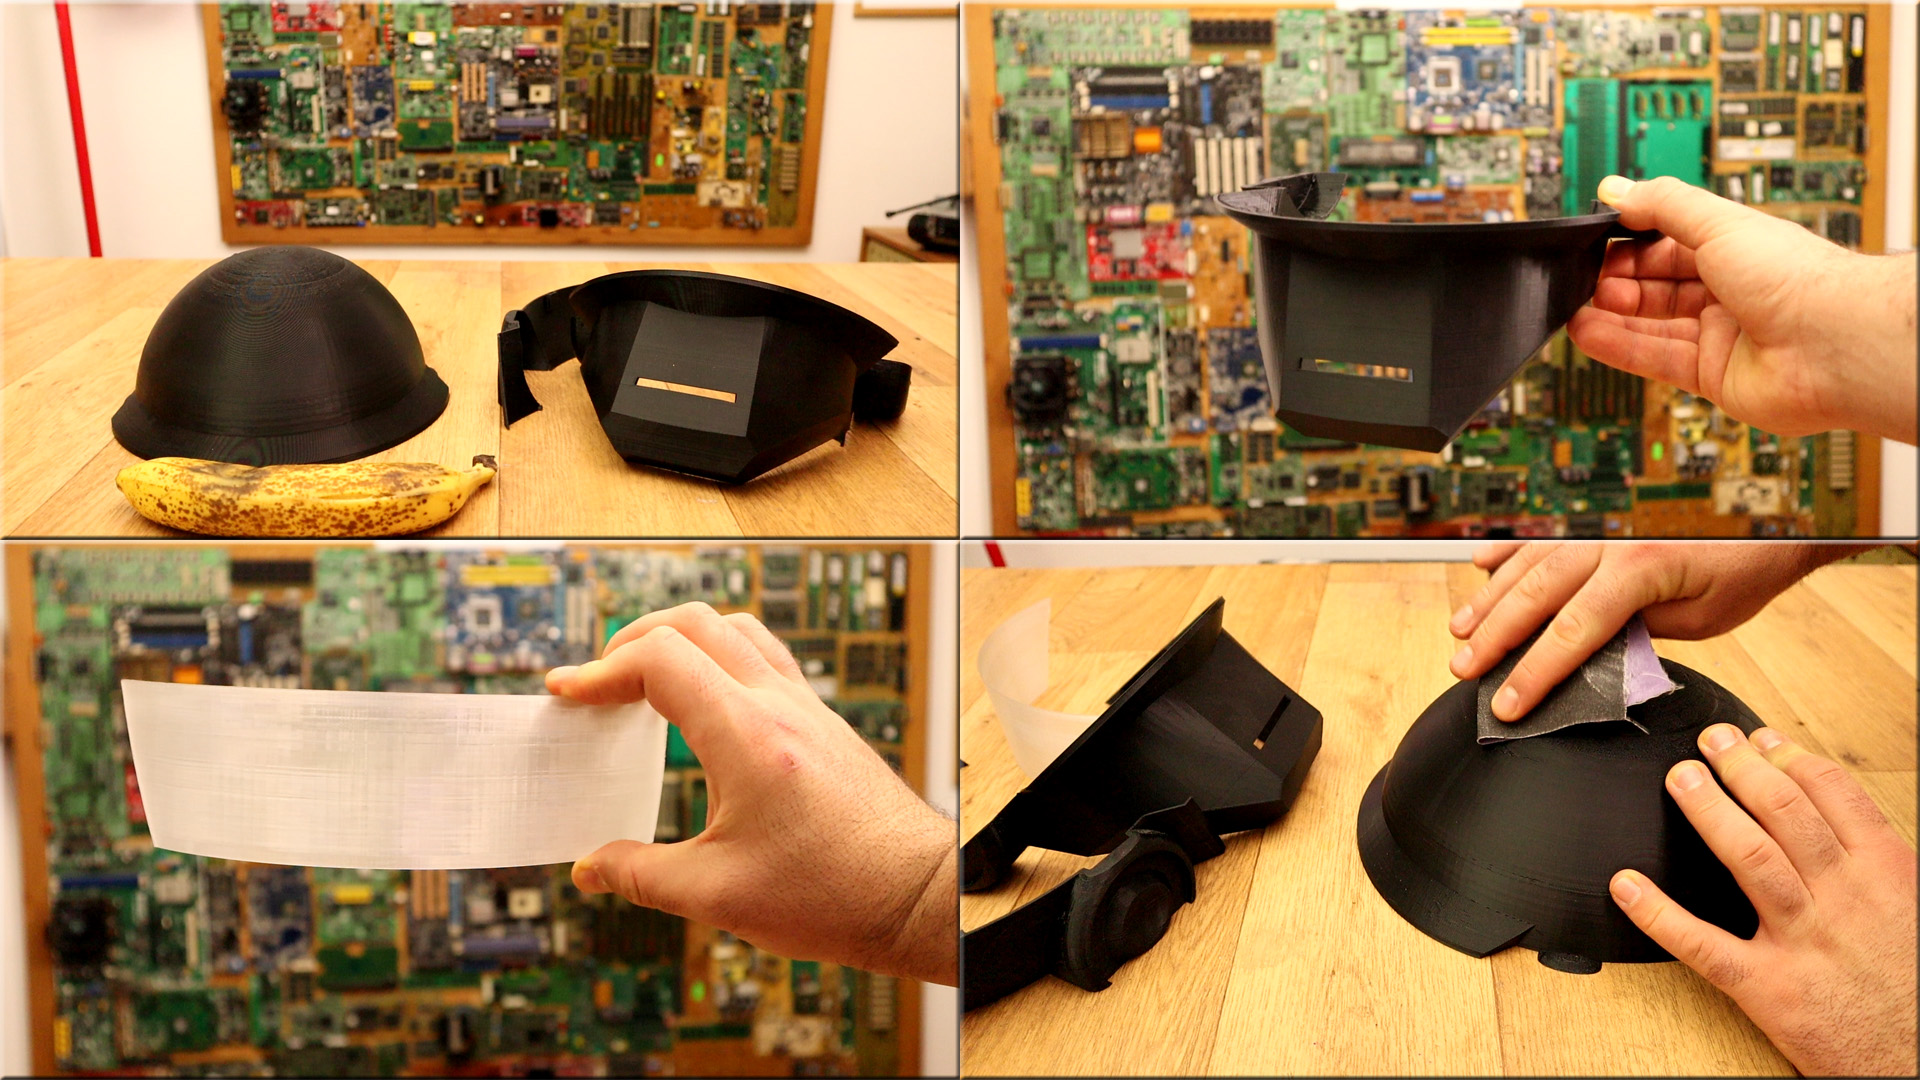
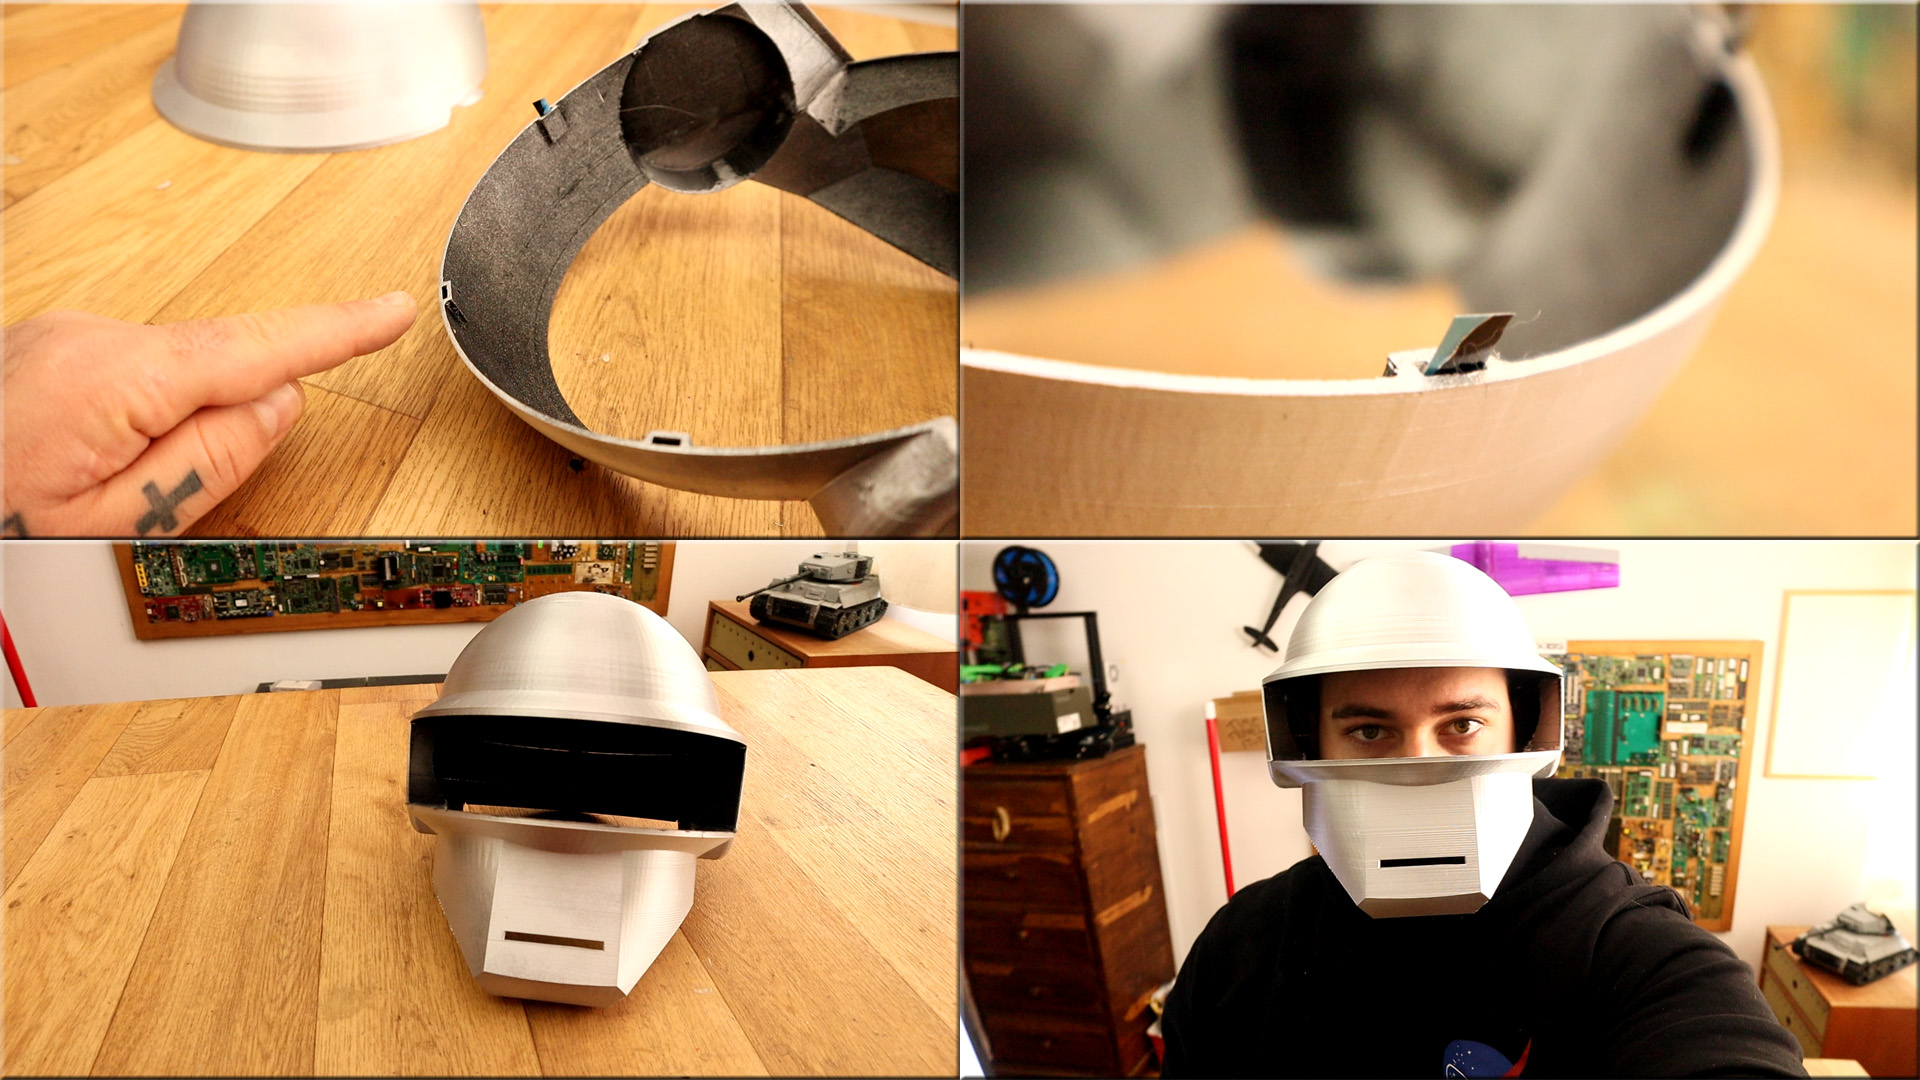
As you can see in the picture above, once we have the files printed, we haev to use a bit of sandpaper and clean the edges. Then, if you have a primer, use that as well. Once we haev smooth surface, we can paint the helmet since the Daft Punk helmet is metalic grey. I've used a basic metalic spary paint to do taht. Cover your table with newspaper, protect your hands, eyes and mouth and apply a first layer of paint. Once it is dry, I've applied a second layer of paint.

last part is to glue all parts together but leave the visor aside for later. I first glue the bottom part and the middle part using super glue but later some hot glue as well on the inner side of the helmet. If you look close, as in the photo below, you can see some small holes. Place a small part of polastic, metal or wood and glue that part in that hole. That will help you join the parts together.
Below you have the simple schematic that I've used for my project.
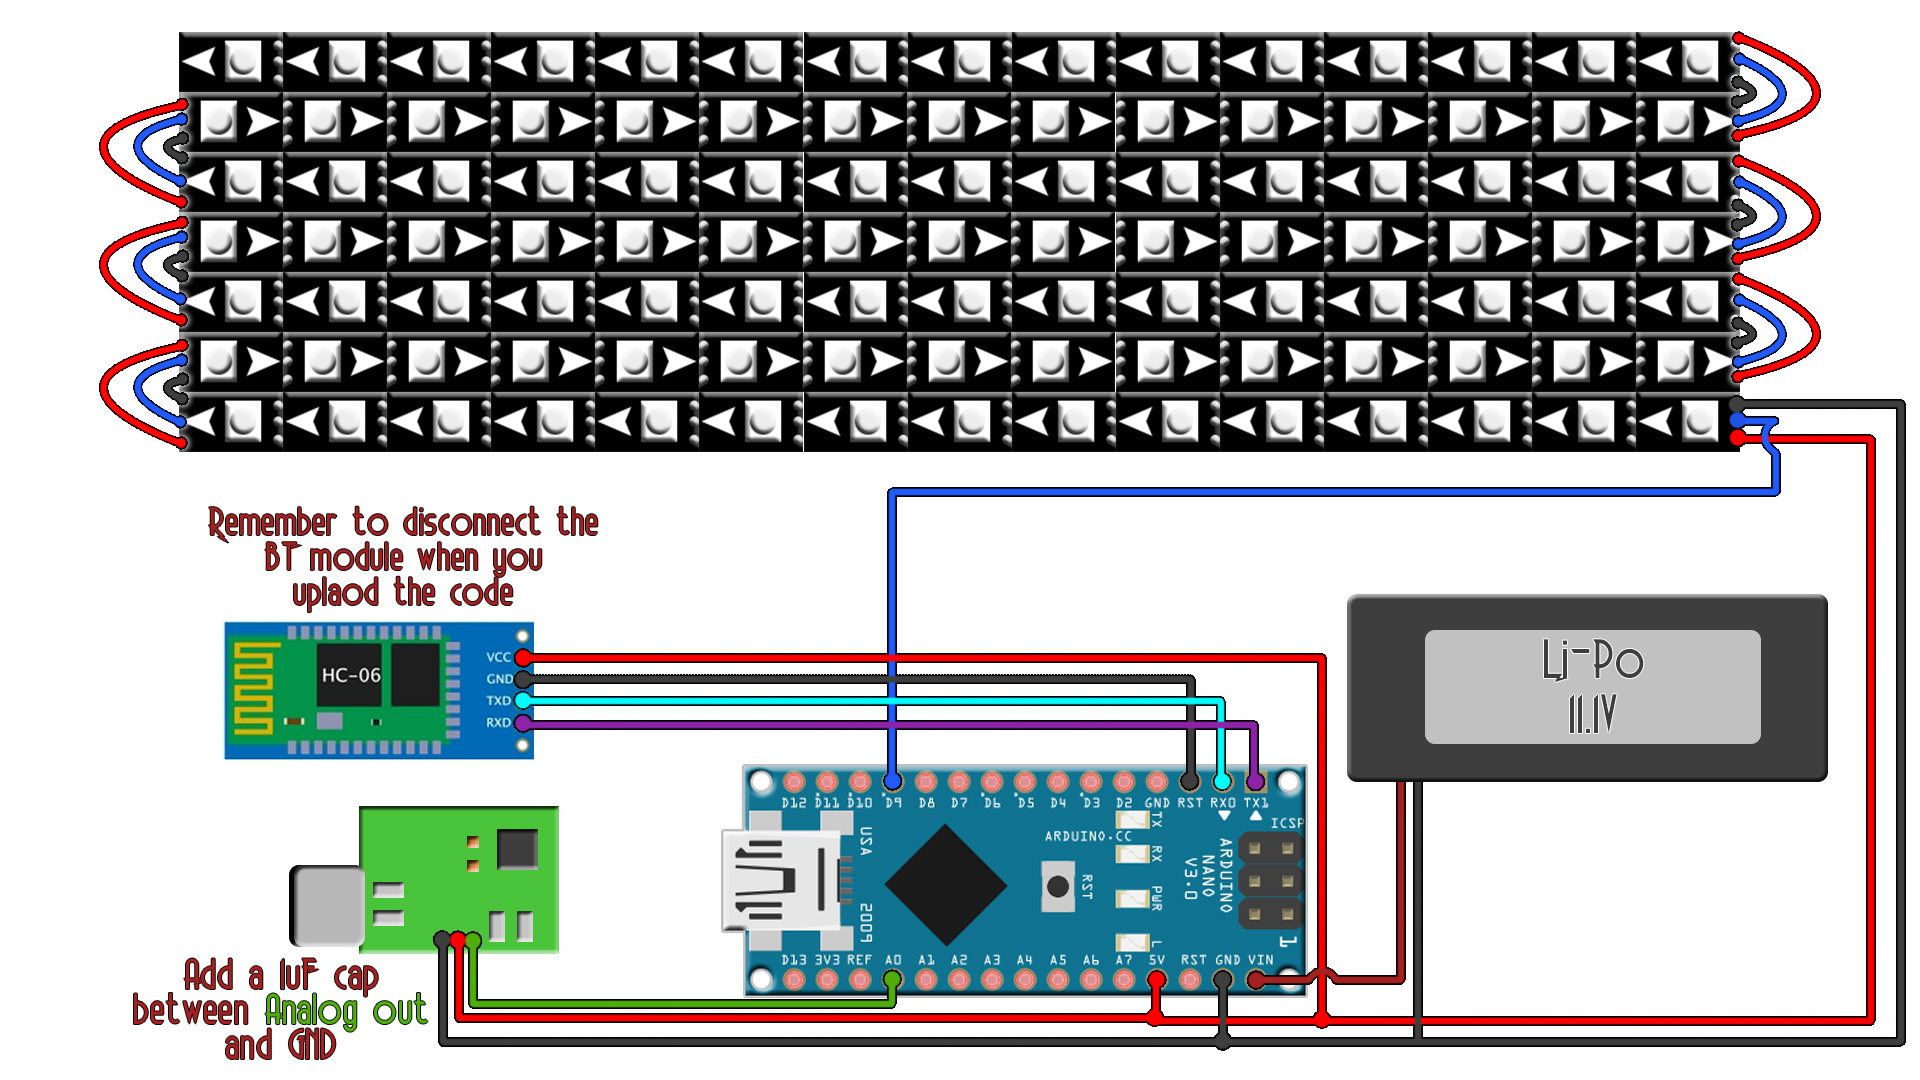
You will see that the LED strip has a small arrow on it. That will show you the dirrection of the input and output. I've made a zig-zag configuration. We start with the input on the bottom row on the right. The second row will have the input on the left and so on as in the schematic above. To supply the circuit, just connect 11V from the battery to the Vin pin of the Arduino. Connect the microphone to analog input A0 and the Bluetooth module to the Rx and Tx pins
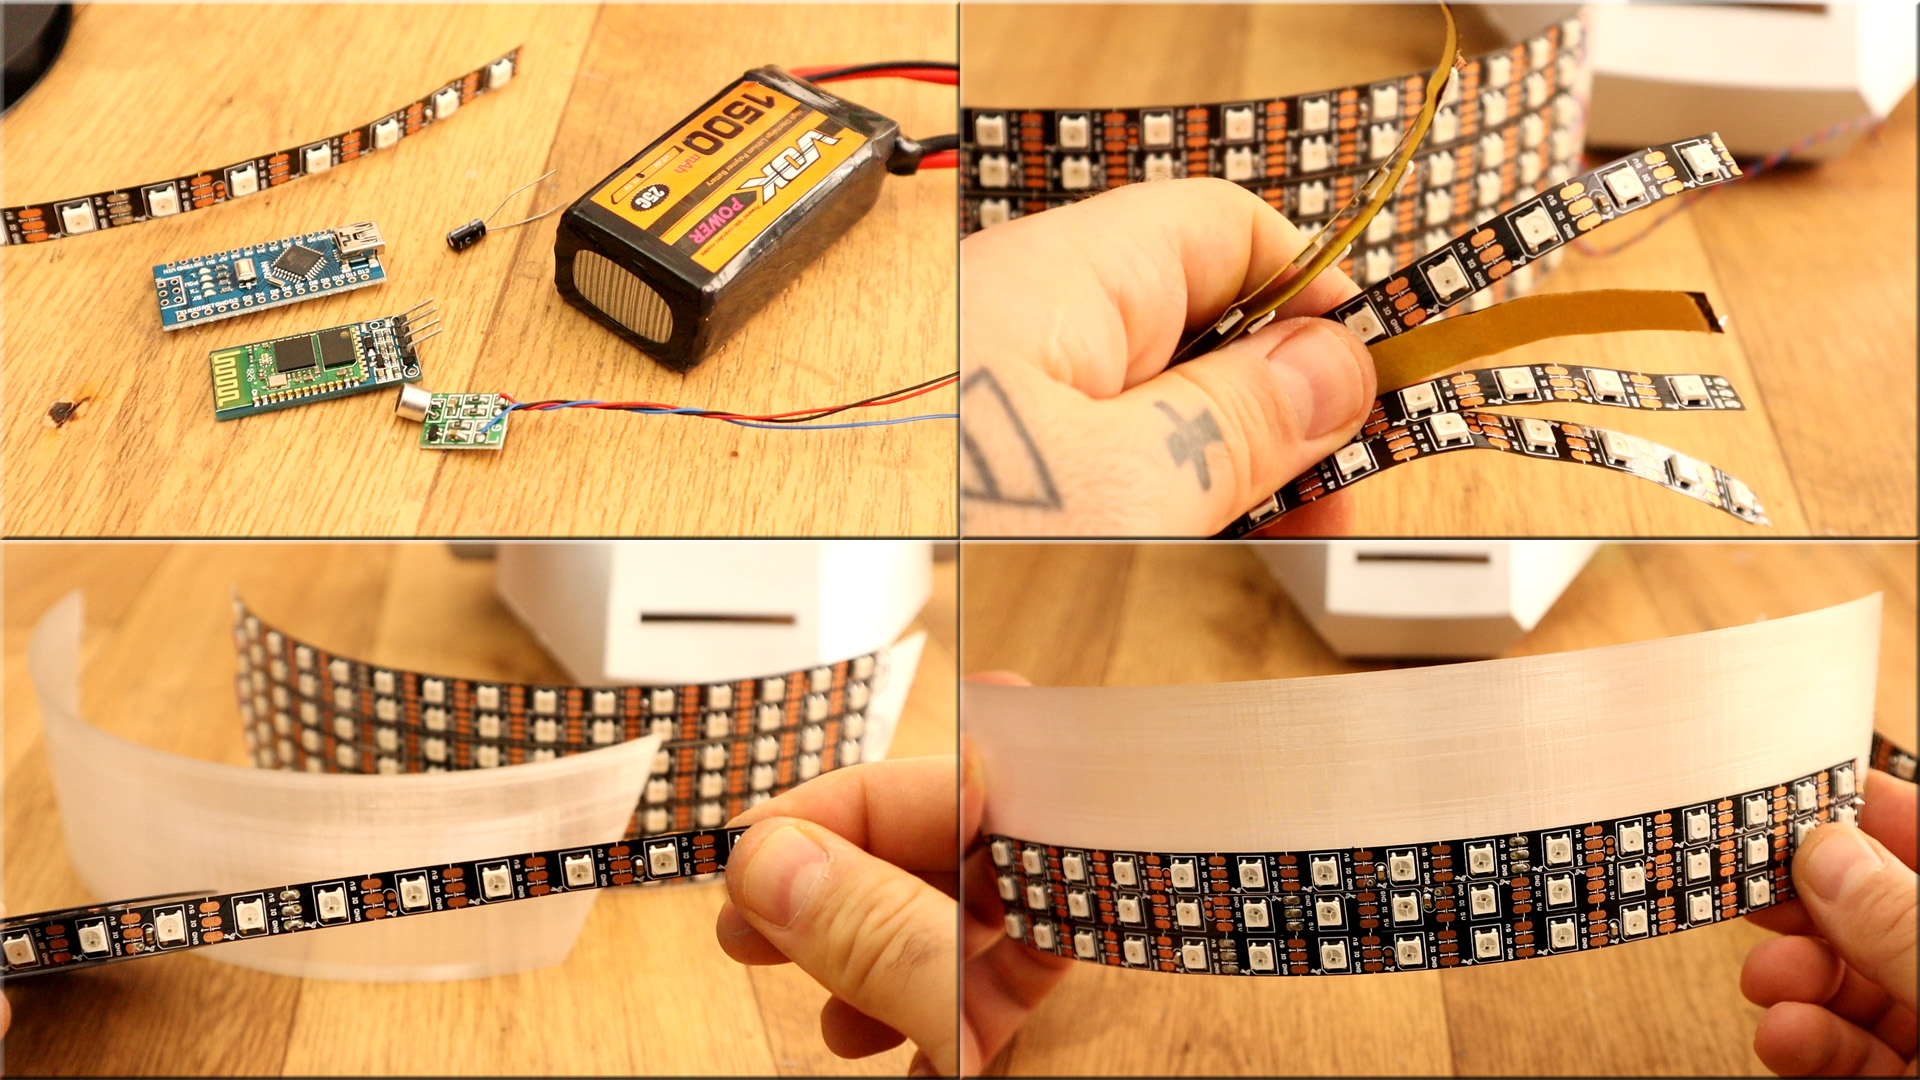
I've cut 7 rows of 15 LEDs each of the adressable LED strip. Peal the back glue cover and place each row on one of the plastic visors we've printed. Then make the connections between eeach row for 5V, GND and signal uisng thin wires. To the first input of the LED strip solder longer wires since those will go to the Arduino.


