


/*A basic 4 channel transmitter using the nRF24L01 module.*/
/* Like, share and subscribe, ELECTRONOOBS */
/* http://www.youtube/c/electronoobs */
/* First we include the libraries. Download it from
my webpage if you donw have the NRF24 library http://localhost/electronoobs/eng_arduino_NRF24_lib.php*/
#include <SPI.h>
#include <nRF24L01.h>
#include <RF24.h>
/*Create a unique pipe out. The receiver has to
wear the same unique code*/
const uint64_t pipeOut = 0xE8E8F0F0E1LL;
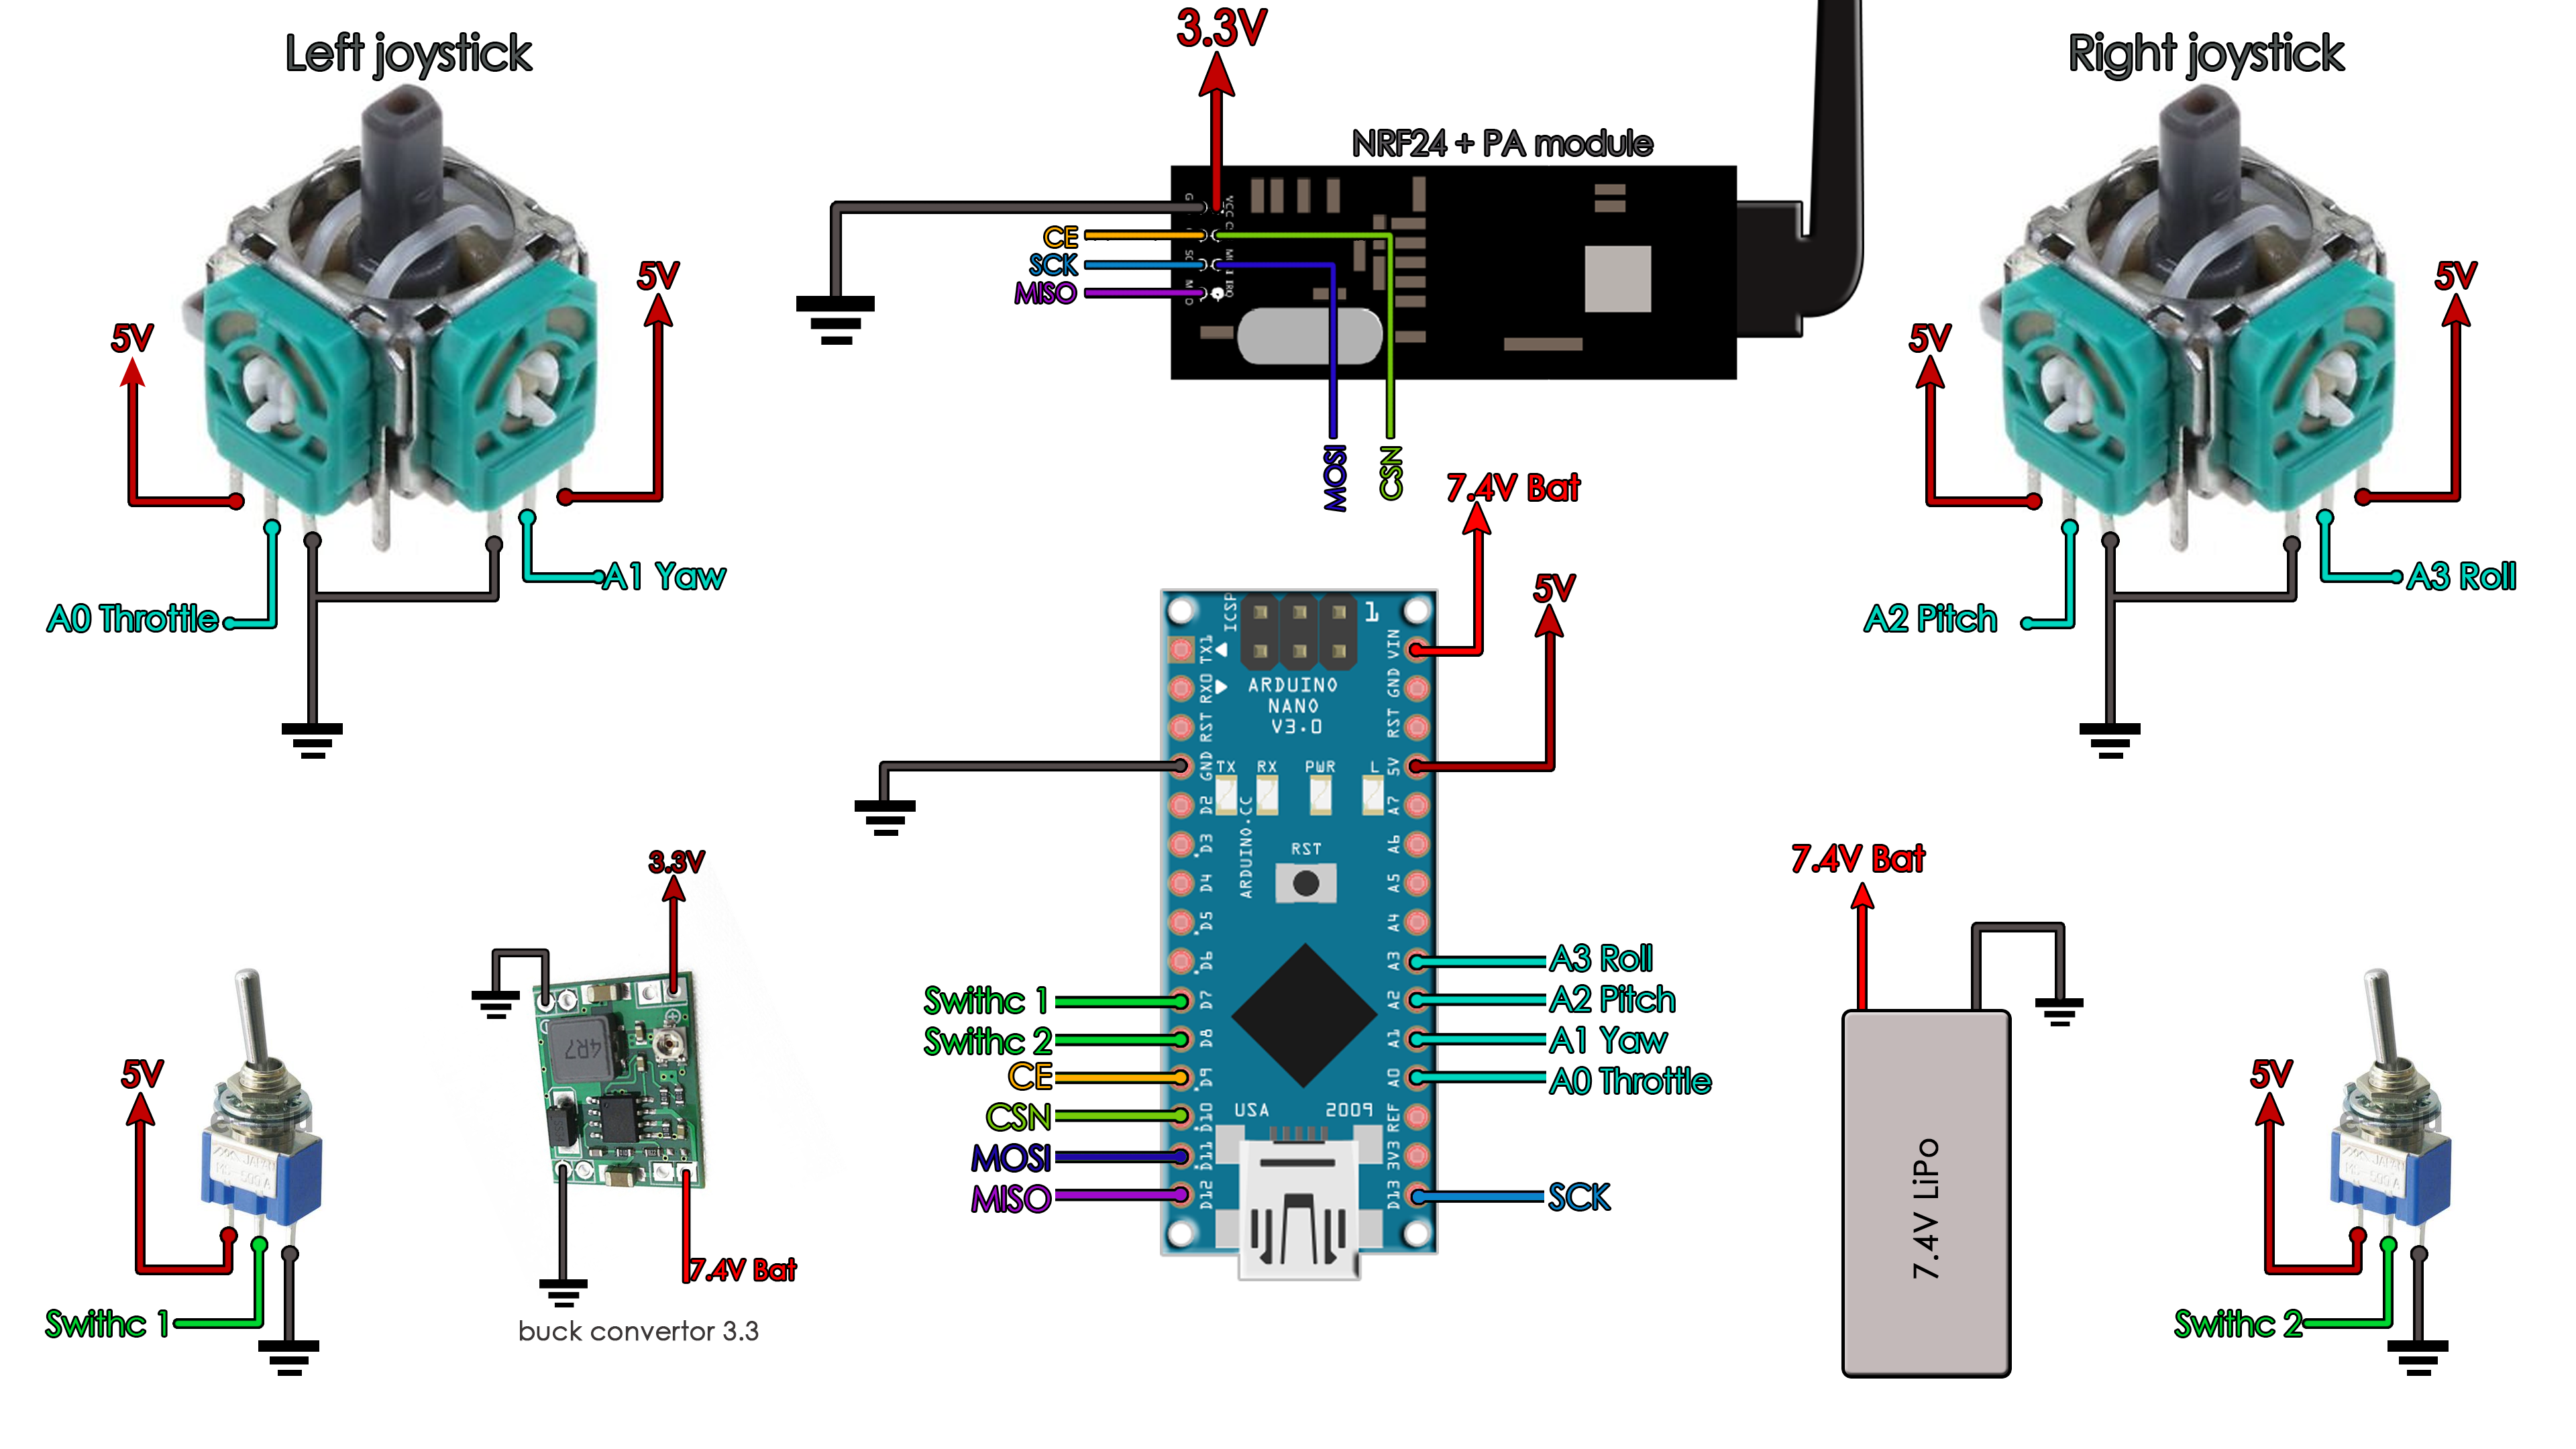
RF24 radio(9, 10); // select CSN pin
// The sizeof this struct should not exceed 32 bytes
// This gives us up to 32 8 bits channals
struct MyData {
byte throttle;
byte yaw;
byte pitch;
byte roll;
byte AUX1;
byte AUX2;
};
MyData data;
void resetData()
{
//This are the start values of each channal
// Throttle is 0 in order to stop the motors
//127 is the middle value of the 10ADC.
data.throttle = 0;
data.yaw = 127;
data.pitch = 127;
data.roll = 127;
data.AUX1 = 0;
data.AUX2 = 0;
}
void setup()
{
//Start everything up
radio.begin();
radio.setAutoAck(false);
radio.setDataRate(RF24_250KBPS);
radio.openWritingPipe(pipeOut);
resetData();
}
/**************************************************/
// Returns a corrected value for a joystick position that takes into account
// the values of the outer extents and the middle of the joystick range.
int mapJoystickValues(int val, int lower, int middle, int upper, bool reverse)
{
val = constrain(val, lower, upper);
if ( val < middle )
val = map(val, lower, middle, 0, 128);
else
val = map(val, middle, upper, 128, 255);
return ( reverse ? 255 - val : val );
}
void loop()
{
// The calibration numbers used here should be measured
// for your joysticks till they send the correct values.
data.throttle = mapJoystickValues( analogRead(A0), 0, 127, 255, true ); //Change this values and calibrate the sent data
data.yaw = mapJoystickValues( analogRead(A1), 0, 127, 255, true ); // true or false in order to invert the joystick direction
data.pitch = mapJoystickValues( analogRead(A2), 0, 127, 255, true ); //0 low value, 127 middle value, 255 top value
data.roll = mapJoystickValues( analogRead(A3), 0, 127, 255, true );
data.AUX1 = digitalRead(7); //These are digital values so 0 and 1 maped in the receiver code to 0 to 255
data.AUX2 = digitalRead(8);
radio.write(&data, sizeof(MyData));
}


