


Wery easy, let's get to the point. Check the last version for more. Let's go step by step and build the ultra low cost drone using some wood sticks, the Arduino, the MPU6050, NRF24 radio modules and the old radio transmitter.
The transmitter is the same as in this past tutorial so check that for more information. Just open an old radio controller, and solder the next circuit. Then upload the transmitter code that you could also find below ready to download. Make sure you will send the middle value for each potentiometer which for 8 bits is 127.
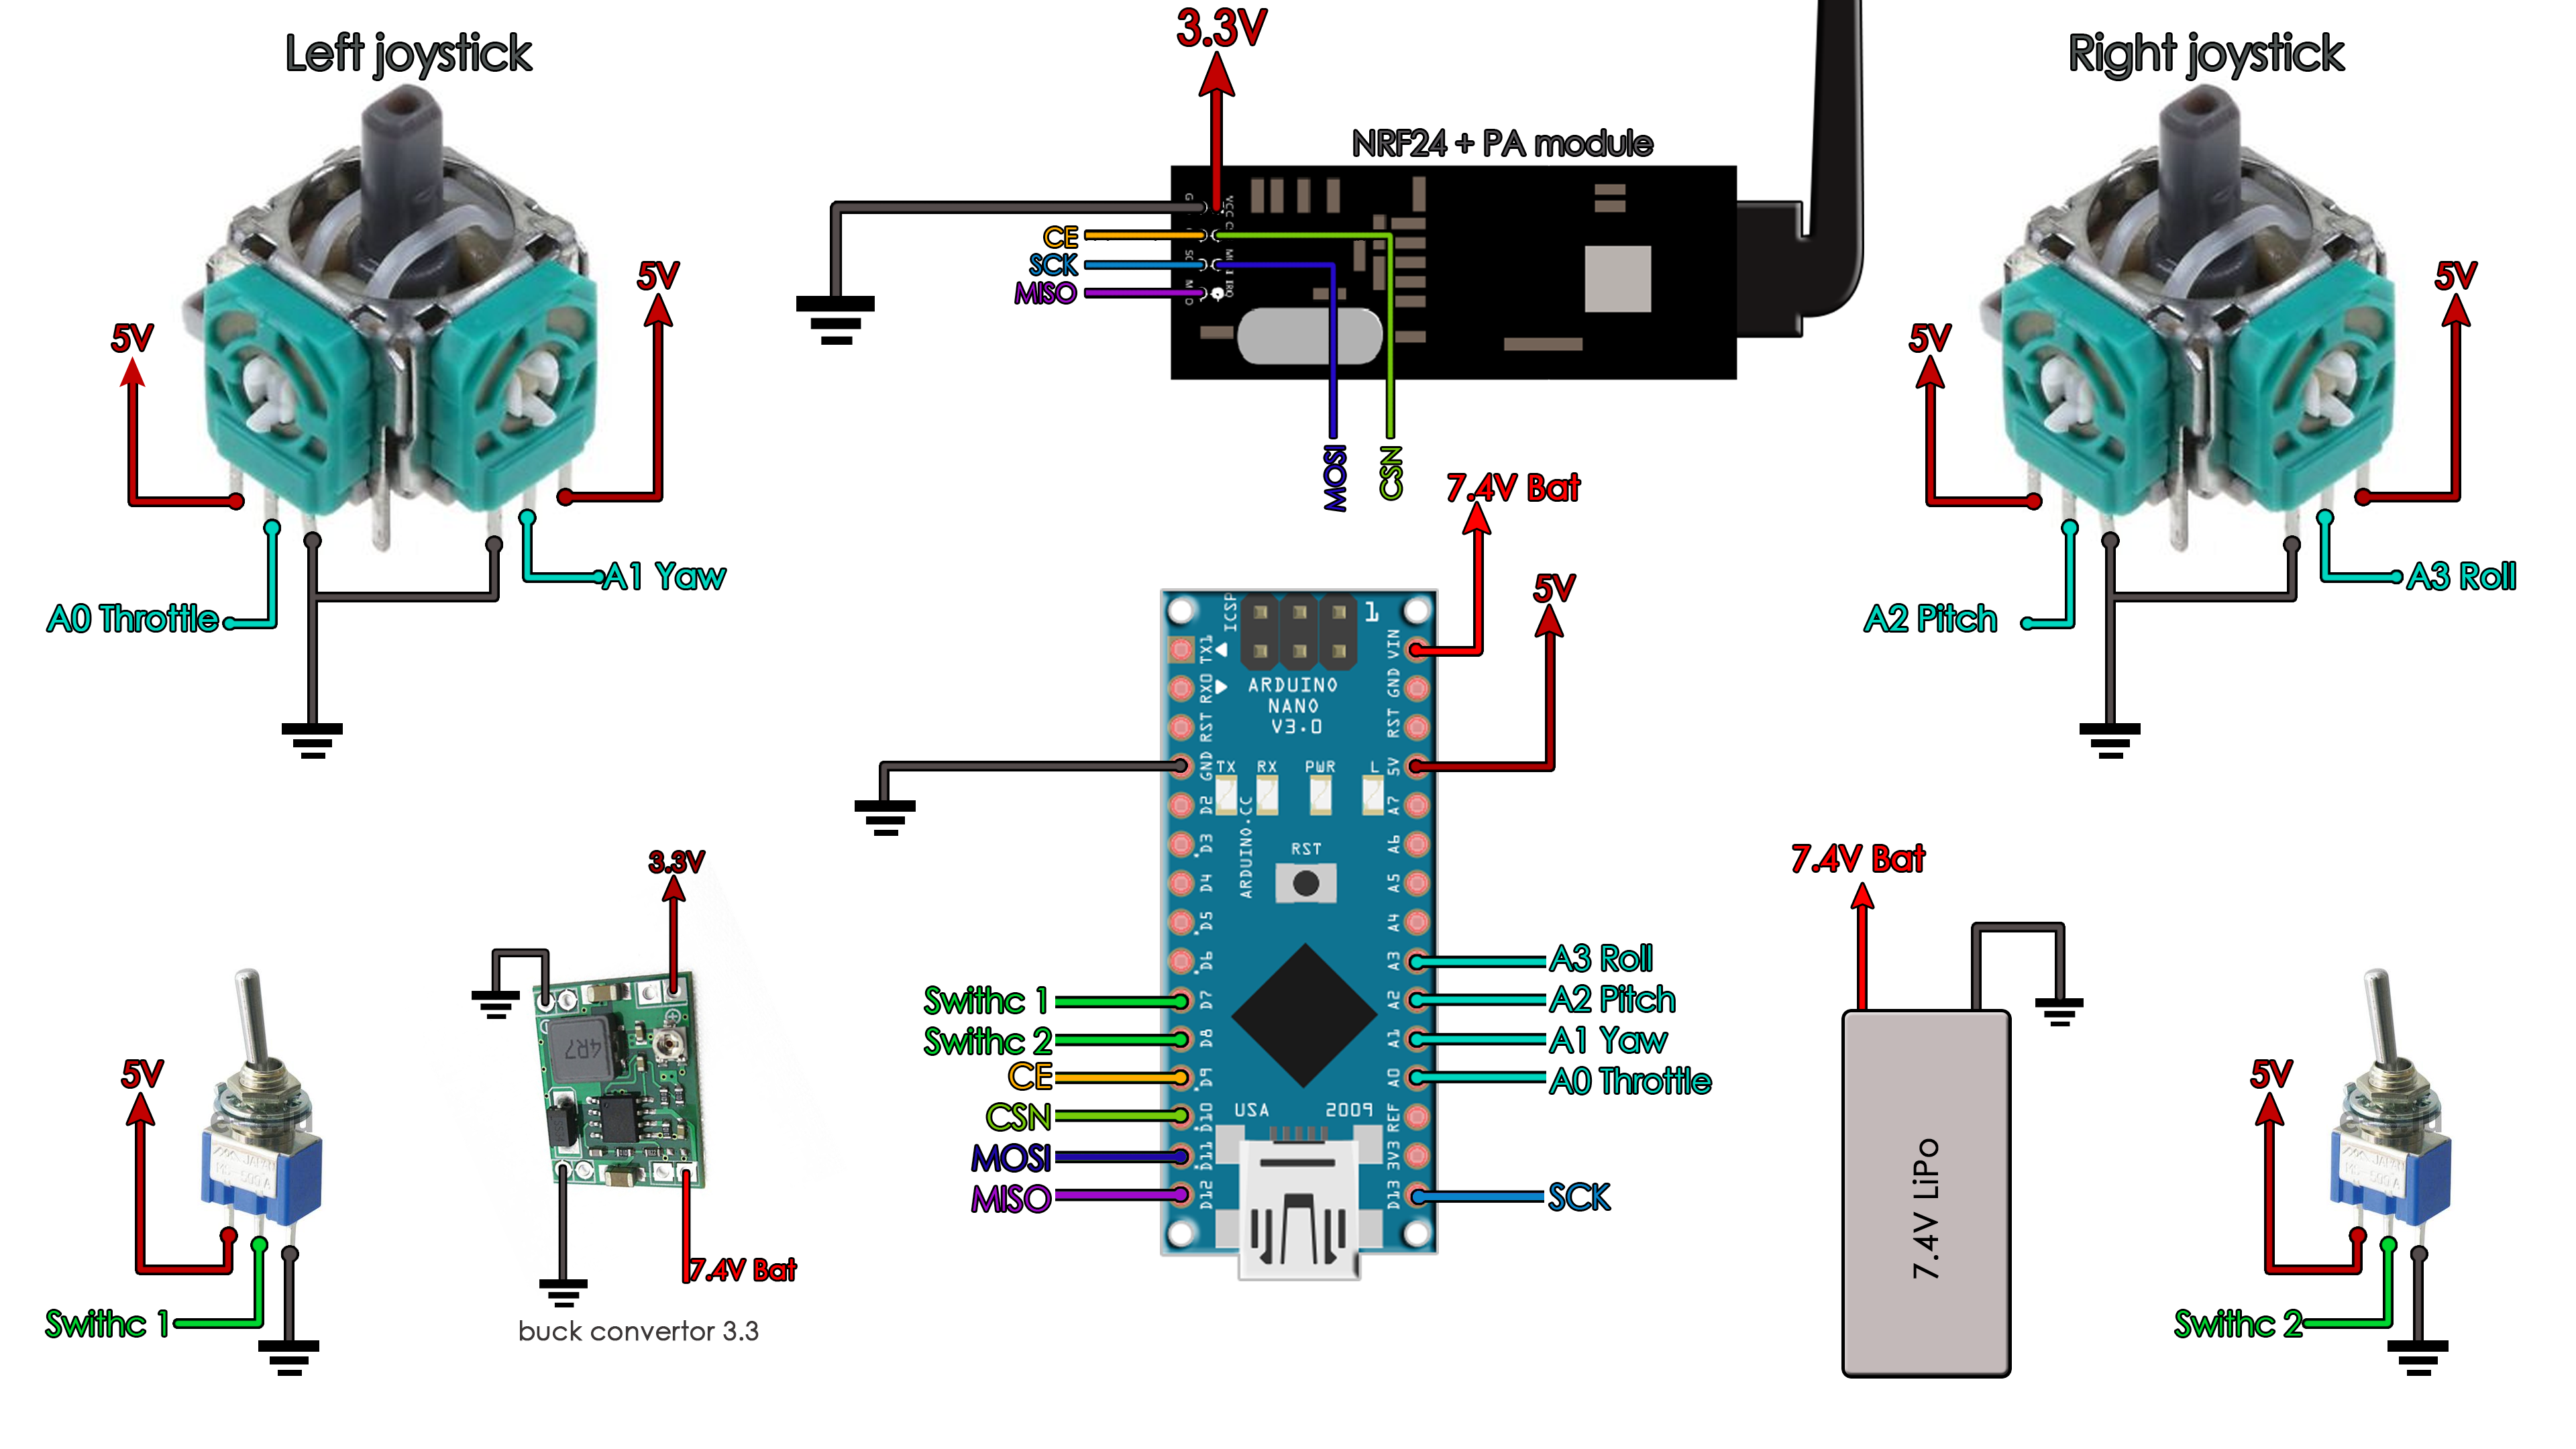
Make the connections as below. Before you connect the NRF24 module, make sure the buck converter will give you around 3.3 or 3.4 volts. Then connect the radio module and all the other connections. Connect the battery 7.4V to the Vin of the arduino. Then upload the code you have above. The 2 switches are extra. You could not use those if you want. The battery could be up to 15V.
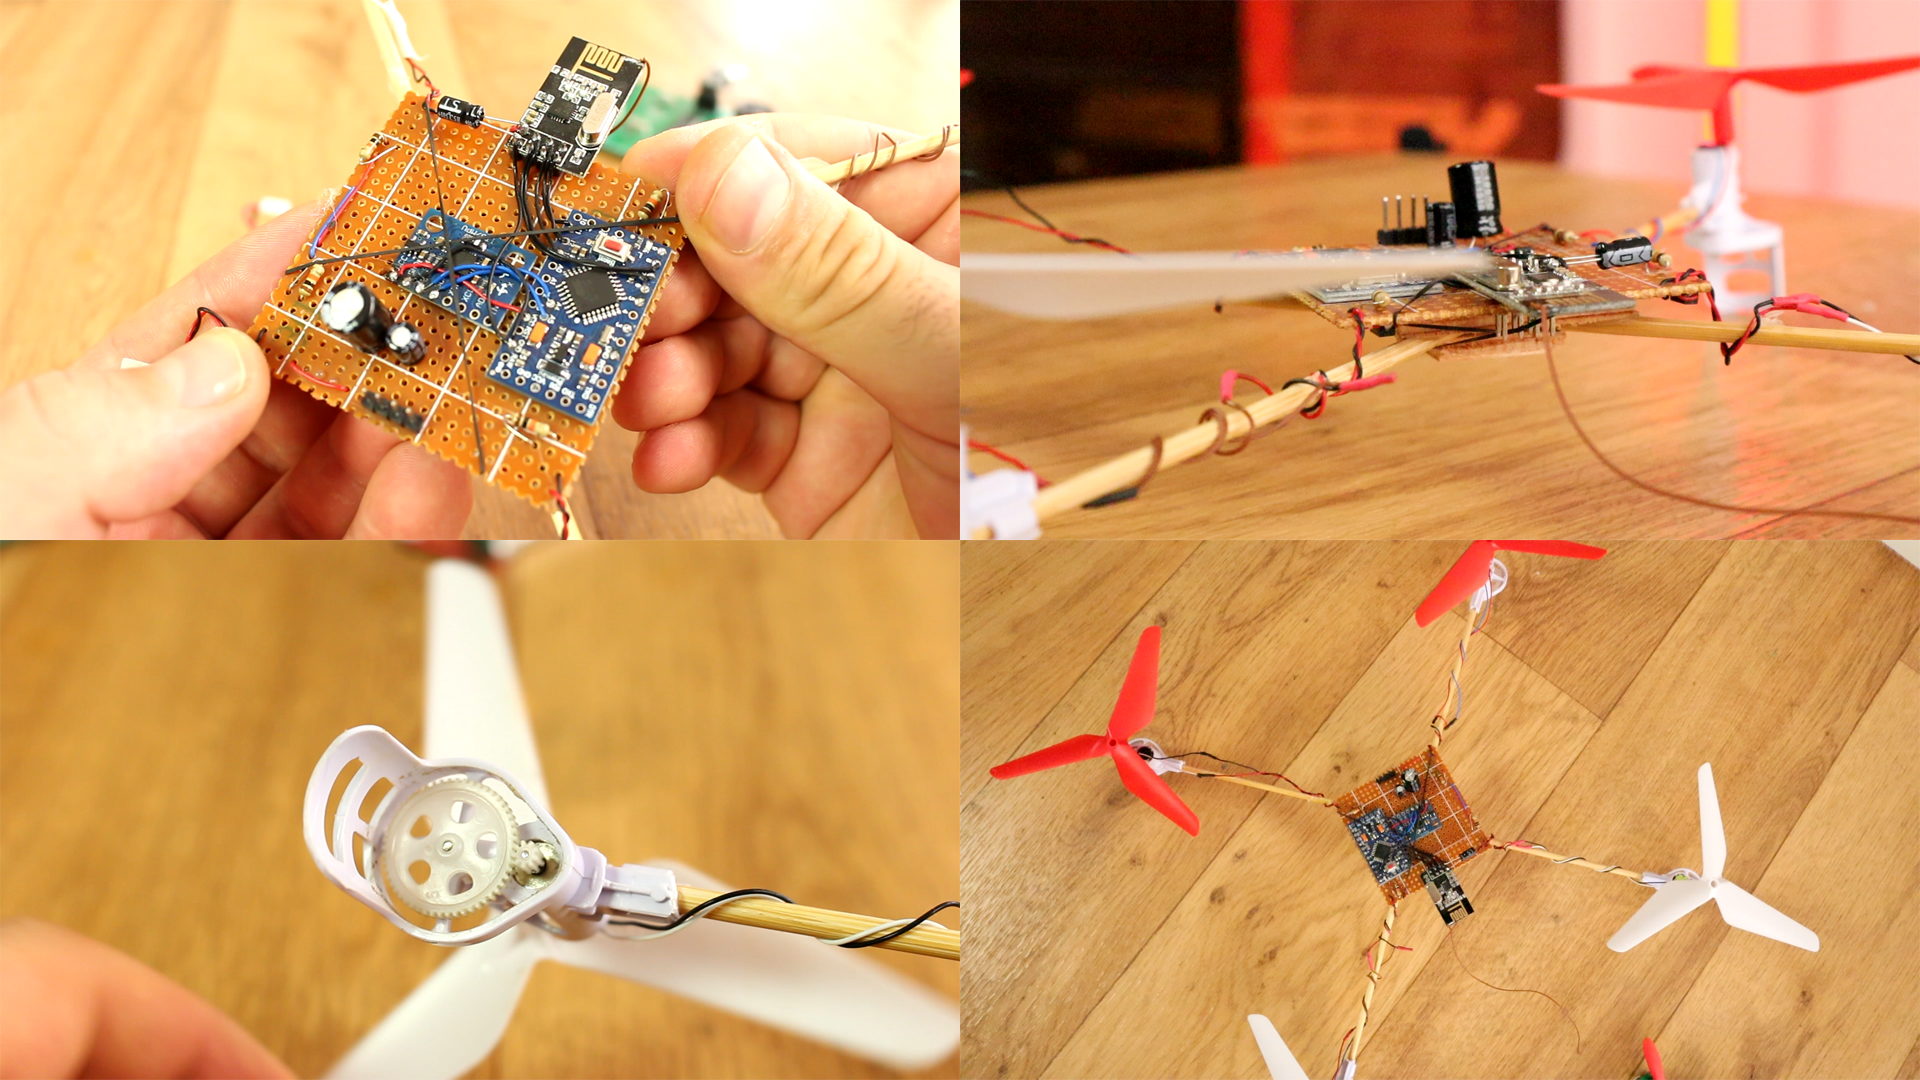
The receiver is simple. We won't use a 3.3V voltage regulator. Jsut connect the 3.7V from the LIPO to the NRF24 mdoule and to the 5V pin of the Arduino. Don't worry, the Arduino could work with 3.7V. Also, add a big capacitor at the battery output so we will prevent big current spikes from the motor that could reset the microcontroller. Place the MPU6050 in the position shown below so that will be the front of the drone.
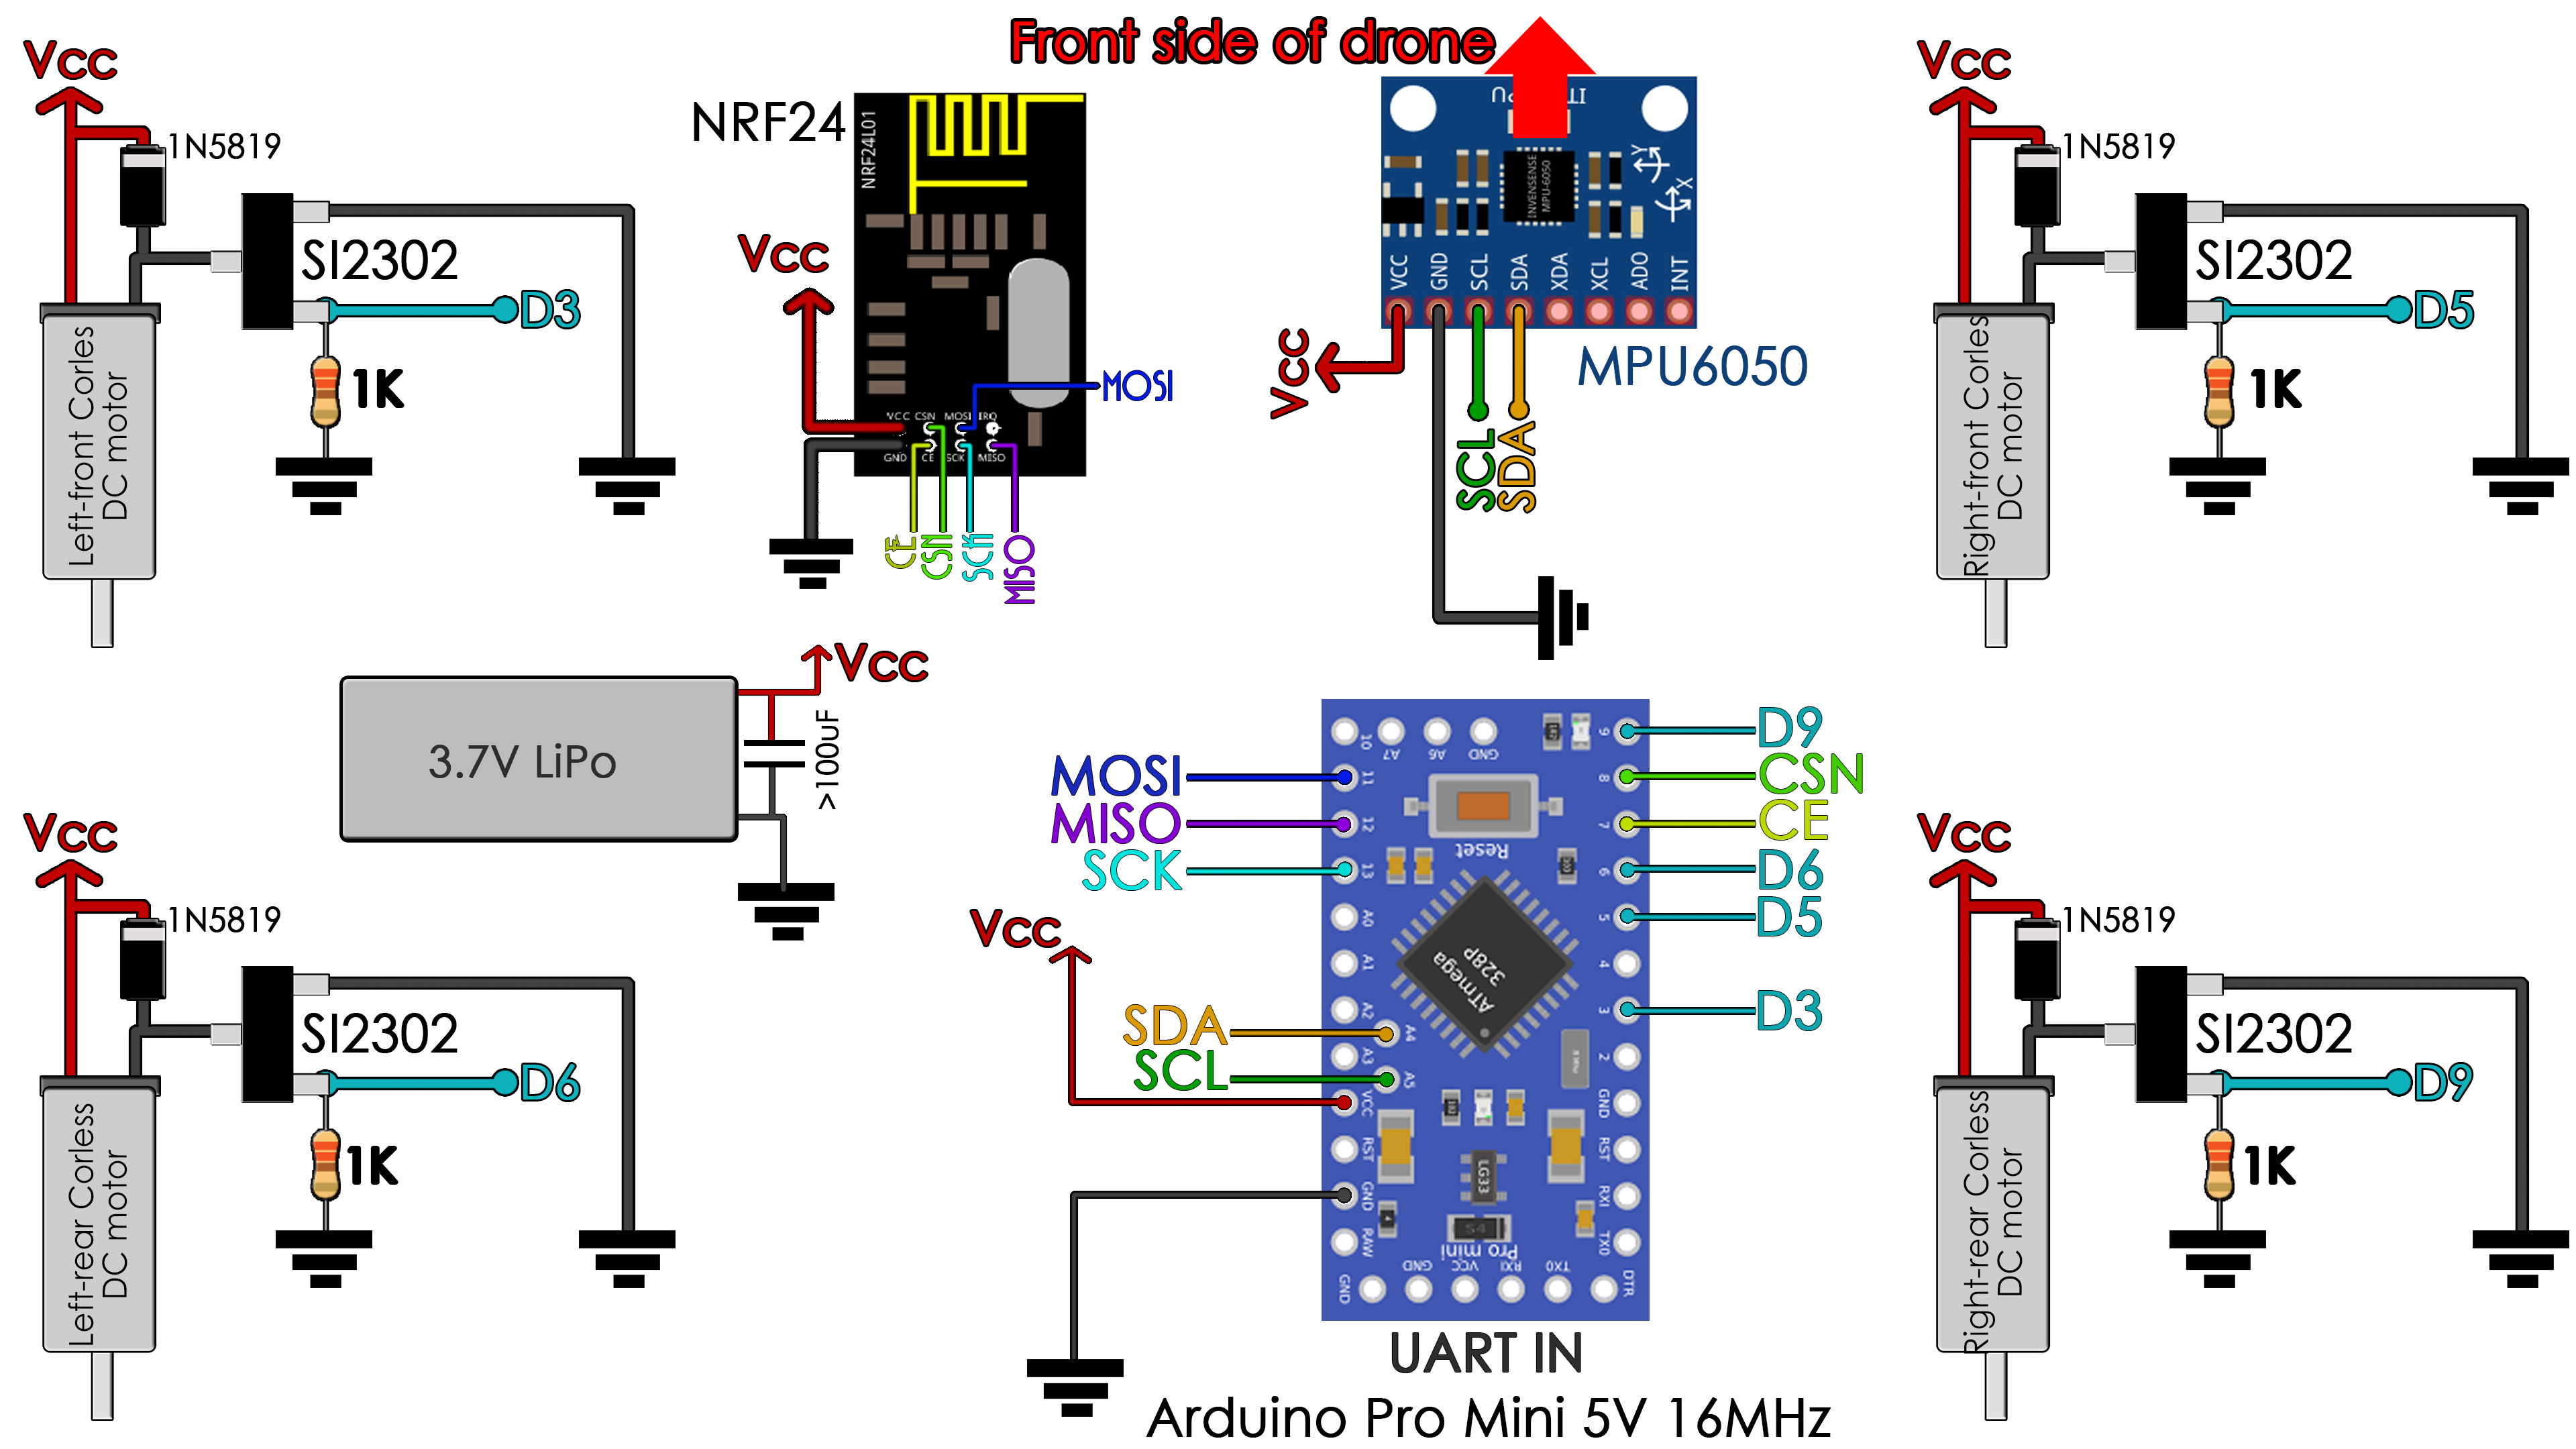
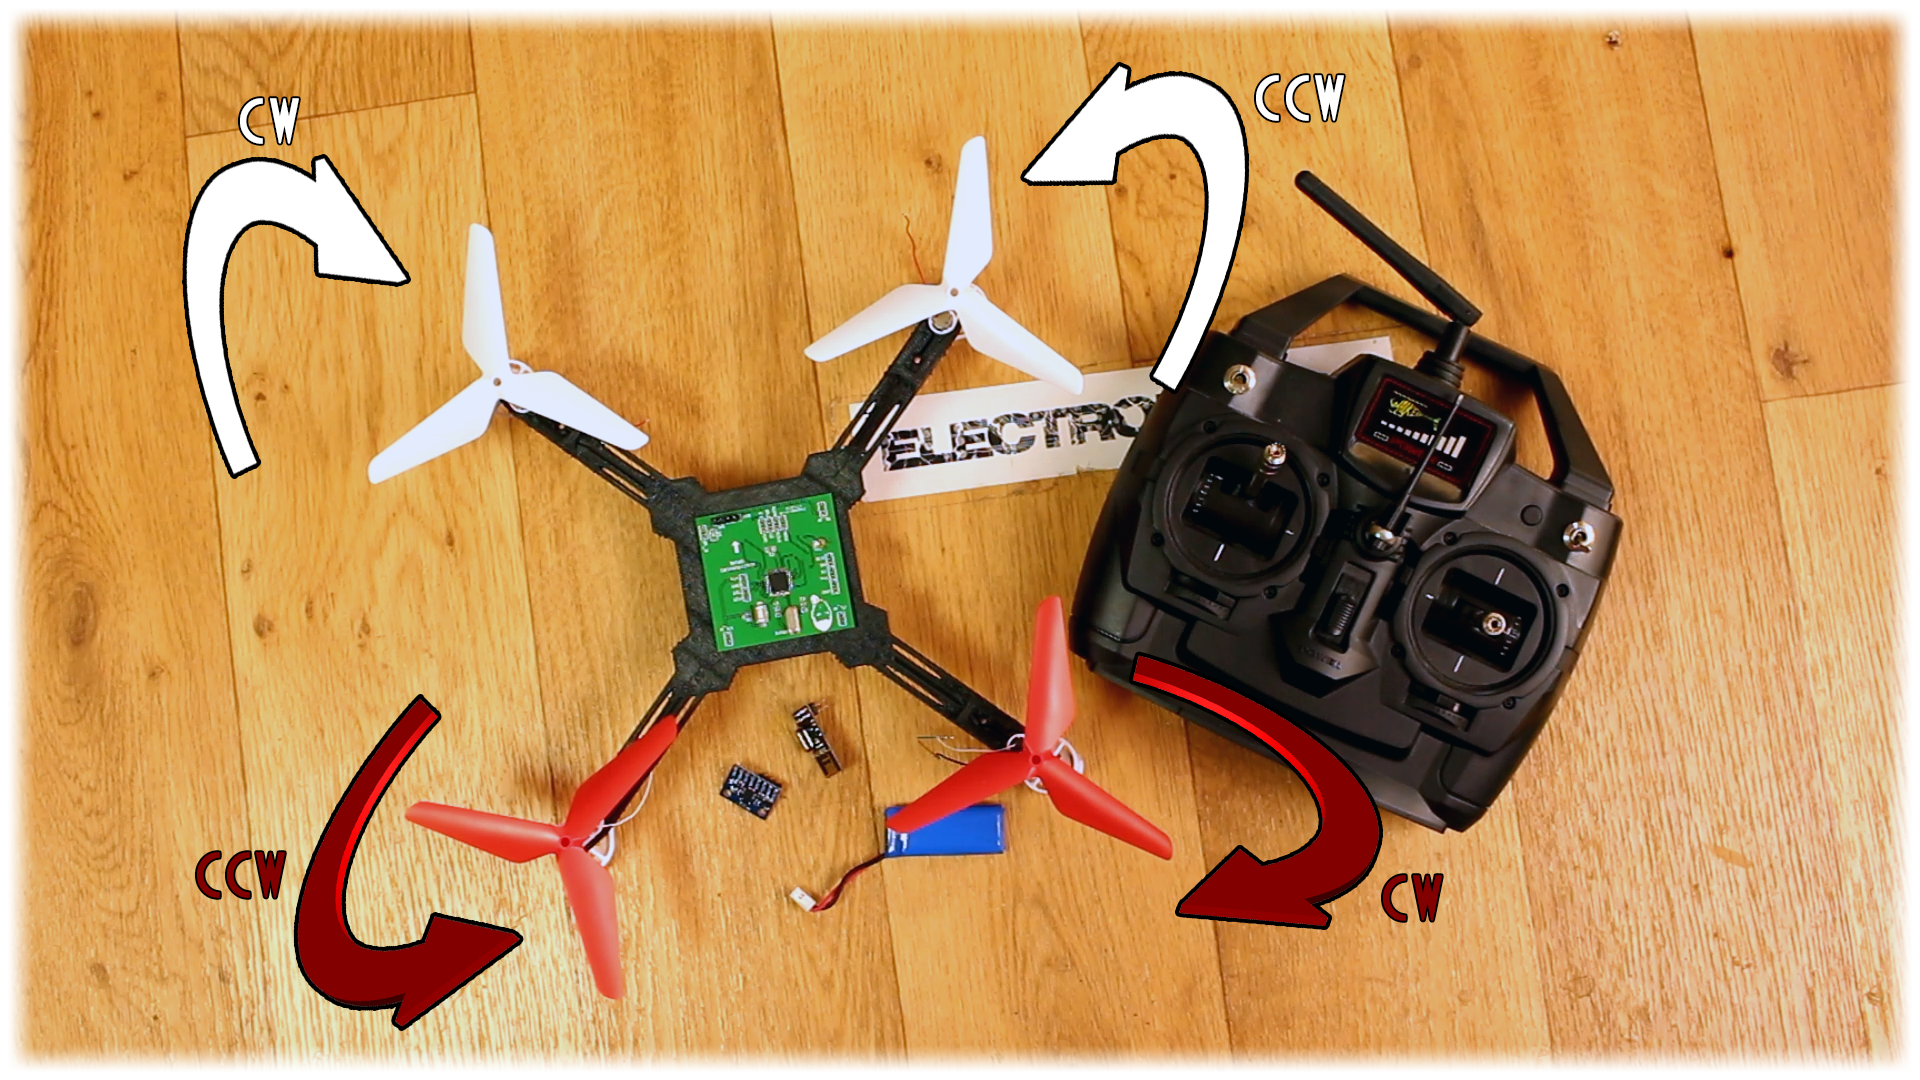
Make sure the propellers will spin in the directions below and that the air will push downwards. If not, just swap the wires for the motors. Remember to share GND with all the components. To upload the code you will ned an FTDI module like this one.
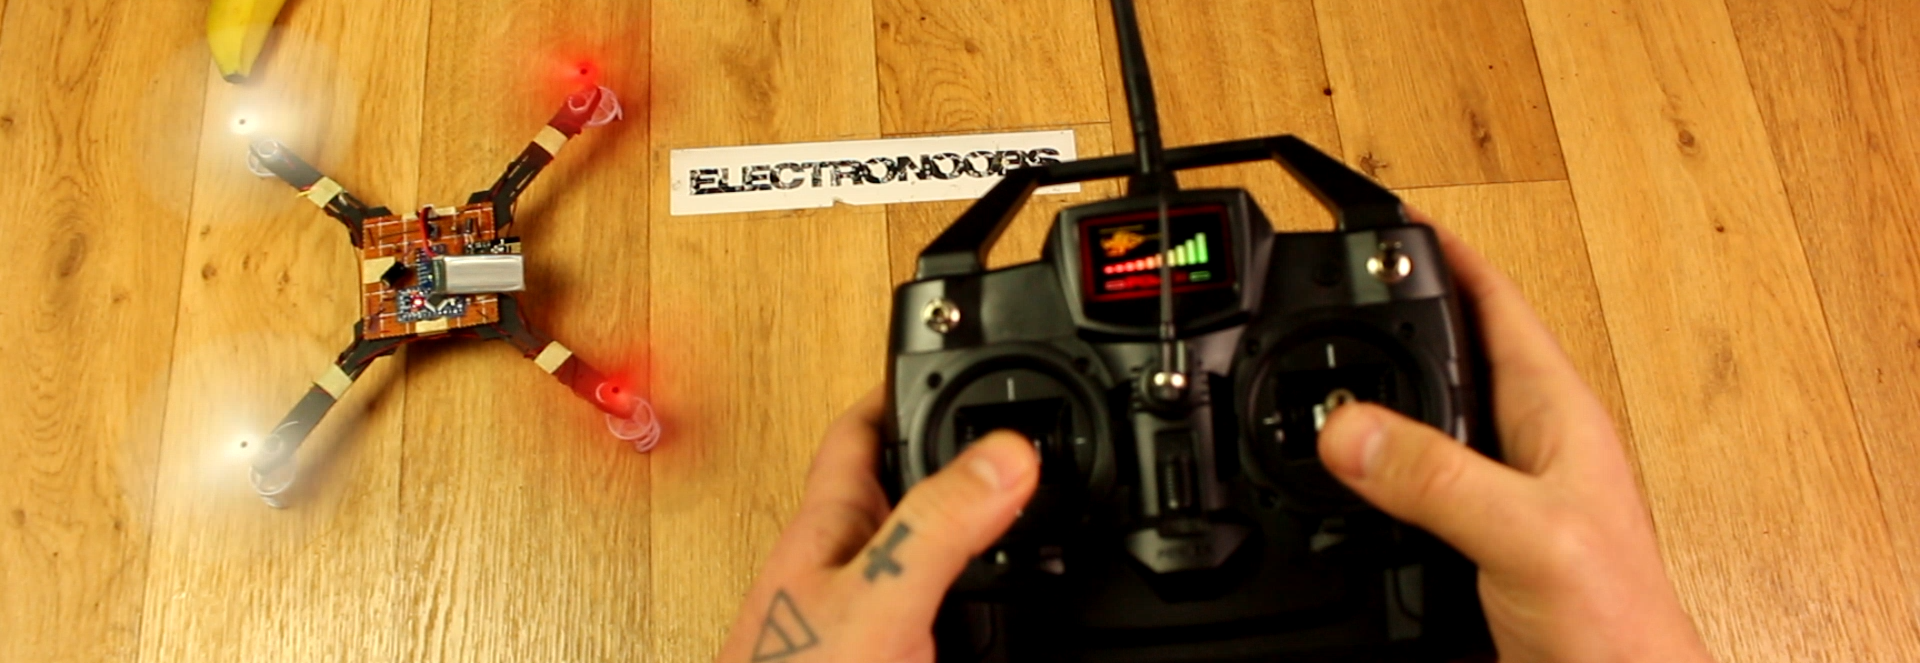
As for the body, try to make it as light as you can. My final version was made using barbeque wood sticks as you can see below. I've glued the sticks to a basla wood plate using hot glue and then I secured in place the PCB. You could also download the STL file for the 3D body here.
In the download links above, you will also find the MultiWii Java platform for 32 and 64 bits. After you uplaod the code to the flight controller, connect the FTDI module to the Arduino Pro Mini and open the Java platform. Open the COM of the drone and calibrate the acdelerometer, change settings, etc.
Now, place the drone flat, put throttle to minimum and yaw to maximum for 3 seconds and activate the motors. Once the motors are armed, increase throttle and see the drone fly.


