
 About me
  History
  Let's learn
  Contact us
  Arduino tutorials
 Circuits tutorials
  Robotics tutorials
 Q&A
Q&A Blog
Blog  Arduino
  Circuits
 Robotics
  Modules
  Gadgets
  Printers
  Materials
  3D objects
  3D edit
  Donate
  Reviews
  Advertising


Menu with voice & rotary encoder

4.1 DFplayer Mp3
This is the module that we will use and the scheamtic below are the connections that we need. The speaker output, the serial communication and the power supply. We need to add the 1k resistors between the RX/TX serial communication Arduino pins and the module, because if not there will be a hiss noise when playing the sound. I don’t know why is that but the 1k ohm resistor fixed the problem.
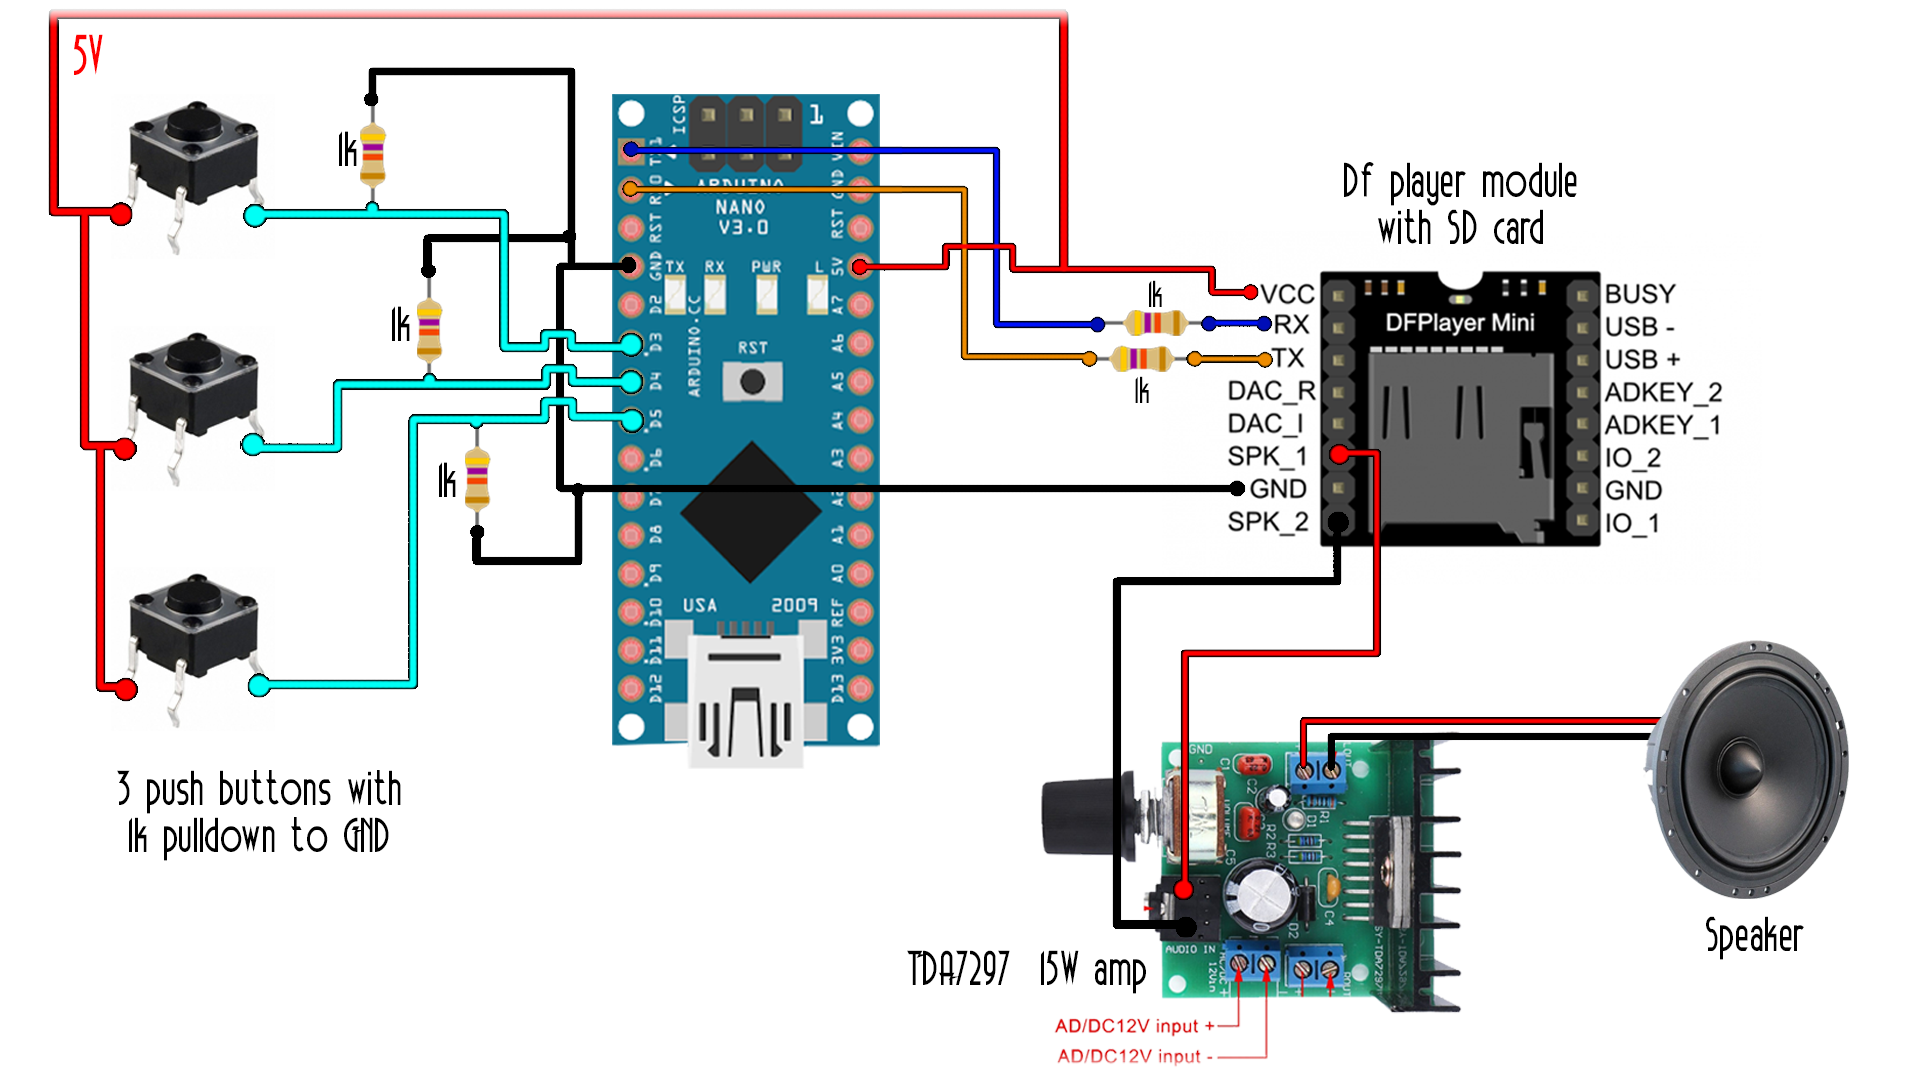
We also need a micro SD card to store the MP3 files. On this SD card we have to put the files as this. On the SD card create a folder named mp3 and we start with file 0000, then file 0001, 0002 and so on. I’ve created my files using a webpage that will pass text to female robotic voice.
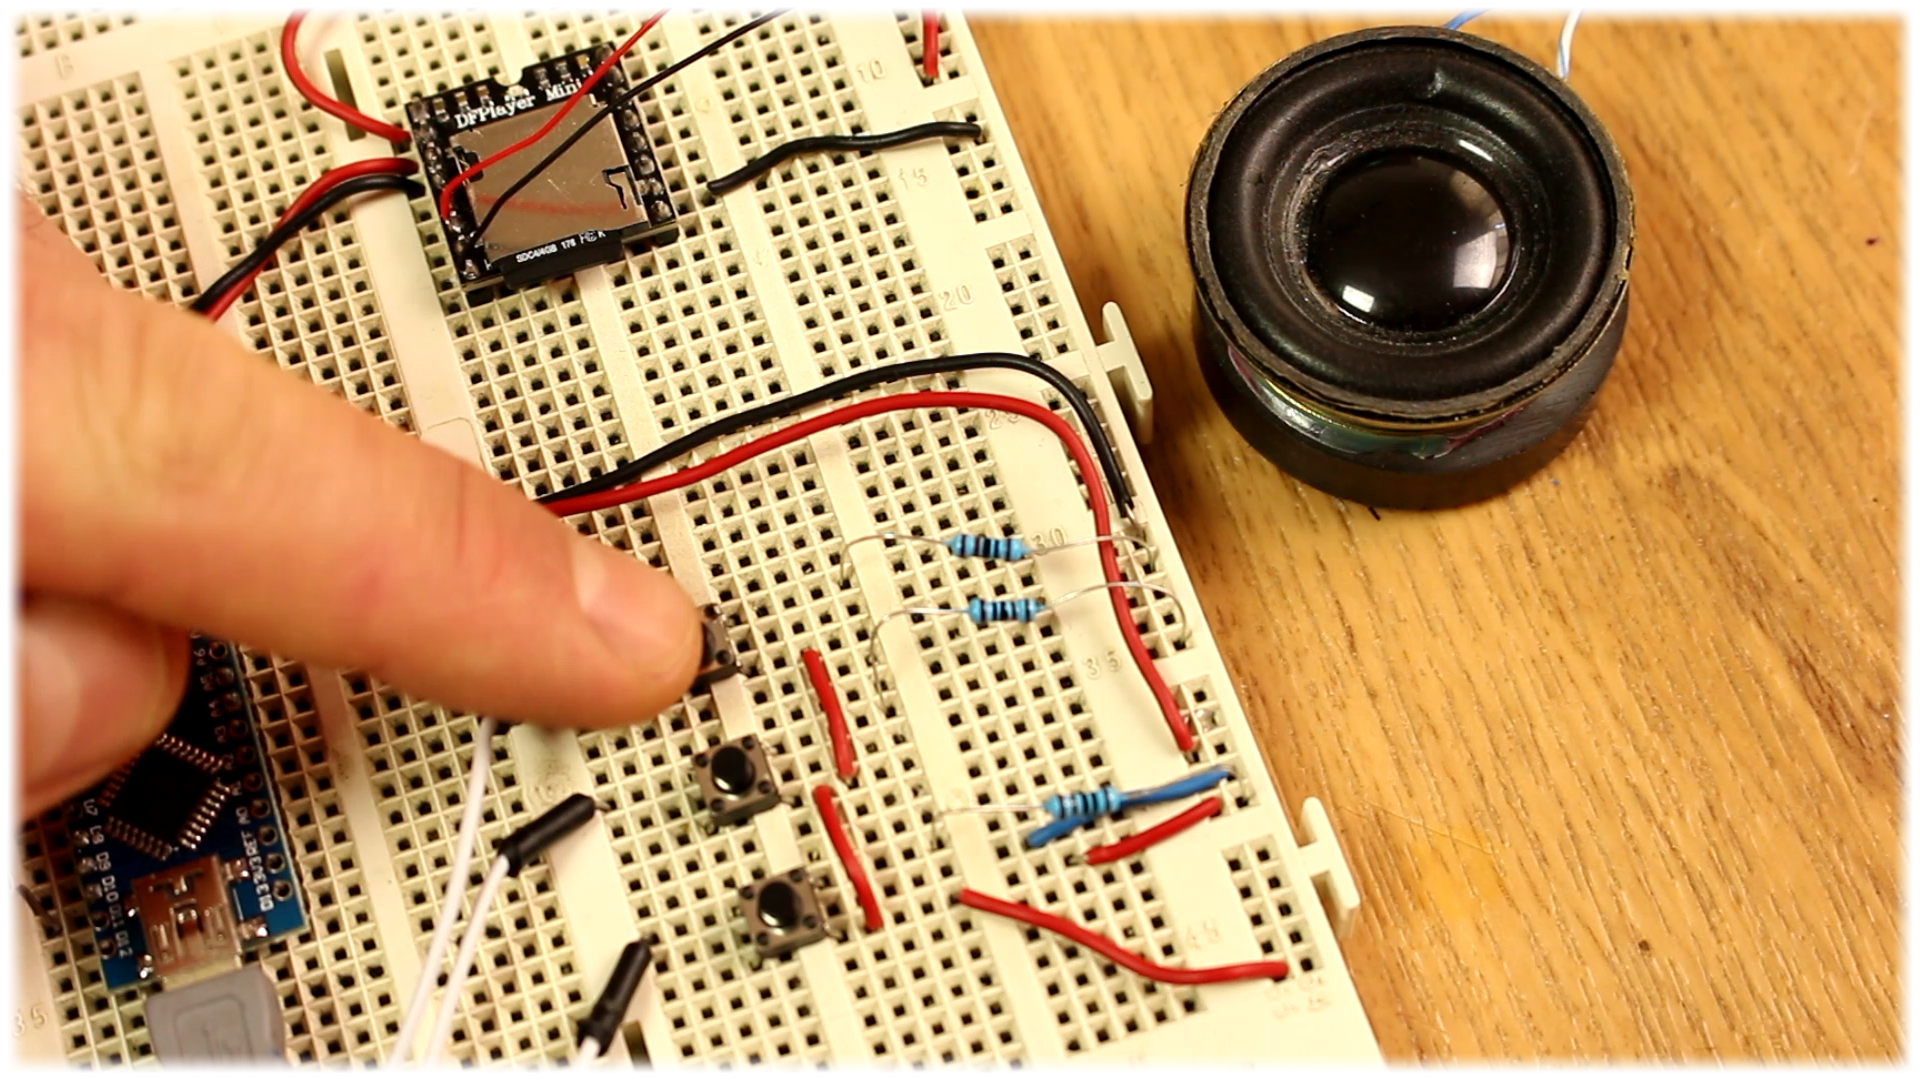
Ok, make the connections above between the module and the Arduino. At the output I’ve added a simple audio amplifier. Add a small speaker, connect 3 push buttons and upload the next code.
Dwonlaod the DFplayer code here:
First, we need to install the DF player library. Download it from a link below and install it on your Arduino IDE.
In the setup loop we define the pins fort the push buttons and prepare the audio module. To play the sounds we use the playMp3 folder track and select the file number where track one represents file 0000 on the SD card and so on…
Each time I press a button a different sound will play. Upload the code and let’s see the results.
There you go. Now we know how everything works for this project.
Dwonlaod the DFplayer library here:
Go to the next part, the final project