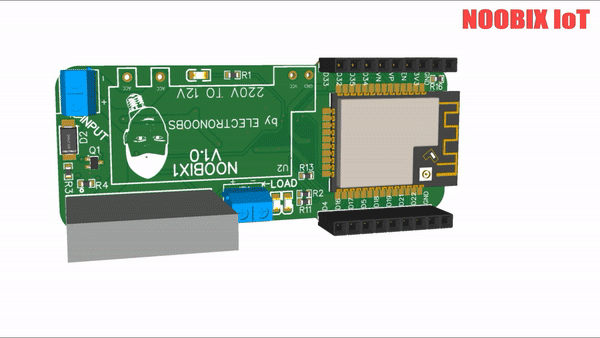
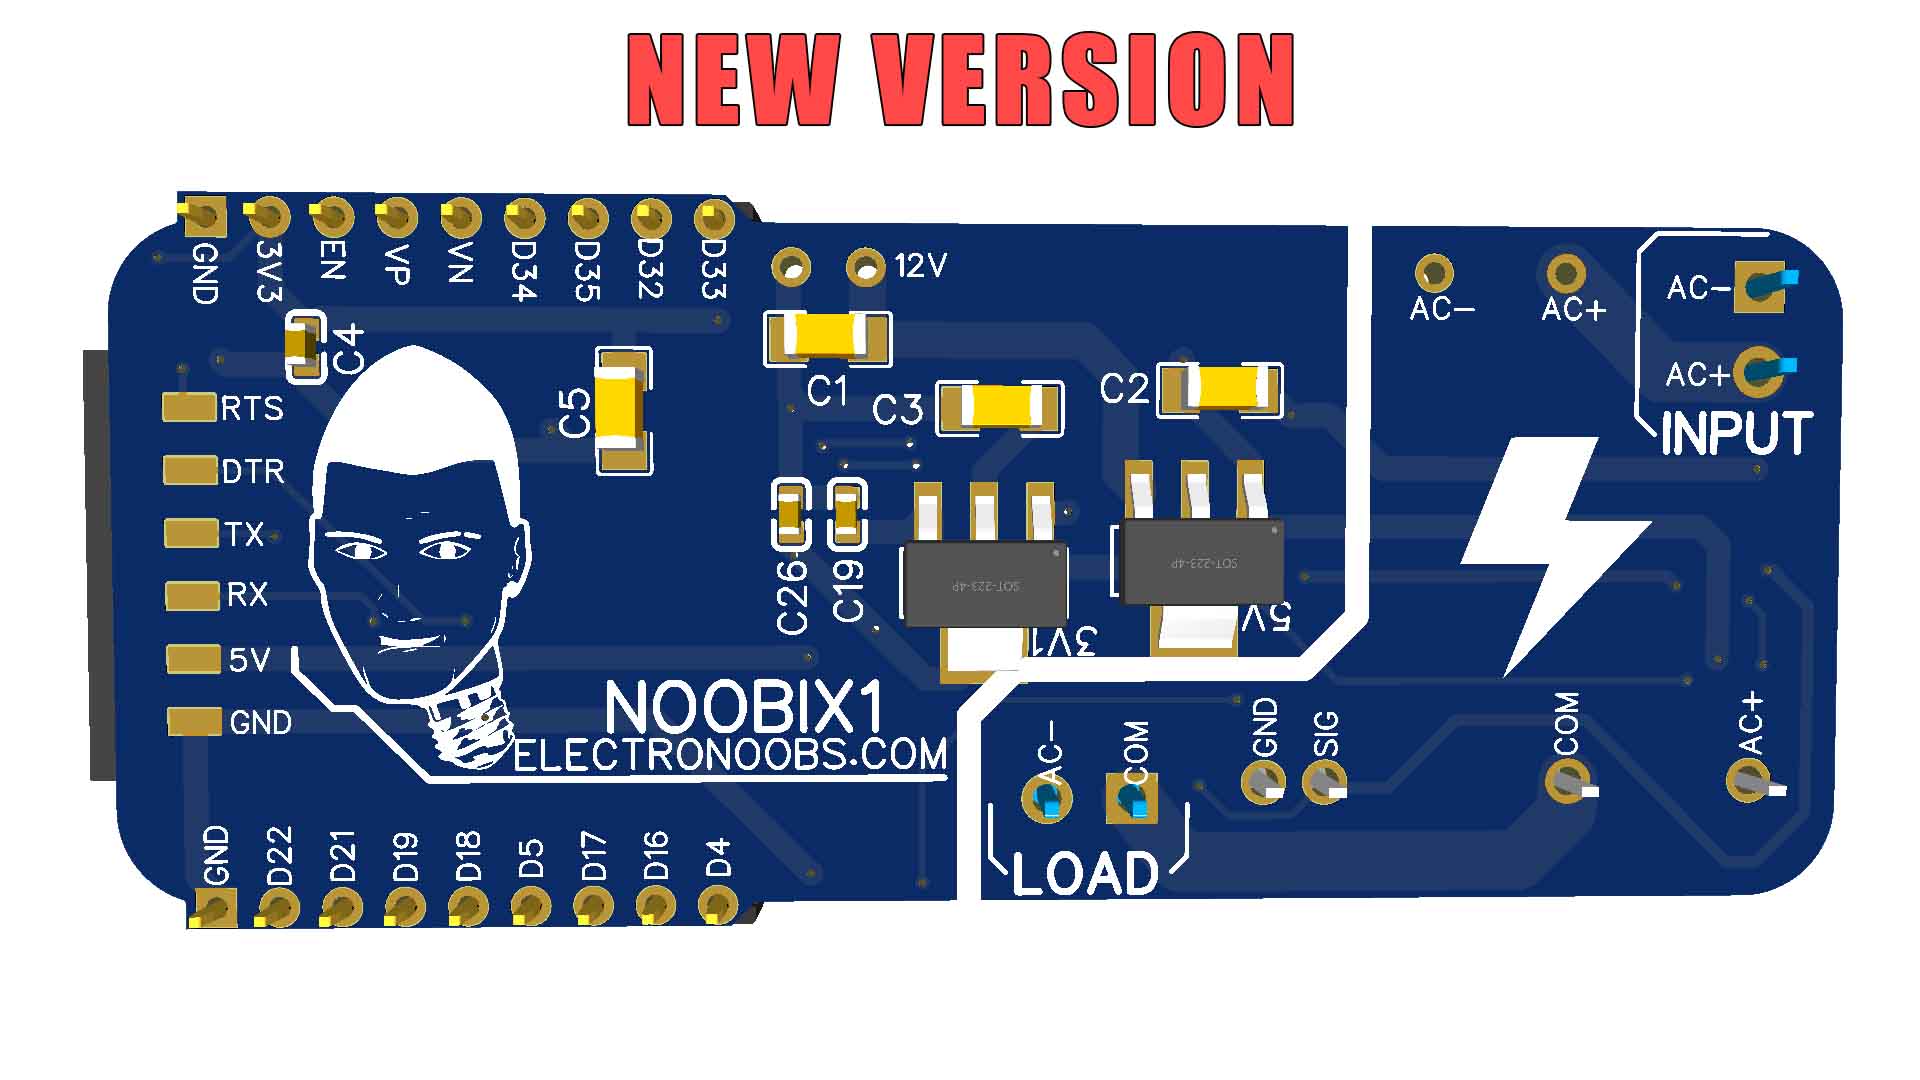
This below is the PCB that I’ve designed for my project. I’ve tried to make it as small as I could so it could fit inside of a basic wall electric box.
Since it works at 220V AC and the ESP32 needs 3 to 5V DC, I’m using a voltage converter module. That is very small and will give us a very steady 12V DC and 1 amp of current which is more than enough. Then, on the other side I’m using two linear regulators to get 5V and 3.3V. The ESP32 is controlling an SSR or solid-state relay. And that relay is connected to the output where we can connect our load. I’ve placed some pins around in case that you want to connect anything else to the ESP32. So guys go and download the GERBER files for the PCB from below. Then go to PCBWAY.COM and click the quote button. Add the size of the PCB (71 x 30mm), the amount of boards that you want and select a color. Since the green one is made faster, I selected the green solder mask. Save to cart and on the next page click the upload button. Now upload the GERBER files you’ve just downloaded from below my video. Make the order and receive my PCB in just a few days. Give them a quick inspection, but as always they look great.