The DFPlayer Mini is a small, low-cost audio player that we can connect to a microcontroller such as the Arduino and play audio in MP3 format. Arduino does not have enough power to play a compressed file like an MP3. No matter how hard you try, or even if you use a more powerful micro, it is not the function of a controller to perform these tasks, so, is much better to use a specific IC for that. DFPlayer Mini is actually a complete audio player, capable of playing MP3, WMA and WAV file formats and we can control this wusing a simple UART communication between the module and the Arduino with the TX and RX pins.
It has a micro SD reader compatible with FAT16 and FAT32, with a maximum capacity of 32GB. Supports up to 100 folders and can access up to 255 songs. The DFPlayer Mini provides sampling rates of 8, 11,025 12 16 22.05 24 32 44.1 and 48 kHz, and output with 24-bit DAC. It has 30 adjustable volume levels, 6-level equalizer, and a signal noise ratio (SNR) of 85dB The DFPlayer Mini receives commands from the Arduino through the serial port. It has functions to play, stop, pause, advance, go backwards between songs. The output is made directly to the speaker, through the corresponding pins. The DFPlayer Mini MP3 player is a very cheap device, we can find it for € 1.20 by searching international sellers on eBay or AliExpress.

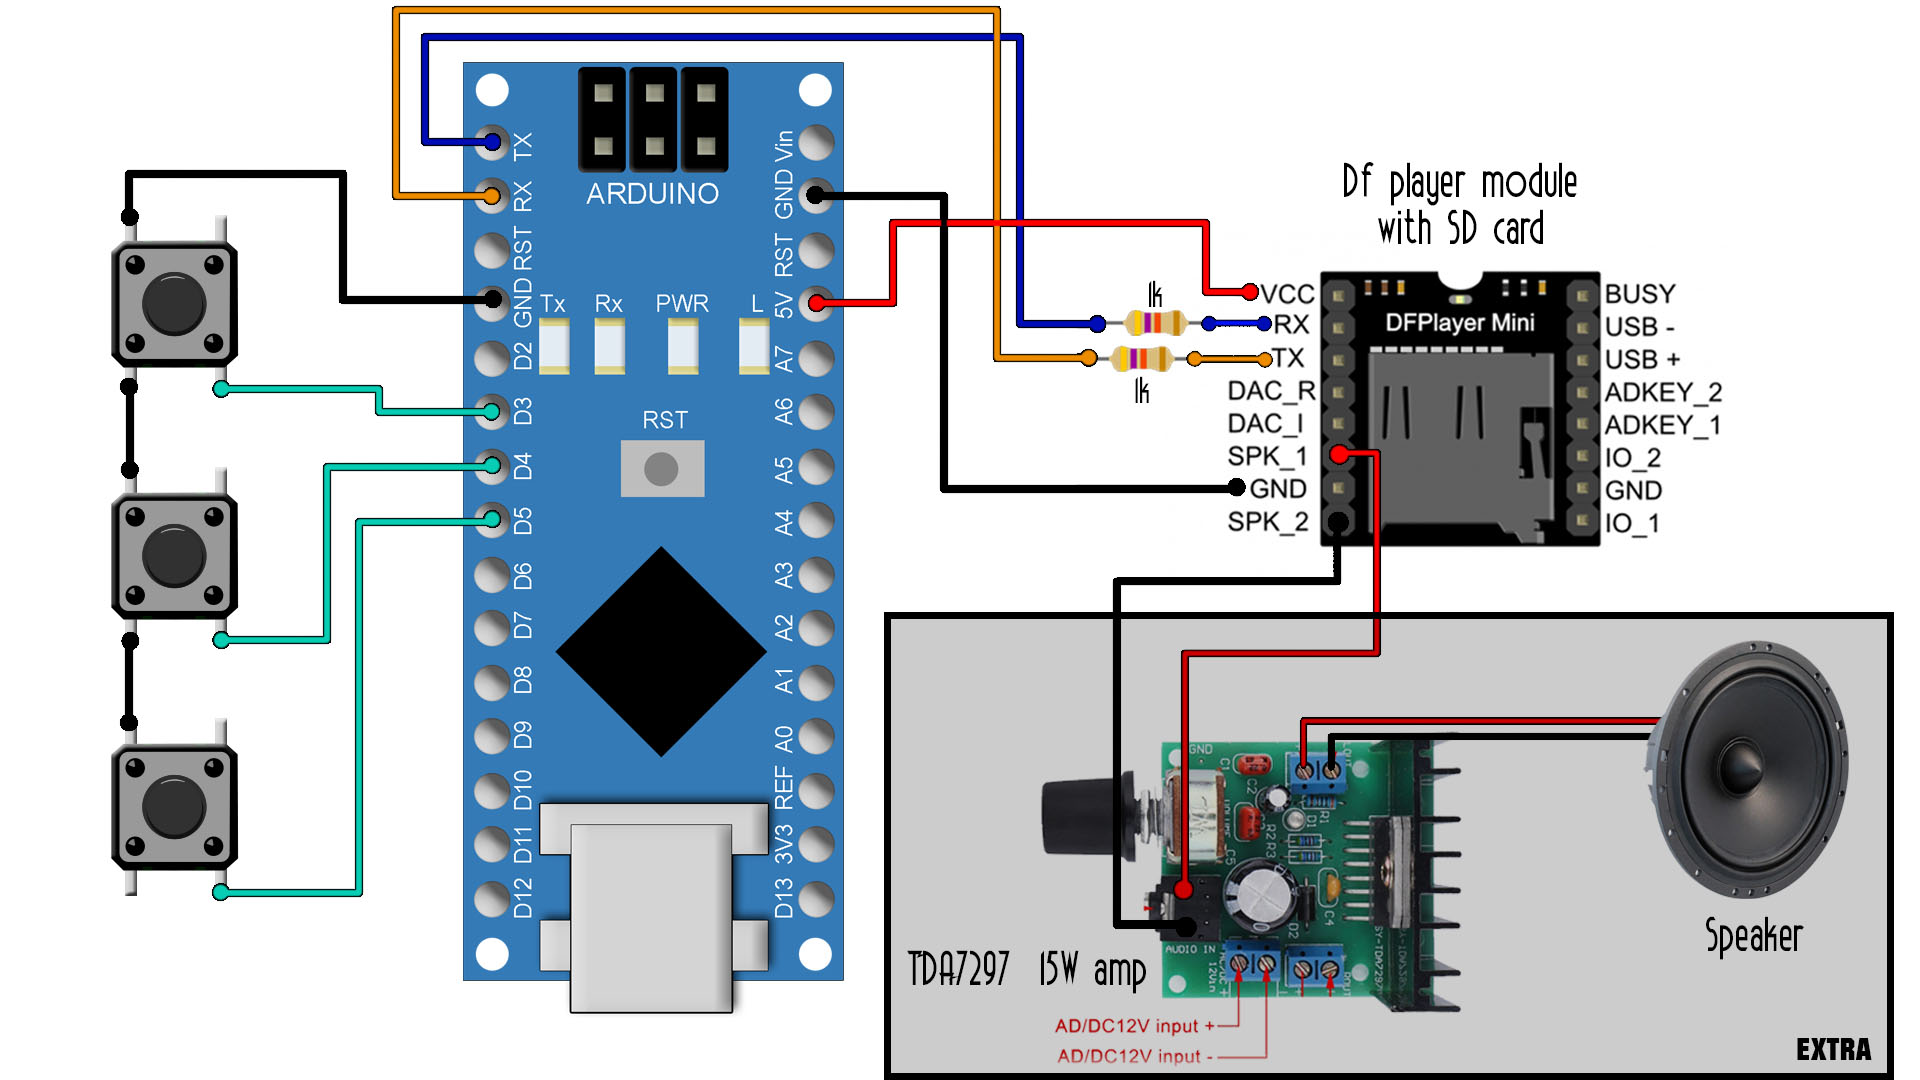
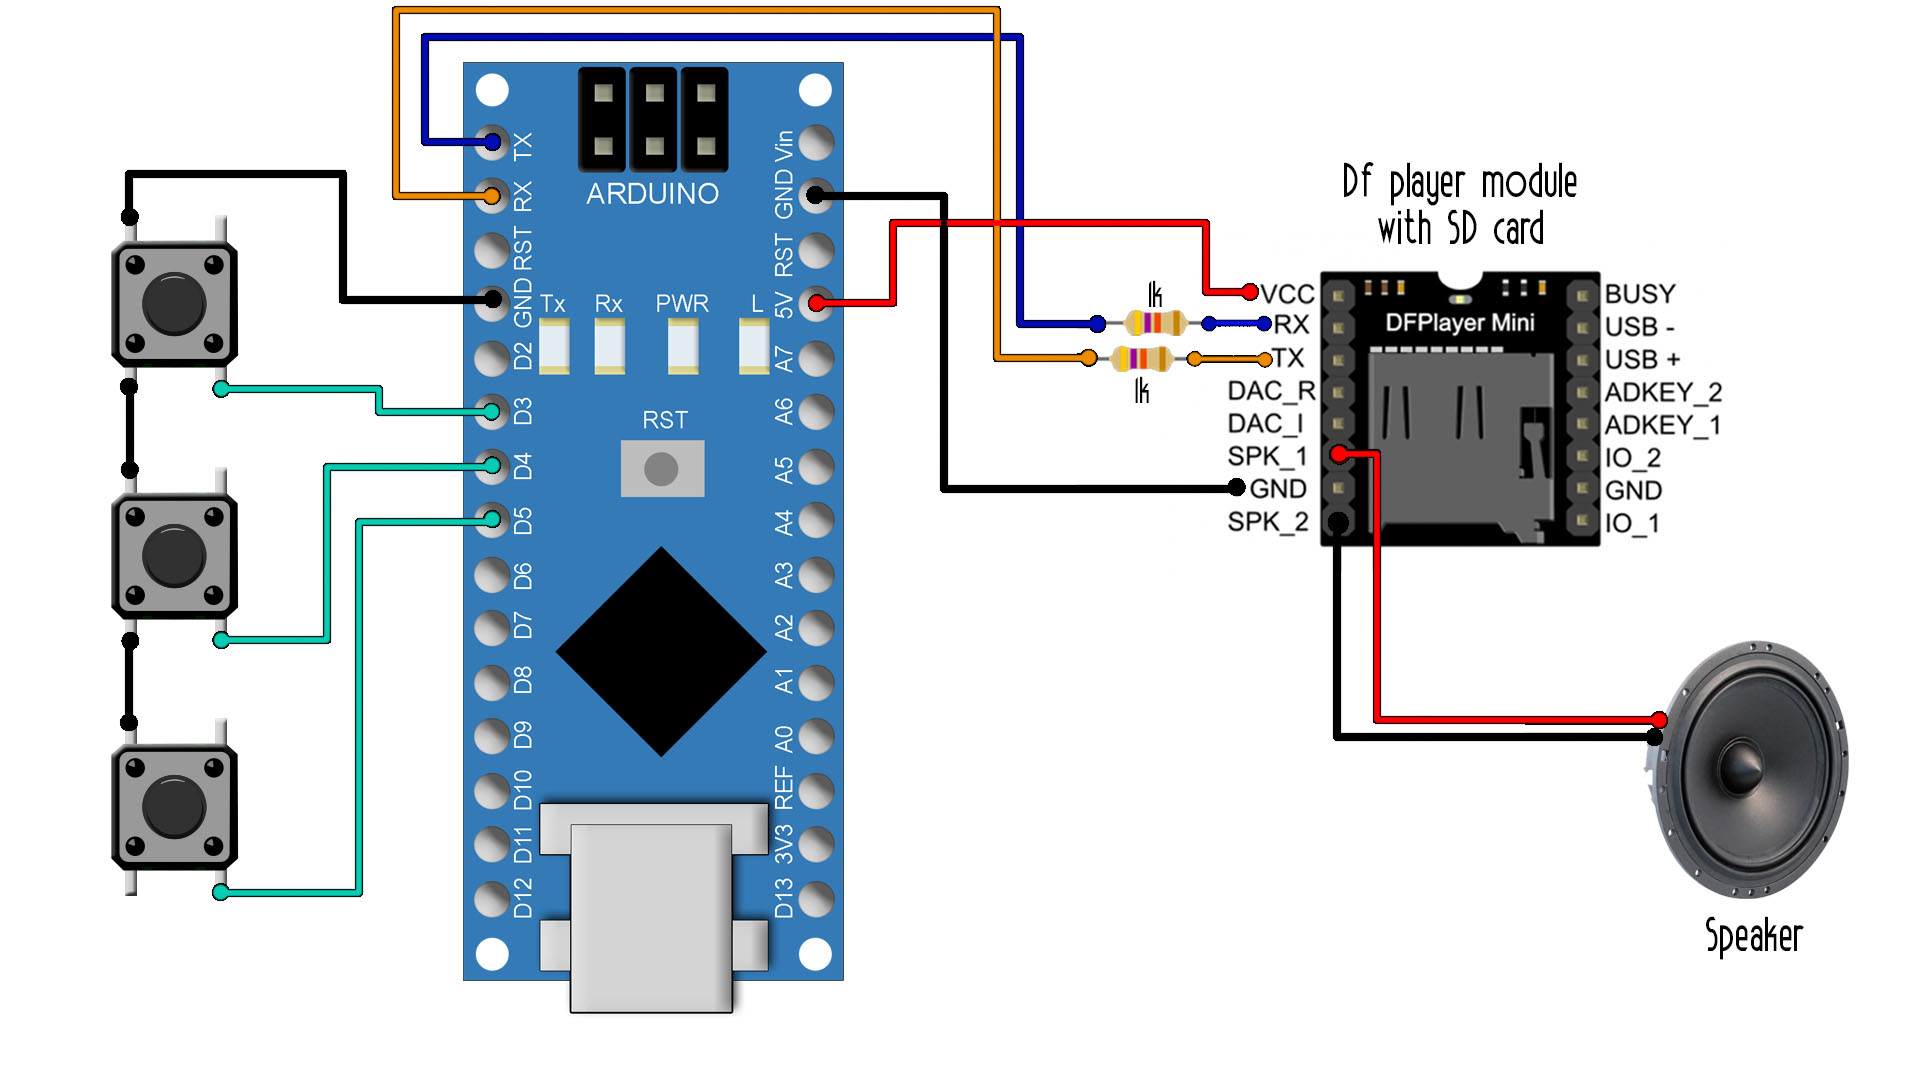
The connection with the DFPlayer Mini MP3 player is very simple since communication with the module is done through the serial port. I had a lot of hiss noise but I've fiexed that by adding two 1K resistors between the RX and TX pins of the Arduino and the module. Supply the module with 5V from the arduino but is better to have an external 5V supply since the module on volume peaks, will use a lot of current that the Arduino regulator can't provide. At the SPK pins you can add directly a small speakre or add an amplifier. The module could provide small power but not for big speakers so is better to use an external amplifier.
For the DF player to work you need the DF player library taht I've used. Also, you need a micro SD card and a small speaker. On the empty SD card create a folder and name it mp3, this is important. Then inside the mp3 folder copy your mp3 files and give them names in this way: 0000, 0001, 0002 and so on. You could download my tank engine, fire and movement sounds from below in a zip file and copy that folder tou yuur SD card.
You have a another tutorial on how to use the DF player module on this link. For more read that tutorial and make that example code. Make sure you install the library. I hope that you liek this tutorial. Consider supporting me on my PATREON page. Thanks!
To handle the DFPlayer Mini we will need the DFPlayer_Mini_Mp3 library available below. The library provides code samples, which it is advisable to review. The following examples are modifications from those available in the library. Download the library and install it to the Arduino IDE. Copy or downlaod the example code from below.
/*  DFplayer test example
    Tutorial: https://electronoobs.com/eng_arduino_tut122.php
    YouTube channel: http://www.youtube.com/c/ELECTRONOOBS */

//#include <SoftwareSerial.h>   //If we use other pins than D0 and D1 for TX and RX for the music player
#include <DFMiniMp3.h>          //Downlaod here: https://electronoobs.com/eng_arduino_DFPlayer_Mini_Mp3_by_Makuna.php


int sw1 = 3;
int sw2 = 4;
int sw3 = 5;

DFMiniMp3<HardwareSerial, Mp3Notify> mp3(Serial);   //Create the UART connection to the module

void setup()
{
  //3 push buttons with pullups
  pinMode(sw1,INPUT_PULLUP);                        //Define each button as input with pullup
  pinMode(sw2,INPUT_PULLUP);
  pinMode(sw3,INPUT_PULLUP);

  Serial.begin(9600);
  mp3.begin();                                      //Start communication with the DFplayer module
  uint16_t volume = mp3.getVolume();                //Get actual volume
  mp3.setVolume(30);                                //Set new volum (max is 30)
  uint16_t count = mp3.getTotalTrackCount();        //Get the total tracks on the SD card in case we want to sue this later...
}


//just a fucntion that we use to create delays in "ms"
//without using the delay() function
void waitMilliseconds(uint16_t msWait)
{
  uint32_t start = millis();

  while ((millis() - start) < msWait)
  {
    // calling mp3.loop() periodically allows for notifications
    // to be handled without interrupts
    mp3.loop();
    delay(1);
  }
}

void loop()
{

   if(!digitalRead(sw1))
  {
      mp3.playMp3FolderTrack(1);  // Play audio track 0001
      waitMilliseconds(1000);     // 1s of delay
  }

  if(!digitalRead(sw2))
  {
      mp3.playMp3FolderTrack(2);  // Play audio track 0002
      waitMilliseconds(1000);     // 1s of delay
  }

  if(!digitalRead(sw3))
  {
      mp3.playMp3FolderTrack(3);  // Play audio track 0003
      waitMilliseconds(1000);     // 1s of delay;
  }
}//end of void
Use this scheamtic if you use an amplifier. Connect the speaker to the amplifier adn the SPK pins to the amplifier. Supply the amplifier with external supply maybe at 12V or so... The code is the same! I hope that you liek this tutorial. Consider supporting me on my PATREON page. Thanks!